CCTV Installation Checklist & Common Mistakes South Africa
✅❌ Blurry night vision? Cabling errors? Wrong camera angles? Use this checklist to avoid the 10 most common CCTV installation mistakes made by South African homeowners and businesses.
You’ve done your research, chosen the perfect CCTV system, and hired a PSIRA-registered installer. But even with the best equipment and professionals, things can go wrong. Poor camera placement, incorrect cabling, and overlooked details can leave you with blind spots, useless footage, and wasted money. Whether you’re securing a home in Johannesburg, a business in Cape Town, or an estate in Durban, this comprehensive CCTV installation checklist common mistakes South Africa guide will help you ensure your system works perfectly from day one. Use this checklist during planning, installation, and final inspection to catch errors before they become expensive problems.
📋 Planning a CCTV Installation?
Don’t go it alone. Get free quotes from PSIRA-registered installers who know exactly how to avoid these common mistakes. They’ll do a proper site survey and get it right the first time.
Servicing Johannesburg, Pretoria, Cape Town, Durban, and all major areas
📋 Table of Contents – Installation Checklist & Mistakes
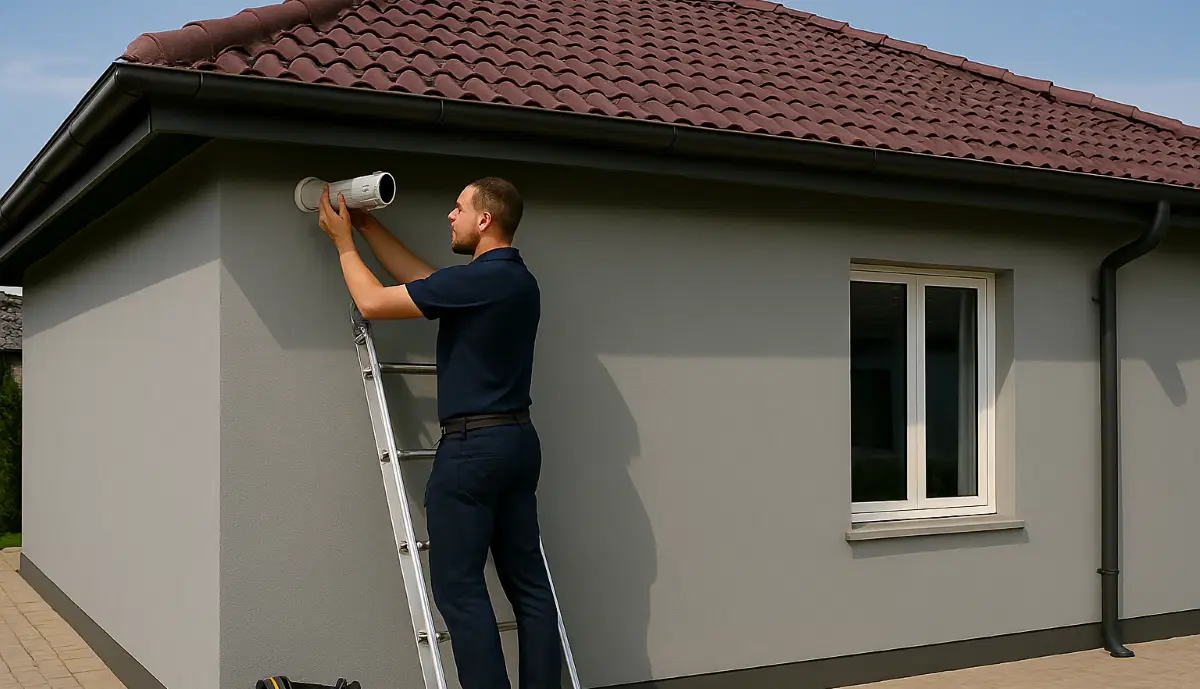
📝 Pre-Installation Planning: Get It Right Before You Start
Most mistakes are made before the first hole is drilled. Proper planning prevents poor performance.
✅ Pre-Installation Checklist:
- ☐ Walk the property and identify all entry points and vulnerable areas.
- ☐ Mark potential camera locations and check views from each.
- ☐ Measure cable runs – ensure you have enough length.
- ☐ Check wall types (brick, plaster, concrete) – affects drilling and cabling.
- ☐ Identify power source locations for NVR and any non-PoE cameras.
- ☐ Test WiFi signal strength at each camera location (for wireless systems).
- ☐ Check for potential obstructions (trees, walls, eaves).
- ☐ Verify HOA or Body Corporate rules for exterior cameras.
- ☐ Ensure professional site inspection is conducted.
⚠️ Planning Red Flags:
- ✗ Installer provides quote without site visit.
- ✗ No discussion of camera placement or coverage.
- ✗ Ignoring HOA or estate rules.
- ✗ No consideration of night-time lighting conditions.
- ✗ Assuming WiFi will reach without testing.
Pro Tip: Take photos of potential camera locations from ground level and from the proposed mounting height (use a ladder). This reveals what the camera will actually see and helps spot issues like obstructions or backlighting.
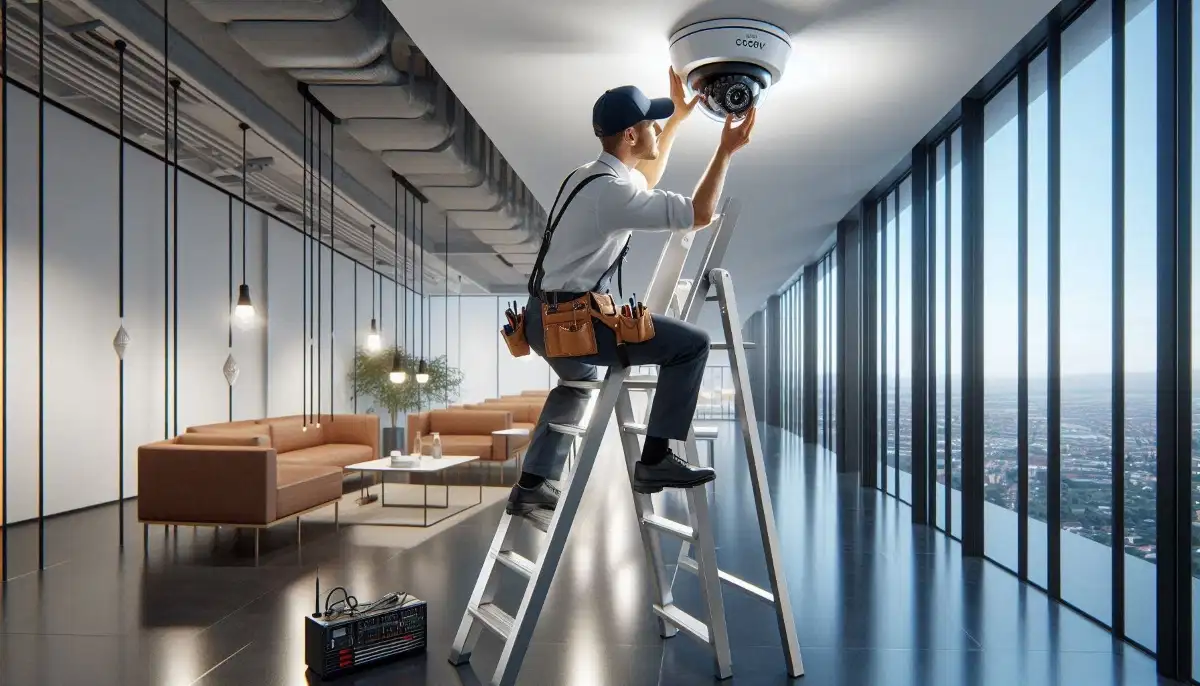
📍 Top Camera Placement Mistakes
Where you put your cameras is as important as the cameras themselves.
Mistake #1: Mounting Too High
Many people mount cameras as high as possible to prevent tampering. But too high, and you lose facial recognition. The ideal height is 2.5 to 3 metres – high enough to be out of reach, low enough to capture faces.
Mistake #2: Pointing at Neighbour’s Property
Not only is this a common privacy violation, but it also wastes your camera’s coverage. Always angle cameras to cover your own property. Walk your boundary and check the field of view.
Mistake #3: Ignoring Blind Spots
Cameras have limited fields of view. A single camera cannot cover a wide area without leaving blind spots. Use multiple cameras with overlapping coverage. For example, corner-mounted cameras should cover along each wall, not just the corner itself.
Mistake #4: Not Covering Entry Points
The most important locations are all entry points: front door, back door, garage door, ground-floor windows, and side gates. Prioritise these before covering the garden or driveway.
📐 Height & Angle: Getting It Just Right
Even well-placed cameras can fail if angled incorrectly.
Mistake #5: Pointing Too Far Down
Angling the camera down too steeply gives you a great view of the top of people’s heads – and nothing of their faces. Aim for a slight downward angle that captures the face of someone approaching.
Mistake #6: Not Considering the Lens
Different lenses have different fields of view:
- 2.8mm lens: Wide angle (100°+), good for general coverage but poor for identification at distance.
- 4mm lens: Standard view (70-80°), good balance for most uses.
- 6mm lens: Narrower view (50°), better for long driveways or specific focus areas.
Solution: Use varifocal cameras (adjustable lens) so you can set the exact field of view after installation.
🌙 Night Vision & IR Reflection: The #1 Night-Time Problem
A camera that works perfectly during the day but is useless at night is a common and frustrating problem.
Mistake #7: IR Reflection (The Halo Effect)
This happens when the camera’s infrared LEDs reflect off something close to the lens, creating a bright halo that washes out the image.
Common causes:
- Dome cameras mounted too close to a wall or ceiling – IR bounces off the surface back into the dome.
- Dirty or smudged dome cover – IR reflects off the dirt.
- Spider webs in front of the lens – IR reflects off the webs.
- Camera mounted inside a window looking out – IR reflects off the glass.
Solutions:
- Use turret cameras outdoors – they have separate IR LEDs and lens, eliminating dome reflection.
- Keep domes clean – regular maintenance is essential.
- Ensure adequate distance from walls when mounting domes.
- For indoor cameras looking through glass, disable IR and use external lighting, or get cameras specifically designed for through-glass use.
☀️ Backlighting & Glare: Silhouetted Intruders
A camera pointing towards a bright light source will see only silhouettes – useless for identification.
Mistake #8: Pointing Cameras at the Sun or Bright Lights
Cameras facing east will be blinded by the rising sun; those facing west by the setting sun. Similarly, cameras pointing at bright security lights will struggle.
Solutions:
- Position cameras facing north or south where possible to avoid direct sun.
- Use cameras with WDR (Wide Dynamic Range) – this technology balances bright and dark areas in the image.
- Mount cameras under eaves where they are shaded from direct sun.
- Use sunshields (many bullet cameras include them).
- Avoid pointing cameras directly at bright artificial lights.
Want to Avoid These Mistakes?
A professional, PSIRA-registered installer knows exactly how to avoid every error on this checklist. Get free quotes from vetted experts who will get it right the first time.
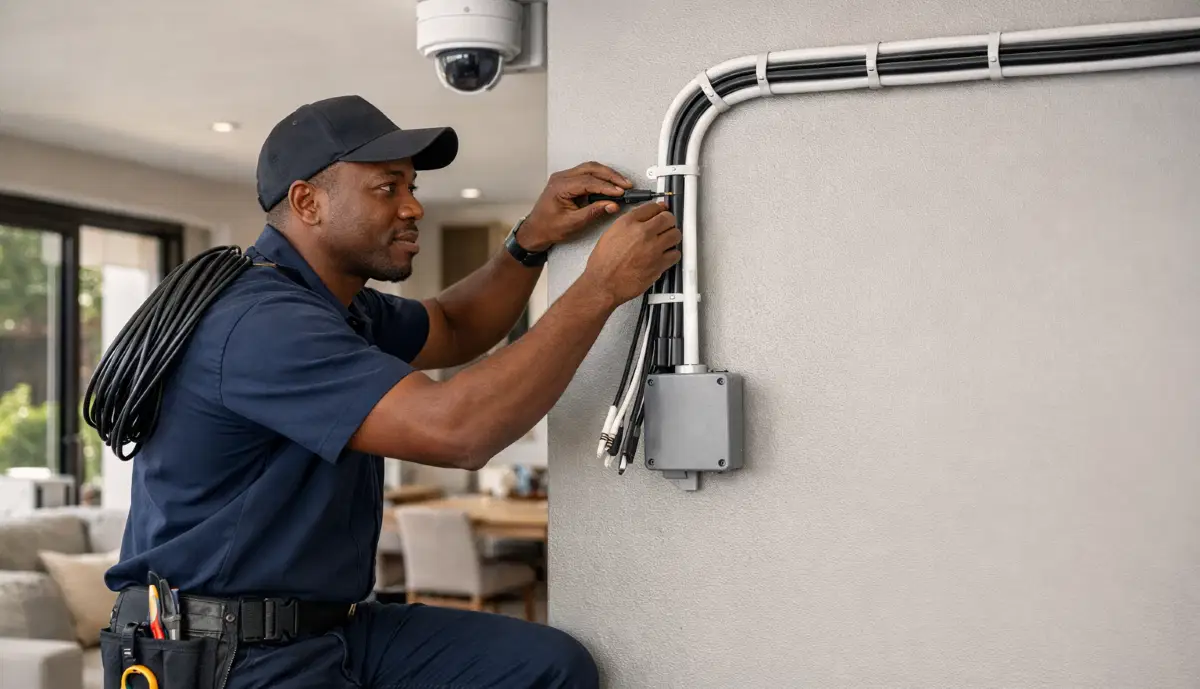
🔌 Cabling & Wiring: The Hidden Heart of Your System
Poor cabling is the cause of many intermittent problems that are difficult to diagnose later.
Mistake #9: Using the Wrong Cable Type
- For IP cameras: Use solid copper Cat5e or Cat6 (not CCA – Copper-Clad Aluminium). CCA is cheaper but has higher resistance and fails faster.
- For analogue cameras: Use RG59 Siamese cable (coaxial + power).
Mistake #10: Running Cable Too Close to Power Lines
Running CCTV cables parallel to electrical cables can cause electromagnetic interference, resulting in noisy or unstable video. Keep at least 300mm separation, and cross power cables at 90 degrees if necessary.
Mistake #11: Not Using Conduit or Protection
Exposed cables are vulnerable to weather, UV, and rodents. Always run cables in conduit outdoors and protect cables in roof spaces from rats (which love to chew them).
Mistake #12: Poor Termination
Loose or poorly crimped RJ45 connectors (for IP) or BNC connectors (for analogue) cause intermittent signal loss. Professional installers use quality connectors and test each run.
⚡ Power Supply: Keeping Your System Alive
Power problems are a leading cause of camera failure.
Mistake #13: Voltage Drop on Long Cable Runs
For analogue cameras, voltage drops over distance. A camera at the end of a 50m cable may receive only 9V instead of 12V, causing intermittent operation or failure.
Solution: Use thicker power cable, provide power locally, or use higher voltage and step down at the camera. Professional installers calculate voltage drop.
Mistake #14: Insufficient Power Supply Capacity
Adding up camera power requirements is essential. A 4-camera system might need 2A total, but if you use a 1A power supply, it will fail.
Mistake #15: No Surge Protection
As covered in our loadshedding guide, power surges destroy electronics. Use surge protectors on all power and network cables entering the building.
💾 DVR/NVR Setup: Configuration Mistakes
The recorder is the brain of your system – get this wrong and nothing works.
Mistake #16: Wrong Date and Time
Footage with incorrect timestamps is useless as evidence. Always set the correct timezone and enable NTP (Network Time Protocol) to sync automatically.
Mistake #17: Not Enabling Overwrite
When the hard drive fills up, the recorder should overwrite the oldest footage. If this isn’t enabled, recording stops when the drive is full. Always enable continuous overwrite.
Mistake #18: Incorrect Recording Schedule
Many recorders allow different schedules (continuous, motion-triggered, scheduled). Ensure your settings match your needs. For most homes, continuous recording is recommended.
Mistake #19: Weak Passwords
Using default or weak passwords is an open invitation to hackers. Change default passwords immediately and use strong, unique passwords for your NVR and cameras.
🌐 Network & Remote Access: Common Configuration Errors
You’ve installed the system, but you can’t view it remotely. This is a common frustration.
Mistake #20: Not Connecting to the Network Properly
Ensure the NVR is connected to your router with a good Ethernet cable. Test the connection.
Mistake #21: Not Scanning the QR Code
Most modern systems use P2P technology – you simply scan a QR code on the NVR with the app to link it. Miss this step, and remote access won’t work.
Mistake #22: Port Forwarding Errors
If your system doesn’t support P2P, you may need to forward ports on your router. This is complex and often done incorrectly. A professional installer will handle this.
Mistake #23: Ignoring WiFi Router Backup
As covered in our backup guide, if your NVR is on backup power but your router isn’t, you lose remote access during loadshedding. Back up both.
💽 Storage Miscalculation: Running Out of Space
Nothing is more frustrating than needing footage and finding it was overwritten because the drive was too small.
Mistake #24: Undersized Hard Drive
Storage requirements depend on:
- Number of cameras
- Resolution (1080p, 4MP, 4K)
- Frames per second (fps)
- Compression technology (H.264, H.265, H.265+)
- Days of storage desired
Rough guide for 7-day storage:
- 4 x 1080p cameras: 1-2TB
- 4 x 4K cameras: 3-4TB
- 8 x 4K cameras: 6-8TB
Always calculate properly or ask your installer. Use surveillance-grade hard drives from Seagate (SkyHawk) or Western Digital (Purple) – they’re designed for 24/7 recording.
⚖️ Legal & Compliance: Don’t Get Sued
Ignoring the law is a costly mistake. See our CCTV laws guide for details.
Mistake #25: No CCTV Signage
Under POPIA, if your cameras capture any public space or area outside your property, you must notify people with clear signage. This is often overlooked.
Mistake #26: Recording Audio Without Consent
Audio recording is heavily regulated by RICA. In most residential cases, it’s best to disable audio entirely to avoid legal risk.
Mistake #27: Hiring an Unregistered Installer
Always verify PSIRA registration. Hiring an unregistered person is illegal and puts you at risk. See our installer vetting guide.
⚡ Loadshedding: The South African Reality
In South Africa, ignoring loadshedding is a critical mistake.
Mistake #28: No UPS for the NVR
Without a UPS, your system is blind during every power outage. A basic UPS for the NVR is essential.
Mistake #29: No UPS for the Router
As mentioned, if your router isn’t on backup, you lose remote viewing during outages.
Mistake #30: No Surge Protection
Repeatedly stressed because it’s that important: surges when power returns destroy equipment.
⚠️ Signage: A Simple Step Often Forgotten
We’ve covered the legal requirement, but it’s worth repeating as a standalone mistake.
Where to place signs:
- At your front gate or driveway entrance.
- At all public entrances to your home or business.
- Clearly visible before someone enters the monitored area.
Signs not only keep you legal but also act as a deterrent – criminals are less likely to target a property with visible CCTV warnings.
📱 Handover & Training: Do You Know How to Use Your System?
A professional installation includes proper handover and training.
Mistake #31: No System Walkthrough
Before the installer leaves, they should walk you through the system:
- How to view live feeds on the app.
- How to playback footage.
- How to receive and manage notifications.
- Where the NVR is located and how to reboot if needed.
- What the warranty covers and for how long. See our guarantees page.
Mistake #32: No Documentation
You should receive:
- Itemised invoice with all equipment listed.
- Warranty documents.
- Login credentials for the app (securely provided).
- Contact details for support.
✅ Final Inspection Checklist: Before You Sign Off
Use this checklist to inspect the completed installation:
Daytime Checks:
- ☐ All cameras show clear, focused images.
- ☐ No obstructions in any camera view.
- ☐ Camera angles cover intended areas.
- ☐ No cameras pointed at neighbours’ private spaces.
- ☐ Cables are neat, secured, and in conduit where needed.
- ☐ NVR is in a secure, ventilated location.
- ☐ Signage is installed at all entrances.
Night-Time Checks:
- ☐ Night vision activates correctly in darkness.
- ☐ No IR reflection (halo) in any camera.
- ☐ Images are clear and usable in low light.
- ☐ No glare from nearby lights.
Remote Access Checks:
- ☐ App installed on your phone.
- ☐ Can view live feeds remotely.
- ☐ Can playback footage remotely.
- ☐ Push notifications work (test by walking in front of a camera).
Documentation Checks:
- ☐ Received itemised invoice.
- ☐ Warranty details provided.
- ☐ Support contact saved.
- ☐ System walkthrough completed.
❓ Frequently Asked Questions
What is the most common CCTV installation mistake?
The most common mistake is poor camera placement – either mounting too high (missing faces), pointing at neighbours’ property, or creating blind spots. Next is IR reflection, which ruins night vision. Proper planning and a professional installer prevent these.
How high should I mount my security cameras?
The ideal height is 2.5 to 3 metres (8-10 feet). This is high enough to prevent tampering but low enough to capture clear facial images. Anything higher than 3 metres will likely show only the tops of heads.
Why is my CCTV camera blurry at night?
This is usually caused by IR reflection (the halo effect) – the infrared LEDs reflecting off something close to the lens, like a dirty dome, spider web, or nearby wall. Cleaning the lens or adjusting the camera position usually fixes it. See our maintenance guide for more.
What type of cable should I use for CCTV?
For IP cameras, use solid copper Cat5e or Cat6 (avoid CCA – Copper-Clad Aluminium). For analogue cameras, use RG59 Siamese cable (coaxial + power). Always use high-quality cable to ensure signal integrity and longevity.
Do I need a UPS for my CCTV system?
Yes, absolutely. In South Africa, loadshedding means your system will be without power regularly. A UPS keeps your system running during outages and, crucially, protects against power surges when electricity returns. See our backup guide for details.
How much storage do I need for my CCTV system?
For a typical 4-camera 1080p system, a 2TB hard drive gives about 7-10 days of recording. For 4K cameras, you’ll need 3-4TB for the same period. Always use surveillance-grade drives from brands like Seagate or Western Digital.
Do I need CCTV signage?
Yes, under POPIA, if your cameras capture any public space or area outside your property, you must notify people with clear, visible signage. This is a legal requirement, not optional.
Can I install CCTV myself to save money?
DIY installation is possible for simple wireless systems, but for anything more than 2-3 cameras, professional installation is strongly recommended. Mistakes in placement, cabling, and configuration can cost more to fix than you save. Always use a PSIRA-registered installer for best results.
What should I check before the installer leaves?
Use our Final Inspection Checklist above. Key checks: daytime image quality, night vision (no IR reflection), remote app access, push notifications, and receipt of all documentation and warranties. Don’t sign off until everything works perfectly.
✅ Final Thoughts: Get It Right the First Time
A CCTV system is an investment in your safety and peace of mind. By understanding the common mistakes and using this checklist, you can ensure your installation is done right, avoiding costly errors and frustrating problems down the line.
Your 3-Step Installation Action Plan:
- Plan thoroughly: Use the pre-installation checklist and walk your property.
- Hire a professional: Choose a PSIRA-registered installer with good references.
- Inspect carefully: Use the final inspection checklist before signing off.
🔒 The Bottom Line:
An hour of planning and inspection
saves years of frustration and ensures your security system actually works
Ready for a Hassle-Free Installation?
Don’t learn these mistakes the hard way. Connect with trusted, PSIRA-registered installers who will get it right the first time, every time.
📞 Call our installation helpline: 073 138 4726
📚 Official Resources:
- PSIRA – Code of conduct for installers and verification.
- SABS – Cabling and installation standards (SANS 10220:2016).
- Security SA – Common installation fault analysis and industry news.
This guide is for informational purposes. Always consult with a qualified professional for your specific security needs.
Written by: Innocent T Hanyani
21+ years construction and digital industry experience, ServiceLink SA
Innocent has overseen thousands of CCTV installations across South Africa and has seen every mistake imaginable. His practical experience ensures this checklist catches real-world problems before they cost you time and money.