Cornice & Ceiling Trim Design Ideas South Africa
🏛️ Ogee, Scotia, Shadow Gap, LED cornices – we explore every style, cost, and installation option for South African homes.
That simple line where your wall meets the ceiling – it’s easy to overlook, but the right cornice or ceiling trim can transform a room from ordinary to extraordinary. Whether you’re renovating a period home in Stellenbosch, building a modern masterpiece in Sandton, or adding character to a coastal property in Durban, cornices offer endless design possibilities. This comprehensive guide covers everything you need to know – from classic plaster profiles to contemporary shadow gaps, LED-integrated trims, costs, installation, and design ideas for every room. We’ll help you choose the perfect cornice to complete your ceiling.
📋 Planning a Cornice Installation?
Get free, no-obligation quotes from experienced cornice installers in your area. They’ll advise on profiles, materials, and costs.
Find Cornice Installers Near You
Servicing Johannesburg, Pretoria, Cape Town, Durban, and all major areas
📖 Table of Contents – Cornice & Ceiling Trim Guide
🏛️ What Is Cornice?
Cornice (also called coving) is decorative trim installed where the wall meets the ceiling. It serves both aesthetic and practical purposes, softening the transition between surfaces and adding architectural interest to a room.
Cornice vs Coving – What’s the Difference?
- Cornice: Typically more ornate, often with decorative details (ogee, dentil, egg-and-dart).
- Coving: Simpler curved profile, usually plain and understated.
In South Africa, the terms are often used interchangeably, but cornice generally implies more decorative profiles.
Parts of a Cornice
- Base: The part against the wall.
- Top: The part against the ceiling.
- Profile: The decorative shape between.
✅ Why Install Cornice? Benefits & Purpose
🎨 Aesthetic Benefits
- Adds character: Transforms plain rooms into elegant spaces.
- Defines style: Classical, modern, minimalist – cornice sets the tone.
- Hides imperfections: Covers uneven wall-ceiling joints.
- Creates proportion: Visually lowers high ceilings or adds height to low rooms.
- Completes the look: Finishes the room like a picture frame.
🛠️ Practical Benefits
- Hides cables: LED cornices conceal wiring for lighting.
- Protects walls: Prevents damage at the vulnerable wall-ceiling joint.
- Increases property value: Perceived as a premium feature.
- Easy to clean: Smooth profiles wipe clean.
- Can incorporate lighting: LED cornices provide indirect ambient light.
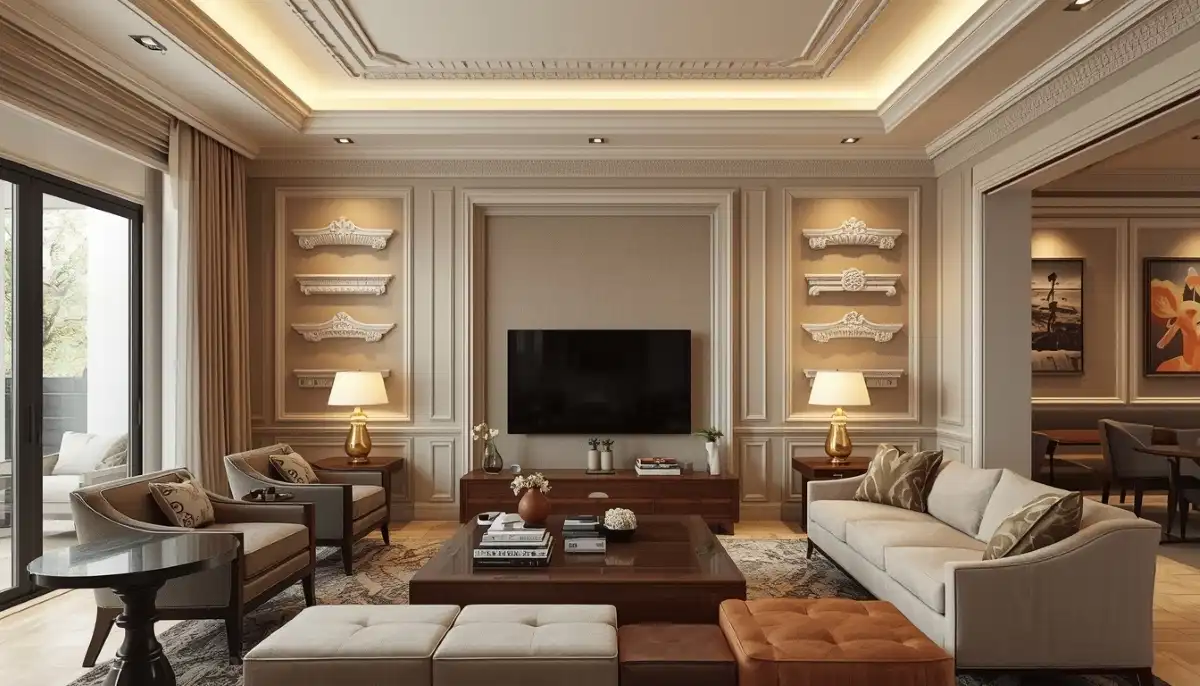
📐 Cornice Profiles – Choosing the Right Shape
The profile is the shape of the cornice – it’s the most important design decision. Here are the most common profiles in South Africa.
| Profile Name | Description | Best For | Style |
|---|---|---|---|
| Ogee | S-shaped curve, classic and elegant | Traditional homes, formal living rooms | Classical |
| Scotia | Simple concave curve, understated | Modern homes, bedrooms, hallways | Simple / Traditional |
| Cavetto | Quarter-round concave, very simple | Minimalist interiors, apartments | Modern / Minimalist |
| Dentil | Block-like pattern, very ornate | Period homes, grand entrances | Ornate / Classical |
| Egg & Dart | Classical pattern with alternating shapes | Heritage homes, formal dining rooms | Very ornate |
| Toru | Convex rounded profile | Traditional homes, cottages | Classical |
| Step / Square | Angular, geometric profile | Modern homes, contemporary spaces | Modern |
| Shadow Gap | Recessed gap, no visible cornice | Ultra-modern, minimalist | Contemporary |
For modern homes in Sandton or Fourways, scotia or step profiles are popular. For Cape Dutch or period homes in Stellenbosch, ogee or dentil cornices are more appropriate.
🧱 Cornice Materials – Which One to Choose?
Cornices are available in several materials, each with different characteristics, costs, and applications.
Plaster Cornice
The traditional choice. Made from gypsum plaster, often reinforced with fibreglass.
- Pros: Authentic look, takes paint beautifully, can be repaired, fire-resistant.
- Cons: Heavy, requires professional installation, can crack if building settles.
- Cost: R80 – R200 per metre installed.
- Best for: Period homes, formal spaces, where authenticity matters.
Polyurethane Cornice
Lightweight, pre-primed, and easy to install. Increasingly popular.
- Pros: Lightweight, won’t crack, moisture-resistant, DIY-friendly.
- Cons: More expensive than plaster, can look “plastic” if not painted well.
- Cost: R120 – R250 per metre installed.
- Best for: Modern homes, bathrooms, coastal areas (moisture-resistant).
Polystyrene Cornice
The budget option. Very lightweight but easily damaged.
- Pros: Very cheap, extremely light, DIY-friendly.
- Cons: Easily damaged, looks cheap, can yellow over time.
- Cost: R40 – R80 per metre installed.
- Best for: Rental properties, tight budgets, temporary solutions.
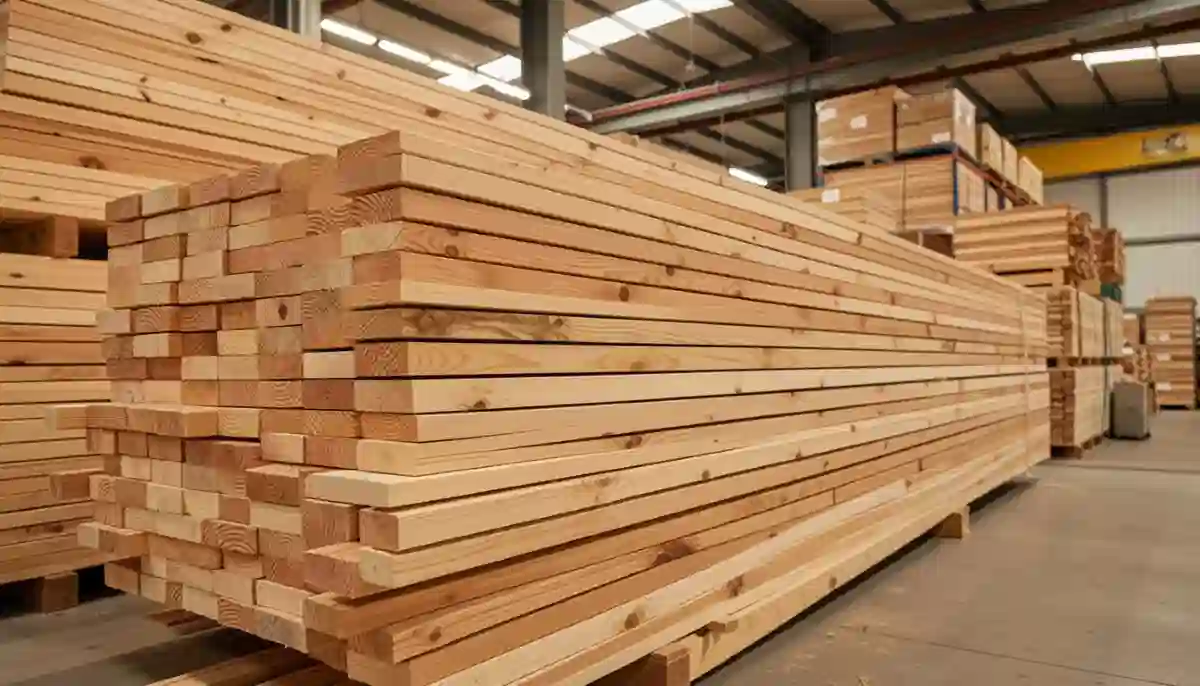
Timber Cornice
Solid wood or MDF cornice for a natural look.
- Pros: Beautiful natural appearance, can be stained or painted.
- Cons: Expensive, requires skilled carpentry, can warp in humidity.
- Cost: R200 – R500+ per metre installed.
- Best for: Rustic, farm-style, or very high-end homes.
For coastal homes in Durban or Cape Town, polyurethane is recommended – it won’t absorb moisture or rot. For period homes, plaster is the authentic choice.
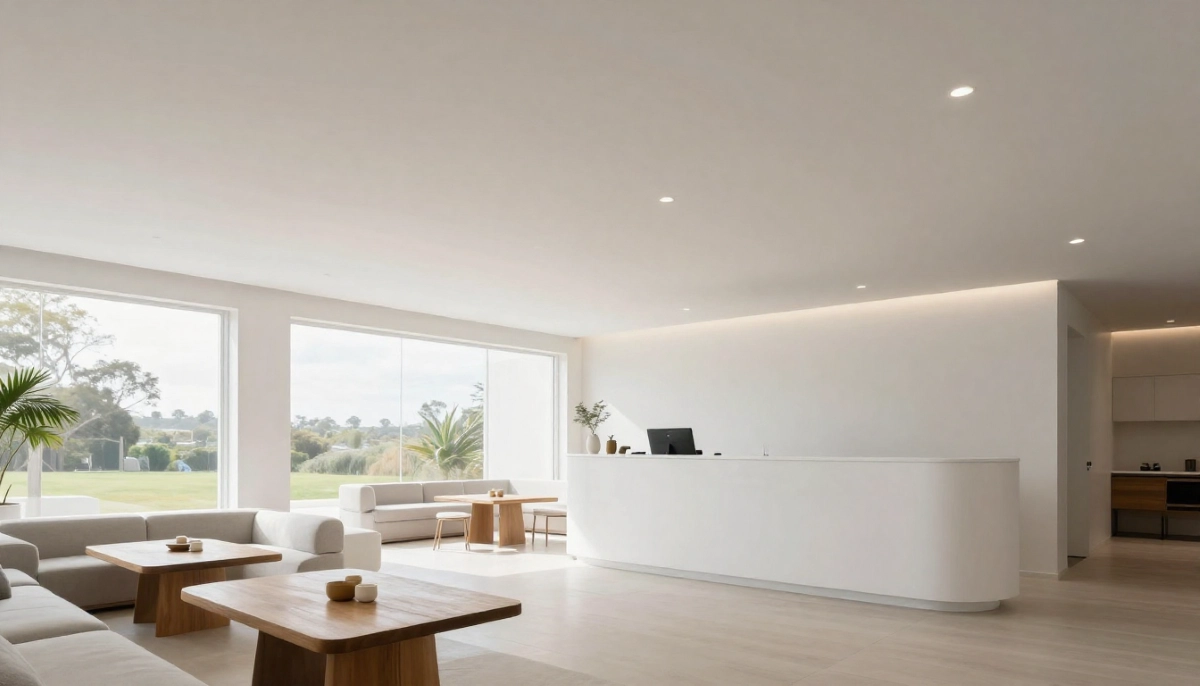
⬛ Modern Styles – Shadow Gaps & Square Set
Contemporary architecture often eliminates traditional cornices entirely, opting for clean lines and minimalist details.
Shadow Gap
A recessed groove where the wall meets the ceiling, creating a clean, defined line without a protruding cornice.
- How it’s made: Plasterboard is stopped short of the wall, creating a recess, or a special profile is installed.
- Pros: Ultra-modern look, hides imperfections, can incorporate LED lighting.
- Cons: More expensive to create, requires precise workmanship.
- Cost: R150 – R300 per metre (more complex than standard cornice).
Square Set / Arris
A sharp 90-degree angle where wall meets ceiling – no cornice at all. The ultimate minimalist look.
- Pros: Cleanest possible line, very modern.
- Cons: Requires perfectly straight walls and ceilings – any imperfection is visible.
- Cost: Requires high-quality plastering – may cost more than simple cornice.
Modern homes in Fourways or Sandton increasingly feature shadow gaps – they’re clean, contemporary, and perfect for LED strip lighting.
💡 LED Cornices – Lighting Integrated Trim
LED cornices combine decorative trim with integrated lighting, creating stunning ambient effects.
Types of LED Cornices
- LED strip behind cornice: Standard cornice with LED strip hidden behind, casting light upwards or downwards.
- Purpose-made LED cornice: Cornice with built-in channel for LED strip, creating a neat, professional finish.
- Shadow gap with LED: LED strip inside the shadow gap for a floating ceiling effect.
Benefits of LED Cornices
- Ambient lighting: Soft, indirect light creates a warm atmosphere.
- Feature lighting: Highlights the ceiling and architectural details.
- No visible fittings: Lights are hidden, creating a clean look.
- Dimmable: LED strips can be dimmed for mood lighting.
Installation Considerations
- Requires electrical planning – power supply for LED strips.
- LED strips should be accessible for replacement.
- Use quality LED strips with good colour rendering (CRI >90).
Cost
- LED cornice (material only): R150 – R300 per metre
- Installation (including electrical): R200 – R400 per metre
- Total installed: R350 – R700 per metre
For LED cornice installation in your area, check our Johannesburg or Cape Town pages.
🏠 Cornice by Room – Choosing the Right Profile
| Room | Recommended Profile | Why |
|---|---|---|
| Living Room | Ogee, Dentil, or Step | Living rooms are formal spaces where cornice makes a statement. Ogee is classic, dentil for ornate, step for modern. |
| Dining Room | Ogee, Egg & Dart | Formal dining deserves elegant detailing. Egg & dart adds classical sophistication. |
| Bedroom | Scotia, Cavetto, or Step | Bedrooms benefit from softer, simpler profiles. Scotia is understated and calming. |
| Bathroom | Polyurethane (any profile) or Shadow Gap | Moisture resistance is key. Polyurethane won’t absorb humidity. Shadow gap works well in modern bathrooms. |
| Kitchen | Scotia or Step (polyurethane) | Simple profiles are easier to clean. Polyurethane resists grease and moisture. |
| Hallway / Passage | Scotia or Step | Long, narrow spaces benefit from simple, clean lines. Avoid ornate profiles that overwhelm. |
| Home Office | Step or Shadow Gap | Modern, clean look suits professional spaces. Shadow gap adds contemporary edge. |
| Entrance Hall | Dentil, Egg & Dart, or Ogee | Make a grand first impression – ornate cornice sets the tone. |
🏛️ Ready to Add Cornice to Your Home?
Get free, no-obligation quotes from experienced cornice installers in your area. They’ll help you choose the perfect profile and provide accurate pricing.
💰 Cornice Cost Breakdown – Materials & Installation
Here’s what you can expect to pay for cornice installation in South Africa. Prices are per linear metre.
| Material | Material Cost (per m) | Installation Labour (per m) | Total Installed (per m) |
|---|---|---|---|
| Polystyrene (budget) | R20 – R40 | R30 – R50 | R50 – R90 |
| Plaster (standard) | R50 – R100 | R60 – R120 | R110 – R220 |
| Plaster (ornate / custom) | R100 – R200 | R80 – R150 | R180 – R350 |
| Polyurethane (standard) | R80 – R150 | R60 – R100 | R140 – R250 |
| Polyurethane (LED profile) | R150 – R250 | R100 – R200 | R250 – R450 |
| Timber / MDF | R150 – R350 | R100 – R200 | R250 – R550+ |
| Shadow Gap (plaster) | N/A (part of ceiling) | R150 – R300 | R150 – R300 |
| LED cornice complete | R150 – R300 | R200 – R400 (inc elec) | R350 – R700 |
Room Cost Examples
- Small bedroom (30m of cornice): R3,300 – R6,600 for plaster cornice.
- Living room (40m of cornice): R4,400 – R8,800 for plaster, R5,600 – R10,000 for polyurethane.
- Whole house (150m of cornice): R16,500 – R33,000 for plaster cornice.
For accurate quotes in your area, use our free quote service.
🛠️ Installation – DIY vs Professional
DIY Cornice Installation
Possible for: Polystyrene and polyurethane cornices (lightweight, adhesive-fixed).
Challenges:
- Cutting perfect mitred corners (45° angles) requires practice.
- Corners must align perfectly – any gap is visible.
- Long lengths are awkward to handle alone.
- Adhesive must be applied correctly to prevent sagging.
DIY cost savings: You save R30 – R100 per metre on labour.
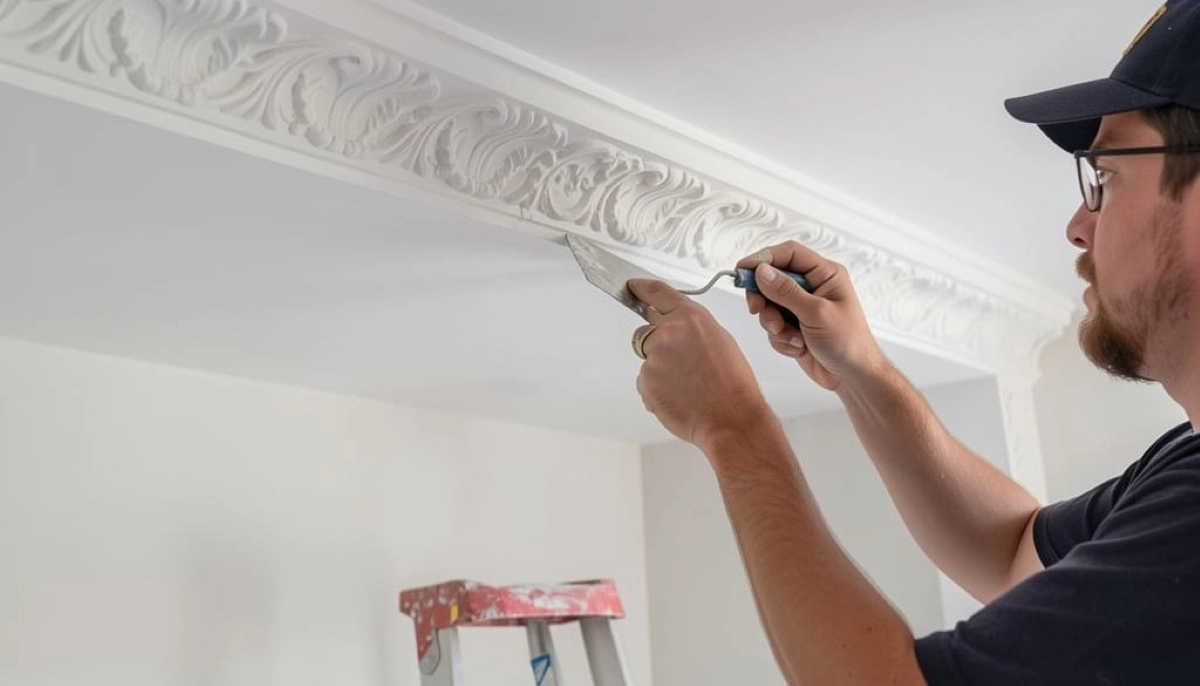
Professional Installation
Recommended for: Plaster cornices (heavy), ornate profiles, LED cornices, and perfect finish.
Benefits:
- Perfect mitred corners – seamless joins.
- Proper fixing – cornice won’t sag or fall.
- Experience with difficult corners and angles.
- Faster completion (1-2 days for average house).
- Warranty on workmanship.
For professional installation, see our contractor selection guide.
🎨 Painting & Finishing Cornices
Proper finishing is essential for a professional look.
Before Painting
- Fill any gaps between cornice and wall/ceiling with filler.
- Sand smooth.
- Caulk the edges for a seamless transition.
- Prime bare plaster or filler.
Painting Tips
- Use the same paint as the ceiling for a cohesive look (usually flat white).
- For contrast, paint cornice to match walls or a contrasting colour.
- Use a small brush for detailed profiles.
- Two coats minimum for even coverage.
Painting Costs
- DIY: R50 – R150 for paint and materials.
- Professional painting (add to ceiling painting): R20 – R50 per metre extra.
See our ceiling painting guide for more details.
🏠 Real-Life Cornice Installation Examples
Example 1: Period Home, Pretoria
1950s home, restoring original character.
Plaster ogee cornice: R8,500 (65m)
Matched original profiles, professional installation, painted to match ceiling.
Example 2: Modern Townhouse, Fourways
New build, contemporary interior.
Shadow gap throughout: R12,000 (80m)
Created during plastering, clean minimalist lines, LED strips in living area.
Example 4: Coastal Home, Ballito
New home near beach, moisture concerns.
Polyurethane scotia: R11,000 (70m)
Moisture-resistant, won’t rot, painted to match walls.
Example 4: Luxury Apartment, Cape Town
High-end apartment with LED feature lighting.
LED cornice: R22,000 (45m)
Purpose-made LED profile, dimmable RGBW strips, smart home integrated.
❌ 7 Common Cornice Mistakes
Learn from others’ errors: These mistakes ruin the look of cornices and waste money.
Mistake #1: Poorly Mitred Corners
Gappy corners are immediately noticeable. Professional mitring is essential for a seamless look. Practice on scrap pieces first if DIY.
Mistake #2: Wrong Profile for Room Size
Large, ornate cornice in a small room overwhelms the space. Small, simple cornice in a grand room looks lost. Choose proportionally.
Mistake #3: Using Polystyrene in High-End Homes
Polystyrene looks cheap and can yellow. For quality homes, invest in plaster or polyurethane.
Mistake #4: Not Priming Before Painting
Paint on bare plaster or filler will flash – look patchy. Always prime first.
Mistake #5: Ignoring Moisture in Bathrooms
Plaster cornice in a bathroom absorbs moisture and deteriorates. Use polyurethane in wet areas.
Mistake #6: Poor Adhesive Application
Too little adhesive and cornice sags. Too much and it squeezes out, creating mess. Follow manufacturer instructions.
Mistake #7: Not Planning for Lighting
Adding LED strips after cornice installation is difficult. Plan electrical rough-in before installation if you want LED cornice.
❓ Frequently Asked Questions – Cornice & Ceiling Trim
How much does cornice cost per metre in South Africa?
Costs range from R50 – R90 per metre for polystyrene, R110 – R220 for plaster, R140 – R250 for polyurethane, and R250 – R550+ for timber. Installation labour adds R30 – R150 per metre.
What is the most popular cornice profile?
Ogee and Scotia are the most popular profiles in South Africa. Ogee for traditional homes, Scotia for modern and simple applications.
Can I install cornice myself?
Yes, for lightweight materials like polystyrene and polyurethane. Plaster cornices are heavy and best left to professionals. DIY requires mitre saw, adhesive, and patience for corners.
What’s the difference between cornice and coving?
Cornice is typically more ornate, coving is simpler. In practice, the terms are often used interchangeably in South Africa, with “cornice” being more common.
Should cornice match ceiling or walls?
Traditionally, cornice matches the ceiling (white). This creates a seamless look. For contrast, you can paint cornice to match walls or a contrasting colour – this highlights the architectural detail.
What is a shadow gap?
A recessed groove where wall meets ceiling, creating a clean line without a protruding cornice. Very popular in modern architecture and can incorporate LED lighting.
Can I add LED lights to cornice?
Yes. Use purpose-made LED cornice profiles or stick LED strip behind standard cornice. Plan electrical supply before installation.
How do I cut cornice corners?
Corners are cut at 45 degrees using a mitre box or mitre saw. The cornice is installed upside down in the mitre box – the ceiling edge is at the bottom of the box. Practice on scrap first.
What adhesive for cornice?
For plaster: Plaster of Paris or special cornice adhesive. For polyurethane/polystyrene: Construction adhesive or “no more nails” type products. Follow manufacturer recommendations.
How long does cornice installation take?
A professional can install cornice in an average house (100-150m) in 1-2 days. DIY will take longer – allow a weekend for a single room.
✅ Final Thoughts – The Finishing Touch
Cornice is often called the “jewellery of a room” – and for good reason. It’s the detail that elevates a space from ordinary to elegant, from unfinished to complete. Whether you choose classic plaster ogee, modern shadow gap, or high-tech LED cornice, this architectural detail adds value and beauty to your home.
Your 4-Step Cornice Action Plan:
- Choose your style: Traditional or modern? Ogee, scotia, shadow gap?
- Select material: Plaster for authenticity, polyurethane for moisture resistance, timber for natural look.
- Measure accurately: Calculate linear metres – measure each wall, add 10% for waste.
- Decide DIY or pro: Be honest about your skills – perfect mitres are harder than they look.
🔑 The Bottom Line:
For R3,000 – R10,000, cornice transforms a room.
It’s the finishing touch that makes a house feel like a home.
🏛️ Ready to Add Cornice to Your Home?
Get free, no-obligation quotes from experienced cornice installers in your area. They’ll help you choose the perfect profile and provide accurate pricing.
📞 Call our cornice advisory line: 073 138 4726
📚 Official Resources & Inspiration:
- Architectural Design SA – Interior trim trends and cornice profiles.
- Plascon – Cornice painting finishes and colour advice.
- Houzz South Africa – Ceiling design inspiration and ideas.
This guide is for informational purposes. Always consult with a qualified professional for your specific cornice installation.
Written by: ServiceLink SA Research Team
Industry analysis and design research for South African homeowners
Our team has decades of combined experience in interior design and construction. We’ve researched cornice trends, materials, and installation techniques to bring you this comprehensive guide.