DIY Ceiling Repair vs Professional
🔧 Small crack or hole? DIY. Sagging ceiling or water damage? Call a pro. We help you decide – and save thousands.
That crack in the ceiling is getting bigger. The water stain from last month’s storm is spreading. Your DIY-loving brain says “I can fix that!” – but can you really? In South African homes, from Johannesburg to Cape Town and Durban, ceiling repairs are common. But some repairs are perfect for a handy homeowner, while others require professional skills, tools, and safety knowledge. This guide helps you decide: when to DIY, when to call a pro, and how to avoid turning a small repair into a major expense.
🛠️ Not Sure If You Need a Professional?
Get free, no-obligation quotes from experienced ceiling repair contractors. They’ll assess the damage and advise whether it’s a DIY job or needs professional attention.
Servicing Johannesburg, Pretoria, Cape Town, Durban, and all major areas
📖 Table of Contents – DIY vs Professional Ceiling Repair
⚠️ SAFETY FIRST – Know the Risks
CEILING REPAIR CAN BE DANGEROUS. Before attempting any DIY repair, consider these risks: working at height (ladder safety), electrical wiring hidden in ceilings, potential asbestos in older homes (pre-1990s), and the risk of ceiling collapse if structural issues exist. If you’re unsure about any of these, call a professional.
Critical Safety Checks Before Any DIY
- Age of home: If your home was built before 1990, ceilings may contain asbestos. DO NOT disturb – testing required.
- Electrical wiring: Always turn off power to the room before cutting into ceilings. Use a non-contact voltage tester.
- Ladder safety: Ensure ladder is stable on level ground. Never overreach.
- Dust protection: Wear mask, goggles, and protective clothing – ceiling dust is irritating.
- Know your limits: If the repair seems complex, it probably is.
See our ceiling regulations guide for safety standards and compliance requirements.
✅ Quick Decision Guide – DIY or Call a Pro?
| Type of Repair | DIY? | Professional? | Why |
|---|---|---|---|
| Small hairline cracks | ✅ Yes | ❌ No | Simple filling and painting – easy DIY. |
| Small holes (<100mm) | ✅ Yes | ❌ No | Patch kits available – requires some skill. |
| Popcorn ceiling patch | ⚠️ Maybe | ⚠️ Maybe | Matching texture is difficult – often better to call pro. |
| Water stains (no active leak) | ✅ Yes | ❌ No | Clean, prime with stain blocker, repaint. |
| Active water leak damage | ❌ No | ✅ Yes | Must fix leak source first – often structural. |
| Sagging ceiling | ❌ NO – DANGER | ✅ YES – URGENT | Risk of collapse – professional only. |
| Large holes (>300mm) | ❌ No | ✅ Yes | Requires new board fitting, jointing, plastering. |
| Structural / batten issues | ❌ NO | ✅ YES | Ceiling may collapse – structural work required. |
| Asbestos ceiling | ❌ NO – EXTREME DANGER | ✅ YES – SPECIALIST ONLY | Asbestos is carcinogenic – specialist removal only. |
| Multiple cracks throughout room | ❌ No | ✅ Yes | Indicates underlying movement – needs investigation. |
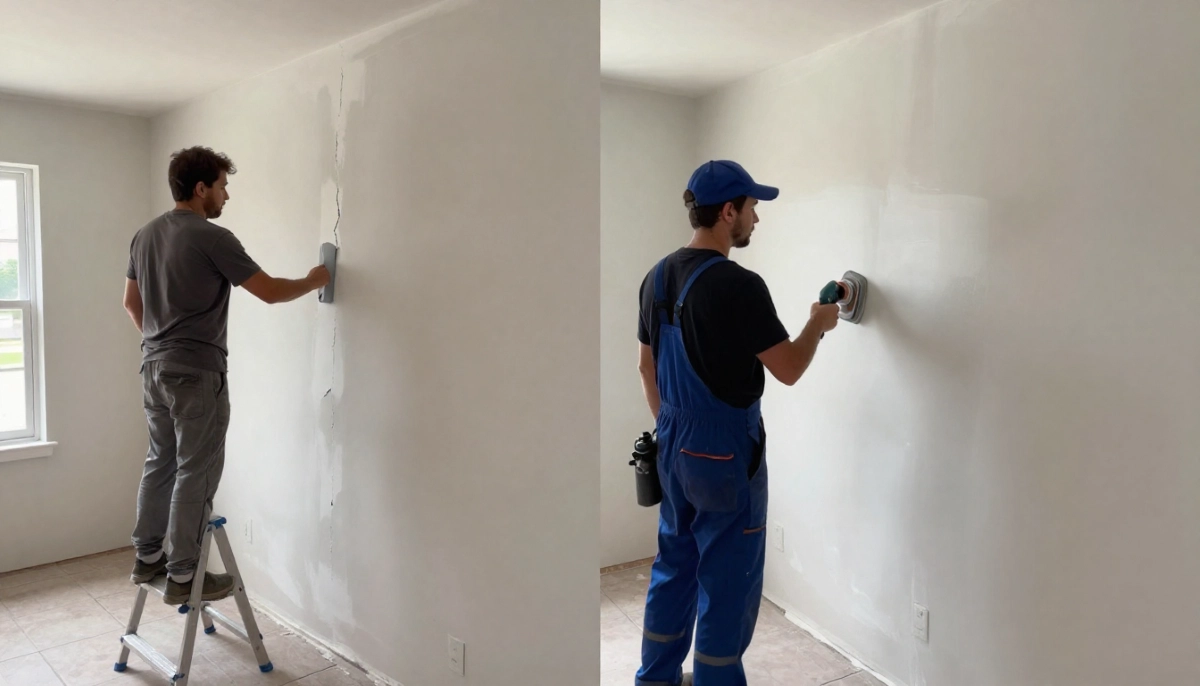
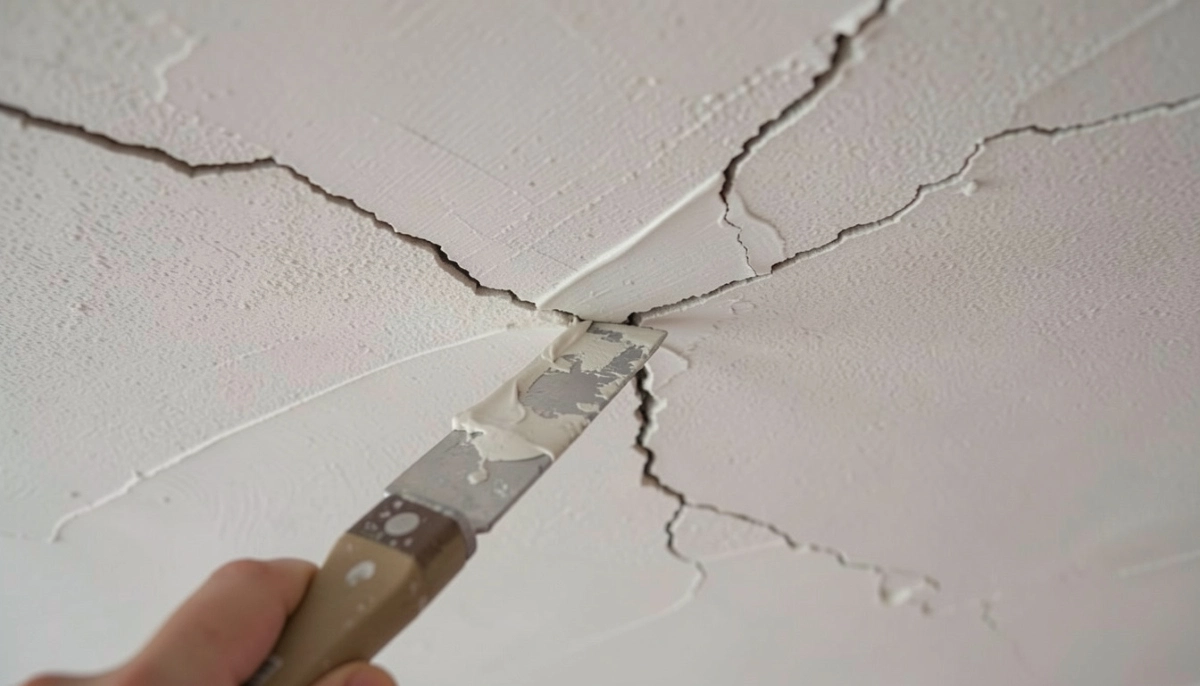
〰️ Small Cracks & Hairline Fractures
Verdict: ✅ DIY-Friendly
Small cracks in plasterboard ceilings are common, especially in newer homes as they settle, or in older homes with temperature changes.
What You’ll Need
- Filling knife / putty knife
- Fine surface filler or joint compound
- Sandpaper (120 and 220 grit)
- Primer and paint
- Paint roller and tray
Step-by-Step DIY Repair
- Widen the crack slightly with the corner of your filling knife – this helps filler adhere.
- Remove loose material – brush away dust.
- Apply filler pressing firmly into the crack. Slightly overfill.
- Allow to dry (follow manufacturer’s instructions – usually 2-4 hours).
- Sand smooth – start with 120 grit, finish with 220 grit for smooth finish.
- Prime the repaired area – this prevents “flashing” (different sheen) when painting.
- Repaint the entire ceiling – patched areas will show if you only paint the repair.
When to Call a Professional
If cracks keep reappearing after repair, or if there are many cracks throughout the room, there may be structural movement or batten issues. Call a professional to inspect.
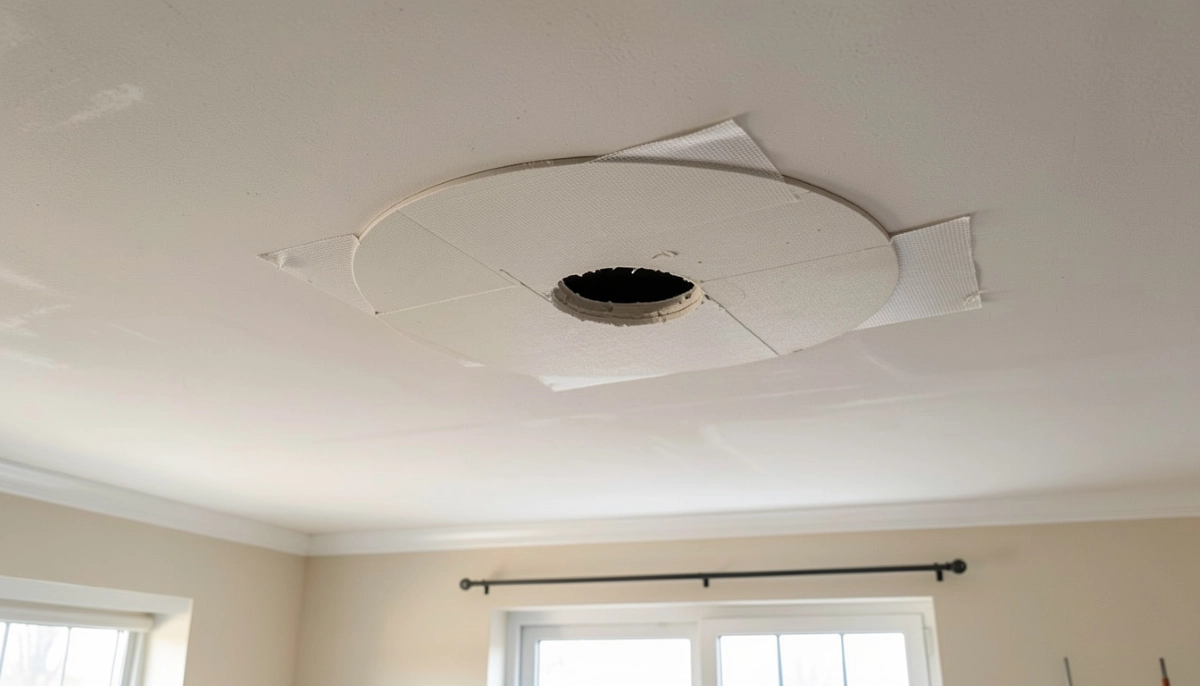
🕳️ Small Holes (Up to 100mm)
Verdict: ✅ DIY-Friendly with Patience
Small holes from removed hooks, accidental impacts, or minor damage can be patched successfully.
What You’ll Need
- Fiberglass mesh tape or perforated repair patch
- Joint compound or patching plaster
- Filling knives (100mm and 200mm)
- Sandpaper
- Primer and paint
Step-by-Step DIY Repair
- Clean the hole edges – remove any loose paper or debris.
- Apply self-adhesive mesh patch over the hole, larger than the hole itself.
- Apply first coat of joint compound over the patch, extending beyond edges. Don’t worry about smoothness yet.
- Allow to dry (4-6 hours).
- Apply second coat – wider than first, aiming for smooth finish.
- Sand when dry – use light touch to avoid exposing tape.
- Third coat if needed – for perfect finish.
- Prime and paint entire ceiling.
Pro Tip: For holes up to 50mm, use “hot patch” or rapid-set filler – it’s easier to apply and sands well. For larger holes, use the mesh tape method for strength.
🍿 Popcorn / Textured Ceiling Repair
Verdict: ⚠️ Tricky – Consider Professional
Popcorn (textured) ceilings are notoriously difficult to patch because matching the texture is an art.
DIY Challenges
- Matching the exact texture pattern is extremely difficult.
- Popcorn texture may contain asbestos if installed before 1990 – TEST FIRST.
- Texture application requires practice and special spray equipment.
If You DIY
- Test for asbestos first (home test kit or professional sample).
- Patch the hole as above, sand smooth.
- Buy aerosol texture spray matched to your ceiling type.
- Practice on cardboard first.
- Apply texture in thin layers, building up to match.
- Accept that it may not be perfect.
Better Option
Call a professional who has texture-matching experience. The cost is usually reasonable (R500 – R1,500 for a small patch) and the result will be invisible.
💧 Water Damage & Stains
Verdict: ⚠️ Depends – Fix the Leak FIRST
Water stains are common after leaks, but the approach depends on whether the leak is still active and whether the ceiling structure is compromised.
Step 1: Fix the Leak Source
Before any ceiling repair, the leak must be stopped. This may involve:
- Roof repair (tiles, sheeting, flashing)
- Plumbing repair (burst pipes in ceiling cavity)
- Bathroom waterproofing (if from upstairs)
These are almost always professional jobs – see our water damage guide.
If Ceiling Is Structurally Sound (No Sagging)
DIY Possible:
- Ensure ceiling is completely dry (use moisture meter if available).
- Sand the stained area lightly to remove loose paint.
- Apply stain-blocking primer – essential to prevent stain bleeding through new paint.
- Allow to dry thoroughly.
- Apply second coat of primer if stain still visible.
- Repaint entire ceiling.
If Ceiling Is Sagging, Bulging, or Soft
❌ NOT DIY – CALL PROFESSIONAL IMMEDIATELY. Water-damaged plasterboard loses strength and can collapse. The affected section must be cut out and replaced.
📉 Sagging Ceilings – DANGER – Professional Only
Verdict: ❌ NO – EXTREME DANGER – CALL PROFESSIONAL IMMEDIATELY
SAGGING CEILINGS CAN COLLAPSE WITHOUT WARNING. If your ceiling is visibly sagging, bulging, or drooping, do not work under it. Evacuate the area and call a professional immediately. This indicates structural failure of the ceiling battens or fixings.
Causes of Sagging Ceilings
- Water damage weakening boards
- Failed or rotten ceiling battens
- Insufficient fixings when installed
- Termite damage to timber battens
- Excessive weight (old insulation, etc.)
Professional Repair
A professional will:
- Install temporary supports to prevent collapse
- Identify and fix the underlying cause
- Replace damaged boards or re-fix existing ones
- Reinforce battens if needed
- Re-finish and paint
Cost varies greatly but expect R2,000 – R8,000+ depending on extent.
🏠 Sagging Ceiling? Water Damage?
Don’t risk collapse or further damage. Get a professional assessment from experienced ceiling repair contractors.
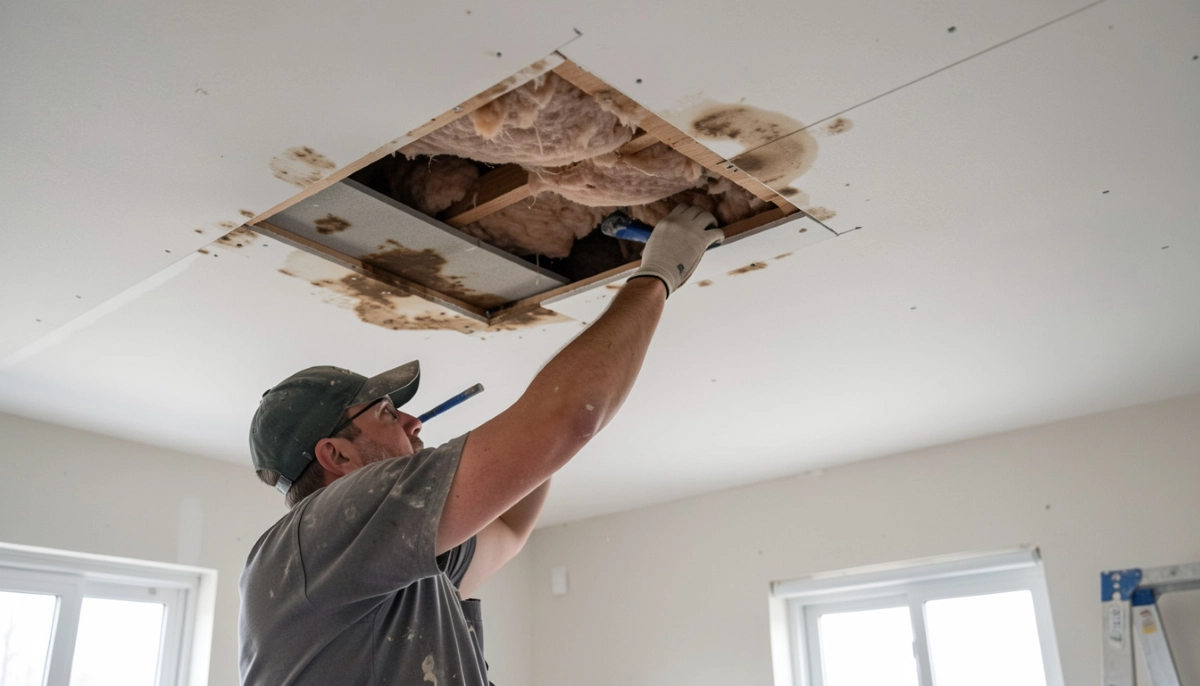
🕳️ Large Holes & Sections (>300mm)
Verdict: ❌ Professional Required
Large holes require cutting back to the nearest supports, installing new backing, fitting a new board section, taping, jointing, and plastering – all skilled work.
Why It’s Not DIY
- Need to locate and fix to ceiling battens – requires knowing where they are.
- New board must be cut precisely to fit.
- Jointing and taping large areas is a skilled trade – visible joints if done poorly.
- Matching existing ceiling texture is difficult.
Professional Cost
- Small section replacement (1m²): R1,500 – R2,500
- Large area replacement (5m²+): R3,000 – R6,000+
🏗️ Structural Issues & Batten Problems
Verdict: ❌ Professional Only – Structural Work
If your ceiling is moving, cracking repeatedly, or the battens are damaged, this is structural work requiring professional expertise.
Signs of Structural Issues
- Multiple cracks throughout the room
- Cracks that keep reappearing after repair
- Visible sagging between supports
- Creaking or movement when walking above
- Visible gaps between ceiling and walls
Professional Solutions
- Re-fixing loose boards with plaster washers
- Adding additional battens or supports
- Replacing damaged timber
- Full ceiling replacement in severe cases
☣️ Asbestos Ceilings – EXTREME DANGER – Professional ONLY
ASBESTOS KILLS. If your home was built before 1990, ceilings may contain asbestos. Do NOT drill, sand, cut, or disturb asbestos ceilings. Asbestos fibres cause mesothelioma and lung cancer. Only licensed asbestos removal specialists should handle these ceilings.
How to Identify Potential Asbestos
- Home built before 1990
- Textured coatings (some contain asbestos)
- Old fibre cement sheets (often in garages)
- If unsure, assume it’s asbestos until tested
What to Do
- Do NOT disturb the ceiling.
- Have a sample tested by a certified laboratory.
- If positive, only use licensed asbestos removal contractors.
- They will follow strict safety protocols for removal and disposal.
Cost: Asbestos removal is expensive (R200 – R500 per m²) but non-negotiable for safety.
🛠️ Tools & Materials for DIY Repairs
If you’re tackling a DIY repair, here’s what you’ll need:
🔧 Essential Tools
- Filling knives / putty knives (50mm, 100mm, 200mm)
- Sandpaper (120, 220 grit) and sanding block
- Utility knife
- Paint roller and extension pole
- Paint tray
- Dust mask and safety glasses
- Stepladder
- Vacuum cleaner (for dust)
🧪 Materials
- Joint compound / patching plaster
- Fiberglass mesh tape
- Self-adhesive repair patches
- Stain-blocking primer
- Ceiling paint (flat white or matched colour)
- Fine surface filler (for small cracks)
📋 Step-by-Step DIY Repair Guides
For detailed step-by-step instructions with photos, see our specific guides:
💰 Professional Ceiling Repair Costs
| Repair Type | Typical Cost Range | Includes |
|---|---|---|
| Call-out / inspection fee | R500 – R1,000 | Diagnosis, quote, often waived if proceed |
| Small crack repair | R800 – R1,500 | Fill, sand, prime, paint small area |
| Small hole patch (<300mm) | R1,200 – R2,000 | Mesh, jointing, sanding, painting |
| Water stain treatment | R1,000 – R2,000 | Stain block, prime, repaint area |
| Section replacement (1m²) | R1,500 – R2,500 | Cut out, new board, tape, joint, paint |
| Sagging ceiling repair | R2,000 – R8,000+ | Re-fix, reinforce, patch, paint |
| Full room re-sheet (20m²) | R6,000 – R12,000 | Remove old, new boards, finish, paint |
| Asbestos testing | R800 – R1,500 | Sample collection, lab analysis |
| Asbestos removal (specialist) | R200 – R500 per m² | Licensed removal, disposal, certification |
🏠 Real-Life Repair Examples
Example 1: Small Crack, Randburg
Hairline crack above door frame.
DIY: R150 (materials only)
Homeowner filled, sanded, and painted – 2 hours work, perfect result.
Example 2: Water Stain, Umhlanga
Yellow water stain from old leak (fixed).
DIY: R250 (stain block + paint)
Stain-blocking primer worked perfectly – stain invisible after painting.
Example 3: Sagging Ceiling, Pretoria
Large sagging area in living room.
Professional: R4,500
Technician re-fixed boards with plaster washers, reinforced battens – safe and smooth.
Example 4: Asbestos Ceiling, Durban
1950s home with asbestos ceiling.
Professional: R18,000 (45m²)
Licensed removal, disposal, new gypsum ceiling installed.
❌ 7 Common DIY Ceiling Repair Mistakes
Learn from others’ errors: These mistakes turn small repairs into big problems.
Mistake #1: Not Fixing the Underlying Problem
Painting over a water stain without fixing the leak, or filling a crack caused by structural movement, means the problem returns. Always address the root cause first.
Mistake #2: Using the Wrong Filler
Standard wall filler shrinks and cracks on ceilings. Use joint compound or patching plaster designed for ceilings.
Mistake #3: Sanding Too Aggressively
Over-sanding exposes the paper facing or tape, creating more work. Sand lightly with fine grit.
Mistake #4: Not Priming Before Painting
Patched areas without primer “flash” – they look different under paint. Always prime repaired areas.
Mistake #5: Ignoring Asbestos Risk
Sand-drilling an asbestos ceiling releases deadly fibres. Test before disturbing any pre-1990 ceiling.
Mistake #6: Working Alone at Height
Ladder accidents are common. Have someone spot you, and never overreach.
Mistake #7: Taking on Too Much
A full room replacement or sagging ceiling repair is NOT a DIY job. Know your limits.
❓ Frequently Asked Questions – DIY vs Professional Ceiling Repair
Can I fix a ceiling crack myself?
Yes, for small hairline cracks. Use fine surface filler, sand smooth, prime, and repaint. If cracks are large or keep reappearing, there may be structural issues requiring professional inspection.
How much does professional ceiling repair cost?
Costs vary by job: R800 – R1,500 for small cracks, R1,500 – R2,500 for section replacement, R2,000 – R8,000+ for sagging ceilings. Call-out fees are typically R500 – R1,000.
Is it safe to repair a sagging ceiling myself?
ABSOLUTELY NOT. Sagging ceilings can collapse without warning. Evacuate the area and call a professional immediately. This is not a DIY job under any circumstances.
How do I fix a water-stained ceiling?
First, ensure the leak is fixed. Once dry, sand lightly, apply stain-blocking primer, then repaint the entire ceiling. If the ceiling is sagging or soft, it needs professional replacement.
Can I patch a hole in my ceiling myself?
Small holes (up to 100mm) are DIY-friendly using mesh tape and joint compound. Larger holes require professional replacement to ensure proper support and invisible joints.
How do I know if my ceiling contains asbestos?
If your home was built before 1990, there’s a risk. Do not disturb the ceiling. Have a sample tested by a certified laboratory (R800 – R1,500). Only licensed professionals should handle asbestos.
Why does my ceiling crack keep coming back?
Recurring cracks indicate structural movement or batten issues. The ceiling may be flexing, or the building may be settling. A professional inspection is needed to identify and fix the root cause.
What’s the best filler for ceiling cracks?
Use joint compound (drywall mud) or fine surface filler designed for ceilings. Avoid standard wall filler – it shrinks and cracks. For small holes, consider “hot patch” rapid-set compounds.
Do I need to paint the whole ceiling after repair?
Yes, highly recommended. If you only paint the repaired area, it will “flash” – look different under light. Painting the entire ceiling ensures uniform appearance.
How long does ceiling repair take?
DIY small repairs: 2-4 hours plus drying time. Professional repairs: 1-3 days depending on extent. Drying time between coats of joint compound is the biggest factor.
✅ Final Thoughts – DIY or Call a Pro?
Small cracks, minor holes, and water stains are well within reach of a handy DIYer. But sagging ceilings, large areas, structural issues, and asbestos are strictly professional territory.
Your 4-Step Decision Plan:
- Assess the damage: Size, location, and underlying cause.
- Check for dangers: Asbestos, electrical, structural risk.
- Evaluate your skills: Be honest about your abilities.
- When in doubt, call a pro: A consultation is cheaper than a collapse.
🔑 The Bottom Line:
DIY small repairs to save money.
Call a professional for anything that sags, leaks structurally, or might contain asbestos.
Your safety is worth more than the repair cost.
🏠 Not Sure If You Need a Professional?
Don’t guess and risk your safety. Get free quotes from experienced ceiling repair contractors who can assess the damage and advise.
📞 Call our repair helpline: 073 138 4726
📚 Official Resources & Standards:
- SABS – Electrical safety – ceiling fans/light fittings.
- Building Repair SA – Industry best practice for ceiling repairs.
- NHBRC – Latent defect liability for new homes.
This guide is for informational purposes. Always consult a qualified professional for repairs involving structural issues, electrical work, or potential asbestos.
Written by: ServiceLink SA Research Team
Industry analysis and technical research for South African homeowners
Our team has decades of combined experience in construction and home repair. We’ve seen the results of both successful DIY repairs and costly mistakes – and compiled this guide to help you decide wisely.