Fix Sagging & Water Damaged Ceilings South
💧 Water stain? Sagging bulge? Ceiling about to collapse? We show you exactly how to diagnose, fix, and prevent ceiling damage.
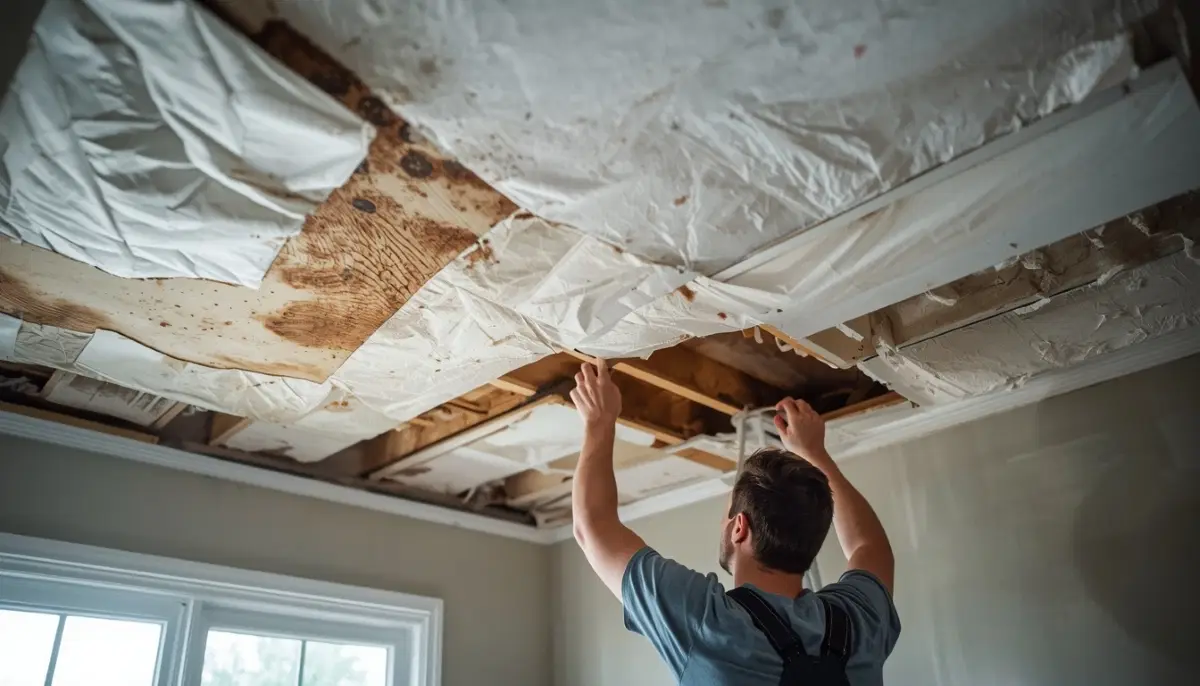
That dark water stain has been spreading. The ceiling is starting to bulge. Maybe you’ve even heard creaking sounds. Water damage and sagging ceilings are among the most stressful problems a homeowner can face – but ignoring them only makes things worse. Whether you’re dealing with a leaky roof in Johannesburg, burst pipes in Pretoria, or humidity damage in Durban, this comprehensive guide covers everything you need to know about fixing sagging and water-damaged ceilings. We’ll help you identify the cause, decide between DIY and professional repair, and walk through the step-by-step process for different types of damage.
🆘 Urgent Ceiling Damage?
Don’t risk collapse or further damage. Get free quotes from experienced ceiling repair contractors in your area for emergency assessments.
24/7 emergency services available in Johannesburg, Pretoria, Cape Town, Durban, and all major areas
📖 Table of Contents – Ceiling Repair Guide
⚠️ SAFETY FIRST – When to Evacuate
A SAGGING OR BULGING CEILING CAN COLLAPSE WITHOUT WARNING. If you see any of these signs, evacuate the area immediately and call a professional:
🚨 DANGER SIGNS – EVACUATE NOW
- Large sagging area – more than 1m² visibly drooping.
- Bulging or bubbling – water pooling above causing the ceiling to balloon.
- Creaking or cracking sounds – the ceiling is under stress.
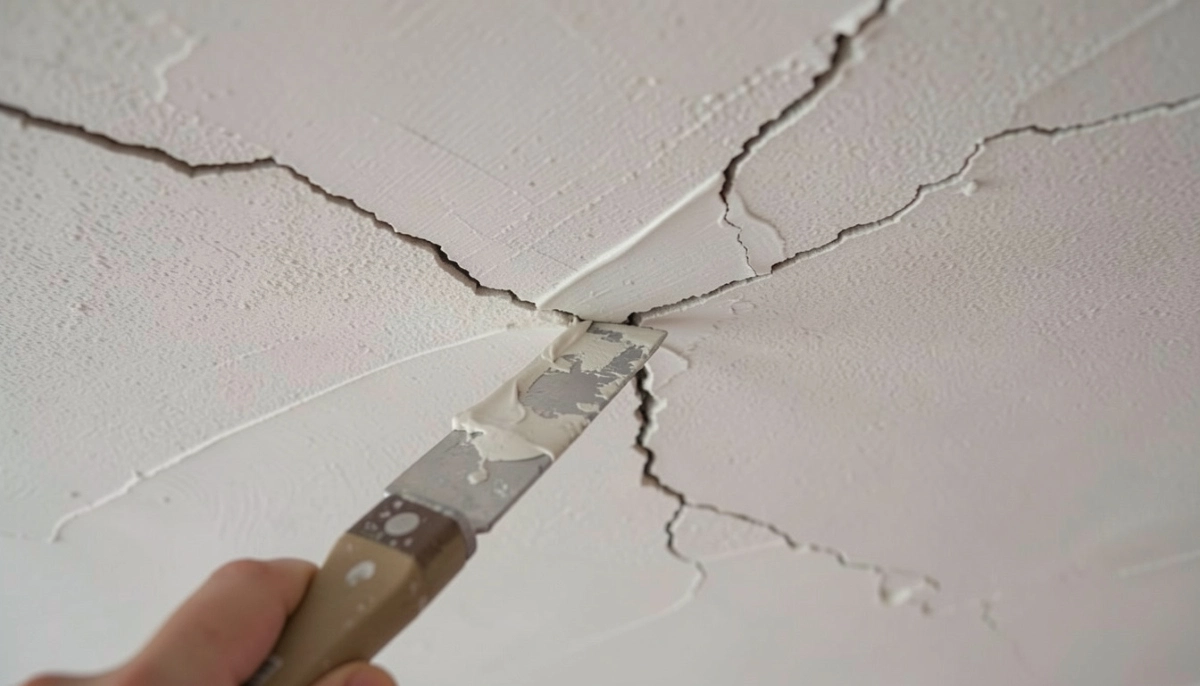
- Visible cracks spreading rapidly – structural failure imminent.
- Water actively pouring through – the ceiling may collapse under the weight.
If you see these signs, do not work under the ceiling. Move furniture, evacuate the room, and call a professional immediately. Your safety is worth more than any repair cost.
For professional help, use our emergency repair request service to find qualified contractors in your area.
🔍 Identify the Cause – Leak or Moisture?
Before repairing, you MUST identify and fix the source of the problem. Otherwise, the damage will simply recur.
Common Causes of Ceiling Damage
- Roof leaks: Missing tiles, damaged sheeting, blocked gutters, failed flashing.
- Plumbing leaks: Burst pipes in ceiling void, leaking bathroom fittings above.
- Condensation: Poor ventilation causing moisture buildup (common in bathrooms).
- Humidity: Coastal homes in Durban or Cape Town may have chronic moisture issues.
- Structural movement: Building settling causing cracks that let water in.
How to Find the Source
- Check the roof space – look for daylight, wet insulation, rusted sheeting.
- Check plumbing – look for wet pipes, signs of leaks.
- Check after rain – if damage worsens after rain, roof leak is likely.
- Check bathroom above – leaking shower or bath seals.
- Use a moisture meter – professionals use these to trace moisture paths.
If you can’t find the source, call a professional. See our contractor selection guide for finding qualified help.
🎨 Fixing Water Stains (No Sagging)
Verdict: ✅ DIY-Friendly (after leak fixed)
If the ceiling is still sound (no sagging, no soft spots) but has unsightly water stains, you can repair it yourself.
What You’ll Need
- Stain-blocking primer (oil-based or shellac-based)
- Paint roller and tray
- Paintbrush for edges
- Ceiling paint (matching existing)
- Drop cloths, ladder, safety gear
Step-by-Step Process
- Ensure the leak is fixed – wait for the ceiling to dry completely (may take days or weeks).
- Clean the area – remove any loose paint or debris.
- Sand lightly – smooth any rough edges.
- Apply stain-blocking primer – this is essential. Regular paint won’t stop stains bleeding through.
- Allow to dry – follow manufacturer instructions (usually 2-4 hours).
- Apply second coat of primer if stain still visible.
- Paint the entire ceiling – not just the stained area, or it will “flash” (look different under light).
Pro Tip: For stubborn nicotine or smoke stains, use shellac-based primer – it’s the most effective at blocking stains.
🔩 Small Sagging Areas – Plaster Washers
Verdict: ⚠️ DIY with Caution (small areas only)
For small sagging areas (less than 1m²) where the board is still intact but has pulled away from battens, plaster washers can be a solution.
What Are Plaster Washers?
Plaster washers are large-diameter washers (usually metal or plastic) used with screws to pull sagging plasterboard back up against the battens. They distribute the screw pressure over a wider area, preventing the screw from pulling through.
When to Use Plaster Washers
- Sagging area is less than 1m².
- The plasterboard is still in good condition (not waterlogged).
- The battens above are still sound.
- No active water leak.
Step-by-Step Process
- Locate the ceiling battens – use a stud finder or tapping to find them.
- Drive screws with plaster washers through the sagging area into the battens.
- Space washers every 150-200mm along the sagging area.
- Pull the ceiling up gently as you screw – don’t overtighten or you’ll crack the plaster.
- Fill the screw/washer depressions with joint compound.
- Sand smooth, prime, and repaint the entire ceiling.
Warning: Plaster washers are a temporary fix for minor sagging. If the ceiling is severely damaged or waterlogged, replacement is the only safe option.
🔄 Large Sagging Sections – Replacement Required
Verdict: ❌ Professional Required
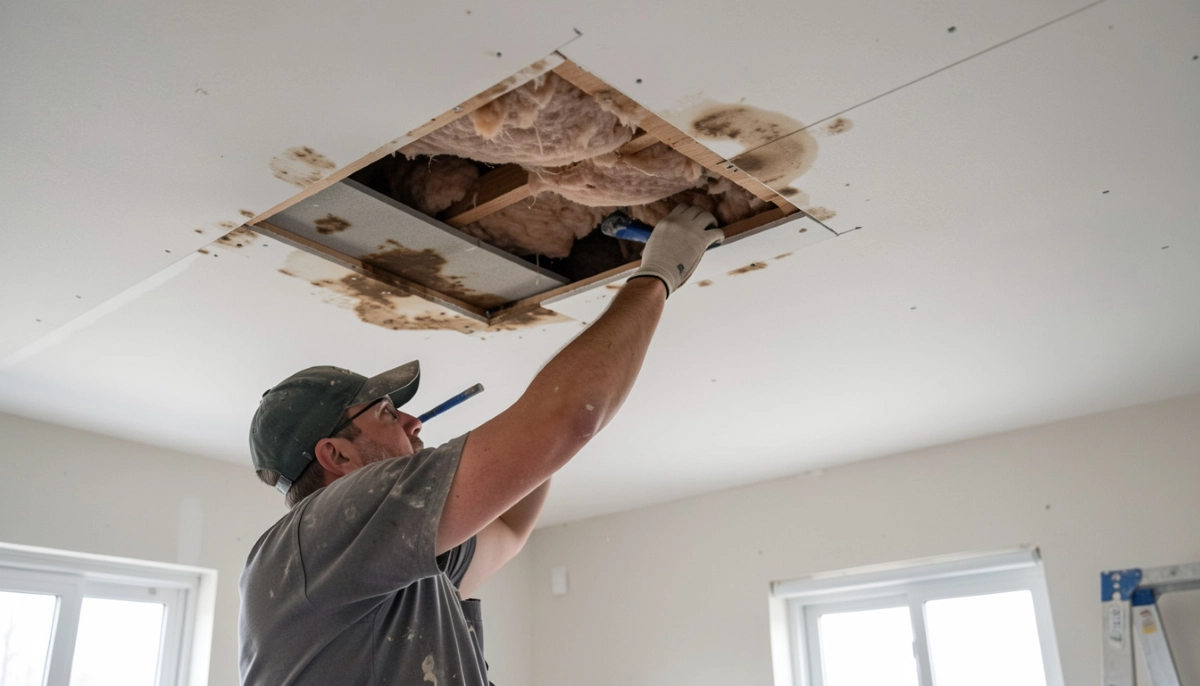
When sagging affects large areas (more than 1m²) or the board is water-damaged, soft, or crumbling, replacement is necessary.
Why Replacement?
- Water-damaged plasterboard loses structural strength – it won’t hold screws.
- The board may be contaminated with mould.
- Large sagging indicates batten failure or widespread damage.
- Patching large areas rarely looks seamless.
Professional Replacement Process
- Remove damaged section – cut back to nearest battens.
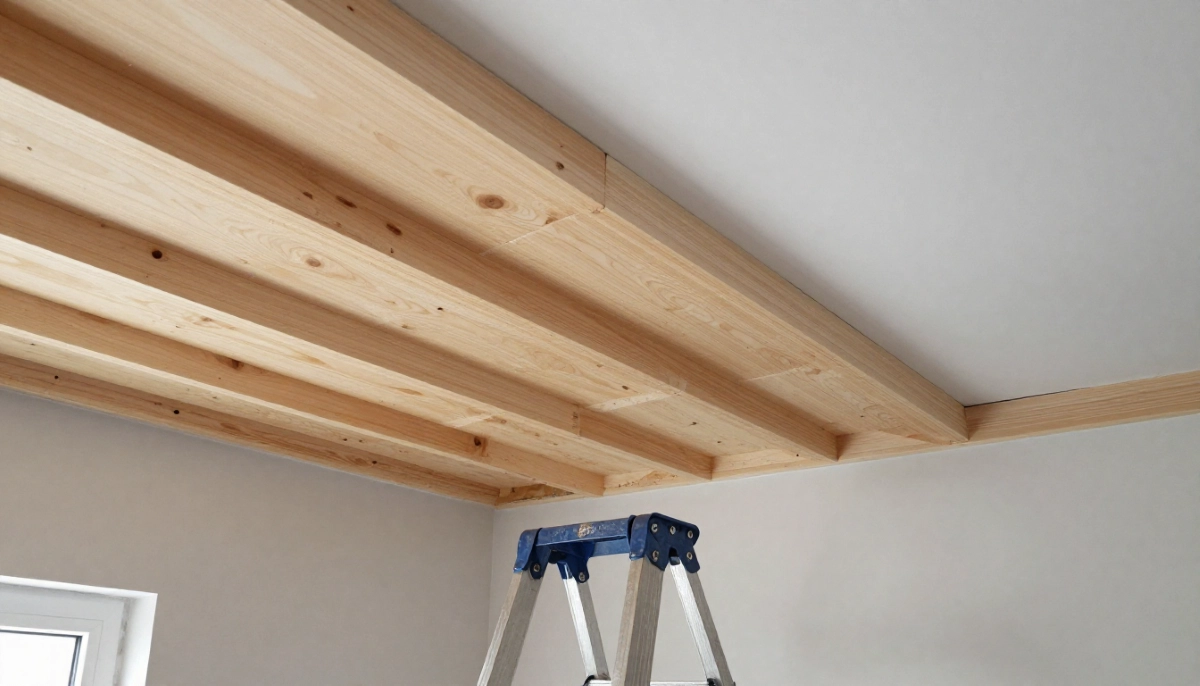
- Inspect and repair battens – replace any rotted or damaged timber.
- Install new plasterboard – cut to size, fix to battens.
- Tape and joint – apply joint tape and multiple coats of joint compound.
- Sand smooth – feather edges to blend with existing ceiling.
- Prime and paint entire ceiling – ensures uniform appearance.
Cost
- Small section replacement (1-2m²): R1,500 – R2,500
- Large area replacement (5m²+): R3,000 – R6,000+
For professional help in your area, check our ceiling services in Johannesburg or Cape Town pages.
💧 Bulging / Soft Spots – DANGER – Professional Only
BULGING OR SOFT SPOTS INDICATE WATER POOLING ABOVE THE CEILING. This is a collapse risk. Do NOT push on it, do NOT work under it. Evacuate and call a professional immediately.
What Causes Bulging?
Water pooling above the ceiling – from a leaking pipe or roof – soaks into the plasterboard, making it heavy and soft. The weight causes the ceiling to bulge downward. If the water continues to accumulate, the ceiling will eventually collapse.
Emergency Steps
- Evacuate the area – move people and pets out.
- Contain the water – place buckets to catch drips, but don’t go under the bulge.
- Turn off water supply if a pipe is suspected.
- Call a professional immediately – they may need to release water safely or support the ceiling.
Professional Response
A professional will:
- Assess the risk of collapse.
- If safe, create a small drain hole to release water (controlled).
- Identify and fix the leak source.
- Replace the damaged ceiling section.
Find emergency contractors near you using our urgent repair request service.
🔧 Active Water Leaks – Fix the Source First
Verdict: ❌ Professional Required (for leak itself)
Before any ceiling repair, the water source must be stopped. This may involve:
Roof Leaks
- Replace missing or broken roof tiles.
- Repair or replace damaged roof sheeting.
- Fix flashing around chimneys, vents, or skylights.
- Clean blocked gutters and downpipes.
Plumbing Leaks
- Locate and repair burst pipes (may require plumber).
- Fix leaking shower bases or bath seals.
- Repair leaking toilet cisterns or supply pipes.
Condensation / Humidity
- Improve ventilation – install extractor fans.
- Use dehumidifiers in chronically damp spaces.
- Ensure insulation doesn’t block ventilation pathways (see regulations guide).
Once the leak is fixed and the ceiling is completely dry (may take weeks), you can proceed with repairs.
🦠 Mould & Mildew Remediation
Water damage often leads to mould growth, which poses health risks.
Health Risks of Mould
- Respiratory issues, allergies, asthma triggers.
- Headaches, fatigue, skin irritation.
- Particularly dangerous for children, elderly, and those with compromised immune systems.
DIY Mould Removal (Small Areas)
For small mould patches (less than 1m²) on sound ceilings:
- Wear protective gear – N95 mask, gloves, goggles.
- Mix water and mild detergent or white vinegar (1:1).
- Scrub gently with soft brush.
- Rinse with clean water.
- Dry thoroughly.
- Apply mould-inhibiting primer before painting.
When to Call a Professional
- Large mould areas (over 1m²).
- Mould in ceiling cavity (above the ceiling).
- If occupants have health issues.
- If mould returns after cleaning.
Professional mould remediation costs R1,500 – R5,000+ depending on extent.
🏠 Need Professional Ceiling Repair?
Don’t risk collapse or health issues. Get free quotes from experienced ceiling repair contractors in your area.
🍿 Repairing Textured / Popcorn Ceilings
Textured ceilings present special challenges for repair.
Challenges
- Matching the existing texture is extremely difficult.
- Older textured ceilings (pre-1990) may contain asbestos – TEST FIRST.
- Textured coatings can be damaged by water, becoming soft and peeling.
Asbestos Warning
If your home was built before 1990 and has a textured ceiling, it may contain asbestos. Do NOT sand or disturb it. Have it tested before any repair work.
Repair Options
- Small patches: Use spray-on texture in a can – practice on cardboard first. Results may not match perfectly.
- Large areas: Consider removing texture entirely (skim coating) – this creates a smooth ceiling.
- Water-damaged textured ceilings: Often need complete removal and replacement.
For textured ceiling repairs, professional help is strongly recommended. See our ceiling services in Randburg or your local area.
🆚 DIY vs Professional – Decision Guide
| Situation | DIY? | Professional? | Why |
|---|---|---|---|
| Water stain (no sagging) | ✅ Yes | ❌ No | Stain-blocker and paint – straightforward DIY. |
| Small sagging area (<1m²) | ⚠️ Maybe | ⚠️ Maybe | Plaster washers possible, but need to ensure battens sound. |
| Large sagging area (>1m²) | ❌ No | ✅ Yes | Structural issue – professional assessment and repair needed. |
| Bulging / soft spots | ❌ NO – DANGER | ✅ YES – URGENT | Collapse risk – evacuate and call pro immediately. |
| Active water leak | ❌ No | ✅ Yes | Leak source must be fixed by appropriate trade (roofer, plumber). |
| Mould remediation (small) | ✅ Yes | ❌ No | Small patches can be DIY with proper protection. |
| Mould remediation (large) | ❌ No | ✅ Yes | Health risk – professional remediation required. |
| Textured ceiling patch | ⚠️ Maybe | ✅ Yes | Matching texture is difficult – pro recommended. |
| Asbestos ceiling | ❌ NO – EXTREME DANGER | ✅ YES – SPECIALIST ONLY | Asbestos is deadly – licensed removal only. |
💰 Typical Ceiling Repair Costs
| Repair Type | DIY Cost (materials) | Professional Cost |
|---|---|---|
| Water stain treatment | R200 – R500 | R800 – R1,500 |
| Small crack repair | R100 – R300 | R800 – R1,200 |
| Plaster washer fix (small area) | R200 – R500 | R1,200 – R2,000 |
| Section replacement (1-2m²) | R500 – R1,000 | R1,500 – R2,500 |
| Large area replacement (5m²+) | Not recommended | R3,000 – R6,000+ |
| Mould remediation (professional) | N/A | R1,500 – R5,000+ |
| Asbestos testing | R800 – R1,500 | Included in testing |
| Asbestos removal (licensed) | ❌ NO | R200 – R500 per m² |
For accurate quotes in your area, use our free quote service to connect with local contractors.
🛡️ Preventing Future Ceiling Damage
Once you’ve fixed the damage, take steps to prevent recurrence.
Regular Maintenance
- Inspect roof annually – check for missing tiles, damaged flashing.
- Clean gutters and downpipes – at least twice a year.
- Check plumbing for leaks – look for damp spots, mould.
- Ensure bathroom and kitchen extractor fans vent outside, not into ceiling void.
Improve Ventilation
- Install extractor fans in bathrooms and kitchens.
- Ensure roof space ventilation isn’t blocked by insulation.
- Consider dehumidifiers in chronically damp areas.
Use Appropriate Materials
- In bathrooms and kitchens, use moisture-resistant or PVC ceilings (see our materials guide).
- In coastal areas like Durban or Cape Town, consider PVC or aluminium for moisture resistance.
🏠 Real-Life Ceiling Repair Examples
Example 1: Water Stain, Randburg
Small water stain from old roof leak (fixed). No sagging.
DIY: R350 (stain block + paint)
Homeowner applied stain-blocking primer and repainted entire ceiling – perfect result.
Example 2: Sagging Ceiling, Pretoria
1.5m² sagging area in living room.
Professional: R2,800
Technician used plaster washers, reinforced battens, repainted – problem solved.
Example 3: Bathroom Ceiling Collapse, Durban
Bulging ceiling from leaking pipe above.
Professional: R4,500
Emergency call-out, released water, fixed pipe, replaced 3m² section.
Example 4: Asbestos Ceiling, Cape Town
1950s home with damaged asbestos ceiling.
Professional: R22,000
Licensed asbestos removal (45m²) followed by new gypsum ceiling.
❌ 7 Common Ceiling Repair Mistakes
Learn from others’ errors: These mistakes turn small repairs into big problems.
Mistake #1: Painting Over Water Stains Without Stain-Blocker
The stain bleeds through within weeks. Always use stain-blocking primer first.
Mistake #2: Ignoring the Leak Source
Repairing the ceiling while the leak is still active means you’ll be repairing again soon. Fix the leak first.
Mistake #3: Working Under a Bulging Ceiling
Extremely dangerous. Bulging ceilings can collapse without warning. Evacuate and call a professional.
Mistake #4: Using Regular Paint Instead of Stain-Blocker
Regular paint doesn’t stop stains. You need specialised stain-blocking primer.
Mistake #5: Not Testing for Asbestos
Disturbing an asbestos ceiling is deadly. Test before any sanding or removal.
Mistake #6: Over-tightening Plaster Washers
Can crack the ceiling. Screw just until the washer pulls the board up – don’t overtighten.
Mistake #7: Not Addressing Mould
Painting over mould doesn’t kill it. It continues growing under the paint. Treat mould first.
❓ Frequently Asked Questions – Ceiling Repair
How do I fix a sagging ceiling?
For small areas (<1m²), plaster washers can pull it back up. For larger areas, the ceiling section needs replacement. If the ceiling is bulging or soft, do not work under it – call a professional immediately.
Can I paint over water stains?
Yes, but only after using stain-blocking primer. Regular paint won’t stop stains bleeding through. Apply oil-based or shellac-based primer, then paint the entire ceiling.
How much does it cost to repair a water-damaged ceiling?
Costs vary: R800 – R1,500 for stain treatment, R1,500 – R2,500 for small section replacement, R3,000 – R6,000+ for larger areas. Fixing the leak source is extra.
What causes a ceiling to sag?
Common causes: water damage (leaks making boards heavy), failed fixings (screws pulling out), rotted battens, or excessive weight (old insulation, stored items above).
Is a sagging ceiling dangerous?
Yes, if it’s severe. A sagging ceiling can collapse, especially if water-damaged. If you see bulging, large sagging areas, or hear creaking, evacuate and call a professional.
How do I remove mould from a ceiling?
For small areas: wear protective gear, scrub with water and detergent or white vinegar, dry thoroughly, and apply mould-inhibiting primer before painting. For large areas, call a professional.
Can a water-damaged ceiling collapse?
Yes. Waterlogged plasterboard becomes heavy and loses strength. A bulging ceiling is at high risk of collapse. Do not go under it.
How do I know if my ceiling has asbestos?
If your home was built before 1990 and has textured coatings or old fibre cement sheets, it may contain asbestos. Have samples tested by a certified laboratory – do not disturb it.
What are plaster washers?
Large-diameter washers used with screws to pull sagging plasterboard back up against the battens. They’re a temporary fix for minor sagging, not a solution for severe damage.
How long does ceiling repair take?
Simple stain treatment: 1-2 hours plus drying. Section replacement: 1-2 days including drying between coats. Major repairs: 2-4 days.
✅ Final Thoughts – Don’t Delay, Address Damage Promptly
Ceiling damage rarely improves with time. Water stains spread, mould grows, sagging worsens. Addressing problems promptly saves money and prevents safety risks.
Your 4-Step Repair Action Plan:
- Safety first: Assess danger – evacuate if needed.
- Fix the source: Stop leaks before repairing.
- Assess the damage: DIY or professional? Use our guide.
- Repair properly: Use correct materials and techniques.
🔑 The Bottom Line:
A small repair today costs R1,000.
A collapsed ceiling costs R10,000+ and risks injury.
Don’t delay – address ceiling damage now.
🏠 Need Ceiling Repair Help?
Don’t risk collapse or health issues. Get free quotes from experienced ceiling repair contractors in your area today.
📞 Call our repair helpline: 073 138 4726
📚 Official Resources:
- NHBRC – Latent defects – water damage coverage.
- Institute of Plumbing SA – Leak detection and repair.
- SABS – Waterproofing standards for buildings.
This guide is for informational purposes. Always consult a qualified professional for repairs involving structural issues, electrical work, or potential asbestos.
Written by: Innocent T Hanyani
21+ years construction and digital industry experience, ServiceLink SA
Innocent has overseen thousands of ceiling repairs across South Africa, from minor water stains to emergency collapse prevention. His practical experience ensures this guide reflects real-world situations and solutions.