Floor Leveling & Surface Preparation Before Tiling – Complete South Africa Guide
🔨 R80 to R200 per m² – What you’ll pay to prepare your floor for tiling, plus step-by-step methods for concrete, timber, and existing tiles.
The most beautiful, expensive tiles in the world will fail if the surface beneath them isn’t properly prepared. In fact, industry experts agree that poor surface preparation is the number one cause of tiling failures – cracked tiles, lippage, hollow spots, and complete debonding. Whether you’re preparing a concrete slab in Johannesburg, a timber floor in Cape Town, or tiling over existing surfaces in Durban, this comprehensive guide covers everything you need to know about floor leveling and surface preparation. Drawing on years of practical experience and compliance with SANS 10064 surface preparation standards, we’ll help you ensure your tiling project starts on the right foundation.
🔨 Planning a Tiling Project?
Proper surface preparation is critical. Get free quotes from experienced tilers who can assess your substrate and prepare it correctly.
Servicing Johannesburg, Pretoria, Cape Town, Durban, and all major areas
📖 Table of Contents – Floor Leveling & Surface Preparation
🎯 Why Surface Preparation Matters
Surface preparation is the #1 most critical factor in tiling success. In our decades of experience across thousands of installations, we’ve seen that 90% of tiling failures trace back to inadequate substrate preparation.
Think of your tile installation like building a house – you wouldn’t build on an unstable foundation. The same principle applies to tiling. A properly prepared substrate ensures:
- No cracked tiles: Movement in the substrate transfers directly to tiles. A stable, sound base prevents stress cracks.
- No lippage: Uneven subfloors cause tiles to sit at different heights, creating tripping hazards and ugly appearance.
- Full adhesive coverage: A flat surface allows the recommended 95% adhesive coverage, essential for tile bond strength.
- No hollow spots: Tiles that sound hollow when tapped indicate inadequate adhesive coverage – a failure waiting to happen.
- Long-term durability: Properly prepared floors support tiles for decades without issues.
As we always tell our clients: the time and money spent on surface preparation is the best investment you can make in your tiling project. Skip it, and you’re gambling with your entire installation.
💰 Surface Preparation Cost Summary
Here’s what you can expect to pay for surface preparation in South Africa, based on industry rates and our experience across thousands of projects.
| Service | Cost Range | Notes |
|---|---|---|
| Surface preparation (general) | R500 – R5,000 | Project dependent – assessment, cleaning, minor repairs |
| Self-levelling compound | R80 – R150 per m² | Material + labour – depends on thickness required |
| Screeding (new sand-cement) | R100 – R200 per m² | For new builds or major renovations |
| Existing tile removal | R50 – R150 per m² | Plus disposal costs (R500-4,500 for skip) |
| Primer application | R20 – R40 per m² | Often included in tiling quotes |
| Decoupling membrane | R150 – R300 per m² | Material + labour – essential for timber and cracked concrete |
| Grinding high spots | R50 – R100 per m² | Concrete grinding to remove peaks |
Project Cost Examples
- Small bathroom (10m²) – self-levelling: R800 – R1,500
- Kitchen (15m²) – self-levelling: R1,200 – R2,250
- Living area (40m²) – self-levelling: R3,200 – R6,000
- Whole house (100m²) – self-levelling: R8,000 – R15,000
- Decoupling membrane for 40m² timber floor: R6,000 – R12,000
Key Insight: Surface preparation typically adds 15-25% to your total tiling cost, but it’s the most important money you’ll spend. Every rand spent on preparation saves ten on future repairs.
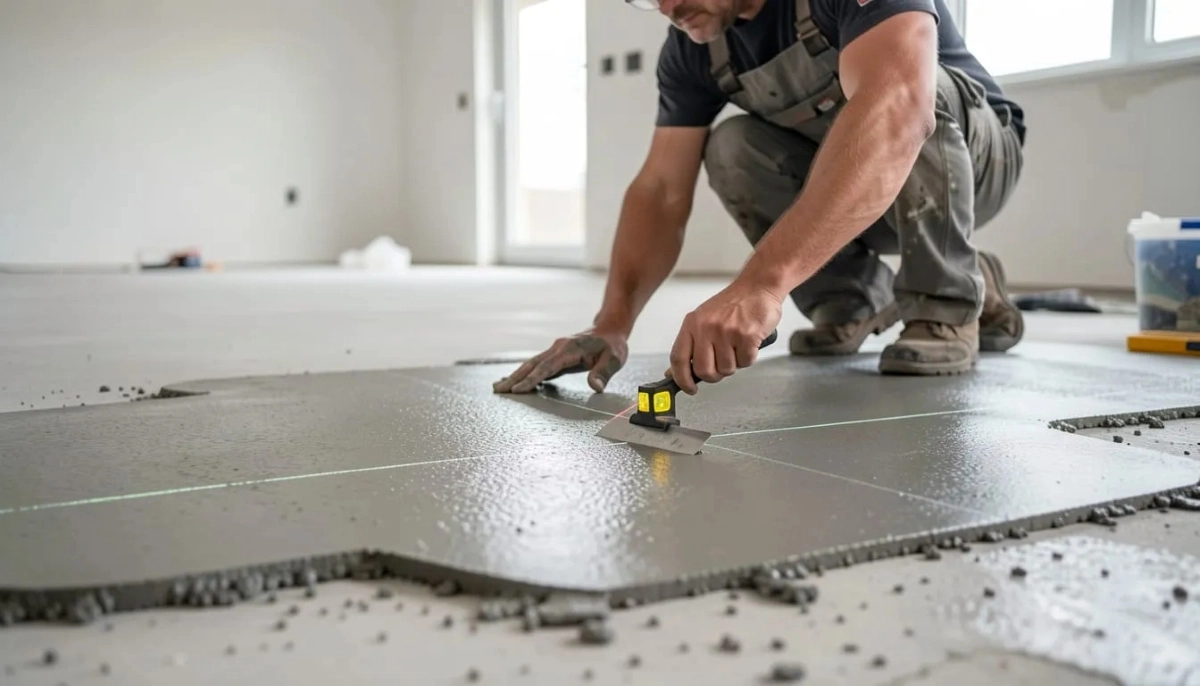
🔍 Substrate Assessment – What to Check
Before any work begins, a thorough assessment of the existing substrate is essential. This is the mark of a professional tiler – someone who identifies potential problems before they become failures.
| Substrate Type | Requirements |
|---|---|
| Concrete slab | Minimum 28 days cure; pass moisture test; clean, sound, free of contaminants; no cracks or movement |
| Existing screed | Sound, well-bonded; minimum compressive strength; no hollow spots when tapped; check for loose areas |
| Existing tiles | Well-adhered (no hollow sounds); clean; deglazed/roughened for adhesion; check for loose tiles |
| Timber/plywood | Minimum 18mm thickness; fully supported (max 400mm joist centres); no movement; decoupling membrane required |
| Underfloor heating | Flexible adhesive required; movement joints essential; heating off during installation and curing |
Flatness Requirements
For successful tiling, the substrate must be flat within specified tolerances:
- General tiling: Maximum 3mm variation over 2 metres
- Large format tiles (>600mm): Maximum 2mm variation over 2 metres
- Rectified porcelain: Maximum 1.5mm variation over 2 metres
Any variation beyond these tolerances requires correction with self-levelling compound or grinding.
🏗️ Concrete Slab Preparation
Concrete is the most common substrate for tiling, but it requires careful preparation.
Step 1: Cure Time
New concrete must cure for a minimum of 28 days before tiling. Tiling onto green concrete leads to moisture issues and adhesive failure.
Step 2: Moisture Testing
Excess moisture in concrete is a common cause of tile failure. Perform a simple moisture test:
- Tape a 1m x 1m plastic sheet securely to the concrete
- Leave for 24 hours
- If condensation or darkening appears under the plastic, the slab has excess moisture – DO NOT TILE
Professional moisture meters give more accurate readings. Acceptable moisture levels are below 75% RH or 5.5% CM.
Step 3: Cleaning
The slab must be absolutely clean – free of oil, grease, curing compounds, paint, and dust. Vacuum thoroughly and use a degreaser if necessary.
Step 4: Repair Cracks
- Widen cracks slightly with angle grinder
- Prime the crack
- Fill with suitable repair mortar
- For active cracks (structural movement), use decoupling membrane
Step 5: Level
Check flatness with a 2-metre straight edge. High spots need grinding; low spots need self-levelling compound.
Step 6: Prime
Apply primer to control suction and improve adhesion. The correct primer depends on the concrete’s porosity.
🪵 Timber Floor Preparation
Tiling directly onto timber is risky – wood moves with humidity changes, and tile adhesive doesn’t bond well to timber. Proper preparation is essential.
Structural Requirements
- Minimum plywood thickness: 18mm (two layers of 12mm is better)
- Joist spacing: Maximum 400mm centres
- No movement: Floor must be solid, with no squeaks or flex
The Critical Step: Decoupling Membrane
Never tile directly onto timber. A decoupling membrane is essential – it allows the timber to move independently of the tiles, preventing cracks. Options include:
- Sheet membranes: Polyethylene mats with a matted surface that bonds to both substrate and adhesive
- Cement backer boards: 6-12mm cement boards screwed to plywood, then tiled over
Installation Process
- Ensure timber substrate is solid, clean, and dry
- Install decoupling membrane according to manufacturer instructions
- Allow any adhesives to cure
- Tile using flexible adhesive suitable for timber substrates
Our floor tiling specialists have extensive experience with timber substrates across Cape Town‘s many timber-floored homes.
🔨 Planning to Tile Over Timber or Concrete?
Different substrates need different preparation. Get free quotes from experienced tilers who can assess your floor and prepare it correctly.
🔄 Tiling Over Existing Tiles
Tiling over existing tiles can save removal costs, but only under the right conditions.
When You CAN Tile Over Existing Tiles
- ✅ Existing tiles are well-adhered – no hollow sounds when tapped
- ✅ Surface is level (or can be levelled with patching)
- ✅ No moisture problems or efflorescence
- ✅ Floor height increase is acceptable for doors and transitions
- ✅ Existing tiles are clean, degreased, and roughened for adhesion
When You MUST Remove Existing Tiles
- ❌ Loose, cracked, or hollow-sounding tiles
- ❌ Failed waterproofing membrane beneath
- ❌ Height restrictions (doors, cabinets won’t clear)
- ❌ Substrate damage requiring access
- ❌ Glazed or polished tiles that won’t provide adequate bond
Preparation for Tiling Over Tiles
- Clean thoroughly: Degrease and remove all dirt and wax
- Roughen surface: Lightly sand or grind to provide key for adhesive
- Prime: Use appropriate bonding primer
- Use rapid-set adhesive: Existing tiles are impervious – standard adhesives dry slowly
- Maintain movement joints: Existing structural joints must be carried through
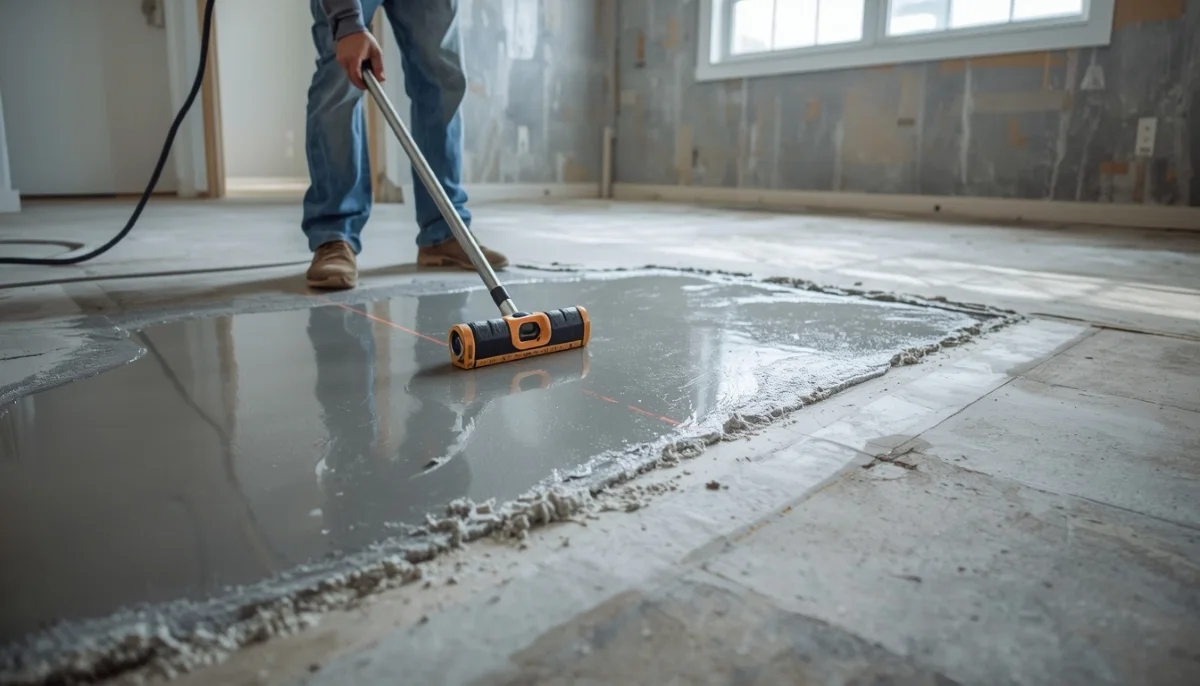
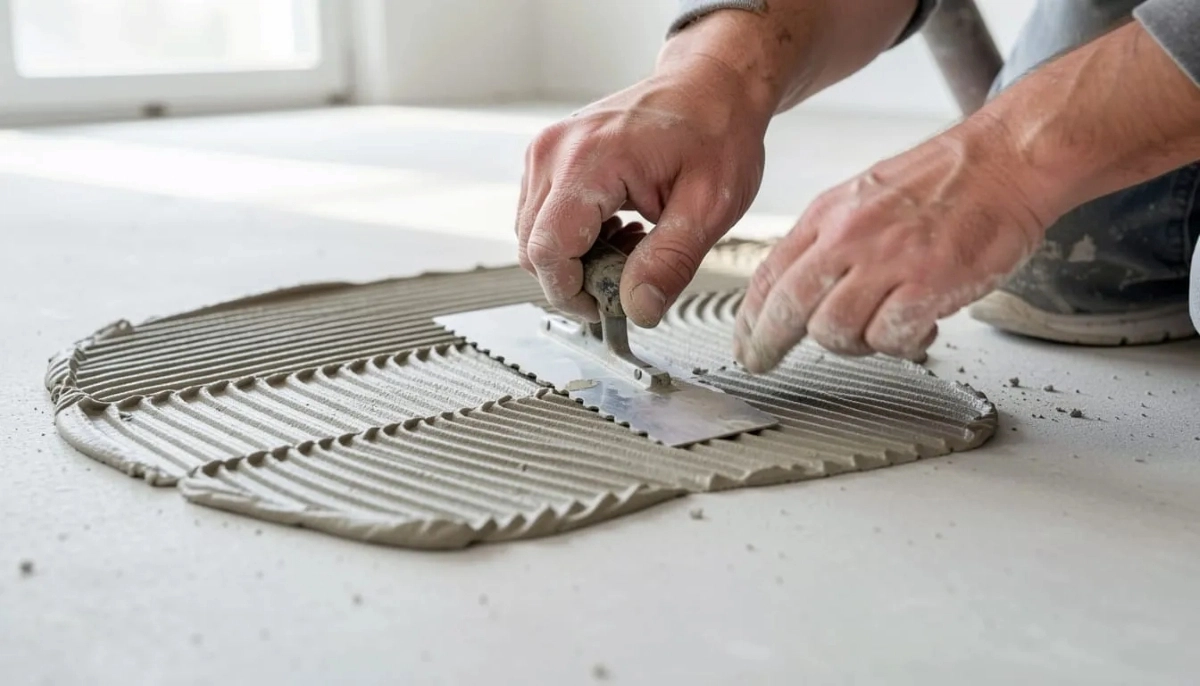
🧪 Self-Levelling Compound – Application Guide
Self-levelling compound is the go-to solution for uneven floors. Here’s how professionals do it:
When to Use Self-Levelling Compound
- Floors with variations >3mm over 2 metres
- After tile removal, to smooth the surface
- Over concrete slabs to create a perfectly flat surface for large format tiles
- To encapsulate underfloor heating pipes
Professional Application Process
- Prepare the substrate: Clean, prime, and seal all joints and cracks
- Mix compound: Follow manufacturer instructions precisely – correct water ratio is critical
- Pour and spread: Pour compound onto floor, spread with gauge rake to desired thickness
- Deaerate: Use a spiked roller to release trapped air bubbles – this is essential for a smooth surface
- Allow to dry: Follow manufacturer drying times – typically 24 hours before foot traffic, 3-7 days before tiling
Drying Time Requirements
Don’t rush this step. Tiling too early traps moisture, leading to adhesive failure and mould. For standard levelling compounds:
- Light foot traffic: 24 hours
- Tiling: 3-7 days depending on thickness
- Underfloor heating: 7-14 days before turning on
🧱 Screeding – When and How
Screeding is the application of a sand-cement layer to create a level surface. It’s typically used in new builds or major renovations.
When Screeding Is Needed
- New concrete slabs that aren’t flat enough for tiling
- Creating falls in wet areas (showers, bathrooms)
- Encapsulating underfloor heating
- Raising floor levels
Screed Specifications
- Minimum thickness: 30mm for bonded screed, 50mm for unbonded
- Mix ratio: Typically 1:4 (cement:sand) with plasticiser
- Cure time: Minimum 7 days before tiling, 28 days for full strength
Professional Screeding Process
- Prime the concrete substrate
- Install edge strips for movement joints
- Place and compact screed
- Float and level to required finish
- Allow to cure – keep damp for first 3 days to prevent cracking
🧴 Priming – Why It’s Essential
Priming is often overlooked by DIY tilers, but professionals know it’s critical.
| Substrate | Primer Type | Purpose |
|---|---|---|
| High suction (concrete, screed) | Acrylic primer | Seals surface, controls suction so adhesive doesn’t dry too quickly |
| Low suction (existing tiles, terrazzo) | Bonding agent / tack coat | Improves adhesion to smooth, impervious surfaces |
| Gypsum/plaster | Specialist primer | Prevents reaction between gypsum and cement in adhesive |
| Underfloor heating | Flexible primer | Ensures bond while accommodating slight movement |
Application Tips
- Apply primer evenly with roller or brush
- Allow to dry completely – usually 2-4 hours
- Don’t over-apply – puddles of primer can cause bonding issues
- Tile while primer is still “tacky” for best adhesion (check manufacturer instructions)
🔄 Decoupling Membranes
Decoupling membranes are one of the most important innovations in modern tiling. They allow the tile installation to move independently of the substrate, preventing cracks from substrate movement.
When Decoupling Membranes Are Essential
- Timber subfloors: Wood moves with humidity – membrane prevents cracks
- Cracked concrete: Membrane bridges cracks, preventing them from telegraphing through tiles
- Underfloor heating: Membrane accommodates thermal expansion and contraction
- Large format tiles: Reduces stress from substrate movement
- Renovations over old tiles: Provides additional security
Types of Decoupling Membranes
- Sheet membranes: Polyethylene or PVC sheets with a matted surface – rolled out and bonded to substrate
- Liquid membranes: Applied like paint, curing to a flexible rubber membrane
- Cement backer boards: Rigid boards that also provide decoupling
Installation Cost
R150 – R300 per m² including materials and labour. This adds cost but is essential for problem substrates.
🔥 Underfloor Heating Considerations
Tiling over underfloor heating requires special attention to prevent cracks and ensure performance.
System Types
- Electric mats: Cables embedded in self-levelling compound or thin screed
- Hydronic systems: Water pipes in screed – requires thicker coverage
Installation Requirements
- Flexible adhesive: Standard adhesive will crack with thermal movement
- Decoupling membrane: Strongly recommended to accommodate expansion
- Movement joints: Essential – at maximum 5m centres, more frequent in large areas
- Heating off during installation: Never turn heating on while adhesive or grout is curing
- Gradual warm-up: After full cure (minimum 14 days), gradually increase temperature over several days
💧 Moisture Testing – CRITICAL
Moisture is the silent killer of tile installations. Excess moisture in concrete causes adhesive failure, mould, and tile debonding. Never tile without testing first.
Simple Plastic Sheet Test
- Tape a 1m x 1m plastic sheet securely to the concrete
- Seal all edges with tape
- Leave for 24-48 hours
- If condensation or darkening appears under the plastic, moisture levels are too high – DO NOT TILE
Professional Testing
- Moisture meter: Gives instant readings – acceptable levels below 5.5% for concrete
- RH testing: Most accurate – relative humidity below 75% is acceptable
- Calcium chloride test: Measures moisture vapour emission rate
What to Do If Moisture Is Too High
- Allow more time for drying (new concrete can take months)
- Use moisture-barrier epoxy primers
- Install a vapour barrier membrane before tiling
- In extreme cases, consider alternative flooring
🏬 Case Study: Greenstone Shopping Centre Refurbishment
One of our most significant projects demonstrates the importance of proper surface preparation at scale. The food court refurbishment at Greenstone Shopping Centre in Edenvale, Johannesburg, required a decorative terrazzo-look flooring system that could handle heavy traffic while creating an eye-catching design.
The Challenge
The architects, Bentel Associates International, designed an intricate floor pattern featuring large butterflies, ladybirds, and dragonflies using coloured glass aggregates. The existing floor needed complete transformation while maintaining the structural integrity required for a busy shopping centre food court.
The Solution
A fast-track, industrial decorative screed system was specified. This seamless, polished floor solution eliminated the need for traditional tile joints while providing durability for high-traffic areas.
Key Learnings
- Surface preparation: The existing floor required thorough cleaning, repair, and priming before the decorative screed could be applied
- Curing time: Unlike traditional tiling, terrazzo floors require up to 28 days to cure before grinding and polishing
- Air release: Spiked rollers were essential to release trapped air and create a smooth, void-free surface
- Professional execution: This complex project required skilled applicators with experience in decorative flooring systems
The project demonstrates that whether you’re installing simple ceramic tiles or intricate decorative floors, proper surface preparation is the foundation of success.
❌ 7 Common Surface Preparation Mistakes
Learn from others’ errors: These mistakes cause tile failure that could have been easily prevented.
Mistake #1: Skipping the Moisture Test
This is the most common and costly mistake. Tiling onto damp concrete guarantees failure – the adhesive won’t bond properly, and moisture will eventually cause tiles to loosen. Always test first.
Mistake #2: Not Checking Flatness
“Flatness is the goal, ideally about 1/8″ over 10′ with no noticeable peaks or dips, which takes real effort.” – Industry expert. Uneven floors cause lippage and make levelling systems ineffective.
Mistake #3: Tiling Directly onto Timber
Timber moves with humidity. Without a decoupling membrane, this movement transfers directly to tiles, causing cracks. Always use a membrane or backer board.
Mistake #4: Ignoring Cracks in Concrete
Cracks in the substrate will eventually become cracks in your tiles. Address them with repair mortar or, for active cracks, a decoupling membrane.
Mistake #5: No Primer on Porous Surfaces
Unprimed concrete or screed sucks moisture from adhesive too quickly, weakening the bond. Primer is essential for consistent adhesion.
Mistake #6: Tiling Too Soon After Screeding
Screed needs time to cure and dry. Tiling too early traps moisture, leading to adhesive failure and mould. Minimum 7 days, preferably 28 days for full cure.
Mistake #7: Poor Assessment of Existing Tiles
Assuming existing tiles are sound without checking for hollow spots leads to new tiles failing over loose ones. Always tap-test the entire area.
🏠 Real-Life Surface Preparation Examples
Example 1: New Build, Midrand
120m² concrete slab, 3 months old.
Preparation: R9,600
Moisture test passed, light grinding of high spots, primer application. Self-levelling not needed – slab was within tolerance.
Example 2: Timber Floor, Constantia
45m² timber floor in 1970s home.
Preparation: R11,250
Decoupling membrane installed over 18mm plywood, flexible primer, movement joints at 4m centres. Essential for timber substrate.
Example 3: Bathroom Renovation, Umhlanga
12m² bathroom, tiles removed.
Preparation: R2,400
Adhesive residue removed, self-levelling compound applied (5mm), waterproofing membrane, primer. Ready for tiling.
Example 4: Commercial, Greenstone
350m² food court refurbishment.
Preparation: R45,000
Extensive preparation for decorative screed – grinding, priming, crack repairs, moisture testing. Critical for high-traffic area.
❓ Frequently Asked Questions – Surface Preparation
How much does it cost to level a floor for tiling in South Africa?
Self-levelling compound costs R80 – R150 per m² including materials and labour. Screeding costs R100 – R200 per m². Total preparation typically adds 15-25% to your tiling budget.
Do I need to level my floor before tiling?
If your floor has variations greater than 3mm over 2 metres, yes. Check with a straight edge. Large format tiles (>600mm) need even flatter surfaces – maximum 2mm variation over 2 metres.
Can I tile directly onto concrete?
Yes, if the concrete is properly prepared. It must be cured (minimum 28 days), clean, and pass a moisture test. Prime before tiling. If there are cracks, use a decoupling membrane.
What is a decoupling membrane and do I need one?
A decoupling membrane allows the tile installation to move independently of the substrate. Essential for timber floors, cracked concrete, and underfloor heating. Cost: R150 – R300 per m².
How long does concrete need to dry before tiling?
Minimum 28 days for new concrete. Even after 28 days, test for moisture – the plastic sheet test is simple and reliable. Don’t rush this step.
Can I tile over existing tiles?
Yes, if existing tiles are well-adhered and level. Roughen the surface, prime, and use rapid-set adhesive. Check for hollow spots first – any loose tiles must be removed.
What primer should I use before tiling?
Acrylic primer for porous surfaces (concrete, screed). Bonding agent for smooth surfaces (existing tiles, terrazzo). Always follow manufacturer instructions for the specific product.
How do I fix an uneven concrete floor before tiling?
High spots need grinding. Low spots need self-levelling compound. For variations up to 10mm, self-leveller is ideal. For deeper variations, consider a full screed.
Can I tile onto plywood?
Yes, with proper preparation. Minimum 18mm plywood, fully supported. Always use a decoupling membrane or cement backer board. Never tile directly onto plywood – movement will crack tiles.
How do I test for moisture in concrete?
The simple plastic sheet test: tape plastic securely to concrete, leave 24 hours. If condensation appears, moisture is too high. Professional meters give more accurate readings.
✅ Final Thoughts – The Foundation of Great Tiling
In our decades of experience across thousands of South African homes and commercial projects, we’ve learned one immutable truth: great tiling starts with great surface preparation. It’s not glamorous work. It’s dusty, time-consuming, and often unseen in the final result. But it’s absolutely essential.
The money you invest in proper surface preparation – whether it’s self-levelling compound, decoupling membranes, or simply taking the time to test and assess – is the best money you’ll spend on your tiling project. It’s the difference between tiles that last decades and tiles that fail within years.
Your 4-Step Surface Preparation Action Plan:
- Assess thoroughly: Check substrate type, flatness, moisture, and soundness. Identify problems before they become failures.
- Repair and level: Fix cracks, grind high spots, fill low spots with self-levelling compound. Create a perfectly flat, sound surface.
- Prime correctly: Use the right primer for your substrate – never skip this step.
- Install necessary membranes: Decoupling membranes for timber/cracked concrete, waterproofing for wet areas.
🔑 The Bottom Line:
R1,000 spent on preparation saves R10,000 on repairs.
Do it right, do it once, enjoy it for decades.
🔨 Ready to Start Your Tiling Project?
Don’t gamble with your tiles. Get free quotes from experienced tilers who understand the critical importance of surface preparation.
📞 Call our tiling advisory line: 073 138 4726
📚 Official Standards:
- SABS – SANS 10064 – Surface preparation standards.
- CIDB – Contractor grading for tiling works.
- NHBRC – Technical requirements for tiling in new homes.
This guide is for informational purposes. Always consult with a qualified, CIDB-registered tiler for your specific project.
Written by: Innocent T Hanyani
21+ years construction and digital industry experience, ServiceLink SA
Innocent has overseen thousands of tiling installations across South Africa, from residential bathrooms to major commercial projects like the Greenstone Shopping Centre refurbishment. He’s seen every failure mode and knows exactly what separates lasting installations from those that fail. This guide reflects decades of practical experience, not theory.