Grouting & Waterproofing for Durable Tiling – Complete South Africa Guide
💧 Waterproof grout, movement joints, bathroom waterproofing – everything you need for tiles that last decades.
You’ve chosen beautiful tiles and had them professionally installed. But without proper grouting and waterproofing, your investment is at risk. Water seeps through unsealed grout, causing mould, staining, and even tile failure. Movement joints are ignored, leading to tenting and cracking. In wet areas like bathrooms and showers, inadequate waterproofing can lead to structural damage costing tens of thousands to repair. Whether you’re tiling a bathroom in Sandton, a kitchen in Cape Town, or a pool in Durban, this comprehensive guide covers everything you need to know about grouting and waterproofing. Drawing on years of industry experience and compliance with SANS 10400 building regulations, we’ll help you ensure your tiling lasts for decades.
💧 Planning Tiling in Wet Areas?
Get free quotes from experienced tilers who understand proper waterproofing and grouting techniques. Protect your home from moisture damage.
Servicing Johannesburg, Pretoria, Cape Town, Durban, and all major areas
📖 Table of Contents – Grouting & Waterproofing
🧪 Why Grouting Matters
Grout is more than just a filler between tiles. It serves several critical functions that professional tilers understand intimately:
- Structural integrity: Holds tiles in position, preventing movement and ensuring the entire tiled surface works as one
- Water protection: Prevents moisture reaching the substrate – the number one cause of tile failure in wet areas
- Stain resistance: Properly applied and sealed grout resists staining from everyday spills and dirt
- Aesthetic finish: Completes the tiled surface, defining or blending with the tile pattern
- Hygiene: Sealed grout prevents mould and bacteria growth, essential for bathrooms and kitchens
Poor grouting leads to cracked joints, water penetration, mould, and eventually loose tiles. In our years of experience across thousands of installations in Johannesburg, Pretoria, and Cape Town, we’ve seen that grout failure is one of the most common – and preventable – problems in tiling.
📊 Grout Types – Cementitious vs Epoxy vs Flexible
Choosing the right grout type is essential for durability. Here’s how the options compare for South African homes.
| Grout Type | Joint Width | Application | Water Resistance | Flexibility | Cost Impact |
|---|---|---|---|---|---|
| Cementitious grout | Up to 8mm | Interior walls, floors, standard areas | Standard – requires sealing | Moderate | Budget |
| Wide-joint grout | 8-25mm | Rustic tiles, stone, quarry tiles | Standard – requires sealing | Moderate | Budget |
| Epoxy grout | All widths | Bathrooms, kitchens, commercial, pools | ✅ Excellent – fully waterproof | Low | Premium |
| Flexible grout | All widths | Underfloor heating, movement-prone areas | Good | ✅ High | Mid |
Cementitious Grout
Traditional powder-based grout mixed with water. This is the most common and affordable option for standard installations. However, it’s porous and requires sealing to prevent staining and moisture absorption. Available in a wide range of colours to match any tile.
Epoxy Grout
Resin-based grout that’s completely waterproof, stain-proof, and doesn’t need sealing. Ideal for kitchens, bathrooms, and commercial kitchens where hygiene is paramount. Epoxy grout is harder to work with – professional installation is strongly recommended – but it’s the ultimate solution for wet areas. Our bathroom tiling specialists frequently recommend epoxy for shower floors and wet zones.
Flexible Grout
Contains polymers that allow movement without cracking. Essential for underfloor heating and areas with temperature fluctuations. In Gauteng’s climate, where temperature swings are common, flexible grout is often the best choice.
Waterproof Additives
For cementitious grout in wet areas, liquid additives can replace water in the mix. This enhances water resistance and flexibility significantly. For bathrooms, showers, and external installations, this is a critical upgrade that adds minimal cost but substantial protection.
🧴 Waterproof Grout Additives
For wet areas like bathrooms, showers, and external installations, standard cementitious grout mixed with water may not provide adequate protection. Waterproof grout additives are the solution.
When to Use Waterproof Additives
- Bathrooms and showers: Enhances water resistance, preventing moisture penetration behind tiles
- Kitchens: Improves stain resistance against food and oil spills
- External installations: Essential for weather resistance in exposed areas
- Suspended slabs: Accommodates movement while maintaining waterproofing
- Pool areas: Critical for long-term durability in constantly wet environments
These additives replace the water in the grout mix, creating a more flexible, water-resistant joint that lasts significantly longer than standard grout. The additional cost is minimal compared to the protection they provide – typically R50-100 per square metre installed.
For professional grout sealing and cleaning and bathroom waterproofing, our experienced tilers always recommend additives in wet areas.
🎨 Grout Colour Selection – Design & Practicality
Grout colour dramatically affects the final look of your tiling. Based on our experience with hundreds of projects across South Africa, here’s how to choose wisely.
Grout Colour Rules
- White grout: Classic but high maintenance – stains visible within months in high-traffic areas. Best for feature walls or areas with minimal traffic.
- Grey/beige grout: Practical choice – hides dirt, matches most tiles, and requires less frequent cleaning. The most popular choice for floors.
- Contrast grout: Defines the tile pattern, creates a modern graphic look. Works well with geometric patterns and metro tiles.
- Matching grout: Creates a seamless, monolithic appearance – tiles appear larger and the surface looks more continuous.
Room-by-Room Recommendations
- Bathroom floors: Grey or beige – hides soap scum and dirt
- Shower walls: Matching or slightly darker – prevents visible staining
- Kitchen floors: Grey or beige – hides food spills
- Kitchen splashbacks: Contrast or matching – design choice
- Feature walls: Contrast – highlights the pattern
Natural Stone Grouting
For natural stone tiles, grout that is slightly darker than the stone creates a natural, earthy look. Lighter grout can make stone appear dirty over time as the grout stains.
For kitchen tiling and bathroom tiling, our design consultants can help you choose grout colours that balance aesthetics with practicality for your specific space.
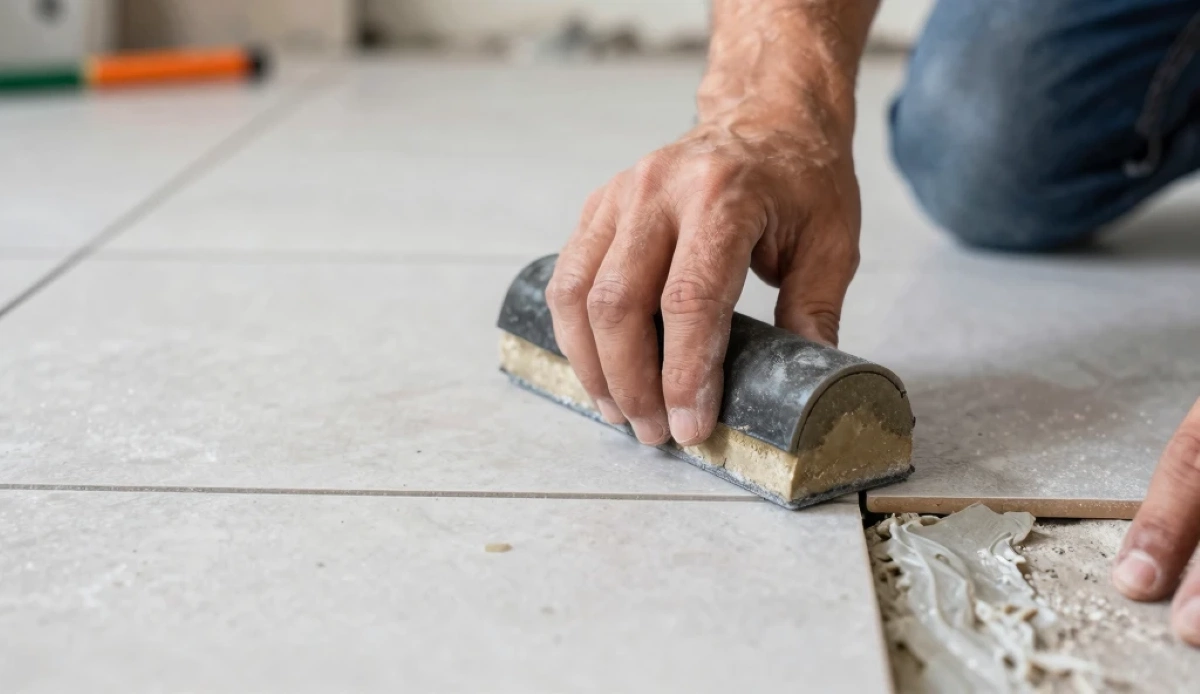
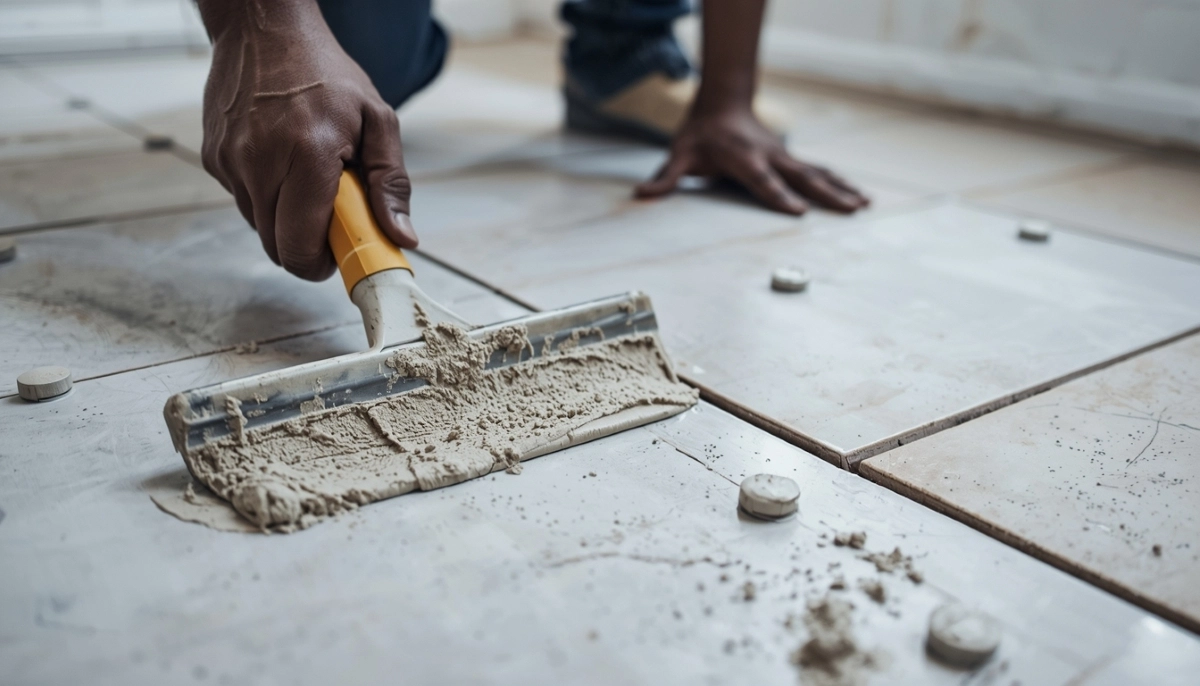
🛠️ Grout Application – Step by Step
Professional grout application follows a precise process that ensures durability and appearance.
When to Grout
Timing is critical. Grouting too early can disturb tiles; too late can make adhesion difficult.
- Standard adhesives: Wait 24-48 hours before grouting
- Rapid-set adhesives: Minimum 6 hours before grouting
- Always check: Adhesive should be firm enough that tiles won’t move when pressure is applied
Professional Grouting Process
- Clean joints: Remove all spacers and ensure joints are completely free of debris. Vacuum thoroughly.
- Mix grout: Follow manufacturer instructions precisely – correct water ratio is critical for strength and colour consistency.
- Apply grout: Use rubber float at 45° angle, forcing grout firmly into joints. Ensure complete fill with no voids.
- Remove excess: Hold float at 90° to scrape off excess grout from tile surfaces.
- Initial clean: Damp sponge with clean water, rinse frequently, use light pressure to shape joints.
- Final clean: After grout firms up (15-30 minutes), polish tile surfaces with dry cloth to remove haze.
⚠️ CRITICAL – Grout Cleaning
Grout left on tile surfaces is the most common cause of permanent staining. Once grout hardens on tile faces, it’s extremely difficult to remove and can ruin the finish permanently.
Why Grout Cleaning Matters
When grout dries on tile surfaces, it bonds to the glaze or, worse, absorbs into porous tiles. This creates a permanent haze that no amount of cleaning can remove. This is especially critical when using waterproof additives, as they make grout even harder to remove once set.
Professional Cleaning Tips
- Clean water, clean sponge: Use clean water and rinse sponge frequently – dirty water redeposits grout
- Don’t oversaturate: Too much water washes grout out of joints, weakening them
- Light pressure: Heavy pressure pulls grout from joints – use light, even strokes
- Textured tiles: Use soft brush to remove grout from textured surfaces
- Grout haze remover: If grout dries on surface, use commercial haze remover immediately
This is why professional installation is so valuable – experienced tilers have the technique to clean perfectly without damaging the installation.
💧 Planning a Bathroom or Shower Renovation?
Proper waterproofing and grouting are essential. Get free quotes from experienced tilers who understand SANS requirements and best practices.
🛡️ Grout Sealing – When and Why
Cementitious grout is porous and needs sealing to prevent staining and moisture absorption. Epoxy grout does not require sealing.
When to Seal
- New grout: Wait 7-14 days for complete cure before sealing
- Existing grout: Test by sprinkling water – if it absorbs quickly, it’s time to reseal
- Frequency: Every 1-2 years in normal areas; annually in wet areas like bathrooms
Sealing Process
- Clean grout thoroughly: Grout must be perfectly clean and dry before sealing
- Apply penetrating sealer: Use small brush or applicator, working sealer into grout lines
- Wipe excess: Immediately wipe excess sealer from tile surfaces – don’t let it dry on tiles
- Allow to dry: Follow manufacturer instructions for drying time
- Second coat: Apply second coat for maximum protection in wet areas
Professional grout sealing services ensure thorough application and can restore grout that’s become stained or porous over time.
🔄 Movement Joints – Preventing Tile Failure
Lack of movement joints is the single most common cause of tile failure in our experience. Tiles tent, crack, and debond when expansion isn’t accommodated.
Tiles, adhesive, and substrates all expand and contract with temperature and humidity changes. Without movement joints, this stress has nowhere to go – causing tiles to lift (tenting), crack, or debond from the substrate.
| Joint Type | Location | Specification |
|---|---|---|
| Perimeter joints | Around room perimeter, at walls, columns, and where tiles meet fixed elements | Minimum 5mm wide; extend through tile and adhesive; fill with flexible sealant |
| Intermediate joints | Interior floors – large areas | Maximum 5m centres in both directions |
| Intermediate joints | Suspended slabs, exterior areas | Maximum 3m centres in both directions |
| Joints over existing tiles | When tiling over existing surfaces | Must maintain existing structural/movement joints |
Why Movement Joints Are Critical
A professional tiler knows that tiles cannot be laid too tightly against walls or fixed elements. Corners require soft joints that absorb movement. Without these, even the most beautiful installation will fail – it’s not a matter of if, but when.
Our floor tiling and commercial tiling specialists always include proper movement joints, sized and placed according to industry standards.
💧 Waterproofing – Not Optional
If you’re tiling a bathroom, shower, or any wet area in South Africa, waterproofing is required by building regulations – it’s not optional.
Waterproofing is not about protecting tiles – it’s about protecting the structure of your home. Water that penetrates through grout or behind tiles can cause catastrophic damage:
- Rotting timber framing: Structural damage that can cost hundreds of thousands to repair
- Corrosion of metal fixings: Hidden damage that compromises structural integrity
- Mould growth within walls: Health hazards and unpleasant odours
- Spalling of concrete: Concrete deterioration from moisture penetration
- Leaks to floors below: Damage to ceilings, walls, and possessions
The additional cost of proper waterproofing – typically R1,500-3,000 for a standard bathroom – is negligible compared to the cost of repairing water damage. We’ve seen bathroom renovations where water damage repairs cost R50,000 or more because waterproofing was skipped.
🚽 Bathroom Waterproofing Requirements (SANS 10400)
South African building regulations (SANS 10400) set specific requirements for waterproofing in wet areas. These are not recommendations – they’re legal requirements that all professional installations must meet.
| Area | Requirement |
|---|---|
| Shower floors and walls | Full waterproofing membrane required – walls to minimum 1.8m height (or full height if tiled to ceiling) |
| Bathroom floors | Waterproofing required across entire floor area |
| Bath surrounds | Waterproofing to extend 150mm beyond bath edge, 300mm up walls |
| Vanity areas | Waterproofing recommended where water exposure occurs |
| Grout in wet areas | Enhanced water resistance required – waterproof additives recommended |
For bathroom tiling and bathroom waterproofing, always use qualified professionals who understand these requirements. A certificate of compliance may be required for insurance purposes.
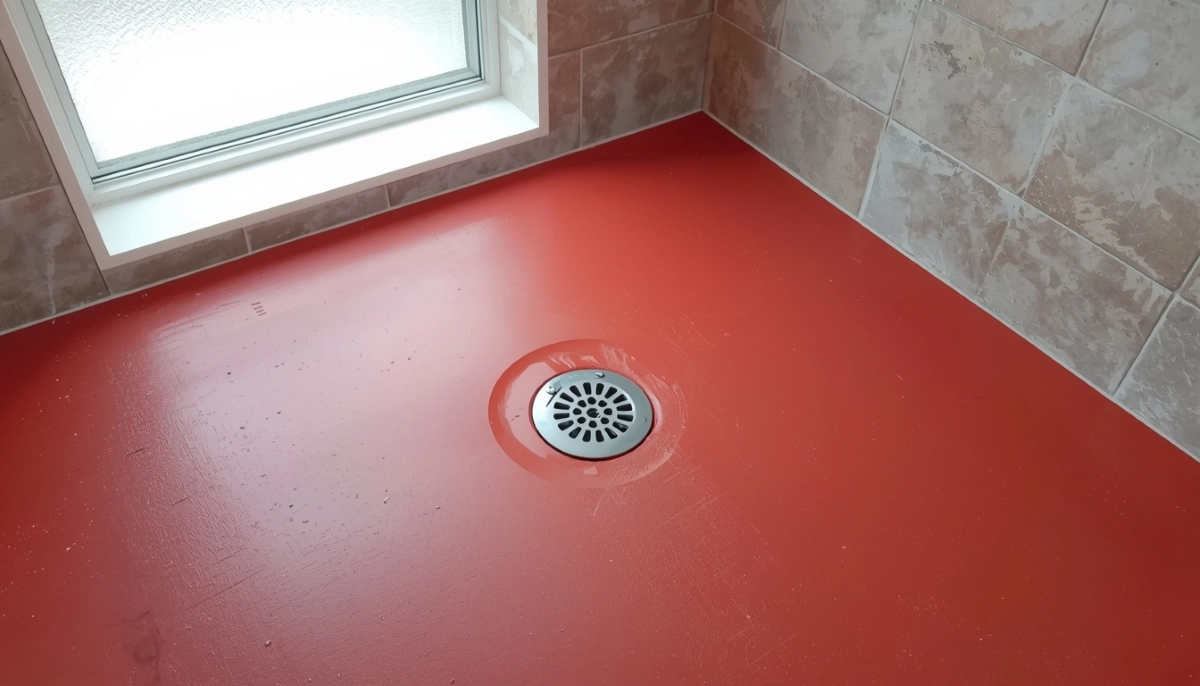
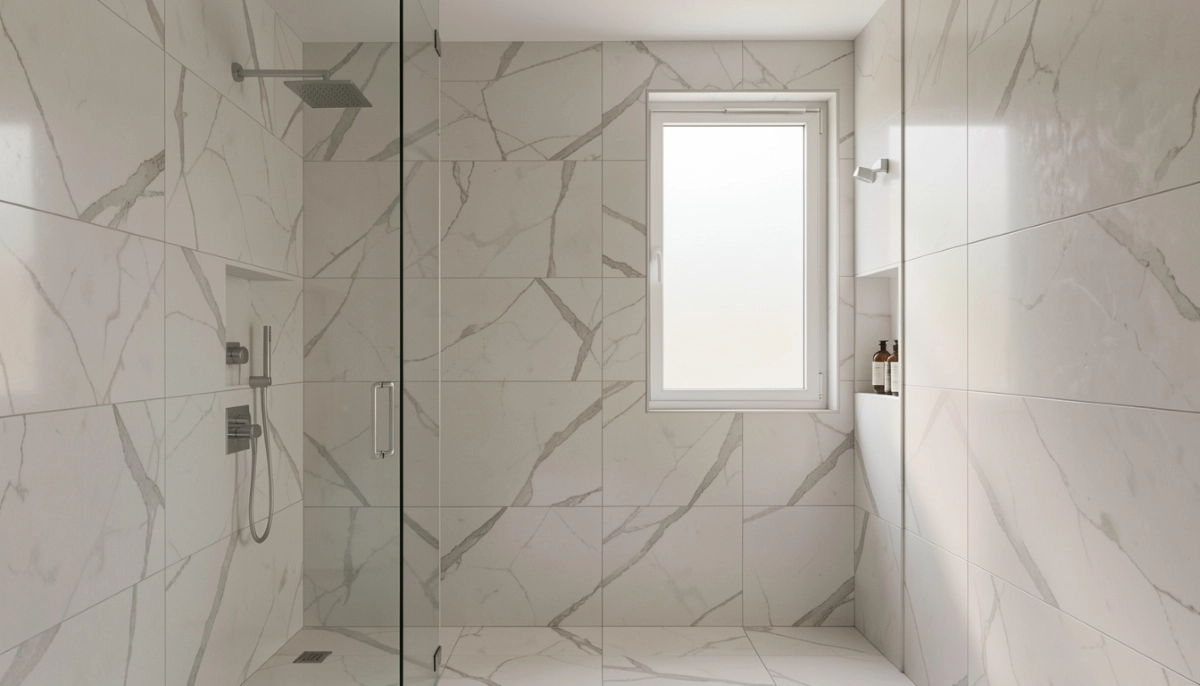
🚿 Shower Waterproofing – Step by Step
Showers are the most demanding wet area. Here’s how professional waterproofing is done:
Step 1: Prepare Substrate
- Ensure surface is clean, dry, and structurally sound
- Repair any cracks or defects that could compromise waterproofing
- Prime surface if required by membrane manufacturer
Step 2: Apply Waterproofing Membrane
- Liquid membrane: Apply with roller or brush – minimum 2 coats, allowing drying between coats
- Sheet membrane: Install with proper overlaps (minimum 50mm) and seals at all joins
- Corners and changes of plane: Reinforce with waterproofing tape or additional membrane
- Penetrations: Seal around pipes and fittings with proprietary collars or seals
Step 3: Flood Test
- Dam drains, fill floor area with 20-30mm water
- Leave for 24 hours, check for leaks in ceiling below
- If leaks found, repair and retest before tiling
Step 4: Tile Over
- Allow membrane to cure fully (follow manufacturer’s instructions)
- Use flexible adhesive suitable for wet areas
- Use waterproof additives in grout for enhanced protection
Our shower waterproofing specialists follow this process rigorously, providing warranties on their work.
🧱 Waterproofing Membranes – Types
Different situations call for different waterproofing systems. Here’s what experienced tilers use:
Liquid-Applied Membranes
- How they work: Brush or roller applied, curing to form a seamless rubber-like membrane
- Advantages: Seamless coverage, ideal for complex shapes, bonds well to most substrates
- Disadvantages: Requires careful application to achieve correct thickness
- Best for: Bathroom floors, walls, shower bases, residential applications
Sheet Membranes
- How they work: Factory-manufactured sheets (often polyethylene) bonded to substrate
- Advantages: Uniform thickness, factory quality, immediate waterproofing
- Disadvantages: Requires careful detailing at corners and penetrations
- Best for: Large floor areas, commercial applications, high-end residential
Cementitious Membranes
- How they work: Two-part cement-based system applied like plaster
- Advantages: Easy to apply, bonds well to concrete and masonry
- Disadvantages: Less flexible, can crack with movement
- Best for: Tanking below ground, pool applications, areas with minimal movement
🏊 Outdoor & Pool Waterproofing
Outdoor tiling and pool areas face even more demanding conditions than bathrooms. Here’s what’s required:
Balcony & Terrace Waterproofing
- Full waterproofing membrane required under all tiles – no exceptions
- Adequate falls for drainage (minimum 1:60) to prevent ponding
- Movement joints at 3m centres maximum to accommodate thermal expansion
- Waterproof upstands at walls and doors – minimum 150mm height
- Flashings at all penetrations and edges
Pool Waterproofing
- Specialist pool waterproofing systems required – not standard bathroom membranes
- Must resist pool chemicals (chlorine, acid washes) and constant water immersion
- Movement joints essential around pool perimeter to accommodate structural movement
- Professional installation essential – pool waterproofing failures are catastrophic
See our balcony and terrace waterproofing and pool tiling guides for detailed information on these specialist applications.
❌ 7 Common Grouting & Waterproofing Mistakes
Learn from others’ errors: These mistakes cause tile failure and water damage that could have been easily prevented.
Mistake #1: No Movement Joints
The most common cause of tile failure we see. Without movement joints, tiles tent and crack within months. Always include perimeter and intermediate joints as specified – this is non-negotiable for any professional installation.
Mistake #2: Grouting Too Early
Grouting before adhesive has set allows tiles to move, creating uneven joints and hollow spots. Wait 24-48 hours for standard adhesives – patience prevents problems.
Mistake #3: Poor Grout Cleaning
Leaving grout residue on tile faces causes permanent staining that no amount of cleaning can fix. Clean thoroughly before grout hardens – this is where professional technique really matters.
Mistake #4: Skipping Waterproofing
Tiles and grout alone are NOT waterproof – water penetrates through both. Without proper waterproofing, moisture reaches the substrate, causing rot, mould, and structural damage. This is false economy of the worst kind.
Mistake #5: Wrong Grout Type
Using standard grout in wet areas or epoxy grout where flexibility is needed leads to premature failure. Match grout type to the specific application – kitchens, bathrooms, and outdoors all have different requirements.
Mistake #6: Not Sealing Grout
Unsealed cementitious grout stains within weeks and absorbs moisture constantly. Seal after curing and reseal annually in wet areas. It’s a small task that makes a huge difference.
Mistake #7: Waterproofing Not Extended Up Walls
In showers, waterproofing must extend to minimum 1.8m. Stopping at floor level allows water to wick up walls behind tiles, causing hidden damage that only appears when it’s too late.
🏠 Real-Life Installation Examples
Here are actual projects our network of tilers has completed across South Africa, showing the importance of proper grouting and waterproofing.
Example 1: Family Bathroom, Umhlanga
18m² bathroom with shower, coastal humidity concerns.
Waterproofing & grouting: R8,500
Full liquid membrane on floors and shower walls to 1.8m, waterproof additives in grout, movement joints at 3m centres. 5-year guarantee on waterproofing.
Example 2: Walk-in Shower, Cape Town
5m² shower area, floor-to-ceiling tiling, wet winter conditions.
Waterproofing system: R6,500
Sheet membrane system, waterproof upstands at all corners, epoxy grout for maximum protection, flood tested for 24 hours.
Example 3: Kitchen Floor, Johannesburg
25m² kitchen floor with underfloor heating.
Grout upgrade: R2,500
Flexible grout specified for thermal movement, stain-resistant formula, colour-matched to tiles. No waterproofing needed as not a wet area.
Example 4: Pool Surround, Ballito
30m² pool deck, coastal exposure, constant moisture.
Waterproofing & grouting: R12,000
Specialist pool waterproofing membrane, flexible grout with waterproof additives, movement joints at 2.5m centres, R11 slip-rated tiles.
❓ Frequently Asked Questions – Grouting & Waterproofing
Do I need to waterproof a bathroom before tiling?
Yes, absolutely. According to SANS 10400, waterproofing is required for all wet areas. Shower floors and walls need full waterproofing membrane, and bathroom floors need waterproofing. This is not optional – it’s the law.
What’s the difference between cementitious and epoxy grout?
Cementitious grout is the traditional option – affordable, available in many colours, but porous and needs sealing. Epoxy grout is completely waterproof, stain-proof, and doesn’t need sealing – ideal for kitchens and bathrooms, but costs more and requires professional installation.
How long should I wait before grouting tiles?
24-48 hours for standard adhesives, minimum 6 hours for rapid-set adhesives. Always check that adhesive is firm and tiles won’t move when pressure is applied. Rushing this step leads to cracked grout and loose tiles.
What are movement joints and why do I need them?
Movement joints are gaps filled with flexible sealant that allow tiles to expand and contract with temperature changes. Without them, tiles will tent, crack, or debond. Required at perimeters and at 5m centres interior, 3m centres exterior.
Can I use waterproof additives in all grout?
Yes, especially in wet areas. Waterproof additives replace the mixing water in cementitious grout, enhancing water resistance and flexibility. We recommend them for all bathrooms, showers, kitchens, and external installations.
How do I stop grout from cracking?
Grout cracks from movement, incorrect mixing, or drying too fast. Use proper joint widths, include movement joints, follow mixing instructions precisely, and keep grout damp in hot weather. Waterproof additives also increase flexibility.
What grout colour is best for kitchen floors?
Grey or beige grout is most practical – hides dirt and food spills effectively. White grout shows every mark and requires constant cleaning. For modern kitchens, contrast grout can define tile patterns beautifully.
How often should I seal grout?
Every 1-2 years in normal areas, annually in wet areas like bathrooms. Test by sprinkling water on grout – if it absorbs quickly rather than beading, it’s time to reseal. Professional sealing ensures thorough coverage.
Can I tile over existing waterproofing?
Only if the waterproofing is intact, sound, and meets current standards. If renovating a bathroom, it’s safer to remove old tiles and reapply fresh waterproofing. Our waterproofing specialists can assess your situation.
How much does professional grouting cost?
Grouting is usually included in tiling labour (R150-300 per m²). For regrouting only, expect R800 – R2,500 per room. Epoxy grout adds R50-100 per m². See our tiling cost guide for detailed pricing.
✅ Final Thoughts – Invest in Protection
Grouting and waterproofing are the unseen heroes of every successful tiling project. They’re invisible when done right, but catastrophic when done wrong. The small additional cost of proper materials – waterproof additives, movement joints, quality membranes – is nothing compared to the cost of repairing water damage or replacing failed tiles.
From our years of experience across thousands of South African homes, we can confidently say: the homes that have problems are the ones where these steps were skipped. The homes that stay beautiful for decades are the ones where professional tilers did the job right the first time.
Your 4-Step Protection Plan:
- Choose the right grout: Cementitious with waterproof additives for wet areas, epoxy for maximum protection, flexible for movement-prone areas
- Include movement joints: Perimeter and intermediate joints at specified centres – non-negotiable
- Waterproof all wet areas: Follow SANS 10400 requirements – bathrooms, showers, kitchens, outdoors
- Use qualified professionals: Grouting and waterproofing are not DIY for critical areas – the savings aren’t worth the risk
🔑 The Bottom Line:
R1,500 worth of waterproofing saves R50,000 in repairs.
Do it right, do it once, enjoy it for decades.
💧 Planning Tiling in Wet Areas?
Don’t risk water damage. Get free quotes from experienced tilers who understand proper waterproofing and grouting techniques.
📞 Call our tiling advisory line: 073 138 4726
📚 Official Standards:
- SABS – SANS 10400 – Waterproofing requirements for wet areas.
- CIDB – Contractor grading for tiling works.
- NHBRC – Technical requirements for tiling in new homes.
This guide is for informational purposes. Always consult with a qualified, CIDB-registered tiler for your specific project.
Written by: Innocent T Hanyani
21+ years construction and digital industry experience, ServiceLink SA
Innocent has overseen thousands of tiling installations across South Africa, from residential bathrooms to large commercial projects. He’s seen every failure mode and knows exactly what separates lasting installations from those that fail. This guide reflects decades of practical experience, not theory.