Painting Preparation Checklist South Africa – The Complete Guide to Perfect Results
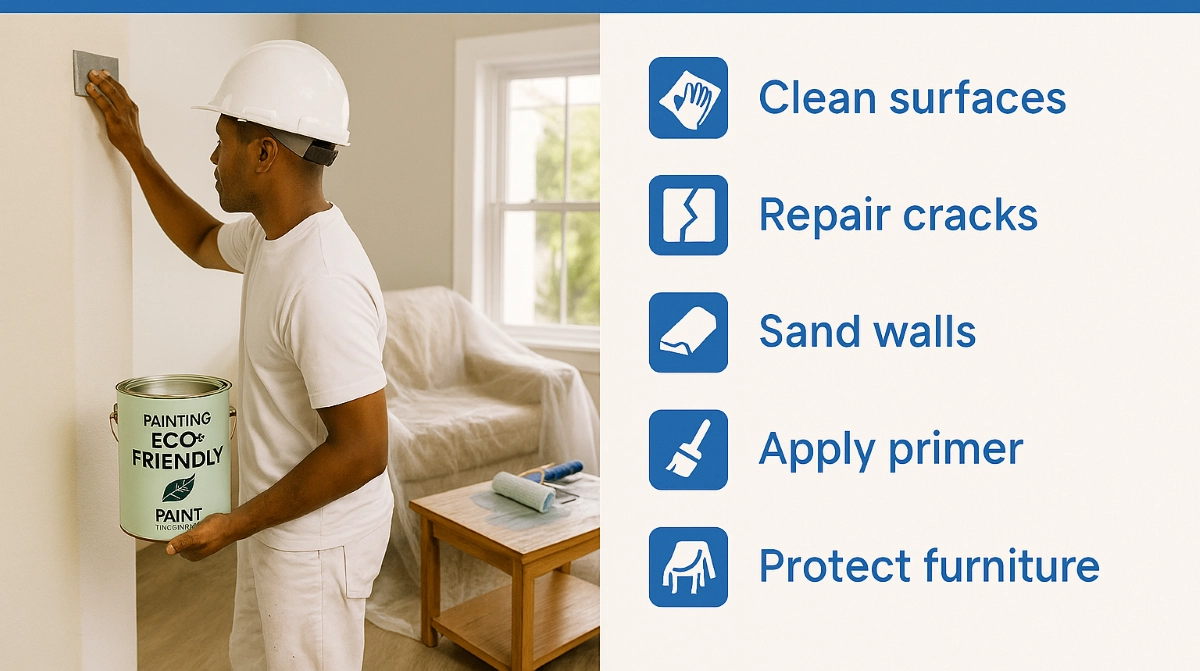
🎨 70% of a perfect paint job is preparation. Here’s exactly what to do before you paint.
Here’s a truth that saves thousands of frustrated homeowners every year: the quality of your paint job is determined before the first brush touches the wall. Whether you’re hiring professional painters in Johannesburg, tackling a DIY project in Cape Town, or preparing a rental property in Durban, proper preparation makes the difference between a 10-year finish and paint that peels within months.
This comprehensive painting preparation checklist covers everything from inspection and repairs to cleaning, priming, and protecting your space. We’ll cover specific considerations for South African conditions – from coastal humidity in Umhlanga to Highveld UV in Pretoria.
⏱️ TIME INVESTMENT: Proper preparation typically takes 2-3 times longer than the actual painting. For a 3-bedroom house, expect 2-4 days of prep work. Skipping it guarantees premature failure.
Don’t want to DIY the prep work?
Professional painting contractors handle all preparation – from pressure washing to crack repairs. Get free quotes from vetted experts in your area.
Servicing Johannesburg, Pretoria, Cape Town, Durban, and nationwide
📋 Table of Contents – Painting Preparation Checklist
🔧 Why Painting Preparation Matters
Professional painters agree: 70% of a successful paint job is preparation. Here’s why :
Adhesion
Paint sticks best to clean, dry, slightly rough surfaces. Preparation creates the ideal surface for paint to bond.
Longevity
A properly prepared surface means paint lasts 5-10 years instead of peeling within months.
Finish Quality
Preparation eliminates bumps, cracks, and imperfections that show through fresh paint.
Protection
Primer and proper preparation protect the substrate from moisture, mould, and UV damage.
⚠️ THE COST OF SKIPPING PREP: Painting over dirty, damp, or peeling surfaces guarantees failure. You’ll be repainting within 12-18 months – costing 2-3 times more than doing it right the first time. Professional painters always include proper preparation in their quotes.
🔍 Inspection Phase – Find Problems Before They Find You
Before any work begins, thoroughly inspect every surface to be painted. Use good lighting and run your hands over surfaces to feel for issues .
| What to Check | What to Look For | Action Required |
|---|---|---|
| Walls & Ceilings | Cracks, holes, dents, peeling paint, damp patches, mould | Mark with pencil for later repair |
| Woodwork | Splinters, rot, old paint, nail pops | Check for structural integrity |
| Metal Surfaces | Rust, oxidation, loose paint | Assess extent of rust damage |
| Windows & Doors | Old putty, sealant failure, rotting frames | Check operation before painting |
| Skirting & Architraves | Gaps, damage, loose fixings | Check for movement |
The Moisture Test
For walls that show signs of damp, especially in coastal areas like Cape Town or humid Durban, perform the plastic wrap test :
- Tape a 30cm square of plastic wrap tightly to the wall
- Leave for 24 hours
- If moisture has formed under the plastic, you have rising damp
- Treat the damp source BEFORE painting – paint over damp will fail
🔨 Repair Phase – Fixing Damages
Once you’ve identified all problem areas, it’s time to fix them. Use appropriate materials for each surface type .
| Problem | Repair Method | Materials | Drying Time |
|---|---|---|---|
| Hairline cracks | Open slightly with scraper, fill with filler | Fine surface filler | 1-2 hours |
| Deep cracks (>2mm) | Open crack, fill with flexible filler | Sika crack filler, expanding foam for large gaps | 4-24 hours |
| Holes in plaster | Fill with patching plaster, build up in layers if deep | Patching plaster, trowel | 24 hours |
| Peeling paint | Scrape back to sound surface, sand edges | Paint scraper, sandpaper | N/A |
| Rotten wood | Cut out rot, replace with new wood, prime before painting | Wood filler for minor rot, new timber for major | Varies |
| Rusted metal | Wire brush or sandblast to bare metal | Wire brush, rust converter, metal primer | 24 hours after primer |
Crack Repair Best Practices
- Open the crack: Use a scraper or crack opener to widen slightly – filler bonds better to an open crack than a hairline.
- Remove loose material: Vacuum or brush out dust before filling.
- Apply filler slightly proud: Fill slightly above the surface, then sand flush.
- For moving cracks: Use flexible fillers designed for cracks that may expand/contract – especially important in Highveld areas with temperature swings .
🧼 Cleaning Phase – Remove Dirt, Grease & Contaminants
Paint won’t stick to dirty surfaces. Thorough cleaning is essential .
Interior Cleaning
- Sugar soap solution: Mix according to instructions (typically 1 cup sugar soap to 4-5L warm water).
- Wash walls from bottom to top: Prevents drips from staining already-cleaned areas.
- Pay attention to kitchens: Grease builds up around cooking areas – may need stronger degreaser.
- Rinse thoroughly: Any residue affects paint adhesion. Rinse with clean water and a sponge.
- Allow to dry completely: At least 24 hours in good conditions. Longer in humid Durban or Ballito.
Exterior Cleaning
- High-pressure cleaning: Essential for removing dirt, algae, and loose paint. Use 1,500-2,000 PSI, keep nozzle moving to avoid damaging surfaces.
- Moss and algae treatment: In damp areas, treat with diluted bleach or specialised cleaner before pressure washing.
- Salt removal (coastal): In Cape Town and Umhlanga, salt residue must be thoroughly removed – pressure washing with fresh water, possibly multiple times.
- Allow to dry: Exterior surfaces need 2-3 days of dry weather before painting. Check weather forecast before starting.
Pro tip: After cleaning, run your hand over the surface. If it feels rough or you see dust, clean again. The surface should feel like clean porcelain .
🔨 Sanding Phase – Creating the Perfect Surface
Sanding creates the “tooth” that paint needs to adhere. It also smooths repairs and removes gloss from previously painted surfaces .
| Surface Type | Grit Recommendation | Method | Notes |
|---|---|---|---|
| New plaster | 120-150 grit | Light sanding to remove nibs | Don’t oversand – plaster should be smooth but not polished |
| Previously painted walls (matt) | 120-150 grit | Light scuff sanding | Remove gloss, create tooth |
| Previously painted walls (gloss) | 100-120 grit | Thorough sanding to degloss | Paint won’t stick to gloss without sanding |
| Repaired areas | 120-150 grit | Sand flush with surrounding | Wrap sandpaper around block for flat surfaces |
| Woodwork | 120-180 grit | Sand with grain | Never sand across grain |
| Metal | 80-120 grit | Sand to remove rust/old paint | Wire brush or sandpaper |
Sanding Tips
- Use a sanding block: Wrapping paper around your hand creates uneven surfaces. Use a block for flat walls.
- Vacuum between sandings: Dust settles and hides imperfections. Vacuum, then inspect.
- Wear a mask: Sanding dust is harmful – especially old paint that may contain lead.
- Final wipe-down: After sanding, use a tack cloth or damp rag to remove all dust.
🛡️ Protection Phase – Masking & Covering
Before you start painting, protect everything you don’t want painted. This step saves hours of cleanup .
Drop Sheets
- Canvas drop sheets: Best for floors – they stay put, absorb drips, and last forever. More expensive but worth it.
- Plastic sheeting: Cheap but slippery – tape down edges. Good for furniture covering but not for floors (can be slippery).
- Paper masking film: Good for quick coverage, but tears easily.
- Cover everything: Move furniture to centre of room and cover completely. Cover floors entirely – even tiny drips matter.
Masking Tape
- Use painter’s tape: Not standard masking tape – painter’s tape removes cleanly without residue.
- Apply correctly: Press down edges firmly to prevent paint bleeding underneath.
- Remove at the right time: For best results, remove tape while paint is still slightly wet (check manufacturer’s instructions).
- Areas to mask: Skirting boards, window frames, door frames, light switches, power outlets (turn power off first).
Remove or Cover
- Light fittings: Remove or cover completely – paint on light fittings is dangerous and unsightly.
- Curtain rails: Remove if possible, or wrap carefully.
- Door handles: Remove or mask thoroughly.
- Power outlets: Turn off power, remove faceplates, or mask carefully.
🎨 Priming Phase – The Essential Foundation
Primer is not optional. It seals the surface, provides adhesion, blocks stains, and ensures colour accuracy .
⚠️ NEVER SKIP PRIMER: Skipping primer is false economy. You’ll need more coats of expensive topcoat, and the finish won’t last as long. Primer is cheaper than topcoat – use it .
Primer Selection by Surface
| Surface | Primer Type | Brand Examples | Notes |
|---|---|---|---|
| New plaster (interior) | Water-based plaster primer | Dulux 1-Step, Plascon Plaster Primer | Seals porous plaster, ensures even finish |
| New plaster (exterior) | Exterior masonry primer | Dulux Weatherguard Primer, Plascon Masonry Primer | Weather-resistant, flexible |
| Previously painted (good condition) | All-purpose primer or no primer needed if same colour | Dulux 1-Step, Plascon Universal Primer | Use primer if changing colour dramatically |
| Stained walls | Stain-blocking primer | Dulux Stain Blocker, Plascon Stain Blocker | Essential for nicotine, water stains, marker |
| Mould-affected | Mould-resistant primer | Plascon Mould-Ex Primer | Treat mould first, then use special primer |
| New wood (interior) | Wood primer | Dulux Wood Primer, Plascon Wood Primer | Seals wood, prevents tannin bleed |
| New wood (exterior) | Exterior wood primer | Dulux Weatherguard Wood Primer | Flexible, weather-resistant |
| Bare metal | Metal primer | Dulux Metal Primer, Plascon Metal Primer | Rust-inhibitive, essential for exterior metal |
| Galvanised steel | Galvanised iron primer | Plascon Galvite, Dulux Galv Primer | Special primer for “new” galvanised surfaces |
🏡 Interior Painting Preparation Checklist
Use this checklist before starting any interior painting project :
✅ Inspection & Repair
- ☐ Inspect all walls for cracks, holes, damage
- ☐ Check for damp or mould (especially bathrooms, kitchens)
- ☐ Fill all cracks and holes
- ☐ Sand repaired areas smooth
- ☐ Scrape any peeling paint
✅ Cleaning
- ☐ Wash walls with sugar soap
- ☐ Rinse thoroughly with clean water
- ☐ Allow to dry completely (24+ hours)
- ☐ Vacuum floors and window sills
✅ Sanding
- ☐ Sand repaired areas smooth
- ☐ Lightly sand entire surface (if glossy)
- ☐ Vacuum all dust
- ☐ Wipe down with tack cloth
✅ Protection
- ☐ Move furniture to centre, cover with drop sheets
- ☐ Cover floors completely
- ☐ Mask skirting, window frames, door frames
- ☐ Remove light fittings or cover
- ☐ Remove outlet covers (turn power off)
✅ Priming
- ☐ Select correct primer for surface
- ☐ Apply primer to all bare or repaired areas
- ☐ Allow primer to dry completely
- ☐ Lightly sand primed areas if rough
✅ Final Checks
- ☐ Check weather forecast (for drying)
- ☐ Ensure adequate ventilation
- ☐ Stir paint thoroughly
- ☐ Test colour on small area
🏠 Exterior Painting Preparation Checklist
✅ Inspection
- ☐ Check for loose or peeling paint
- ☐ Inspect for cracks in plaster
- ☐ Check wood for rot
- ☐ Check metal for rust
- ☐ Look for mould or algae (especially coastal)
✅ Cleaning
- ☐ High-pressure wash entire exterior
- ☐ Treat mould/algae with appropriate cleaner
- ☐ Remove salt residue (coastal areas)
- ☐ Allow to dry 2-3 days minimum
✅ Repairs
- ☐ Scrape loose paint
- ☐ Fill cracks with flexible exterior filler
- ☐ Replace rotted wood
- ☐ Treat rust, apply metal primer
- ☐ Re-caulk windows and joints
✅ Priming
- ☐ Apply exterior primer to bare areas
- ☐ Use stain-blocking primer for water stains
- ☐ Allow primer to dry fully
✅ Protection
- ☐ Cover plants with plastic sheeting
- ☐ Mask windows, doors, light fittings
- ☐ Protect paving from drips
✅ Weather Check
- ☐ Check 5-day forecast – no rain
- ☐ Temperatures above 10°C
- ☐ Humidity below 80%
- ☐ No strong wind predicted
🌊 Coastal Preparation – Cape Town & Durban Special Considerations
If you’re painting in coastal areas like Cape Town, Durban, Umhlanga, or Ballito, preparation must address specific challenges :
Salt Residue
Salt crystals on walls prevent paint adhesion. High-pressure washing with fresh water is essential – sometimes twice. In severe cases, use a salt-neutralising wash before rinsing .
Mould & Algae
Coastal humidity promotes biological growth. Treat affected areas with diluted bleach (1:3) or specialised mould killer. Scrub, rinse, and allow to dry completely. Use mould-resistant primer .
Wind-borne Moisture
Even on “dry” days, coastal mist can deposit moisture. Check surfaces carefully before painting – they must be completely dry. Early morning painting may be affected by dew.
Efflorescence
White crystalline deposits on brickwork indicate moisture movement. Remove with wire brush, identify and fix moisture source, then seal with appropriate primer .
Coastal Preparation Checklist Additions
- ☐ Test for salt residue – if you taste salt on the wall, wash again
- ☐ Treat all mould-affected areas before any other preparation
- ☐ Allow extra drying time (humidity slows drying)
- ☐ Use marine-grade or coastal-formulated paints
- ☐ Consider scheduling painting in summer (less rain, lower humidity)
⛰️ Highveld Preparation – Johannesburg & Pretoria Special Considerations
For properties in Johannesburg, Pretoria, Midrand, and Centurion, the Highveld climate demands specific preparation :
UV Exposure
Highveld UV is intense. Previously painted surfaces may be chalky – a powdery residue that prevents adhesion. Sand or wash to remove chalking before repainting .
Temperature Swings
Daily temperature variations of 15-20°C cause expansion and contraction. Use flexible fillers for cracks and ensure paint specified for thermal movement.
Dust
Highveld is dusty. After cleaning, surfaces can accumulate dust quickly. Paint soon after cleaning, or clean again immediately before painting.
Thunderstorms
Summer afternoons often bring thunderstorms. Paint in mornings only, and monitor forecast closely. Allow 4-6 hours drying before potential rain.
🦠 Mould Treatment – Essential for Humid Areas
Mould is common in bathrooms, kitchens, and coastal homes. Painting over mould guarantees it will return .
Step-by-Step Mould Treatment
- Identify the cause: Is it poor ventilation, rising damp, or condensation? Fix the source first.
- Protect yourself: Wear gloves, mask, and eye protection. Mould spores are harmful.
- Clean the mould: Use a solution of 1 part bleach to 3 parts water, or a commercial mould killer. Apply, scrub, and rinse.
- Dry thoroughly: Use fans and dehumidifiers. This may take several days.
- Apply mould-resistant primer: Products like Plascon Mould-Ex Primer contain fungicides that prevent regrowth.
- Paint with mould-resistant paint: Bathroom and kitchen paints have mould inhibitors.
⚠️ NEVER paint over mould: It will grow through the new paint within months, and you’ll have wasted your time and money. Treat mould properly before painting .
🔧 Crack Repair Guide – By Crack Type
| Crack Type | Cause | Repair Method | Materials |
|---|---|---|---|
| Hairline cracks | Plaster shrinkage, minor settling | Open slightly, fill with fine filler, sand smooth | Fine surface filler |
| Wide cracks (>2mm) | Structural movement, settling | Open crack, fill with flexible filler in layers | Flexible crack filler, mesh tape for stability |
| Cracks at corners | Movement, poor jointing | Reinforce with mesh tape, fill, sand | Corner tape, joint compound |
| Cracks around windows/doors | Thermal movement, settling | Remove old sealant, re-caulk with flexible sealant | Flexible exterior caulk, backer rod for large gaps |
| Cracks in plaster over brick | Brick movement, poor bonding | If stable, fill and reinforce; if active, consult builder | Mesh tape, flexible filler |
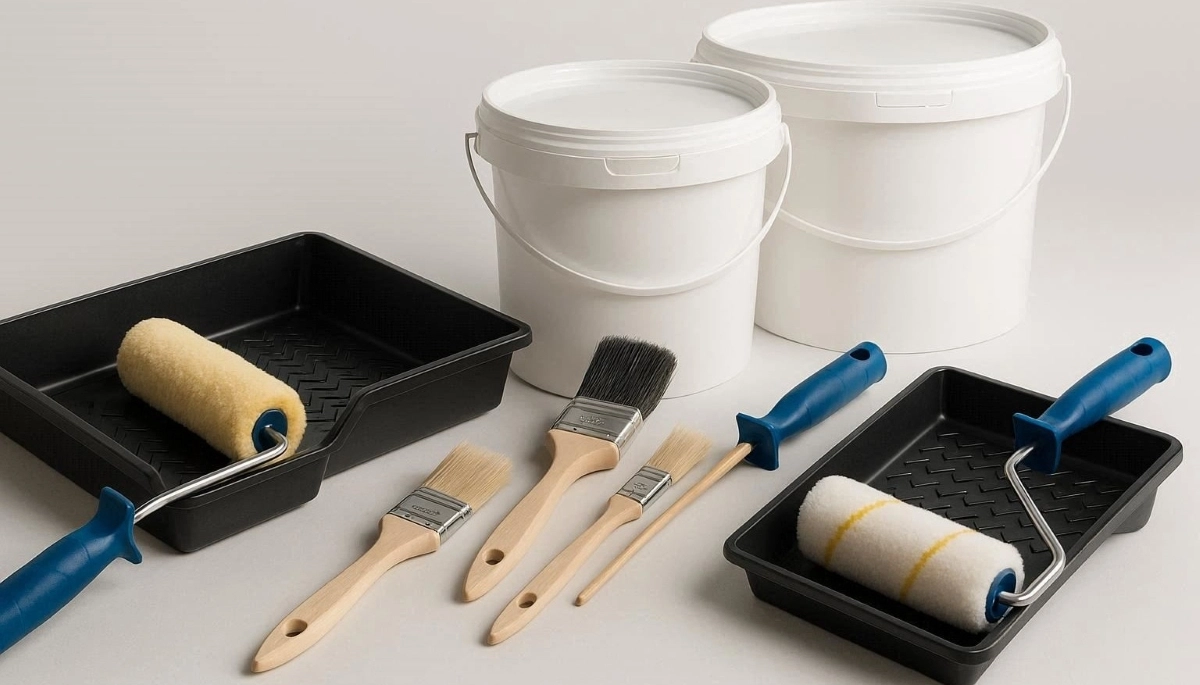
🛠️ Tools & Materials Preparation Checklist
Before starting, gather all necessary tools and materials :
🔨 Repair Tools
- Putty knives (various sizes)
- Filler and joint compound
- Sandpaper (various grits)
- Sanding block
- Scrapers
- Wire brush (for metal)
- Caulking gun
🧹 Cleaning Tools
- Sugar soap
- Sponges and cloths
- Buckets
- Pressure washer (exterior)
- Mould cleaner
- Tack cloths
- Vacuum with brush attachment
🛡️ Protection Supplies
- Drop sheets (canvas or plastic)
- Painter’s tape
- Plastic sheeting
- Masking paper
- Disposable gloves
- Dust masks
☀️ Weather Conditions – When to Paint
Weather dramatically affects paint application and drying. Follow these guidelines :
| Condition | Ideal Range | Why It Matters |
|---|---|---|
| Temperature | 10-25°C | Too cold = poor adhesion; too hot = paint dries too fast, leaving brush marks |
| Humidity | Below 80% | High humidity slows drying, causes blistering, encourages mould |
| Rain | None for 24-48 hours | Rain on fresh paint ruins finish, causes blistering |
| Wind | Light breeze only | Strong wind blows dust onto wet paint, causes uneven drying |
| Dew | Avoid early morning | Dew on surfaces prevents adhesion – wait until surfaces are dry |
Overwhelmed by Preparation?
Professional painting contractors handle all the prep work – from pressure washing to crack repairs and priming. Get free quotes from vetted experts in your area.
Servicing Johannesburg, Pretoria, Cape Town, Durban, and nationwide
❌ 10 Common Painting Preparation Mistakes
- Skipping the inspection: Painting over problems guarantees they’ll reappear. Always inspect thoroughly before starting .
- Not cleaning properly: Dust, grease, and dirt prevent adhesion. Sugar soap and rinsing are essential – even on “clean” walls .
- Painting over mould: Mould grows through new paint within months. Treat mould at the source before painting .
- Using cheap filler: Cheap fillers shrink, crack, or fall out. Use quality fillers from reputable brands .
- Not allowing drying time: Fillers, cleaners, and primers need time to dry. Rushing leads to failure .
- Sanding poorly: Uneven sanding shows through paint. Use blocks for flat surfaces and progress through grits .
- Using wrong primer: Different surfaces need different primers. Using interior primer outside guarantees failure .
- Skipping primer altogether: False economy. Primer is cheaper than topcoat and essential for adhesion .
- Poor masking: Paint bleeds under poorly applied tape. Take time to press edges down firmly .
- Painting in wrong conditions: Too hot, too cold, too humid, or rainy – all ruin paint jobs .
❓ Frequently Asked Questions
How long should I spend on preparation vs painting?
Professional painters spend approximately 70% of total project time on preparation and 30% on painting. For a 3-bedroom house, expect 2-4 days of prep work and 1-2 days of painting .
Can I paint without primer if I use self-priming paint?
“Self-priming” paints are marketing terms – they’re not true substitutes for separate primer on difficult surfaces. For new plaster, stained walls, or significant colour changes, always use dedicated primer .
How do I know if walls are clean enough after washing?
Run your hand over the surface after it’s completely dry. If you feel any grit or see dust on your hand, clean again. The surface should feel smooth like clean porcelain .
Do I need to sand previously painted walls?
If the existing paint is in good condition and not glossy, light sanding creates “tooth” for better adhesion. If the paint is glossy, sanding is essential – paint won’t stick to gloss without it .
How long should I wait after pressure washing before painting?
Exterior surfaces need 2-3 days of dry weather to dry completely. In humid coastal areas like Durban, possibly longer. Check by taping plastic to the wall – if moisture forms, it’s not dry .
What’s the best way to fill large holes in plaster?
For holes larger than 10mm, use patching plaster applied in layers. Allow each layer to dry before adding the next. For very large holes, consider cutting out the damaged area and replastering .
Do I need to remove all old paint before repainting?
Only remove paint that is loose, peeling, or failing. Sound paint can stay. However, if you have multiple layers of old paint, consider whether the buildup is affecting appearance .
How do I prepare walls with wallpaper?
Remove all wallpaper completely. Never paint over wallpaper – it will eventually peel. After removal, wash off adhesive residue, repair any damage, sand, and prime before painting .
What’s the best primer for water-stained ceilings?
Use a stain-blocking primer specifically designed to cover water stains. Ordinary primer won’t block the stain – it will bleed through the new paint. Fix the leak source first .
Should I hire professionals for preparation?
If you’re unsure about any aspect of preparation, hiring professional painting contractors is worthwhile. They have the experience, tools, and knowledge to prepare properly, ensuring a finish that lasts .
✅ Final Thoughts – The Preparation Mindset
Remember: painting is 30% of the job; preparation is 70%. Every minute spent on proper preparation saves hours of fixing problems later. Key takeaways:
- Inspect thoroughly – find problems before you start
- Repair properly – use appropriate materials for each surface
- Clean meticulously – paint won’t stick to dirt
- Sand correctly – create the perfect surface for adhesion
- Protect everything – masking and covering save cleanup time
- Prime always – primer is not optional
- Check weather – especially for exterior work
🎨 The Bottom Line:
Proper preparation takes time
But it’s the difference between a 2-year paint job and a 10-year finish
Let Professionals Handle the Prep Work
Get free quotes from registered, vetted painting contractors in your area – they’ll ensure every surface is properly prepared for a flawless, long-lasting finish.
📞 Call us: 073 138 4726 for expert advice
📚 Official resources & standards:
- Marley Roofing – Surface preparation technical guide
- Sika South Africa – Crack repair and waterproofing primers
- SABS (SANS 10064) – Surface preparation standards
- Plascon – Primer selection guide
This guide is for informational purposes only. Always follow manufacturer instructions for specific products.
Written by: Innocent T Hanyani
21+ years construction and digital industry experience, ServiceLink SA
Innocent has overseen thousands of painting projects across South Africa, from coastal Cape Town to Highveld Johannesburg. His expertise in surface preparation ensures this guide reflects best practices for long-lasting results.