Tile Removal & Replacement Cost & Process
🔨 R50 to R180 per m² – What you’ll pay to remove old tiles, plus replacement costs, methods, and when to tile over existing.
Those 1980s bathroom tiles have to go. The cracked tile in your entrance is an eyesore. Or maybe you’re planning a complete renovation and need to start from scratch. Whatever your situation, tile removal and replacement is a significant part of any tiling project. Whether you’re renovating a bathroom in Sandton, updating a kitchen in Cape Town, or replacing damaged tiles in Durban, this comprehensive guide covers everything you need to know. We’ll explore costs, removal methods, when you can tile over existing tiles, and how to match replacement tiles. Drawing on expertise from TAL and SABS standards, we’ll help you make informed decisions about your tiling renovation.
🔨 Planning a Tile Replacement Project?
Get free, no-obligation quotes from experienced tilers who can assess your existing tiles and provide accurate removal and replacement costs.
Servicing Johannesburg, Pretoria, Cape Town, Durban, and all major areas
📖 Table of Contents – Tile Removal & Replacement
💰 Tile Removal & Replacement Cost Summary
Here’s what you can expect to pay for tile removal and replacement in South Africa. Based on industry cost data and professional rates.
| Service | Labour Cost | Notes |
|---|---|---|
| Tile removal (floor) | R50 – R150 per m² | Dependent on adhesive type, substrate, tile size |
| Tile removal (wall) | R60 – R180 per m² | Higher risk of wall damage; more labour-intensive |
| Single tile replacement | R300 – R800 flat rate | Matching tile required; depends on access |
| Minor tile repairs (multiple) | R300 – R1,500 | Small areas, multiple damaged tiles |
| Adhesive residue removal | R30 – R80 per m² | After tiles removed; additional cost |
| Waste disposal / skip hire | R500 – R4,500 | Volume dependent; skip for large projects |
| Site clean-up | R300 – R1,000 | Post-removal cleaning |
Project Cost Examples
- Small bathroom (10m² floor + 20m² walls): R2,000 – R4,500 for removal
- Kitchen (15m² floor): R750 – R2,250 for removal
- Living area (40m² floor): R2,000 – R6,000 for removal
- Whole house (100m²): R5,000 – R15,000 for removal + R2,000-4,500 skip hire
Key Insight: Removal costs vary significantly based on adhesive type. Epoxy or mastic adhesives are much harder to remove than standard cementitious, increasing labour time and cost.
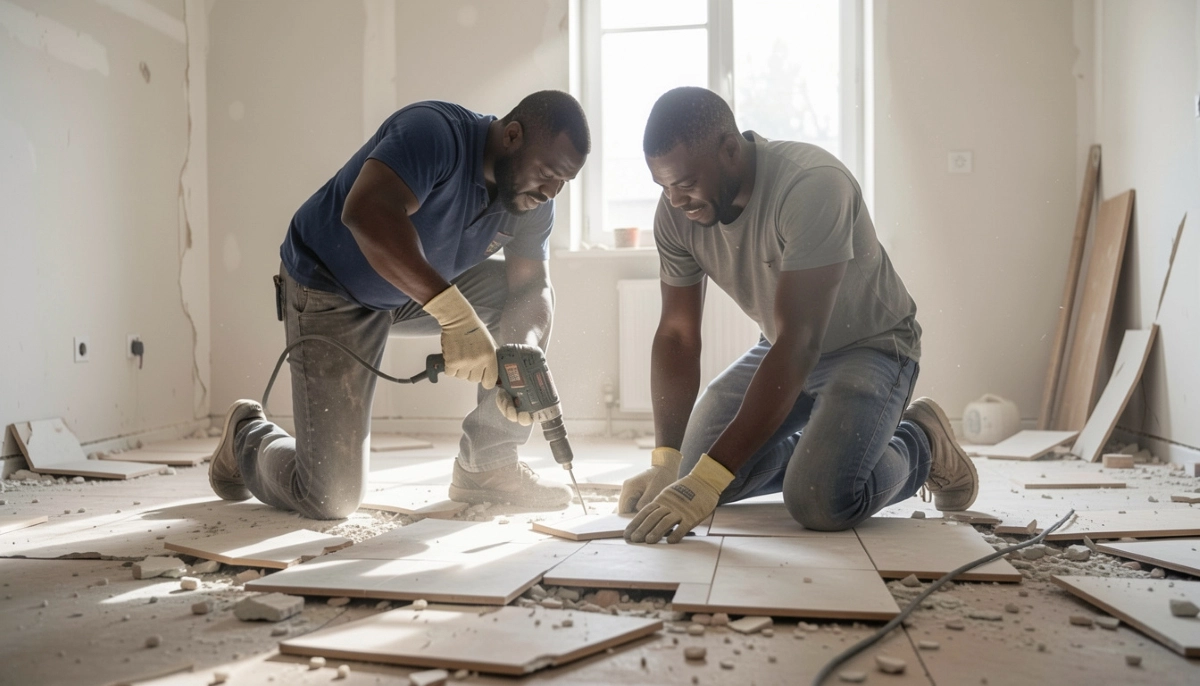
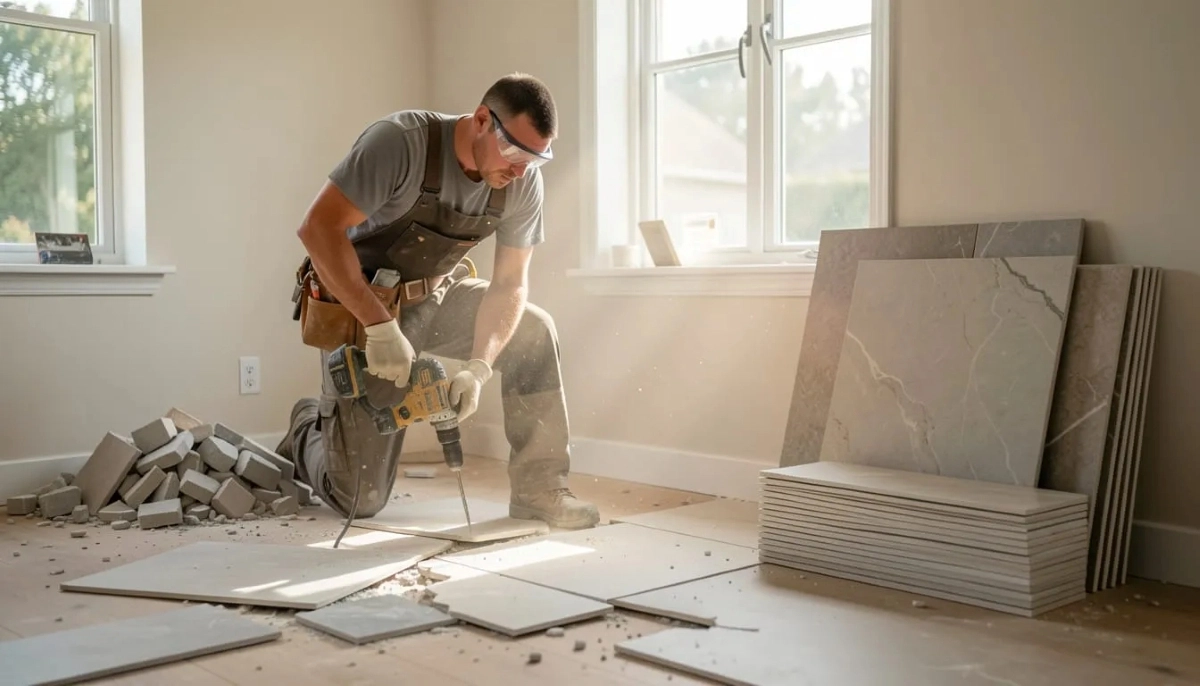
🛠️ Tile Removal Process & Methods
Step 1: Assessment
Before any work begins, a thorough assessment is essential:
- Existing tile condition: Are they loose, cracked, or well-adhered?
- Substrate type: Concrete, screed, timber, existing tiles?
- Adhesive type: Cementitious, epoxy, mastic?
- Presence of waterproofing membrane: Will removal damage it?
- Utilities: Underfloor heating, pipes, cables?
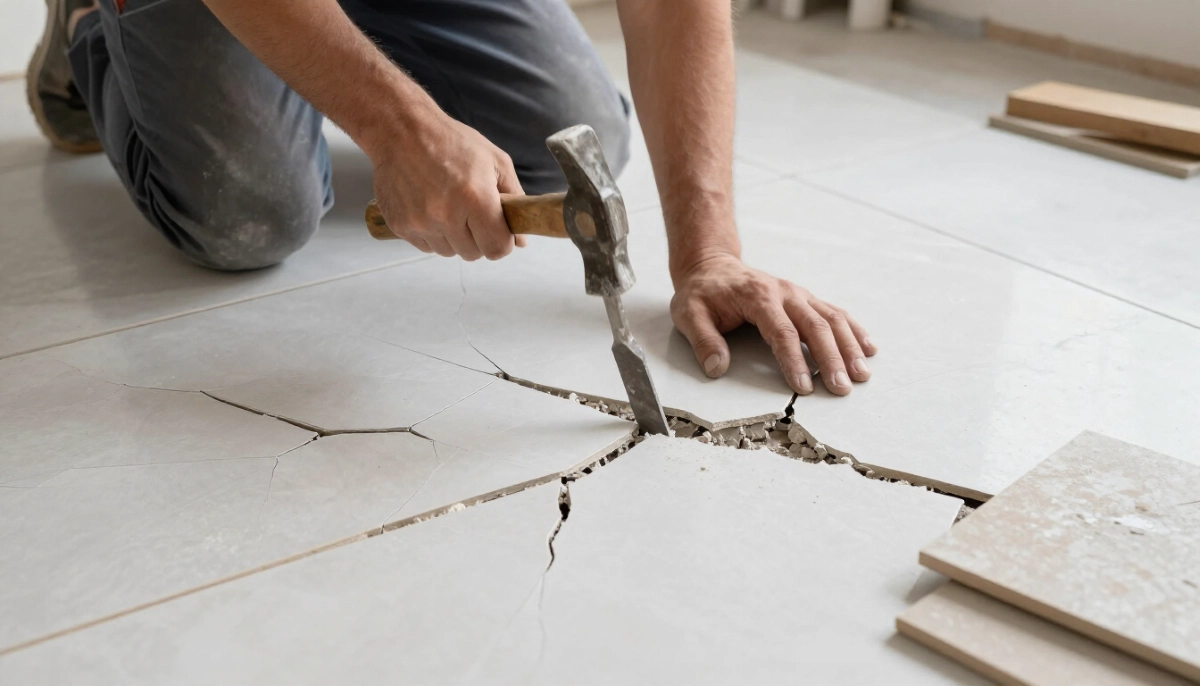
Step 2: Removal Methods
Different methods suit different situations:
| Method | Suitable For | Cost Impact | Pros/Cons |
|---|---|---|---|
| Manual chipping | Small areas, single tiles, delicate substrates | Higher labour cost per m² | Less dust, precise control, slower |
| Electric jackhammer | Large areas, concrete substrate | Lower cost per m² for large areas | Fast, creates significant debris, noisy |
| Angle grinder | Cutting tiles for partial removal, scoring | Additional cost | Precision work, dust control needed |
| Scarifier/grinder | Adhesive residue removal | R30-80/m² extra | Prepares surface for new tiling |
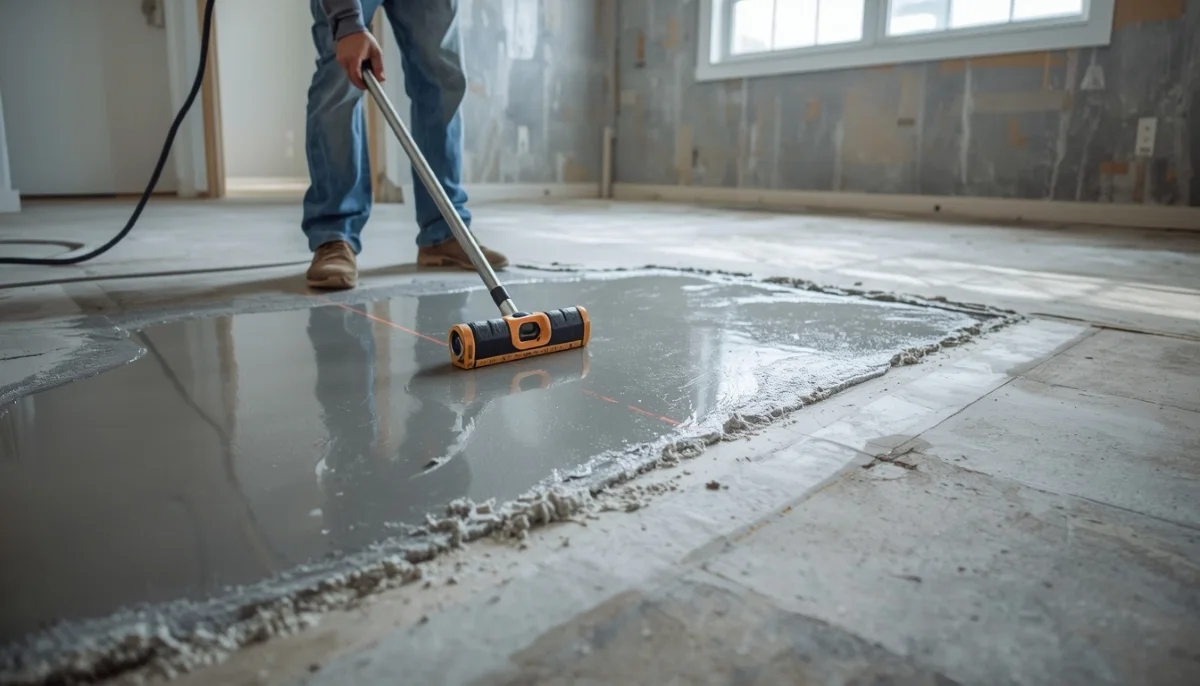
Step 3: Substrate Preparation (Post-Removal)
- Remove all adhesive residue
- Repair any substrate damage
- Apply levelling compound if required – see our floor leveling guide
- Prime surface before new tiling
📊 Factors Affecting Tile Removal Cost
- Tile size: Large format tiles (600x600mm+) are quicker to remove than mosaics
- Adhesive type: Epoxy and mastic are much harder to remove than cementitious
- Substrate: Concrete slabs are forgiving; timber substrates risk damage
- Accessibility: Tight spaces (toilet areas, corners) increase labour time
- Waterproofing: If preserving membrane, careful removal needed
- Disposal: Skip hire adds R500-4,500 depending on volume
- Location: Johannesburg rates may differ from Cape Town
🔧 Single Tile Replacement
Replacing individual cracked or damaged tiles is a common repair job.
Process for Single Tile Replacement
- Remove grout around tile – using grout saw or multitool
- Break tile carefully – start from centre, work outward
- Remove adhesive – chisel out old adhesive, take care not to damage adjacent tiles
- Clean substrate – ensure surface is clean and level
- Test fit new tile – may need trimming to size
- Apply adhesive – back butter tile and press into place
- Level with adjacent tiles – use tile levelling system if needed
- Grout when set – match existing grout colour
Cost
- Single tile replacement: R300 – R800 flat rate
- Multiple tiles: R300 – R1,500 depending on number and access
For professional tile repair services, experienced tilers can match existing tiles and ensure seamless repairs.
🎨 Matching Replacement Tiles
Finding matching tiles for replacements can be challenging.
| Scenario | Success Rate | Strategy |
|---|---|---|
| Current production tile | High | Purchase same batch; mix with existing tiles |
| Discontinued tile | Low | Replace with similar; consider full replacement |
| Natural stone | Variable | Batch variation inevitable; blend installation |
| Stockist hold stock | High | CTM, Tiletoria may have remaining stock |
Pro Tip: “With natural stone or high-variation tile, slight color changes or dye lots can become glaring once installed. Mix boxes as you go to blend variations and always do a dry layout before you commit.”
For bathroom or kitchen renovations, always buy extra tiles (10-15%) and store them for future repairs.
🔨 Need to Replace Damaged Tiles?
Cracked tiles don’t have to ruin your room. Get free quotes from experienced tilers who can match and replace individual tiles.
🔄 Tiling Over Existing Tiles
In some cases, you can tile over existing tiles, saving removal costs and time.
TAL – Tiling Over Existing Tiles
TAL’s technical guidelines state: “When tiling onto existing tiles, it is important to only use a quick- or rapid-setting adhesive, as the existing tiles will present a dense, impervious surface, and standard-setting adhesives will take longer to dry.”
TAL Tile-To-Tile Specifications
- Adhesive: TAL Tile-To-Tile quick-setting adhesive
- Mix for suspended slabs/external: Replace water with TAL Bond or add TAL Bond Powder
- Adhesive bed thickness: Minimum 6mm solid bed beneath each tile
- Back buttering: May be required for large-format tiles
- Movement joints: Existing structural/movement joints must be maintained through new tile installation
When CAN You Tile Over Existing Tiles?
- ✅ Existing tiles well-adhered (no hollow sounds when tapped)
- ✅ Surface is level (or can be levelled with patching)
- ✅ No moisture problems or efflorescence
- ✅ Floor height increase acceptable (door clearances, thresholds)
- ✅ Existing tiles clean, degreased, and roughened for adhesion
⚠️ When You MUST Remove Existing Tiles
In these situations, tiling over is NOT an option – tiles must be removed.
- ❌ Loose, cracked, or hollow-sounding tiles – new tiles will fail over unstable base
- ❌ Failed waterproofing membrane beneath – must access and replace membrane
- ❌ Height restrictions – doors, cabinets, appliances won’t clear higher floor
- ❌ Substrate damage requiring access – rotten timber, cracked concrete needs repair
- ❌ Moisture problems – efflorescence, mould indicates underlying issues
- ❌ Glazed or polished tiles – smooth surface prevents adhesion even after roughening
Pudlo emphasises: “If the substrate isn’t right, the tiles won’t stick, may pop off, could crack – any number of things. It is the job of the tiler to know what to do to make the substrate suitable if it isn’t.”
🧱 Substrate Preparation After Removal
Once tiles are removed, proper substrate preparation is essential for new tiling.
Step 1: Remove Adhesive Residue
- Scrape or grind off old adhesive
- Ensure surface is clean and free of debris
- Vacuum thoroughly
Step 2: Repair Substrate
- Fill cracks with repair mortar
- Patch any damaged areas
- Allow repairs to cure
Step 3: Level Surface
- Apply self-levelling compound if required – see our floor leveling guide
- Ensure flatness within manufacturer specifications
- Allow to dry completely
Step 4: Prime
- Apply primer to control suction
- Ensure compatibility with adhesive
SANS 10107 specifies substrate preparation requirements for tiling.
🗑️ Waste Disposal & Skip Hire
Tile removal creates significant waste that must be disposed of properly.
Skip Hire Costs
- Small skip (1-2m³): R500 – R1,500
- Medium skip (3-4m³): R1,500 – R2,500
- Large skip (5-6m³): R2,500 – R4,500
What Size Skip Do You Need?
- Bathroom only: Small skip (1-2m³)
- Kitchen only: Small-medium skip (2-3m³)
- Whole house (100m²): Large skip (5-6m³)
Disposal Alternatives
- Some tilers include disposal in their quote – confirm before hiring
- Council dump fees apply for self-disposal
- Recycling centres may accept clean tile waste
🏠 Real-Life Tile Replacement Examples
Example 1: Bathroom Renovation, Randburg
Complete bathroom strip – 12m² floor, 25m² walls.
Removal cost: R4,800
Included jackhammer removal, adhesive grinding, skip hire. New tiling cost: R18,500.
Example 2: Single Tile Replacement, Fourways
One cracked 600x600mm porcelain floor tile.
Replacement cost: R550
Tiler matched existing tile, replaced, regrouted – invisible repair.
Example 3: Kitchen Floor, Cape Town
18m² kitchen, tiling over existing tiles.
Tiled over existing: R9,500
TAL Tile-To-Tile adhesive, no removal cost, height increase managed with threshold strips.
Example 4: Commercial Space, Midrand
200m² office floor, old tiles removed.
Removal cost: R18,000
Large-scale removal, heavy machinery, multiple skips, 3-day project.
🆚 DIY vs Professional Tile Removal
DIY Tile Removal
Possible for: Small areas, single tiles, if you’re physically capable and have tools.
Challenges:
- Heavy, dusty, labour-intensive work
- Risk of damaging substrate
- Proper disposal of waste
- Safety concerns – power tools, dust, heavy lifting
- Time-consuming – professionals are much faster
DIY savings: You save R50-180 per m² on labour.
Professional Removal
Recommended for: Large areas, walls, commercial projects, when substrate is delicate.
Benefits:
- Faster completion
- Proper tools for the job
- Experience with different adhesive types
- Less risk of damaging substrate
- Includes disposal in many cases
- Warranty on work
Use our tiler selection guide to find qualified professionals.
❌ 7 Common Tile Removal Mistakes
Learn from others’ errors: These mistakes cause unnecessary damage and expense.
Mistake #1: Not Checking for Utilities
Underfloor heating pipes or electrical cables can be damaged during removal. Always check plans or use a detector before starting.
Mistake #2: Damaging the Substrate
Over-aggressive removal can gouge concrete or break waterproofing. Careful technique preserves the substrate for new tiling.
Mistake #3: Ignoring Asbestos Risk
In homes built before 1990, floor tiles or adhesives may contain asbestos. Test before disturbing.
Mistake #4: Not Protecting the Area
Tile removal creates dust that spreads throughout the house. Seal doorways, cover furniture, and use dust barriers.
Mistake #5: Tiling Over Unsound Tiles
Hollow or loose tiles will cause new tiles to fail. Always ensure existing tiles are sound before tiling over.
Mistake #6: Poor Safety Practices
Flying debris, dust inhalation, and heavy lifting are real risks. Use proper PPE – respirator, safety glasses, gloves.
Mistake #7: Not Planning for Disposal
Underestimating waste volume leads to multiple trips or illegal dumping. Calculate waste and arrange appropriate skip.
❓ Frequently Asked Questions – Tile Removal & Replacement
How much does it cost to remove tiles per square metre in South Africa?
Tile removal costs R50 – R150 per m² for floors and R60 – R180 per m² for walls. Costs depend on adhesive type, tile size, and accessibility.
Can I tile over existing tiles?
Yes, if existing tiles are well-adhered, level, and in good condition. Use TAL Tile-To-Tile rapid-setting adhesive. Check door clearances and floor height increases.
How do I replace a single broken tile?
Remove grout around tile, break tile from centre, carefully chisel out pieces, clean substrate, test fit new tile, apply adhesive, level, and regrout. Professional cost: R300 – R800.
How do I match replacement tiles?
Check with original supplier for stock. Take a sample to tile shops. If discontinued, consider replacing with similar tile or full replacement. Keep spare tiles from original installation.
What is the cheapest way to remove tiles?
DIY removal saves labour costs but is hard work. For large areas, professional removal is often more cost-effective considering time, effort, and proper disposal.
How do I remove tile adhesive after removal?
Use floor grinder or scarifier for large areas. For small areas, manual chiselling or chemical removers. Budget R30-80/m² for professional adhesive removal.
Do I need to remove tiles if there’s waterproofing underneath?
If waterproofing is damaged or failed, yes – you must remove tiles to access and replace the membrane. If waterproofing is intact, you can tile over with care.
How long does tile removal take?
A professional can remove 20-30m² per day depending on conditions. Bathroom removal typically 1-2 days. Whole house 3-5 days.
Can I remove tiles myself and hire a tiler for installation?
Yes, many homeowners do this to save costs. Ensure substrate is properly prepared – tilers may charge extra to fix DIY removal damage. Discuss with your tiler first.
What do I do with old tiles after removal?
Hire a skip, arrange council collection, or use a waste removal service. Never dump illegally. Some recyclers accept clean tile waste.
✅ Final Thoughts – Plan Your Tile Removal Carefully
Tile removal is dusty, noisy, and labour-intensive – but sometimes necessary. Whether you’re replacing damaged tiles or completely renovating, understanding the costs and process helps you plan effectively.
Your 4-Step Tile Removal Action Plan:
- Assess the situation: Can you tile over, or must you remove? Check substrate, tile condition, height constraints.
- Get professional quotes: Removal costs vary – get 3 quotes from experienced tilers.
- Plan for waste: Arrange skip hire or confirm tiler includes disposal.
- Prepare for new tiling: Budget for substrate preparation, levelling, and priming after removal.
🔑 The Bottom Line:
R2,000 – R5,000 for bathroom removal
is a small price for a fresh start.
Do it right, and your new tiles will last decades.
🔨 Ready to Remove Old Tiles?
Get free, no-obligation quotes from experienced tilers who can assess your situation and provide accurate removal and replacement costs.
📞 Call our renovation helpline: 073 138 4726
📚 Official Resources & Technical Guidelines:
- Kandua – Tile removal cost data.
- TAL – TAL Tile-To-Tile – tiling over existing tiles.
- CTM – Tile replacement guidance.
- Pudlo – Substrate assessment before replacement.
- SABS – SANS 10107 – Substrate preparation.
- CIDB – Contractor grading for demolition/tiling.
This guide is for informational purposes. Always consult with a qualified professional for your specific tiling project.
Written by: Innocent T Hanyani
21+ years construction and digital industry experience, ServiceLink SA
Innocent has overseen countless renovation projects involving tile removal and replacement. He’s seen the good, the bad, and the disastrous – and compiled this guide to help you avoid costly mistakes.