Tiling Mistakes to Avoid in Your Home
🔧 Cracked tiles? Uneven floors? Grout failures? We reveal the 10 most common tiling mistakes and how to avoid them.
Tiling seems straightforward – until it goes wrong. Cracked tiles, uneven surfaces, grout that discolours within months – these are the hallmarks of poor tiling. Whether you’re renovating a bathroom in Sandton, updating a kitchen in Pretoria, or tiling a coastal home in Cape Town, avoiding common mistakes saves time, money, and frustration. This guide, drawing on expertise from TAL’s technical advisory service and international best practices, covers the most frequent tiling errors and how to prevent them. We’ll also show you when professional floor tiling and wall tiling services are your best bet.
🛠️ Planning a Tiling Project?
Don’t learn these mistakes the hard way. Get free quotes from experienced, CIDB-registered tilers in your area who know how to avoid these pitfalls.
Servicing Johannesburg, Pretoria, Cape Town, Durban, and all major areas
📖 Table of Contents – Tiling Mistakes to Avoid
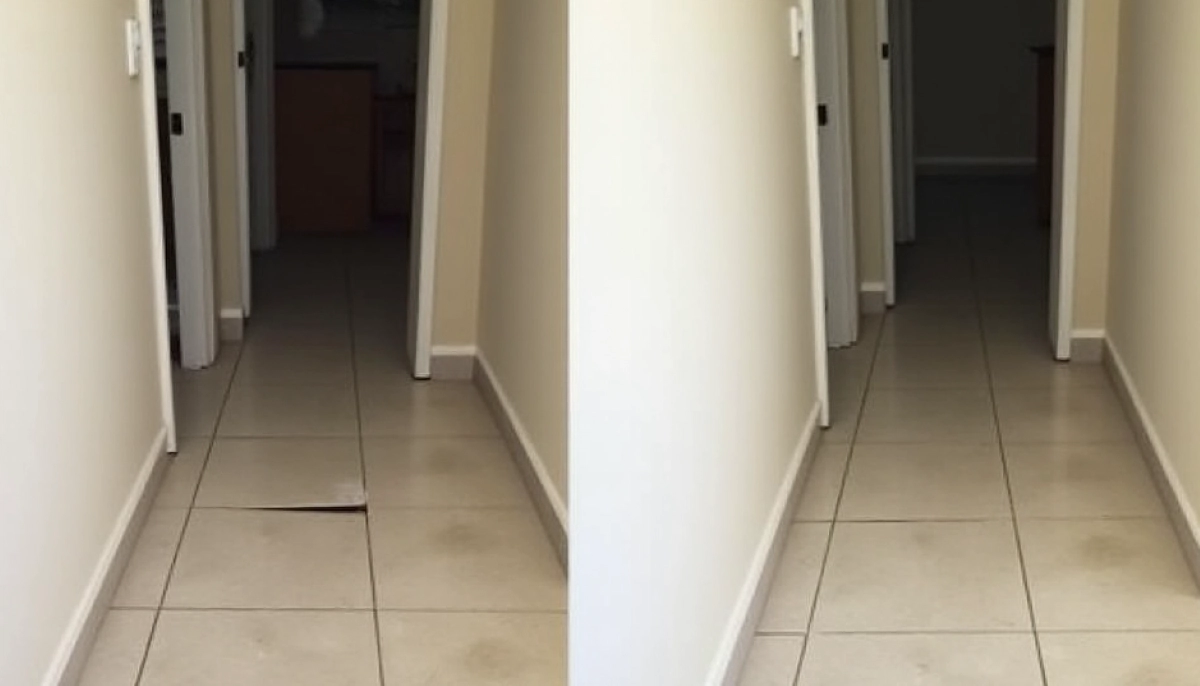
❌ Mistake #1: Skipping Surface Preparation
“This tops the list for good reason. It doesn’t matter how stunning your tile is; if your surface isn’t properly prepped, the job’s already headed for trouble.” – Chip Wade, Daltile
Uneven subfloors, out-of-plumb walls, or skipping backer boards all lead to lippage, cracking, and tile failure. Many DIY tilers underestimate the importance of proper floor leveling and surface preparation.
The Consequences
- Lippage: Uneven edges where tiles don’t align
- Cracked tiles: Movement in the substrate transfers to tiles
- Hollow spots: Tiles that sound hollow when tapped
- Debonding: Tiles lifting from the substrate
How to Avoid It
- Check flatness: Aim for 1/8″ over 10′ with no noticeable peaks or dips
- Use self-levelling compound on uneven concrete floors
- For timber subfloors: Use decoupling membrane and cement backer board
- Prime surfaces before applying adhesive to control suction
Professional tilers always assess the substrate first. If you’re in Johannesburg and need substrate assessment, our Johannesburg tiling specialists can help.
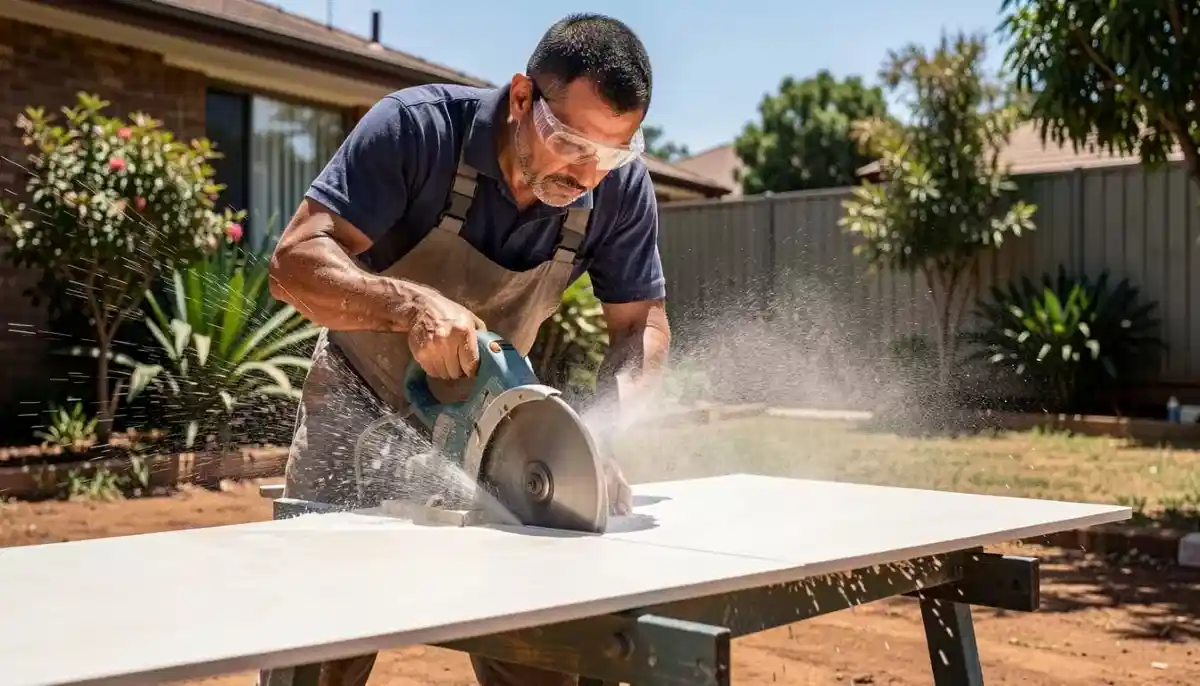
❌ Mistake #2: Choosing the Wrong Tile for the Space
“One of the biggest tile missteps? Using glossy or slick wall tile on floors or choosing tile that’s too thin for foot traffic.” – Chip Wade, Daltile
Common Selection Errors
- Wall tiles on floors: Glossy finishes become dangerously slippery when wet
- Ceramic in wet areas: Higher water absorption (3-7%+) leads to moisture damage
- Polished tiles in bathrooms: Beautiful but hazardous when wet
- Thin tiles in high-traffic areas: Crack under heavy use
How to Choose Correctly
- Floors: Use floor-rated tiles (PEI 3-5) with appropriate slip resistance
- Wet areas: Porcelain with <0.5% water absorption – essential for bathrooms and kitchens
- Outdoor areas: Frost-resistant, slip-rated tiles (R11+)
For expert guidance on tile selection, see our kitchen and bathroom tile guide or consult with professionals offering bathroom tiling services in your area.
❌ Mistake #3: No Movement Joints
“The lack of movement joints in tile installations is a major cause of tile failure.” – TAL
Tiles, adhesive, and substrates all expand and contract with temperature and humidity changes. Without movement joints, this stress causes tenting, cracking, and debonding.
TAL Specifications
- Perimeter joints: Around room edges, columns, and where tiles meet fixed elements – minimum 5mm wide
- Intermediate joints: Interior surface beds – maximum 5m centres both directions
- Suspended slabs/exterior: Maximum 3m centres
- Joints must extend through tile and adhesive to the substrate
- Fill with resilient sealant and backing cord
A professional tiler from our commercial tiling or house tiling services will always incorporate proper movement joints.
❌ Mistake #4: Poor Layout Planning
“Ending up with awkward slivers at a wall or patterns that clash with architectural lines throws off a room’s balance.” – Daltile
Layout Errors
- Thin sliver cuts at walls (less than half a tile width)
- Patterns not centred on room features
- Tiles not aligned with cabinets or fixtures
- Wasting tiles through poor planning
How to Avoid
- Dry layout first: Arrange tiles without adhesive to check fit
- Centre your design: Find the room’s centre line and work outward
- Avoid small cuts: Adjust layout so cuts are at least half a tile width
- Consider feature areas: Shower niches, splashbacks deserve special attention – our mosaic tiling specialists excel at detailed work
🏠 Planning a Complex Tiling Project?
Herringbone, large format, or mosaic patterns require expert layout skills. Get quotes from experienced tilers who can execute your vision.
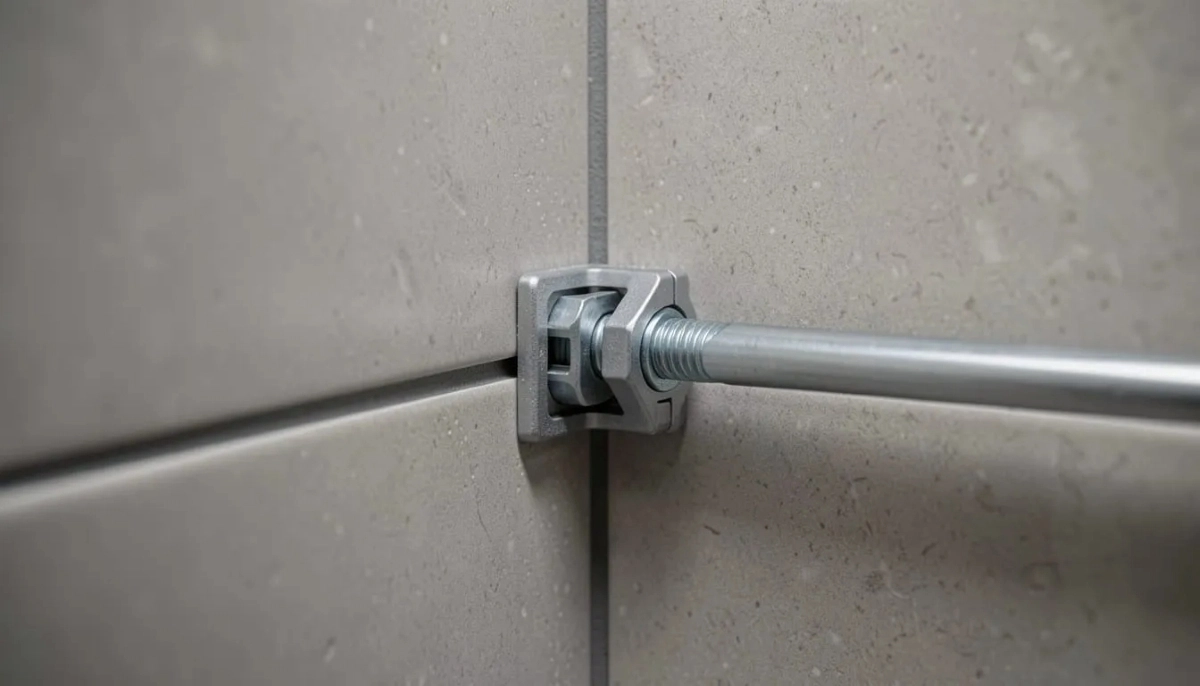
❌ Mistake #5: Wrong Grout Colour & Size
“Skipping this decision or defaulting to standard choices is a common mistake that can turn a stunning tile selection into a missed opportunity.” – LivingEtc
“Discolored grout, or the wrong colored grouting, is a surefire way to make your kitchen look cheap and uncared for.” – LivingEtc
Grout Colour Mistakes
- White grout in high-traffic areas: Stains quickly, looks dirty
- Matching grout with no contrast: Loses definition, can look flat
- High-contrast grout without testing: Can overwhelm the tile design
Joint Width Errors
- Too narrow for tile type: TAL specifies minimum 5mm for glazed ceramic floor tiles, 3mm for rectified porcelain
- Inconsistent spacing: Without proper spacers, joints vary visibly
How to Choose
- Test grout colours on a sample board before committing
- For kitchens and bathrooms, grey or beige grout is more practical than white
- Use consistent tile spacers throughout
Professional grout sealing and cleaning services can restore discoloured grout, but prevention is better.
❌ Mistake #6: Unfinished Edges
“A common issue is not ordering enough tiles to cover the full splashback or wrap a corner properly. This can result in awkward breaks or unfinished edges that cheapen the overall look.” – LivingEtc
Solutions
- Bullnose tiles: Rounded edge tiles designed for corners and edges
- Tile trim: Metal or plastic profiles (Schluter, etc.) that create a clean finish
- Beveled edges: Some tiles have built-in finished edges
- Plan for corners: Order extra tiles and consider how edges will be finished
❌ Mistake #7: Incorrect Adhesive System
“Using the wrong trowel, skipping back buttering, or applying insufficient adhesive coverage.” – TAL
Adhesive Errors
- Wrong trowel size: Too small = insufficient coverage; too large = excess squeeze-out
- No back buttering: Large format tiles need adhesive on the tile back for 95% coverage
- Adhesive too dry or too wet: Affects bond strength
- Wrong adhesive type: Standard adhesive for wet areas, or underfloor heating, fails quickly
TAL Specifications
- Adhesive bed thickness: Minimum 6mm solid bed beneath each tile
- For existing tiles: Use TAL Tile-To-Tile quick-setting adhesive
- For wet areas: Add TAL Bond to adhesive mix for enhanced water resistance
- Coverage: “95% coverage rule” – especially for wet areas and large format tiles
❌ Mistake #8: Not Checking Tile Batches
“With natural stone or high-variation tile, slight color changes or dye lots can become glaring once installed.” – Daltile
The Problem
Tiles from different batches can have slight colour variations. When installed side by side, these differences become obvious and unsightly.
How to Avoid
- Check batch numbers: Ensure all boxes have the same batch number
- Mix boxes during installation: Don’t install all tiles from one box in one area
- Dry layout first: Arrange tiles to blend variations
- Order extra: Buy 10-15% more than needed to ensure batch consistency
❌ Mistake #9: Grouting Too Early
Grouting before the adhesive has sufficiently set can disturb tiles, causing them to shift and creating uneven joints.
TAL Guidelines
- Standard adhesives: Wait 24-48 hours before grouting
- TAL Tile-To-Tile: Minimum 6 hours before grouting
- Always check: Adhesive should be firm enough that tiles won’t move when pressed
Grout Cleaning Critical
“Particular care must be taken to clean the grout off the tile face before it hardens completely. This is especially important when an additive such as TAL Bond has been used.” – TAL
❌ Mistake #10: Following Fleeting Trends
“When investing in a new kitchen, longevity is key. A design that feels current yet classic ensures your space remains stylish for years to come without the need for constant updates.” – LivingEtc
Trends to Approach with Caution
- Extremely bold patterns that may date quickly
- Very specific colour trends
- Novelty shapes that may be hard to match later
Timeless Choices
- Natural materials (stone, terracotta, wood-look)
- Time-honoured patterns (herringbone, subway)
- Neutral colours (whites, greys, beiges)
- Quality over trend – invest in durable materials
📞 When to Call a Professional Tiler
Some projects are best left to experienced professionals. Consider hiring a professional for:
- Large format tiles (>600mm) – require perfect substrate and two-person installation
- Natural stone – expensive material, requires specialist handling and sealing
- Complex patterns – herringbone, diagonal, custom designs
- Wet areas – bathrooms and showers need proper waterproofing
- Underfloor heating – requires flexible adhesives and decoupling membranes
- Commercial projects – higher traffic, stricter standards
Our network includes specialists in porcelain and ceramic tile installation, pool tiling, and pattern tiling across South Africa.
❓ Frequently Asked Questions – Tiling Mistakes
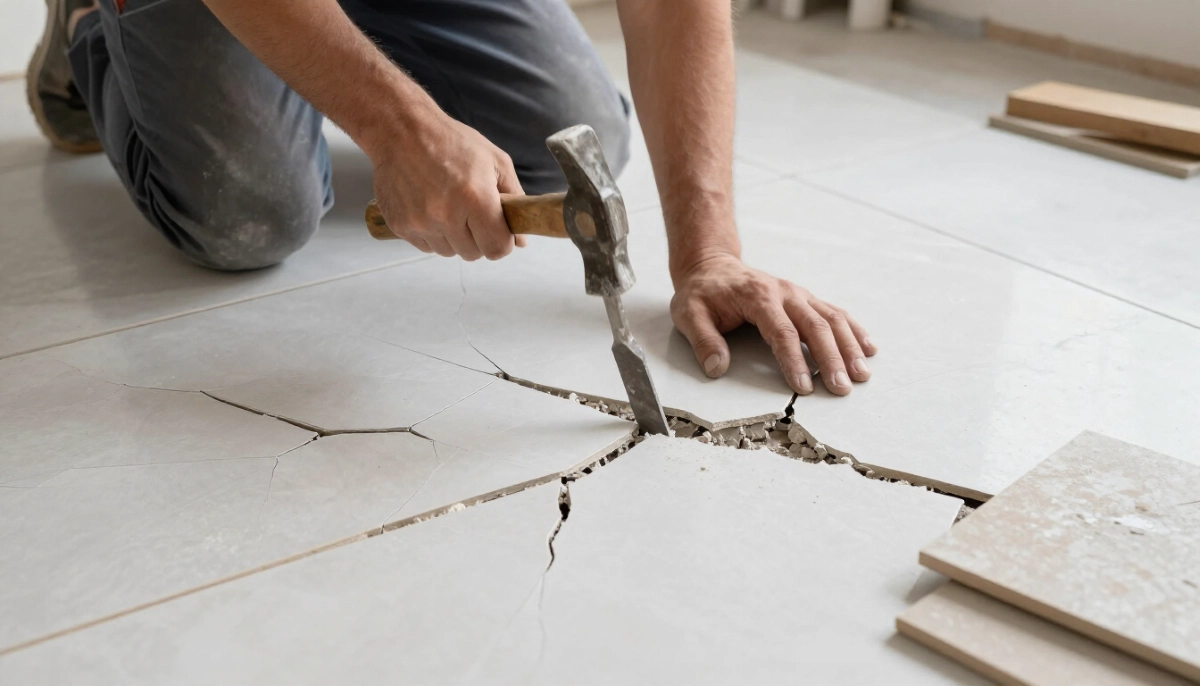
Why are my tiles cracking after installation?
Cracks usually result from substrate movement, lack of movement joints, or insufficient adhesive coverage. The substrate may be flexing, or the installation may lack proper expansion joints as specified by TAL.
Why are my tiles popping off the wall?
This is typically adhesive failure – wrong adhesive type, insufficient coverage, or the substrate wasn’t properly prepared. Walls need to be clean, dry, and primed before tiling.
How do I fix uneven tiles (lippage)?
Minor lippage can sometimes be ground down by a professional, but this risks damaging the glaze. Prevention is key – use a tile levelling system during installation and ensure the substrate is perfectly flat before starting.
Why is my grout discolouring?
Discolouration can be from improper cleaning during installation (grout residue left on tiles), lack of sealing (for cementitious grout), or moisture penetration. Epoxy grout or TAL Bond additive prevents this.
Can I tile over existing tiles?
Yes, if the existing tiles are well-adhered and the surface is sound. Use TAL Tile-To-Tile rapid-setting adhesive. However, check floor height clearances for doors and ensure the extra weight is supported. Floor tiling specialists can advise.
How long should tiles dry before grouting?
24-48 hours for standard adhesives, or minimum 6 hours for rapid-set adhesives like TAL Tile-To-Tile. Always check that adhesive is firm and tiles won’t move before grouting.
What is the 95% coverage rule?
For wet areas and exterior installations, tiles must have 95% adhesive coverage with no voids. This means back buttering large format tiles and using the correct trowel. Insufficient coverage leads to hollow spots and tile failure.
How do I prevent grout from cracking?
Grout cracks from movement, incorrect mixing, or drying too fast. Use proper joint widths, ensure movement joints are included, and follow manufacturer mixing instructions. Adding TAL Bond increases flexibility.
What are movement joints and why do I need them?
Movement joints (expansion joints) allow tiles to expand and contract with temperature changes. Without them, tiles can tent, crack, or debond. They’re required at perimeters and at 5m centres interior, 3m centres exterior.
Should I hire a professional tiler or DIY?
Small, simple areas (like a bathroom floor) can be DIY with careful planning. For large areas, complex patterns, expensive materials, or wet areas, professional installation is strongly recommended. See our guide to choosing a tiler.
✅ Final Thoughts – Get It Right the First Time
Tiling mistakes are costly – not just in materials, but in time, frustration, and the disappointment of a flawed finish. The good news? Almost all these mistakes are preventable with proper planning, the right materials, and skilled installation.
Your 4-Step Tiling Success Plan:
- Prepare properly: Assess and level the substrate – don’t skip this step
- Choose wisely: Select tiles suited to the space (porcelain for wet areas, correct slip rating)
- Plan the layout: Avoid small cuts, centre patterns, include movement joints
- Hire expertise when needed: Complex projects deserve professional tilers
🔑 The Bottom Line:
A small mistake today becomes a big repair tomorrow.
Invest in proper preparation and skilled installation – it’s cheaper than fixing failures.
🏠 Ready to Start Your Tiling Project?
Don’t learn these mistakes the hard way. Get free quotes from experienced, vetted tilers who know how to avoid these pitfalls.
📞 Call our tiling advisory line: 073 138 4726
📚 Official Standards & Technical Resources:
- CIDB – Verify contractor grading for tiling works.
- NHBRC – Technical requirements for tiling in new homes.
- SABS – SANS 10107 – Ceramic tiles; SANS 10400 building regulations.
- TAL – Technical Advisory Service – movement joints, adhesive systems.
This guide is for informational purposes. Always consult with a qualified, CIDB-registered tiler for your specific project.
Written by: Innocent T Hanyani
21+ years construction and digital industry experience, ServiceLink SA
Innocent has overseen hundreds of tiling projects across South Africa and has seen every mistake imaginable. This guide synthesises expertise from TAL technical specifications, CIDB standards, and real-world experience to help you avoid costly errors.