🚰 Installing a New Bathroom Sink?
Get quotes from verified plumbers for sink installation. Same-day service available. Free inspections.
Get Sink Installation Quotes Near You
Servicing Gauteng, Western Cape, Cape Town, Bellville, Stellenbosch, Paarl, and across South Africa
Bathroom Sink Installation Guide: Step-by-Step for Homeowners
🚰 From pedestal to vanity sinks—complete guide to DIY bathroom sink installation, plumbing connections, and common mistakes
Your old bathroom sink is cracked, stained, or just outdated. You’ve bought a beautiful new sink, but now comes the challenge: getting it installed. Do you call a plumber or do it yourself?
The good news is that bathroom sink installation is one of the most DIY-friendly plumbing projects. With basic tools and a few hours, most homeowners can successfully replace a sink. The bad news? Mistakes can lead to leaks, water damage, and frustration.
I’ve helped hundreds of homeowners across South Africa with sink installations. This guide will walk you through every step—from removing the old sink to connecting the water supply and drain. You’ll learn how to install a bathroom sink properly, avoid common mistakes, and know when to call a professional.
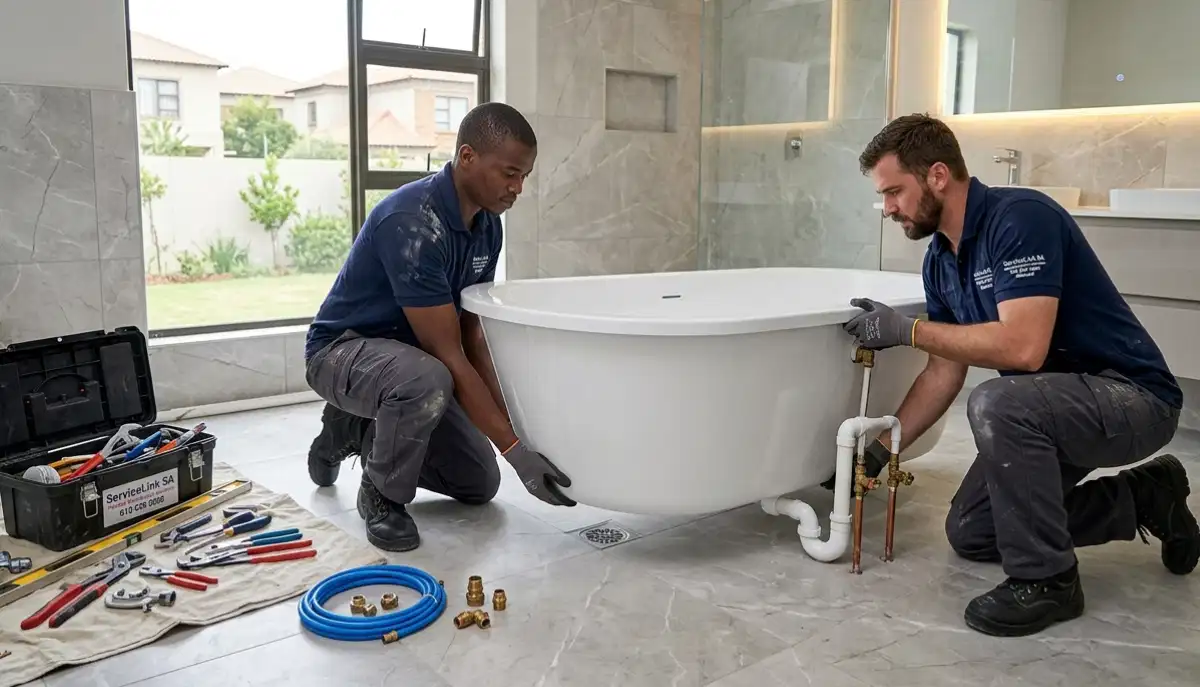
For related information, read our bathroom renovation guide, shower installation cost guide, and bathtub installation guide. Let’s get started.
📋 Table of Contents – Bathroom Sink Installation Guide
🚰 Types of Bathroom Sinks
Different sink types have different sink fitting guide requirements:
- Pedestal sink: Sink basin sits on a pedestal that hides pipes. Elegant but no storage. Requires wall mounting for stability.
- Wall-mounted sink: Attached directly to wall with brackets. Pipes exposed or hidden in wall. Good for small bathrooms.
- Vanity sink (drop-in): Sits into a cutout in a vanity cabinet. Most common and DIY-friendly.
- Undermount sink: Mounted under the countertop. Clean look but requires stone countertop and professional installation.
- Vessel sink: Sits on top of the countertop. Modern look, requires tall faucet.
For most DIYers, a vanity drop-in sink is the easiest install bathroom sink project.
Read our bathroom plumbing guide for more on bathroom fixtures.
🛠️ Tools & Materials You’ll Need
🔧 Tools
- Adjustable wrench (2x)
- Basin wrench (for tight spaces)
- Screwdriver (flathead & Phillips)
- Plumber’s putty or silicone sealant
- Bucket and towels
- Level
- Utility knife
🧩 Materials
- New sink and faucet
- Supply lines (flexible, 2x)
- P-trap kit
- Plumber’s tape (Teflon)
- Mounting brackets (if needed)
Read our plumbing tools guide for more equipment information.
🔧 Step 1: Remove the Old Sink
Before you can install bathroom sink components, remove the old one:
- Turn off water supply – Close the isolation valves under the sink (turn clockwise).
- Disconnect water supply lines – Use a wrench to loosen the nuts. Have a bucket ready for water in the lines.
- Disconnect the drain – Loosen the slip nuts on the P-trap. Remove the trap.
- Remove the faucet (if keeping) – Loosen nuts from under the sink. A basin wrench helps in tight spaces.
- Detach the sink from wall/cabinet – Cut the silicone sealant with a utility knife. Remove mounting screws or brackets.
- Lift out the old sink – Get help—sinks are heavy and awkward.
- Clean the surface – Remove old putty, silicone, and debris.
Read our water leak repair guide if you find any water damage during removal.
🚰 Step 2: Install the New Faucet
Install the faucet before mounting the sink—it’s much easier to work from above:
- Insert faucet through the mounting hole(s) in the sink
- Secure with mounting nuts from underneath (tighten by hand, then 1/4 turn with wrench)
- Connect faucet supply lines (if not pre-attached)
- For single-hole faucets, ensure the base gasket is seated properly
Pro tip: Apply plumber’s putty under the faucet base if required by manufacturer instructions.
🚰 Installing a New Bathroom Sink?
Get quotes from verified plumbers for sink installation. Same-day service available. Free inspections.
Free quotes • Same-day service • Verified specialists
📏 Step 3: Mount the New Sink
For a drop-in vanity sink (most common DIY bathroom sink installation):
- Apply silicone sealant – Run a bead of silicone around the underside edge of the sink rim (or use the included gasket).
- Lower the sink into the cutout – Centre it carefully. Press down firmly to set the seal.
- Secure with mounting clips – Most sinks have clips underneath. Tighten them evenly—don’t overtighten.
- Wipe away excess sealant – Use a damp cloth before it dries.
- Let sealant cure – Follow manufacturer instructions (typically 2-4 hours before using water).
For wall-mounted sinks: Install the wall bracket first, ensuring it’s level and securely anchored into studs. Then hang the sink.
For pedestal sinks: Position the pedestal first, then lower the sink onto it. Secure sink to wall.
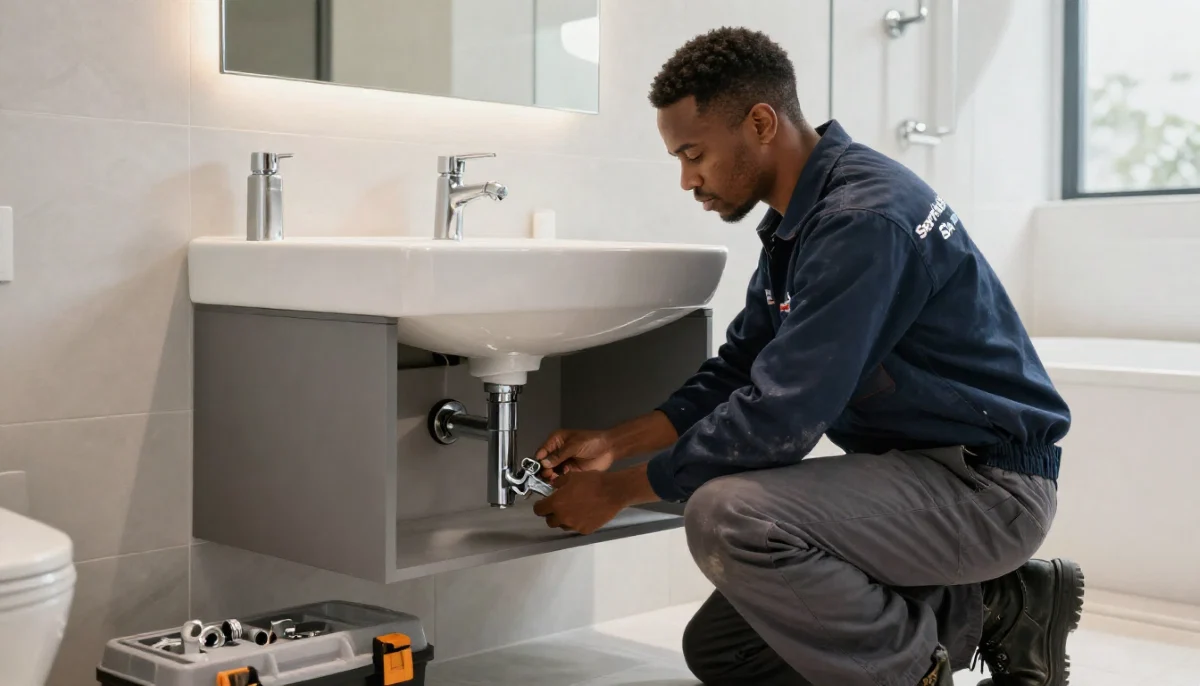
💧 Step 4: Connect the Drain (P-Trap)
The P-trap prevents sewer gases from entering your bathroom while allowing water to drain:
- Insert the pop-up drain assembly into the sink drain hole (apply plumber’s putty under the flange)
- Tighten the lock nut from underneath
- Connect the pop-up linkage to the faucet lift rod
- Assemble the P-trap: tailpiece → trap bend → wall drain
- Tighten all slip nuts hand-tight, then 1/4 turn with pliers (don’t overtighten)
- Run water to test for leaks
💡 Pro Tip:
Don’t overtighten plastic slip nuts—they crack easily. Hand-tight plus 1/4 turn is enough. If it leaks, tighten slightly more, but stop if you hear cracking.
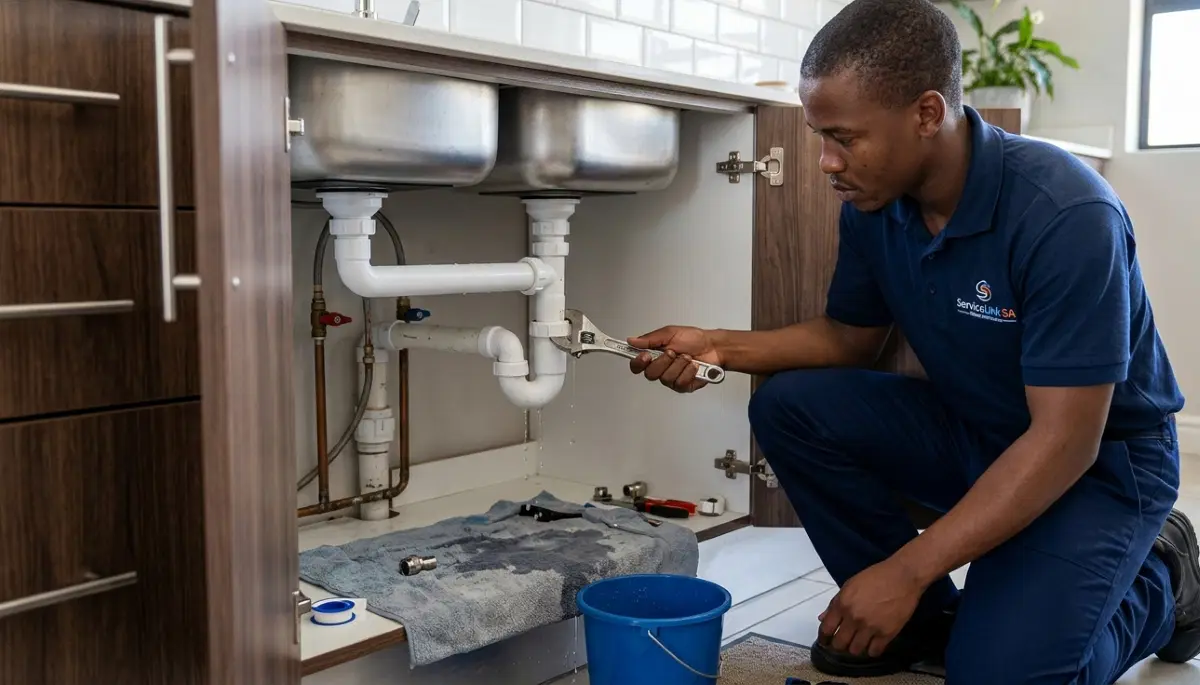
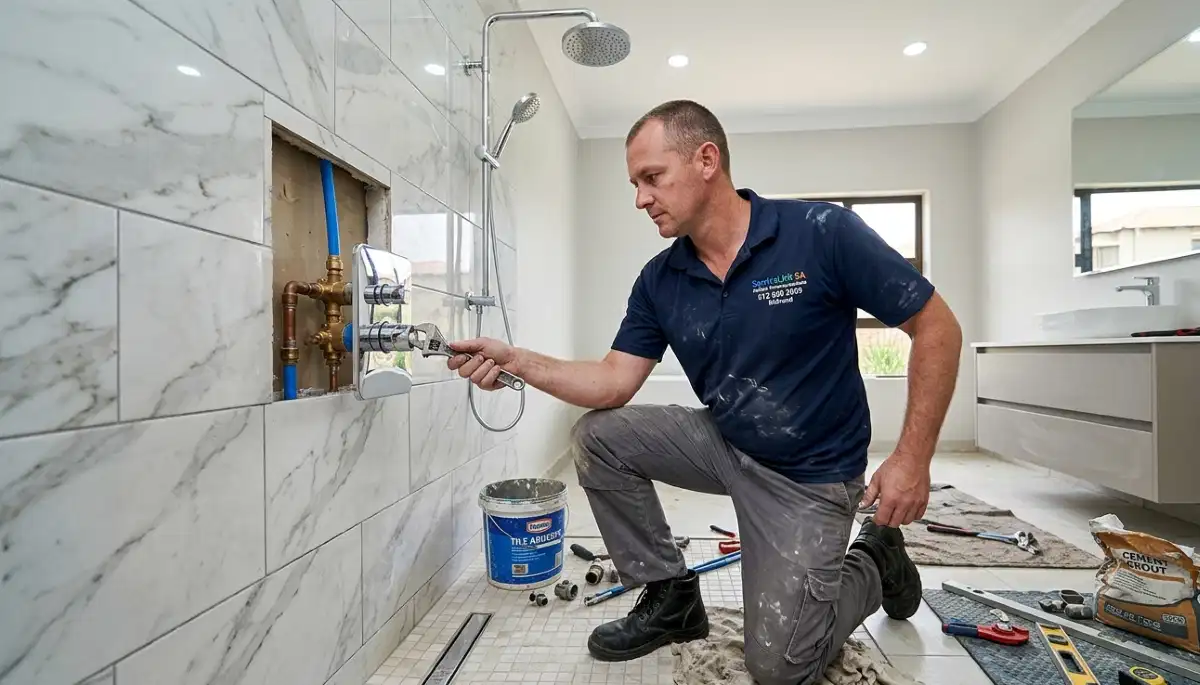
💧 Step 5: Connect Water Supply Lines
Connect the faucet to your home’s water supply:
- Wrap plumber’s tape (Teflon) around the valve threads (2-3 wraps clockwise)
- Connect flexible supply lines to the shut-off valves (hand-tighten, then 1/4 turn with wrench)
- Connect the other ends to the faucet inlets (usually marked “H” for hot, “C” for cold)
- Turn the water supply back on slowly
- Check for leaks at every connection
Important: If your supply lines are too short, buy longer ones (R50-R150). Don’t stretch them.
Read our how to fix a leaking pipe guide for leak troubleshooting.
✅ Step 6: Seal & Test for Leaks
After completing your install bathroom sink project:
- Run both hot and cold water for several minutes
- Check all connections (under sink, at faucet, at valves) for drips
- Check the P-trap for leaks
- Check the sink rim seal—no water should seep under the sink
- Check the pop-up drain operation
- If leaks found, tighten connections slightly (don’t overtighten)
If you have persistent leaks: Call a professional plumber through ServiceLink SA.

🚪 Vanity Sink Installation
If you’re installing a complete vanity (cabinet + sink), here’s the sequence:
- Position the vanity cabinet and level it (shim if needed)
- Secure the cabinet to the wall (into studs)
- Install the sink according to the drop-in instructions above
- Connect plumbing through the cabinet (access panel or open back)
- Install the faucet before lowering the sink (easier access)
For complete bathroom renovations, read our bathroom renovation plumbing guide.
❌ 5 Costly Mistakes to Avoid
Mistake #1: Not Using Plumber’s Putty or Silicone
The drain flange and faucet base need sealing. Without it, water seeps under the sink, causing damage. Always use plumber’s putty or silicone as directed.
Mistake #2: Overtightening Connections
Plastic slip nuts crack easily. Metal nuts can strip threads. Hand-tight plus 1/4 turn is enough. Stop if you hear cracking.
Mistake #3: Forgetting the P-Trap
The P-trap is essential—it prevents sewer gases from entering your home. Never install a sink without a proper P-trap.
Mistake #4: Not Leveling the Sink
A crooked sink looks bad and water won’t drain properly. Use a level—adjust with shims if needed.
Mistake #5: Not Testing for Leaks
Running water for 30 seconds isn’t enough. Test for several minutes, check all connections, and check again after 24 hours.
📞 When to Call a Professional
While bathroom sink installation is DIY-friendly, call a pro if:
- You need to move water supply lines or drain pipes
- You find water damage or mould during removal
- The wall or cabinet structure is damaged
- You’re installing an undermount or vessel sink
- Your DIY attempt has persistent leaks
- You’re uncomfortable with any step
Professional cost: R1,500-R4,000 for sink installation (including labour, not sink). In Cape Town or Stellenbosch, rates may be higher.
Use our how to choose a contractor guide to find a qualified plumber.
💰 Bathroom Sink Installation Cost Guide
Here’s what to budget for how to install a bathroom sink professionally:
| Item | Cost Range (ZAR) | Notes |
|---|---|---|
| DIY Installation (materials only) | R200-R500 | Supply lines, P-trap, sealant, tape |
| Professional Labour (standard) | R1,500-R2,500 | Replace existing sink, same location |
| Professional Labour (new location) | R2,500-R5,000+ | Requires new pipe runs |
| Sink Unit (basic) | R500-R1,500 | Ceramic drop-in |
| Sink Unit (premium) | R1,500-R5,000+ | Designer, vessel, stone |
| Faucet | R300-R2,000+ |
DIY saves R1,500-R2,500 in labour—worth it if you’re handy.
📋 Real-World Sink Installation Case Studies
🚰 Case 1: DIY Drop-In Sink Replacement
Location: Cape Town | Homeowner: The Williams Family
Project: Replace old cracked sink with new drop-in vanity sink.
Approach: DIY using this sink fitting guide. Cost R350 for materials.
Outcome: Successful installation in 3 hours. No leaks. Saved R1,800 in labour.
Lesson: Drop-in replacement is very DIY-friendly with basic tools.
🚪 Case 2: Full Vanity Installation
Location: Bellville | Homeowner: The Ndlovu Family
Project: Complete bathroom renovation including new vanity and sink.
Approach: Professional plumber for sink connections (R1,800), DIY for vanity assembly.
Outcome: Professional ensured leak-free connections. DIY saved on assembly.
Lesson: Hybrid approach (DIY vanity, pro plumbing) balances cost and quality.
❓ Frequently Asked Questions About Bathroom Sink Installation
How to install a bathroom sink myself?
How to install a bathroom sink yourself: 1) Remove old sink, 2) Install faucet, 3) Mount new sink with silicone sealant, 4) Connect P-trap drain, 5) Connect water supply lines, 6) Test for leaks. Basic tools and 2-4 hours are needed. Drop-in vanity sinks are easiest for DIY.
How much does professional bathroom sink installation cost?
Professional bathroom sink installation costs R1,500-R2,500 for a standard replacement (labour only). New installations (moving pipes) cost R2,500-R5,000+. In Paarl or Stellenbosch, rates may vary. DIY saves the labour cost if you’re confident.
What’s the difference between a drop-in and undermount sink?
Drop-in sinks sit into a cutout in the countertop with the rim visible. Easier to install, DIY-friendly. Undermount sinks attach under the countertop—cleaner look but requires professional installation and stone countertops. For vanity installation, drop-in is the most common choice.
Do I need a plumber to install a bathroom sink?
No—a standard install bathroom sink (replacing an existing sink in the same location) is DIY-friendly with basic tools. However, if you need to move pipes, change the drain location, or find water damage, call a professional plumber.
How long does bathroom sink installation take?
DIY bathroom sink installation takes 2-4 hours for a standard replacement. Professional installation takes 1-2 hours. Complex jobs (new plumbing, wall-mounted sinks) take longer.
What is a P-trap and why do I need one?
A P-trap is the curved pipe under your sink. It holds water that blocks sewer gases from entering your home. Every sink legally requires a P-trap. Never install a sink without one.
Can I use flexible supply lines for a bathroom sink?
Yes—flexible braided stainless steel supply lines are recommended. They’re easy to install, resist corrosion, and absorb vibration. Replace old rigid pipes with flexible lines for easier future maintenance.
How do I find a reliable plumber for sink installation?
To find a reliable plumber for bathroom sink installation: 1) Verify PIRB registration, 2) Ask for sink installation experience, 3) Get detailed quotes, 4) Check reviews. ServiceLink SA connects you with verified plumbers in Gauteng and Western Cape.
✅ Final Thoughts: DIY When You Can, Call When You Must
Bathroom sink installation is one of the most rewarding DIY plumbing projects. With basic tools, a few hours, and this guide, most homeowners can successfully replace a drop-in vanity sink.
But know your limits. If you need to move pipes, find water damage, or encounter unexpected problems, don’t hesitate to call a professional. The R1,500-R2,500 labour cost is worth it for peace of mind and proper compliance.
Key takeaways for South African homeowners:
- Drop-in vanity sinks are DIY-friendly – pedestal and undermount are more complex
- DIY cost: R200-R500 (materials only) – Professional cost: R1,500-R2,500 labour
- Time: 2-4 hours for DIY – 1-2 hours for professional
- Always use a P-trap – prevents sewer gases
- Test thoroughly for leaks – run water for several minutes, check all connections
- Don’t overtighten connections – hand-tight plus 1/4 turn is enough
- Call a pro for pipe relocation or water damage
Your action plan: Assess your sink type. Gather tools. Watch a few online videos. Follow this guide step by step. If you get stuck or find problems, use ServiceLink SA to find a verified plumber near you.
🚰 Installing a New Bathroom Sink?
Get quotes from verified plumbers for sink installation. Same-day service available. Free inspections.
📞 Call us: 073 138 4726 for immediate help finding a plumber near you.
Bathroom renovation guide •
Shower installation cost •
Bathtub guide •
Kitchen sink guide •
Beat Your Quote guarantee
📚 Official resources & standards referenced:
- SANS 10400 – Sink installation standards and plumbing compliance.
- Plumbing Industry Registration Board (PIRB) – Find registered plumbers.
Information provided for general guidance based on industry research and SANS/PIRB standards. For complex bathroom sink installation projects, professional assistance is recommended.
Written by: ServiceLink SA Research Team
Bathroom Plumbing & Fixture Specialists
The ServiceLink SA Research Team comprises bathroom plumbing experts, fixture installation specialists, and DIY professionals with decades of experience helping homeowners with bathroom sink installation and vanity installation projects across South Africa. Our team works directly with PIRB-registered plumbers, fixture manufacturers, and building standards authorities to bring you accurate, actionable information about how to install a bathroom sink safely and correctly. We continuously update this sink fitting guide to reflect current best practices and SANS standards.
For more information about bathroom plumbing and sink installation, explore our related resources:
bathroom renovation guide,
shower installation cost guide,
bathtub installation guide,
bathroom sink installation guide,
and kitchen sink installation guide.
Our what is ServiceLink SA and
how ServiceLink SA works pages explain our verification process.
See our service areas page for sink installation coverage in your region.