Best WiFi Extender Installation South Africa – Complete Guide to Eliminating Dead Zones
📶 Dead zones in your Johannesburg home? WiFi dropping in your Durban bedroom? Here’s how to choose and install the best WiFi extender.
You’re working from home in Fourways, but the video call keeps freezing. You move to the bedroom in your Umhlanga apartment, and Netflix buffers endlessly. The culprit? WiFi dead zones.
For many South African homes, a single router isn’t enough. Walls, floor layouts, and interference create areas where signal simply won’t reach. A WiFi extender (also called a repeater or booster) can solve this – but only if you choose the right one and install it correctly.
This comprehensive guide covers everything about best WiFi extender installation South Africa – how they work, which models perform best, professional installation costs, and whether an extender is even the right solution for your home.
If you’re looking for trusted local specialists, explore our Services Overview or view our WiFi Extensions page to find professional installers near you. For more on how we work, visit How It Works.
📡 REGULATORY NOTE: All WiFi extenders in South Africa must operate within ICASA approved channels and power limits. Professional installers ensure your equipment complies and doesn’t cause interference to neighbouring networks.
Tired of WiFi Dead Zones?
Get free, no-obligation quotes from vetted WiFi specialists in your area. Compare extender installation prices and find the right solution for your home.
Servicing Johannesburg, Pretoria, Cape Town, Durban, and nationwide
📋 Table of Contents – WiFi Extender Guide
🔄 What is a WiFi Extender?
A WiFi extender (also called a WiFi repeater or booster) is a device that captures your existing WiFi signal, amplifies it, and rebroadcasts it to areas your router can’t reach. It effectively extends your network coverage to eliminate dead zones.
Key terms you’ll encounter:
- WiFi repeater: Same as extender – receives and retransmits signal
- WiFi booster: Marketing term, generally means the same thing
- Access Point (AP) mode: Alternative mode where extender connects via Ethernet cable for better performance
- WPS pairing: One-touch setup method using router’s WPS button
- Dual-band vs tri-band: Number of frequency bands the extender uses
Extenders are a cost-effective solution for homes with specific dead zones, but they have limitations. Understanding these helps you decide if an extender is right for your situation.
Learn more about our approach on our About Us page or read why clients choose us on our Benefits page.
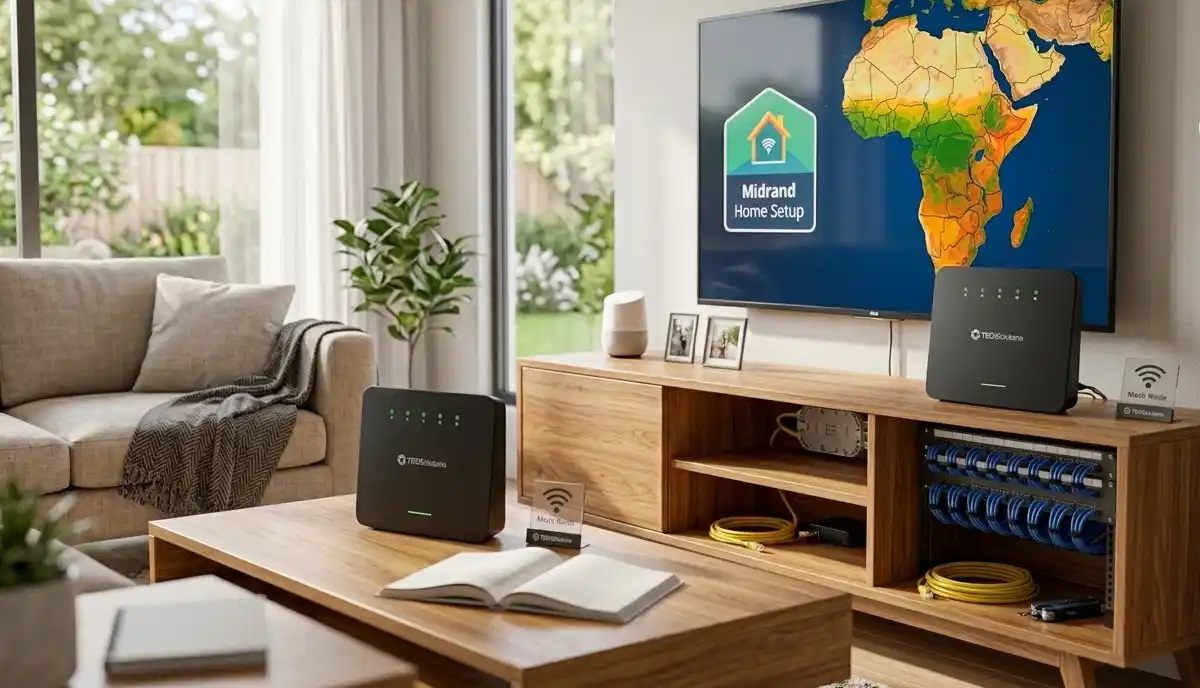
⚖️ WiFi Extender vs Mesh System – Which is Better?
Many homeowners confuse extenders with mesh systems. Here’s the honest comparison:
| Factor | WiFi Extender | Mesh System |
|---|---|---|
| How it works | Receives signal from router, rebroadcasts | Multiple nodes create single intelligent network |
| Network name (SSID) | Often separate (e.g., Home_EXT) – you switch manually | Single SSID – devices roam seamlessly |
| Speed impact | Can cut bandwidth by up to 50% | Minimal speed loss with dedicated backhaul |
| Coverage | Extends to specific areas, may have gaps | Whole-home coverage, no gaps |
| Cost | R400 – R2,000 per extender | R2,500 – R8,000+ for multi-node system |
| Installation | Simple, often DIY | More complex, professional recommended |
| Best for | Small homes, specific dead zones | Large homes, whole-home coverage |
For many homes in Sandton and Fourways, mesh systems are worth the extra investment. See our mesh networks guide for more.
🔧 How WiFi Extenders Work – The Technical Bit
Understanding the basics helps you choose and position your extender correctly.
A WiFi extender works in three steps:
- Receive: It picks up your existing router’s WiFi signal
- Amplify: It boosts the signal strength
- Rebroadcast: It transmits the boosted signal to create a new coverage area
Important limitation: Because the extender communicates with your router wirelessly, it uses part of its bandwidth for that communication. This typically cuts the available speed by up to 50% for devices connected to the extender. A device connected to the extender gets half the speed of a device connected directly to the router.
This is why placement matters – the extender needs a strong signal from the router to provide decent speeds to your devices. If placed too far, it gets weak signal and rebroadcasts weak signal – useless.
📡 Dual-Band vs Tri-Band Extenders – What’s the Difference?
Extenders come in two main types: dual-band and tri-band. The choice affects performance, especially in larger homes.
Dual-Band Extenders
- Operate on two frequencies: 2.4GHz and 5GHz
- One band handles communication with router, the other serves your devices – or both share
- Typically cheaper (R400 – R1,200)
- Suitable for smaller homes, light usage
- Speed loss more noticeable
Tri-Band Extenders
- Add a dedicated 5GHz band specifically for router-extender communication
- This dedicated backhaul reduces speed loss significantly
- More expensive (R1,500 – R3,500)
- Better for larger homes, streaming, gaming
- Maintains higher speeds throughout
For homes in Midrand and Bellville with multiple users and devices, tri-band is worth considering.
✅ When to Use a WiFi Extender
Extenders are the right solution in these scenarios:
- Specific dead zone: One room or area has poor signal, rest of home is fine
- Rental property: You can’t run Ethernet cables or change router location
- Budget constraints: Mesh system is too expensive right now
- Temporary solution: You need coverage quickly while planning better solution
- Single-storey homes: Extenders work better on one level than across floors
- Low bandwidth needs: Browsing, email, light streaming only
❌ When NOT to Use an Extender
In these situations, consider mesh systems, access points, or powerline adapters instead:
- Multiple dead zones: If several areas lack signal, mesh is better
- Gaming or heavy streaming: Speed loss from extenders affects performance
- Large homes (300m²+): Multiple extenders get complicated – mesh simpler
- Thick walls or multiple floors: Extenders struggle with concrete, brick, multi-storey
- Many devices: Extenders can get overloaded with traffic
- Future-proofing: Mesh systems are more scalable
If you’re unsure, a professional site survey can determine the best solution for your specific home.
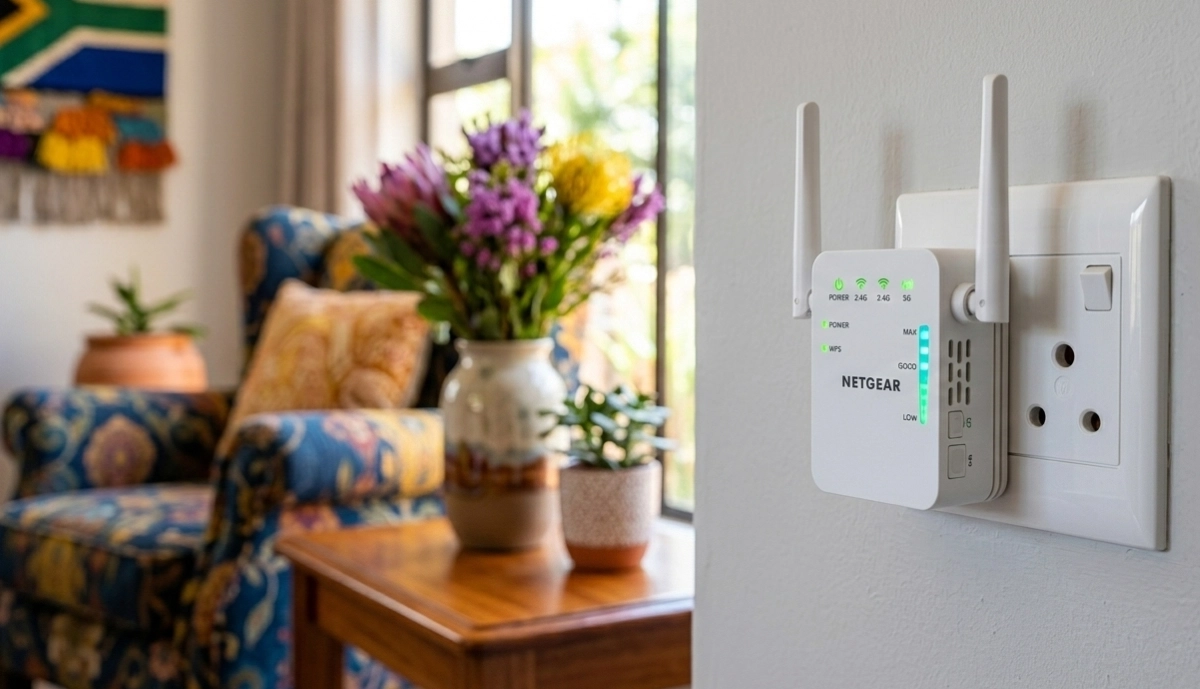
🏆 Best WiFi Extenders for South African Homes
Based on local availability, performance, and value, here are top recommendations:
| Model | Type | Speed | Best For | Price Range |
|---|---|---|---|---|
| TP-Link RE450 | Dual-band AC1750 | 450+1300Mbps | General homes, good value | R800 – R1,200 |
| TP-Link RE605X | Dual-band AX1800 (WiFi 6) | Up to 1.8Gbps | Future-proofing, WiFi 6 routers | R1,500 – R2,200 |
| Netgear EX6120 | Dual-band AC1200 | 300+900Mbps | Budget option, smaller homes | R600 – R900 |
| Netgear EX7700 | Tri-band AC2200 | Up to 2.2Gbps | Large homes, dedicated backhaul | R2,200 – R3,200 |
| TP-Link RE650 | Dual-band AC2600 | 800+1733Mbps | High-performance, 4K streaming | R1,600 – R2,300 |
Always check compatibility with your existing router. TP-Link and Netgear are widely available in South Africa with good local support.
📶 TP-Link Extender Installation & Popular Models
TP-Link is the most common brand in South Africa. Their TP-Link extender installation is straightforward but best done professionally for optimal results.
Popular TP-Link Models
- RE200 (AC750): Entry-level, good for small spaces – R400-R600
- RE450 (AC1750): Best-selling, great balance of price/performance – R800-R1,200
- RE605X (AX1800): WiFi 6, future-proof – R1,500-R2,200
- RE650 (AC2600): High-performance, 4K streaming – R1,600-R2,300
- RE700 (AC1900): SignalBoost technology, good range – R1,200-R1,800
Installation Methods
- WPS pairing: Press WPS button on router, then on extender – 2-minute setup
- TP-Link Tether app: Smartphone app guides you through setup
- Web interface: Manual configuration via browser for advanced settings
Professional installers use the web interface to optimise channel selection, security settings, and placement.
📶 Netgear Extender Setup & Options
Netgear offers premium extenders, including their Orbi series (which are mesh systems) and standalone extenders. Netgear extender setup is similar to TP-Link.
Popular Netgear Models
- EX6120 (AC1200): Budget option, good for small homes – R600-R900
- EX6400 (AC1900): Mid-range, good coverage – R1,400-R2,000
- EX7300 (AC2200): High-performance, 4K streaming – R1,800-R2,500
- EX7700 (AC2200 tri-band): Dedicated backhaul, large homes – R2,200-R3,200
- EX8000 (AC3000 tri-band): Premium, mesh-capable – R3,500-R5,000
Installation Methods
- WPS pairing: Quick one-touch setup
- Netgear Nighthawk app: Smartphone setup and management
- Web interface: Advanced configuration options
Netgear’s higher-end models support FastLane technology, which uses both bands for maximum speed.
🏠 Best WiFi Extender for Large Home South Africa
For larger South African homes – think 300m²+ in Bryanston, Stellenbosch, or Umhlanga – standard extenders may not suffice. Here’s what works:
Top Picks for Large Homes
- TP-Link RE650 (AC2600): Four external antennas, powerful amplification – covers large areas
- Netgear EX7700 (tri-band): Dedicated backhaul maintains speed across distance
- TP-Link RE605X (WiFi 6): Future-proof, better efficiency in crowded homes
- Netgear EX8000 (AC3000): Premium option, can be part of mesh network
Considerations for Large Homes
- Multiple extenders may be needed – each creates its own network segment
- Tri-band models with dedicated backhaul perform much better
- Placement becomes critical – extenders must be within good range of router
- For truly large homes, mesh systems or wired access points are often better investments
Consider a professional site survey to determine the optimal solution for your specific layout.
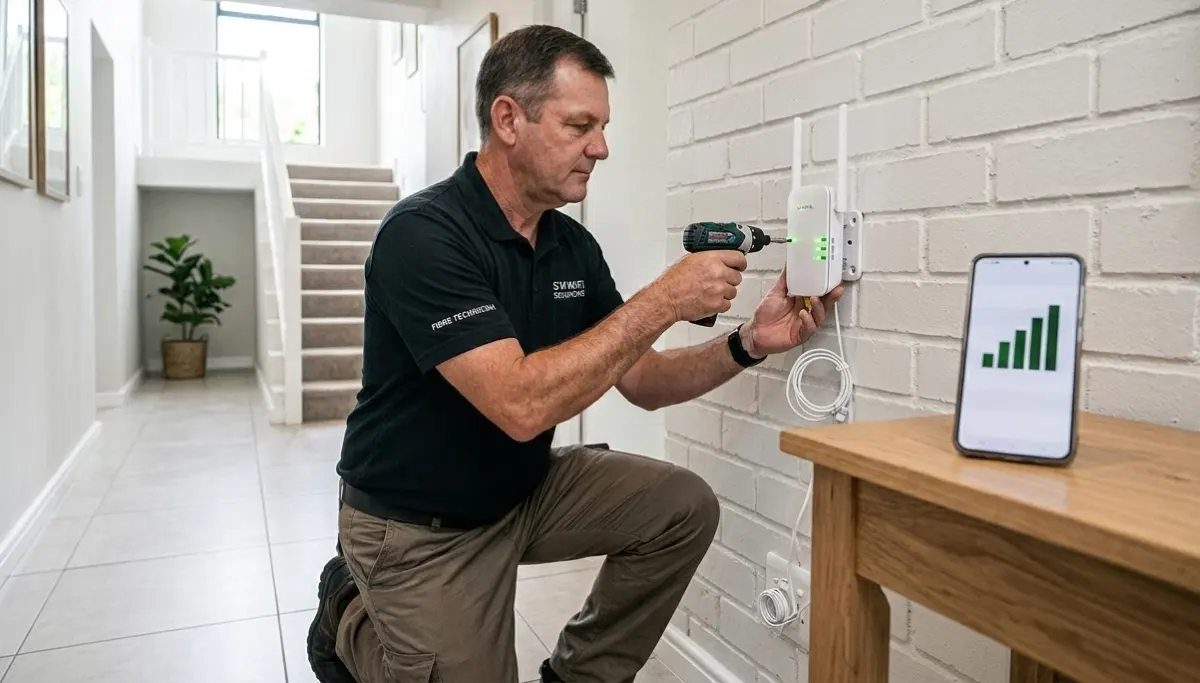
👨🔧 Professional WiFi Extender Installation Process
While extenders are often marketed as DIY, professional installation ensures optimal performance. Here’s what a professional does:
- Site assessment: Identify dead zones, measure signal strength, find interference sources
- Optimal placement: Determine exact location where extender gets good router signal while covering dead zone (the “sweet spot”)
- Equipment selection: Recommend appropriate extender model for your needs
- Hardware setup: Physical placement, power connection
- Configuration: Connect to your network, set optimal channels, configure security
- Testing: Verify coverage in previously dead areas, check speeds
- Education: Show you how to connect devices and manage the extender
Professional installation typically takes 1-2 hours and costs R500 – R1,200 including configuration.
📍 Optimal Extender Placement – The 50% Rule
The single most important factor for extender performance is placement. Follow the “50% rule”:
Place the extender halfway between your router and the dead zone, but closer to the router than the dead zone.
Why? The extender needs a strong signal from the router to rebroadcast a usable signal. If placed too far, it gets weak signal and rebroadcasts weak signal – useless. If placed too close to the router, it doesn’t extend coverage far enough.
Placement Tips
- Avoid: Corners, behind furniture, inside cabinets, near metal objects
- Elevate: Place at waist height or higher, not on floor
- Away from interference: Keep away from microwaves, cordless phones, baby monitors
- Test signal: Many extenders have signal strength LEDs – use them to find optimal spot
- Multiple floors: Place on same floor as dead zone, not different floor
Professionals use signal meters to find the exact optimal location – worth the investment.
💰 TP-Link Extender Installation Cost – What to Expect
Understanding TP-Link extender installation cost helps you budget:
Complete Cost Breakdown
| Extender Type | Hardware Cost | Labour (Professional Install) | Total Installed |
|---|---|---|---|
| Basic extender (AC750-AC1200) | R400 – R900 | R500 – R800 | R900 – R1,700 |
| Mid-range (AC1750-AC1900) | R800 – R1,500 | R600 – R900 | R1,400 – R2,400 |
| High-end (AC2600, WiFi 6) | R1,500 – R2,500 | R700 – R1,100 | R2,200 – R3,600 |
| Tri-band premium | R2,200 – R3,500 | R800 – R1,200 | R3,000 – R4,700 |
Additional Costs
- Site survey (if standalone): R300 – R600 (often free with installation)
- Travel fee: R200 – R500 for outlying areas like Hartbeespoort
- Multiple extenders: Discounts often apply for installing 2+ units
- After-hours surcharge: +25-50% for evenings/weekends
Compare these costs to mesh systems (R3,500-R7,000) to decide which solution offers better value for your situation.
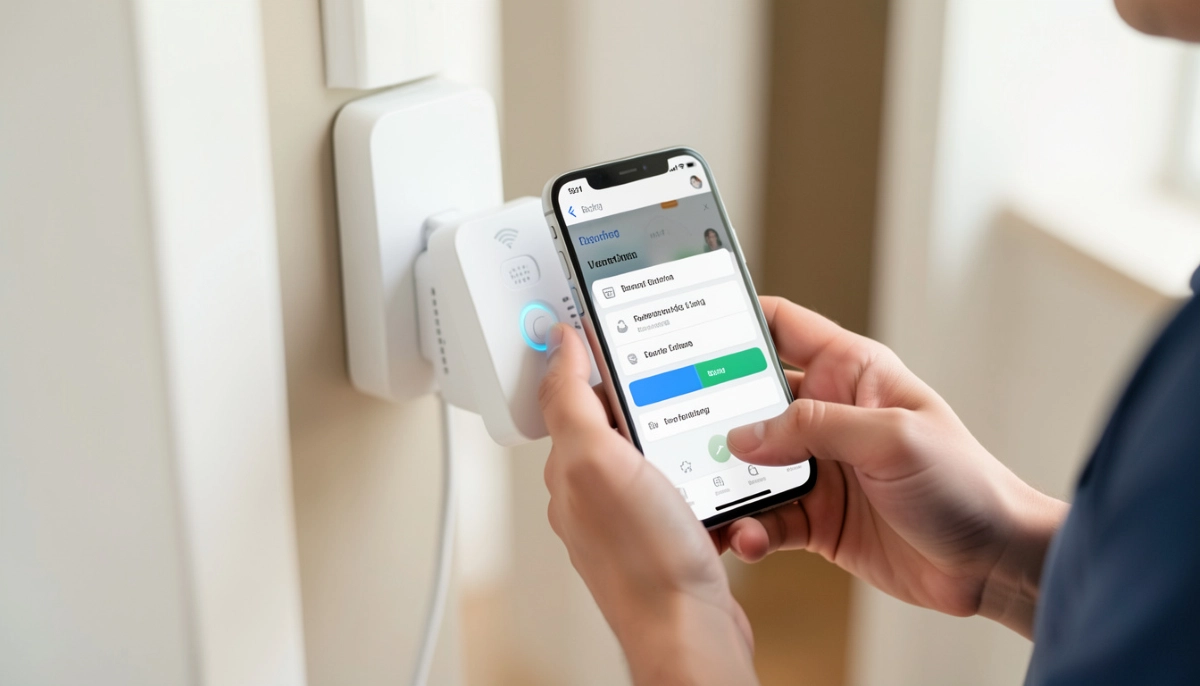
🔘 WPS Pairing vs Manual Configuration – Which is Better?
Most extenders offer two setup methods:
WPS Pairing (One-Touch Setup)
- Press WPS button on router, then on extender – they automatically connect
- Takes 1-2 minutes
- Pros: Extremely quick and simple
- Cons: Limited configuration options, may use suboptimal channels, security concerns (WPS can be vulnerable)
Manual Configuration (Web Interface or App)
- Connect to extender’s temporary network, open browser or app, configure settings
- Takes 10-20 minutes
- Pros: Full control over network name, channels, security, features like access schedules
- Cons: Requires more technical knowledge
Professional installers always use manual configuration to optimise performance and security. For DIY, use the manufacturer’s app for best results.
🎯 Access Point (AP) Mode – When to Use It
Many extenders offer an AP mode (Access Point mode). This is a different way of using the device:
- Normal extender mode: Connects wirelessly to router
- AP mode: Connects to router via Ethernet cable, then broadcasts WiFi
Advantages of AP Mode
- No speed loss – full bandwidth available
- More reliable than wireless extension
- Same network name (SSID) as main router possible
- Ideal for homes with Ethernet cabling already installed
When to Use AP Mode
- You have Ethernet ports in the dead zone area
- During renovations, run cables for future APs
- Maximum performance needed for gaming/streaming
- Commercial spaces with structured cabling
See our ethernet vs wireless guide for more on cabling options.
📊 Signal Strength Optimisation Tips
Beyond placement, these factors affect signal strength optimisation:
- Channel selection: In congested areas, choose less crowded channels. Use WiFi analyser apps to check.
- Band selection: 2.4GHz travels further but slower; 5GHz faster but shorter range. Match to needs.
- Antenna orientation: Adjust antennas perpendicular to each other for best coverage (if adjustable).
- Firmware updates: Ensure extender has latest firmware for performance and security.
- Reduce interference: Move cordless phones, baby monitors away from extender.
- QoS settings: Some extenders allow prioritising certain devices or traffic.
Professional WiFi signal optimisation services can significantly improve performance, especially in dense areas like Sandton apartments.
🔄 Roaming Assist – Seamless Device Handoff
One limitation of basic extenders is that your device may stick to a weak signal rather than switching to the stronger extender. Roaming assist (or fast roaming) solves this.
Features to look for:
- Band steering: Guides devices to best available band (2.4GHz vs 5GHz)
- Smart roaming: Encourages devices to switch between router and extender seamlessly
- Same SSID: Using the same network name on both router and extender (manual configuration required)
- Signal threshold settings: Some extenders let you set signal levels that trigger roaming
Higher-end extenders from TP-Link (RE series with Smart Roaming) and Netgear (with FastLane) offer better roaming. Mesh systems are superior for seamless roaming across multiple nodes.
📍 WiFi Extender Installation by City
📶 Johannesburg & Surrounds
In Johannesburg, Sandton, Fourways, and Midrand, high-density housing means significant WiFi interference. Professional installers use spectrum analysers to find clear channels.
- Common issues: Neighbour interference, thick walls in older homes
- Recommended: Tri-band extenders with dedicated backhaul
📶 Pretoria & Centurion
In Pretoria, large stands and older homes with thick walls create coverage challenges.
- Common issues: Distance from router to far rooms
- Recommended: High-power extenders with external antennas
📶 Cape Town & Bellville
In Cape Town and Bellville, multi-storey homes and heritage buildings with thick walls are common.
- Common issues: Signal penetration through concrete, multiple floors
- Recommended: Mesh systems often better than extenders for multi-storey
📶 Durban & Umhlanga
In Durban and Umhlanga, humidity and coastal conditions don’t directly affect WiFi but building materials do.
- Common issues: Open-plan layouts need careful placement
- Recommended: Dual-band extenders for most, tri-band for larger homes
❌ 8 Common WiFi Extender Installation Mistakes
Even with good intentions, DIY installers often make these mistakes:
- Mistake #1: Placing extender in the dead zone. The extender needs good signal from router – place it halfway, not in the dead zone itself.
- Mistake #2: Using different SSID names. If your extender creates “Home_EXT”, you have to manually switch networks as you move. Use same SSID for seamless transition (requires manual config).
- Mistake #3: Ignoring channel congestion. In dense areas, default channels may be crowded. Professional channel selection improves performance.
- Mistake #4: Not updating firmware. Outdated firmware causes performance issues and security vulnerabilities.
- Mistake #5: Using WPS only. Quick but often uses suboptimal settings. Manual configuration yields better results.
- Mistake #6: Buying the cheapest extender. Low-end models have weak processors, poor range, and may not handle multiple devices.
- Mistake #7: Expecting extender to solve all problems. If your router is old or weak, extenders won’t fix it. Consider upgrading router first.
- Mistake #8: Not testing placement. Use the extender’s signal LEDs to find optimal spot – don’t just guess.
For more guidance, see our contractor selection guide.
Need Expert WiFi Extender Installation?
Don’t guess – get it right first time. Professional installation ensures optimal placement, configuration, and performance for your specific home.
Serving Johannesburg, Pretoria, Cape Town, Durban, and nationwide
❓ Frequently Asked Questions
What is the best WiFi extender for South African homes?
The best WiFi extender for large home South Africa is the TP-Link RE650 (AC2600) for its powerful amplification and four external antennas. For most medium homes, the TP-Link RE450 (AC1750) offers the best value. For WiFi 6 routers, the TP-Link RE605X is future-proof. Netgear’s EX7700 tri-band is excellent for larger homes with many devices. Choose based on your home size, budget, and performance needs.
How much does WiFi extender installation cost?
TP-Link extender installation cost ranges from R900-R1,700 for basic models, R1,400-R2,400 for mid-range, and R2,200-R3,600 for high-end extenders including hardware and labour. Professional installation ensures optimal placement and configuration. DIY saves labour cost (R500-R1,200) but risks poor performance if placement is wrong. For best results, professional installation is recommended.
Should I get a WiFi extender or mesh system?
WiFi extender vs mesh system – choose an extender for specific dead zones in smaller homes (under 200m²) on a budget. Choose mesh for whole-home coverage, large homes (250m²+), multi-storey properties, or if you need seamless roaming without speed loss. Mesh costs more (R3,500-R8,000) but delivers superior performance. See our mesh guide for detailed comparison.
Where should I place my WiFi extender?
Place your extender halfway between your router and the dead zone, but closer to the router. It needs strong signal from the router to rebroadcast effectively. Use the extender’s signal strength LEDs to find the optimal spot – aim for at least 60-70% signal from router. Avoid corners, behind furniture, near metal objects, or interference sources like microwaves.
Do WiFi extenders reduce speed?
Yes, WiFi extenders typically cut speed by up to 50% because they use the same bandwidth to communicate with the router and serve your devices. Tri-band extenders with dedicated backhaul minimise this loss. For maximum speed, use AP mode with Ethernet connection, or consider a mesh system. If speed is critical (gaming, 4K streaming), wired solutions are better.
Can I use the same WiFi name on my extender?
Yes, you can use the same SSID (network name) on your extender, but it requires manual configuration – WPS setup typically creates a separate name. Using the same name allows devices to switch between router and extender automatically, though switching may not be seamless. Higher-end extenders with roaming assist improve this transition. A professional installer can configure this for you.
What’s the difference between dual-band and tri-band extenders?
Dual-band vs tri-band – dual-band uses two frequencies (2.4GHz and 5GHz), sharing them for router communication and device connections. Tri-band adds a dedicated 5GHz band specifically for router-extender communication, reducing speed loss. Tri-band is better for larger homes, multiple users, and high-bandwidth activities, but costs more. For most homes, a good dual-band extender suffices.
How do I set up a TP-Link extender?
TP-Link extender installation can be done via WPS (press WPS on router, then on extender) for quick setup, or via the TP-Link Tether app for more control. For optimal performance, use the app or web interface to configure manually – choose channels, set same SSID if desired, and update firmware. Professional installation ensures these steps are done correctly for best results.
✅ Final Thoughts – Your WiFi Extender Action Plan
A well-chosen and properly installed WiFi extender can eliminate dead zones and restore your internet experience. But it’s not always the right solution.
Key takeaways:
- Extenders suit specific dead zones – not whole-home coverage
- Placement is everything – halfway between router and dead zone
- Speed loss is normal – up to 50% with basic models
- Tri-band helps – for larger homes, invest in dedicated backhaul
- Professional installation pays off – optimal placement and configuration
- Consider mesh for whole-home – if multiple dead zones or large home
📶 The Bottom Line:
R900 – R3,600
is what most South Africans pay for a professionally installed WiFi extender – a cost-effective solution for specific dead zones.
Your 5-Step Action Plan
- Identify your dead zones – use WiFi analyser apps to map coverage
- Decide if extender is right – consider mesh for whole-home issues
- Choose the right model – based on home size, speed needs, budget
- Get professional installation – ensure optimal placement and configuration
- Test thoroughly – verify dead zones are covered, speeds acceptable
Ready to Eliminate WiFi Dead Zones?
Connect with trusted, vetted WiFi specialists in your area. Compare quotes, read reviews, and choose the right expert for your home.
📞 Call us: 073 138 4726 for personalised assistance
Free site surveys •
Beat-your-quote guarantee •
Our guarantees
📚 Official resources & standards:
- TP-Link South Africa – Extender best practices and product specifications
- Netgear South Africa – Orbi/Extender installation standards and guides
- ICASA – Interference regulations and spectrum compliance
Information accurate as of publication. Prices are indicative and may vary by location and installer. This guide is for informational purposes.
Written by: Innocent T Hanyani
21+ years construction and digital industry experience, ServiceLink SA
Innocent has advised thousands of homeowners on WiFi coverage solutions, working closely with certified network installers and following ICASA regulations. His expertise ensures this guide reflects current best practices for extender selection and installation in South African homes.