
Planning to Tile an A-Frame Home?
Get free quotes from verified tiling specialists who have experience with angled wall tiles and sloped surfaces in A-frame constructions.
Get Free A-Frame Tiling Quotes
Servicing Western Cape, Cape Town, Camps Bay, and across South Africa
Tiling an A-Framed House: Challenges & Solutions for Angled Walls SA
🏔️ From dramatic slopes to angled ceilings – the complete guide to tiling A-frame homes
There’s something magical about an A-frame house. The soaring ceilings, the dramatic angled walls, the way light floods through massive windows. But when it comes time to tile – especially in bathrooms, kitchens, or around fireplaces – those beautiful angles become serious challenges.
I’ve tiled several A-frame homes across the Western Cape, from Cape Town to Camps Bay. And I can tell you: tiling an A-frame is NOT the same as tiling a standard house. Sloped surfaces create cutting challenges, gravity works against you, and waterproofing becomes more complex. But with the right techniques, the results are stunning.
In this complete guide to tiling a framed house challenges solutions, I’ll answer how to tile an A framed house with angled walls step by step. You’ll learn about substrate preparation on sloped walls, tile selection for angled surfaces, cutting techniques for odd angles, adhesive considerations for vertical installations, and waterproofing on pitched surfaces. By the end, you’ll know exactly how to tackle your A frame tiling project.
For more installation guidance, check out our guides on tile installation tools, tile adhesives explained, tile spacers and leveling systems, and tile lippage guide.
📋 Table of Contents – A-Frame Tiling Guide
🏔️ Understanding A-Frame Tiling Challenges
Before diving into how to tile an A framed house with angled walls, understand the unique challenges:
Key Challenges of A-Frame Tiling:
- Angled walls: Tiles must be cut at precise angles where walls meet sloping ceilings
- Gravity: Tiles on angled walls want to slide down – requires stronger adhesive and support
- Cutting complexity: Every cut at the ceiling line is different – no straight lines
- Layout planning: Traditional grid layouts look wrong on angled walls – needs careful design
- Waterproofing: Angled surfaces in bathrooms need special attention to prevent leaks
- Expansion joints: A-frame structures move differently than standard homes
- Access and safety: Working on ladders or scaffolding on angled surfaces is hazardous
Common A-Frame Tiling Areas:
- Bathroom walls (often extend to angled ceiling)
- Kitchen backsplashes on angled walls
- Fireplace surrounds (often central feature)
- Entryway floors (usually standard, but walls angle)
- Shower enclosures (complex waterproofing)
According to SANS 10400 angled surface standards and SABS adhesive standards, proper techniques are essential for safety and durability.
🏗️ Substrate Preparation for Angled Walls
Proper preparation is critical for sloped surfaces:
Wall Substrate Requirements:
- Must be perfectly flat – angled walls amplify any imperfections
- Must be structurally sound – no movement or flexing
- Use cement backer board in wet areas (not drywall)
- For wooden substrates, use primer and consider uncoupling membrane
- Check for plumb (vertical) – angled walls may not be perfectly vertical
Ceiling/Sloped Wall Junction:
- The transition between wall and angled ceiling must be smooth
- Use corner bead or trim for clean edge
- Consider using a transition strip where tiling ends
Floor Substrate for A-Frame:
- Standard floor preparation applies – ensure proper slope if in wet areas
- Use uncoupling membrane to prevent cracks from structural movement
For more on preparation, read our building construction guide.
🧱 Best Tiles for Angled Walls and Sloped Surfaces
Choosing the right angled wall tiles makes A-frame tiling easier:
| Tile Type | Suitability for Angled Walls | Pros | Cons | Best For |
|---|---|---|---|---|
| Small format (100x100mm) | Excellent | Easy to cut, conforms to angles, less waste | More grout lines, slower installation | Complex angles, curved walls, bathrooms |
| Subway tiles (75x150mm) | Very good | Rectangular shape works well, classic look | More cuts than larger tiles | Kitchen backsplashes, bathroom walls |
| Medium format (300x300mm) | Good | Fewer grout lines, faster installation | More challenging to cut at angles | Standard walls, fireplace surrounds |
| Large format (600x600mm+) | Difficult | Very few grout lines, modern look | Very hard to cut at angles, heavy, may not conform to slight curves | Straight walls only, not for complex angles |
| Mosaic sheets | Excellent | Flexible, conforms to curves, easy to cut | Many grout lines, more expensive | Shower floors, curved walls, accents |
Recommendation for A-Frame: Small to medium format tiles (100x100mm to 300x300mm) are best for angled walls. They’re easier to cut at precise angles and create less waste. Avoid large format tiles (600x600mm+) on angled walls – they’re very difficult to cut and install properly.
Need an A-Frame Tiling Specialist?
Get free quotes from verified tiling specialists who have experience with angled wall tiles and A frame tiling projects.
Get Free A-Frame Tiling Quotes
Free inspections available. Workmanship guarantees.
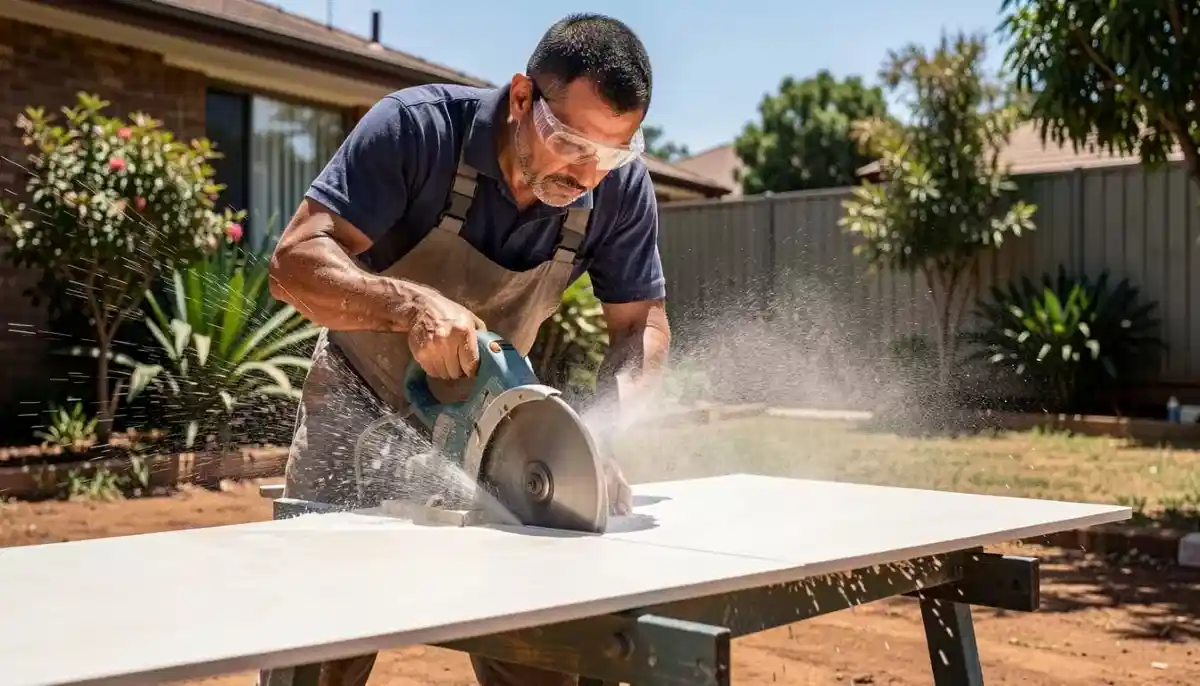
✂️ Cutting Techniques for Angled Ceilings and Walls
Cutting tiles for A-frame angles requires precision:
Tools Needed:
- Wet saw with diamond blade (essential for accurate angle cuts)
- Angle finder or protractor to measure ceiling angles
- Cardboard for templates (highly recommended)
- Tile scribe or marker
- Measuring tape and level
Step-by-Step Cutting Process:
Step 1: Measure the Angle
Use an angle finder to measure the exact angle where the wall meets the sloping ceiling. A-frame angles vary – typically 45-70 degrees depending on the roof pitch.
Step 2: Create a Template
For complex angles, cut a template from cardboard first. Transfer the angle to the tile. This saves expensive tiles from wrong cuts.
Step 3: Mark the Tile
Transfer the angle to the tile using a marker. For wet saw cutting, mark clearly on the tile surface.
Step 4: Cut with Wet Saw
Use a wet saw for clean, precise angle cuts. Manual cutters won’t work for angled cuts. Go slowly – rushing causes chipping.
Step 5: Test Fit
Dry-fit the cut tile before applying adhesive. Adjust as needed. Keep a stack of spares – mistakes happen.
Pro Tip: Cut all your angle tiles at once after measuring – consistent angles look better than varying cuts.
For more on cutting, read our tile installation tools guide.
🩹 Adhesive Application on Vertical and Sloped Surfaces
Adhesive selection and application are critical for sloped surfaces:
Adhesive Requirements for Angled Walls:
- Use non-sag (non-slump) thin-set mortar – prevents tiles from sliding down
- Polymer-modified adhesive provides better bond on vertical surfaces
- For large tiles on angled walls, use LFT (large format tile) mortar
- Read our tile adhesives guide for specific recommendations
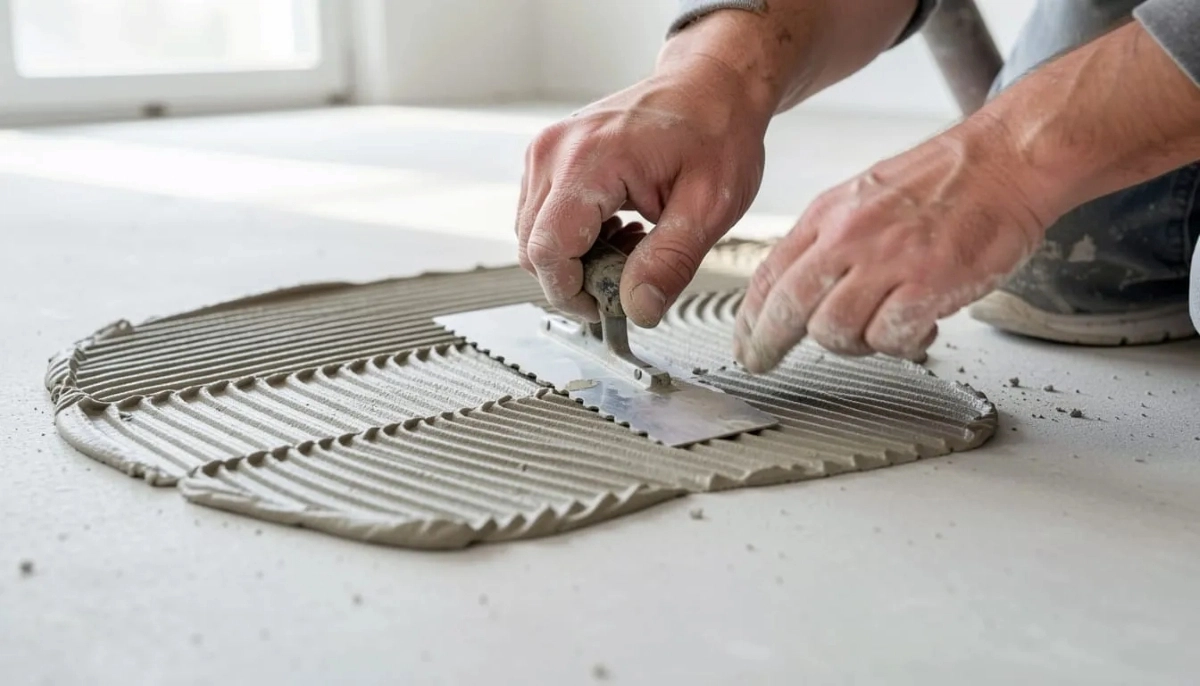
Application Technique:
- Apply adhesive with notched trowel (6-8mm for standard tiles)
- Work in small sections – adhesive skins over faster on vertical surfaces
- Back-butter each tile for full coverage – essential on angled walls
- Use a beating block to seat tiles firmly
- Support tiles with temporary braces if needed (for very steep angles)
Working Time Considerations:
- Non-sag mortars have shorter working times – mix smaller batches
- Hot weather reduces working time further
- Only spread what you can tile in 15-20 minutes
📐 Layout Planning for A-Frame Interiors
Smart layout planning prevents awkward cuts and wasted tiles:
Layout Strategies for Angled Walls:
- Start at the peak/angle: Begin layout at the highest point (where wall meets ceiling) and work downward. This ensures the most visible area has full tiles.
- Centre the layout: For feature walls, centre the layout so cuts at both sides are equal.
- Avoid sliver cuts: Adjust starting point to avoid very thin cuts at the angle – they’re difficult to cut and look bad.
- Use a laser level: Essential for marking straight lines on angled walls.
Pattern Recommendations:
- Vertical stacking (tiles stacked straight) works well – complements the vertical lines of A-frame
- Horizontal brick bond can make angled walls feel less dramatic
- Herringbone on angled walls is very challenging – not recommended
- Diagonal layout on angled walls creates even more complex cuts – avoid unless you’re very experienced
Measuring Tips:
- Measure each row individually – walls may not be perfectly straight
- Check level frequently – angled walls can drift
- Dry-lay a test row before applying adhesive
For more on layout, read our tile spacers guide.
💧 Waterproofing on Angled Walls
Waterproofing A-frame bathrooms requires special attention:
Challenges of Waterproofing Angled Walls:
- Liquid membranes can sag or run on steep angles
- Sheet membranes may not conform to angles as easily
- Corners where walls meet at angles need extra reinforcement
Recommended Waterproofing Methods:
- Liquid membrane (multiple thin coats): Apply thin coats to prevent sagging. Build up to required thickness with 2-3 coats.
- Sheet membrane with corner pieces: Use pre-formed corner pieces for angled junctions.
Critical Areas for Waterproofing:
- Floor-wall junctions (especially on angled walls)
- Wall-ceiling junctions in wet areas (if tiling to ceiling)
- Around window openings (A-frames often have large windows)
- Shower niches and shelves
Testing: Flood test shower bases before tiling – even on angled floors.
For more on waterproofing, read our building construction guide and roofing services guide.
🚫 Common Mistakes to Avoid in A-Frame Tiling
⚠️ Warning: These Mistakes Ruin A-Frame Tile Installations
Avoid these errors when planning how to tile an A framed house with angled walls.
- Using large format tiles on angled walls: 600x600mm+ tiles are very difficult to cut at angles and heavy – they can slide before adhesive sets. Stick to small or medium format.
- Not using non-sag adhesive: Standard thin-set allows tiles to slide down angled walls. Always use non-sag (non-slump) mortar.
- No back-buttering: Without full coverage, tiles on angled walls can develop hollow spots. Always back-butter.
- Starting layout at the bottom: Starting at the floor means awkward cuts at the peak. Start at the peak/angle and work down.
- Skipping templates for angle cuts: Guessing angles wastes tiles. Use cardboard templates for complex cuts.
- Not accounting for structural movement: A-frames can move differently than standard homes. Use expansion joints and uncoupling membranes.
- Poor waterproofing at angles: Liquid membranes can sag. Apply thin coats, use corner reinforcement.
- DIY without experience: A-frame tiling is NOT beginner-friendly. If you haven’t tiled before, hire a professional with angled wall experience.
⭐ Pro Tips for A-Frame Tiling Success
These insider techniques will improve your A frame tiling results:
- Use a laser level for all layout lines: Angled walls make traditional bubble levels less accurate. A laser level projects lines across the entire wall.
- Support tiles with temporary braces: For very steep angles, use painter’s tape or temporary wooden braces to hold tiles while adhesive sets.
- Mix smaller batches of adhesive: Non-sag mortars set faster. Mix only what you can use in 15-20 minutes.
- Number your cut tiles: When cutting multiple angled tiles, number them and lay them out in order. This prevents confusion during installation.
- Use tile wedges for fine adjustments: Angled walls may have slight variations – tile wedges allow micro-adjustments.
- Consider a decorative transition: Where tiled wall meets angled ceiling, a metal trim or wood batten creates a clean finish.
- Hire a specialist: Not all tilers have A-frame experience. Ask for portfolio examples of angled wall work before hiring.
For more pro tips, read our tile installation tools guide and adhesives guide.
💰 Cost Considerations for A-Frame Tiling
Here’s what to expect for tiling a framed house challenges solutions budgeting:
| Cost Factor | Standard Home | A-Frame Home | Premium |
|---|---|---|---|
| Tiling labour (per m²) | R150 – R250 | R250 – R450 | +50-80% due to complexity |
| Cutting time (angled cuts) | Standard | 2-3x longer | Each tile at ceiling needs custom angle cut |
| Waste percentage | 10% | 15-25% | More cuts = more waste |
| Waterproofing complexity | Standard | Higher | Angled junctions need extra attention |
| Scaffolding/ladder work | Minimal | Significant | High ceilings require safe access |
| Typical bathroom (15m² walls) | R3,000 – R5,000 | R5,000 – R9,000 | Includes angled wall premium |
Why A-Frame Costs More:
- Every tile at the ceiling needs a custom angle cut (no straight lines)
- Installation takes 50-100% longer than standard walls
- Higher waste (15-25% vs standard 10%)
- Specialised adhesive (non-sag mortar) costs more
- Requires experienced tiler with angled wall expertise
- Safety equipment for working at heights
❓ Frequently Asked Questions About Tiling A-Frame Houses
Can you tile angled walls in an A-frame house?
Yes – angled wall tiles are absolutely possible in A-frame homes. The key is using the right techniques: small to medium format tiles (not large format), non-sag adhesive, back-buttering each tile, and precise angle cutting with a wet saw. Start layout at the peak/angle and work downward. Hire an experienced tiler who has done angled wall work before.
What tiles work best for A-frame angled walls?
Small to medium format tiles work best – 100x100mm, 150x150mm, or subway tiles (75x150mm). These are easier to cut at precise angles and create less waste. Avoid large format tiles (600x600mm+) on angled walls – they’re very difficult to cut and heavy, making them prone to sliding before adhesive sets. Mosaic sheets also work well for curved or complex angles.
Is tiling an A-frame more expensive than a standard home?
Yes – tiling a framed house challenges solutions typically costs 50-80% more than standard tiling. Labour is higher (R250-450/m² vs R150-250/m²), cutting time is 2-3x longer, waste is higher (15-25% vs 10%), and you need an experienced tiler. A standard bathroom might cost R3,000-5,000 in labour; an A-frame bathroom with angled walls costs R5,000-9,000.
Can I tile an A-frame bathroom myself?
Only if you have significant tiling experience AND have worked with angled walls before. How to tile an A framed house with angled walls requires precision angle cutting, non-sag adhesive application, and layout planning for slopes. Beginners should hire a professional – mistakes are expensive and visible on angled walls. If you’re determined to DIY, practice on a small angled board first.
How do you cut tiles for angled A-frame ceilings?
Use an angle finder to measure the exact wall-ceiling angle. Create a cardboard template first, then transfer to the tile. Cut with a wet saw – manual cutters won’t work for angled cuts. Measure each row individually (walls may not be perfectly straight). For complex angles, cut all tiles at once after measuring to ensure consistent angles. Read our tile installation tools guide for more.
What adhesive should I use for angled walls?
Use non-sag (non-slump) polymer-modified thin-set mortar. Standard adhesive allows tiles to slide down angled walls before setting. Non-sag mortar has higher shear strength and stays in place. For large tiles, use LFT (large format tile) mortar. Always back-butter tiles on angled walls for full coverage. Read our adhesives guide for specific product recommendations.
Do A-frame houses need special waterproofing for bathrooms?
Yes – waterproofing angled walls requires extra attention. Liquid membranes can sag on steep angles – apply multiple thin coats rather than one thick coat. Use pre-formed corner pieces for angled junctions. Pay special attention to wall-ceiling junctions if tiling to the peak. Read our building construction guide for detailed instructions on angled surfaces.
How do I find a tiler experienced with A-frame homes?
Ask potential tilers for portfolio examples of angled wall work. Look for photos showing cuts at ceiling angles – clean, consistent cuts indicate experience. Ask specifically: “Have you tiled A-frame or cathedral ceilings before?” Use ServiceLink SA to find verified tiling specialists in your area – we can help match you with tilers who have A frame tiling experience. Read our contractor guide for more tips.
✅ Final Thoughts: Embrace the Challenge, Enjoy the Results
Tiling a framed house challenges solutions are real – but the results are spectacular. An A-frame home with beautifully tiled angled walls is a showpiece. The dramatic lines, the soaring ceilings, the way tiles follow the architecture – it’s a look that standard homes can’t achieve.
The key to success is preparation: choose small to medium format tiles, use non-sag adhesive, back-butter every tile, and plan your layout starting at the peak. Cut tiles with precision using templates and a wet saw. And most importantly, hire an experienced tiler who has worked with angled walls before.
Key takeaways for A-frame tiling:
- Small to medium format tiles (100-300mm) work best – avoid large format on angled walls
- Use non-sag (non-slump) polymer-modified adhesive – prevents tile slippage
- Back-butter every tile for full coverage on angled surfaces
- Start layout at the peak/angle – work downward for best appearance
- Create cardboard templates for complex angle cuts – saves wasted tiles
- Expect higher costs (50-80% premium) due to complexity and waste
- Hire a specialist with A-frame or angled wall experience
- Use ServiceLink SA to find verified tilers for your A-frame project
Your next step: Ready to tile your A-frame home? Get free quotes from verified tiling specialists who have experience with angled wall tiles and sloped surfaces in A-frame constructions.
Ready to Tile Your A-Frame Home?
Get free quotes from verified tiling specialists who have experience with A frame tiling and angled wall tiles.
📞 Call us: 073 138 4726 to discuss your A-frame tiling project.
Are You a Tiling Professional with A-Frame Experience?
Join ServiceLink SA’s network of verified tiling contractors. Get qualified leads for specialised A-frame and angled wall projects.
📚 Official resources & standards referenced:
- SANS 10400 – South African National Standard for angled surface standards and building regulations.
- SABS – South African Bureau of Standards for adhesive standards and material specifications.
Information provided for general guidance. A-frame tiling requires specialist skills – always consult qualified professionals.
Written by: ServiceLink SA Research Team
Specialist Tiling & Architectural Finishing Experts
The ServiceLink SA Research Team has extensive experience with complex tiling projects, including A-frame homes, cathedral ceilings, and other angled wall applications. Our team has worked with architects, builders, and specialist tilers across the Western Cape to develop best practices for sloped surfaces. This guide distills years of specialised knowledge into practical advice for homeowners and professionals tackling these beautiful but challenging spaces.
For more information about complex tiling projects, explore our related resources: tile installation tools guide, tile adhesives explained, tile spacers and leveling systems, and tile lippage guide. Learn about our process on what is ServiceLink SA and how we verify contractors. Find tilers in your area: Western Cape, Cape Town, and Camps Bay. For related services, see our building construction and roofing services guides.