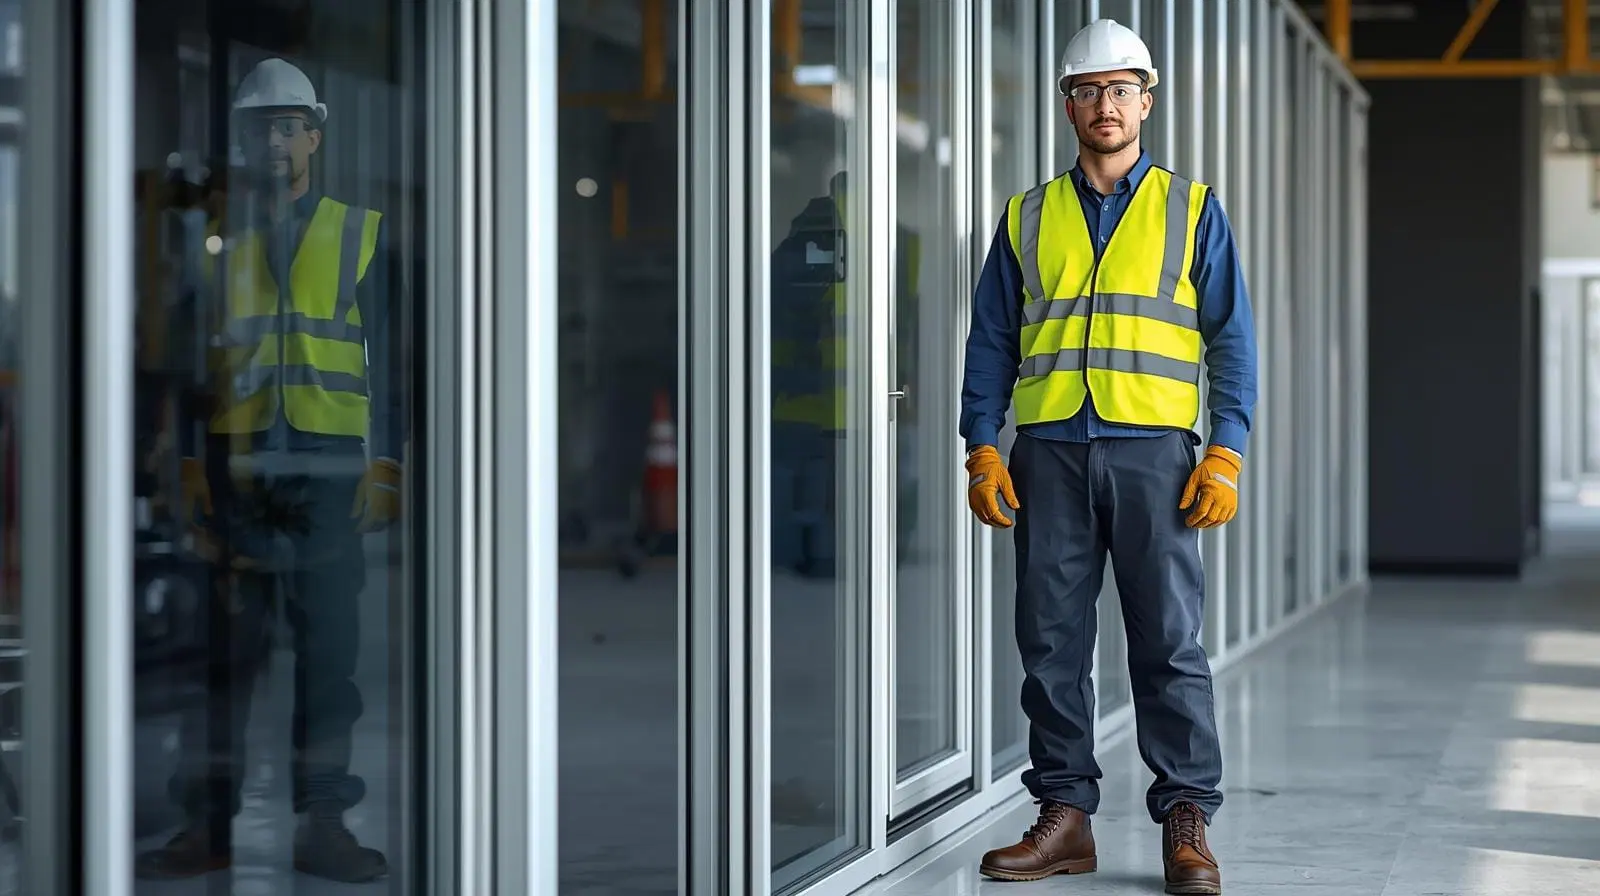
Planning a Bifold Door Installation?
Get free quotes from verified aluminium fabricators. Professional bifold door installation guide experts are ready to help.
Servicing Gauteng, Johannesburg, Pretoria, Sandton, and Centurion
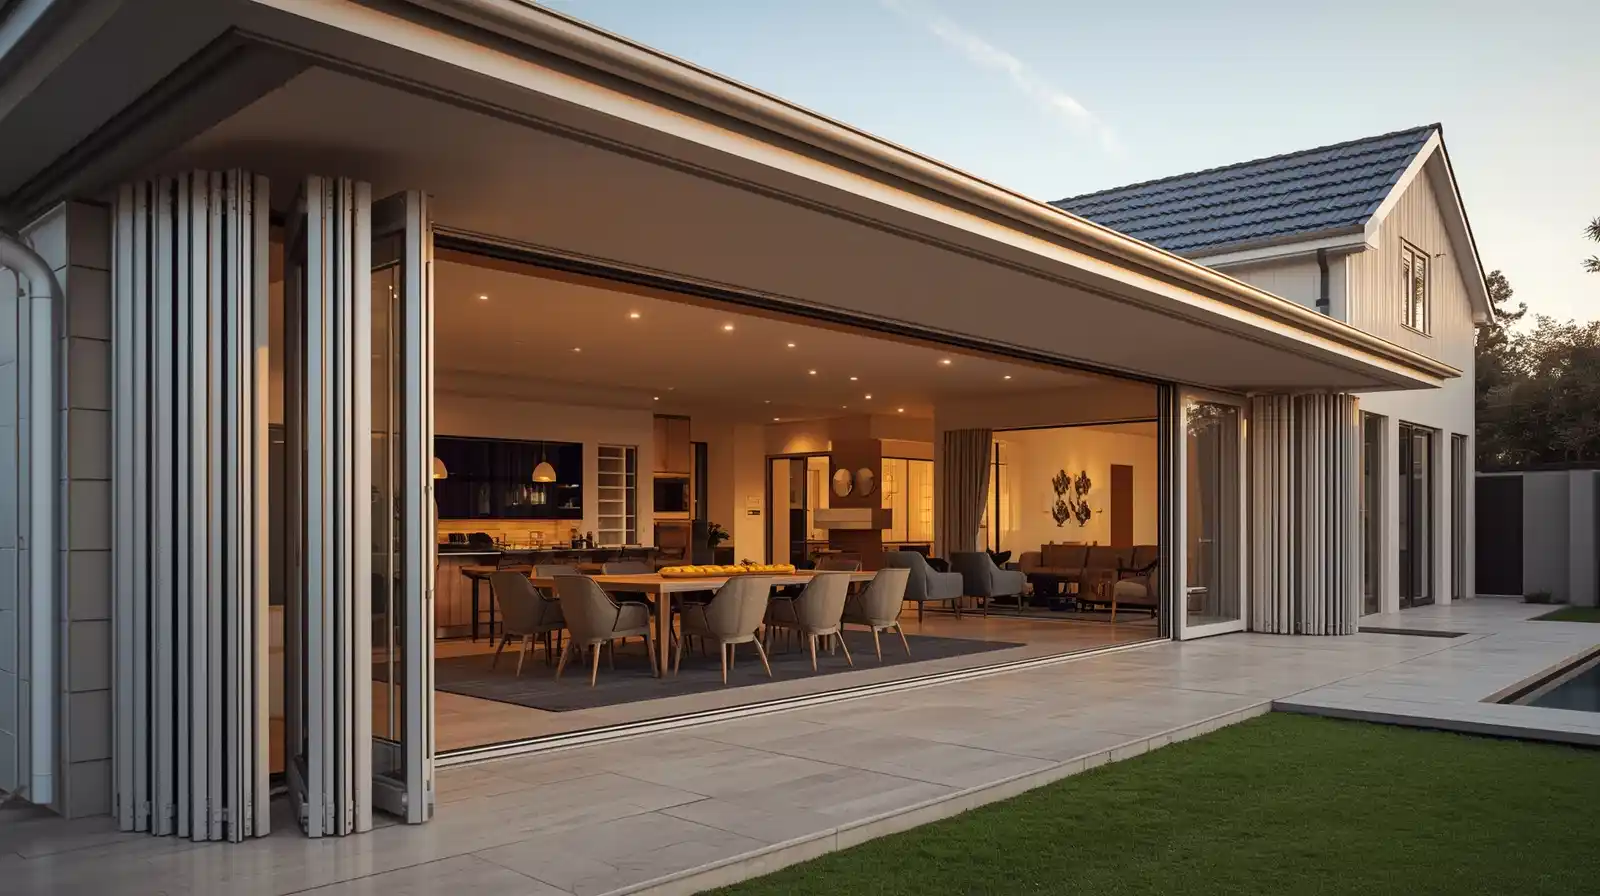
Aluminium Bifold Doors Installation Guide: Step-by-Step for SA Homeowners
🪟 The complete professional guide to installing folding doors – from preparation to finishing
Let me be direct with you. Aluminium bifold doors installation is not a DIY project. I’ve seen too many homeowners attempt it and end up with doors that stick, jam, leak, or worse – fail completely. Bifold doors are complex. Multiple panels, intricate hinge systems, critical alignment, and heavy glass require professional expertise.
However, understanding the installation process helps you manage expectations, communicate with your installer, and ensure the job is done right. In this comprehensive bifold door installation guide, I’ll walk you through every step of professional folding door install, from site survey to final adjustments. You’ll learn what to expect, where problems occur, and how to ensure a successful installation.
For those determined to DIY, I’ve included detailed instructions – but my honest advice is to hire a professional. The cost of mistakes far exceeds installation fees.
For more bifold information, read our cost guide, explore custom joinery options, or compare sliding vs stacking doors. Ready to master bi-fold fitting? Let’s dive in.
📋 Table of Contents – Bifold Installation Guide
📋 Pre-Installation: Site Survey & Preparation
Before any aluminium bifold doors installation, proper preparation is essential.
Site survey checklist – critical measurements:
- Opening width: Measure at top, middle, and bottom – openings are rarely square
- Opening height: Measure at left, centre, and right – note any variations
- Floor level: Check for slopes or unevenness – bifold tracks require a perfectly level floor
- Wall plumb: Check if walls are vertical – out-of-plumb walls cause alignment issues
- Header level: The top of the opening must be level across the entire width
- Structural integrity: Ensure lintels can support the weight of the bifold system
Critical preparation steps:
- Clear the installation area – remove furniture, curtains, and window treatments
- Protect flooring with dust sheets or ramboard
- If replacing existing doors, prepare for removal and disposal
- Ensure power is available for tools (generator during load-shedding if needed)
- Check weather forecast – installation requires dry conditions for sealing
Opening preparation:
- Remove old doors and frames carefully
- Repair any damaged masonry, plaster, or timber
- Install structural lintel if required (for wide openings)
- Level the floor if necessary – self-levelling compound may be required
- Ensure the opening is clean and dry
According to SANS 10400 bifold door standards and SABS hardware quality standards, proper installation is critical for safety and performance.
🛠️ Tools & Materials Required for Bifold Installation
Professional folding door install requires specialised tools. Here’s what’s needed.
Essential tools:
- Laser level or long spirit level (minimum 1.8m)
- Impact driver and drill with masonry bits
- Rubber mallet
- Allen key set (for hinge adjustments)
- Measuring tape and square
- Shims (plastic or aluminium)
- Foam sealant gun
- Silicone gun
- Safety glasses and gloves
- Ladder or scaffolding (for tall openings)
- Glass suction cups (for heavy panels)
Materials required:
- Bifold door system (frame, panels, hardware)
- Fixing screws (appropriate for wall type – masonry, timber, steel)
- Expanding foam sealant
- External grade silicone sealant
- Weather seals (if not pre-installed)
- Shims for levelling
- Drop cloths and masking tape
Safety equipment:
- Hard hat (for overhead work)
- Safety glasses
- Work gloves
- Steel-toe boots (for heavy panels)
For related tools, see our profiles guide and maintenance guide.
📐 Step-by-Step Aluminium Bifold Doors Installation
This is the core of our bifold door installation guide – the professional installation sequence.
Step 1: Prepare the opening (Day 1, 2-4 hours)
Remove old doors, clean the opening, check for square and level. Repair any damage. Install lintel if required. Level the floor if uneven – this is critical.
Step 2: Install the frame (Day 1, 3-5 hours)
Position the outer frame in the opening. Use shims to level and square the frame. Check for plumb on all sides. Secure the frame with appropriate fixings every 400-600mm. Fill gaps with expanding foam. Allow foam to cure overnight.
Step 3: Install tracks and hardware (Day 2, 2-3 hours)
Attach the top and bottom tracks to the frame. Ensure tracks are perfectly parallel. Install pivot brackets and hinges according to manufacturer specifications. Double-check all measurements – mistakes here compound later.
Step 4: Hang the first panel (Day 2, 1-2 hours)
Starting with the panel that attaches to the frame (the master panel). Insert the top pivot pin, then the bottom. Check that the panel swings freely. Adjust pivot points as needed.
Step 5: Hang remaining panels (Day 2, 3-4 hours)
Attach each subsequent panel using the intermediate hinges. Each panel must align perfectly with the previous. This is where patience is essential – rushing causes misalignment.
Step 6: Install handles and locking mechanisms (Day 2-3, 2 hours)
Fit handles, locks, and multi-point locking systems. Test that locks engage properly. Adjust strike plates as needed.
Step 7: Weather sealing (Day 3, 2-3 hours)
Apply silicone sealant around the frame exterior. Install weather seals between panels and at the jambs. Ensure seals are continuous – gaps cause leaks.
Step 8: Final adjustments and testing (Day 3, 2-3 hours)
Operate the doors through full open and close cycles. Adjust hinges and pivot points for smooth operation. Check that the folding stack is neat and panels don’t rub. Adjust floor track height if needed.
Step 9: Finishing and cleanup (Day 3, 1-2 hours)
Remove protective film. Clean glass and frames. Remove debris and trash. Final inspection with homeowner.
Total professional installation time: 2-3 days for a 4-panel system.

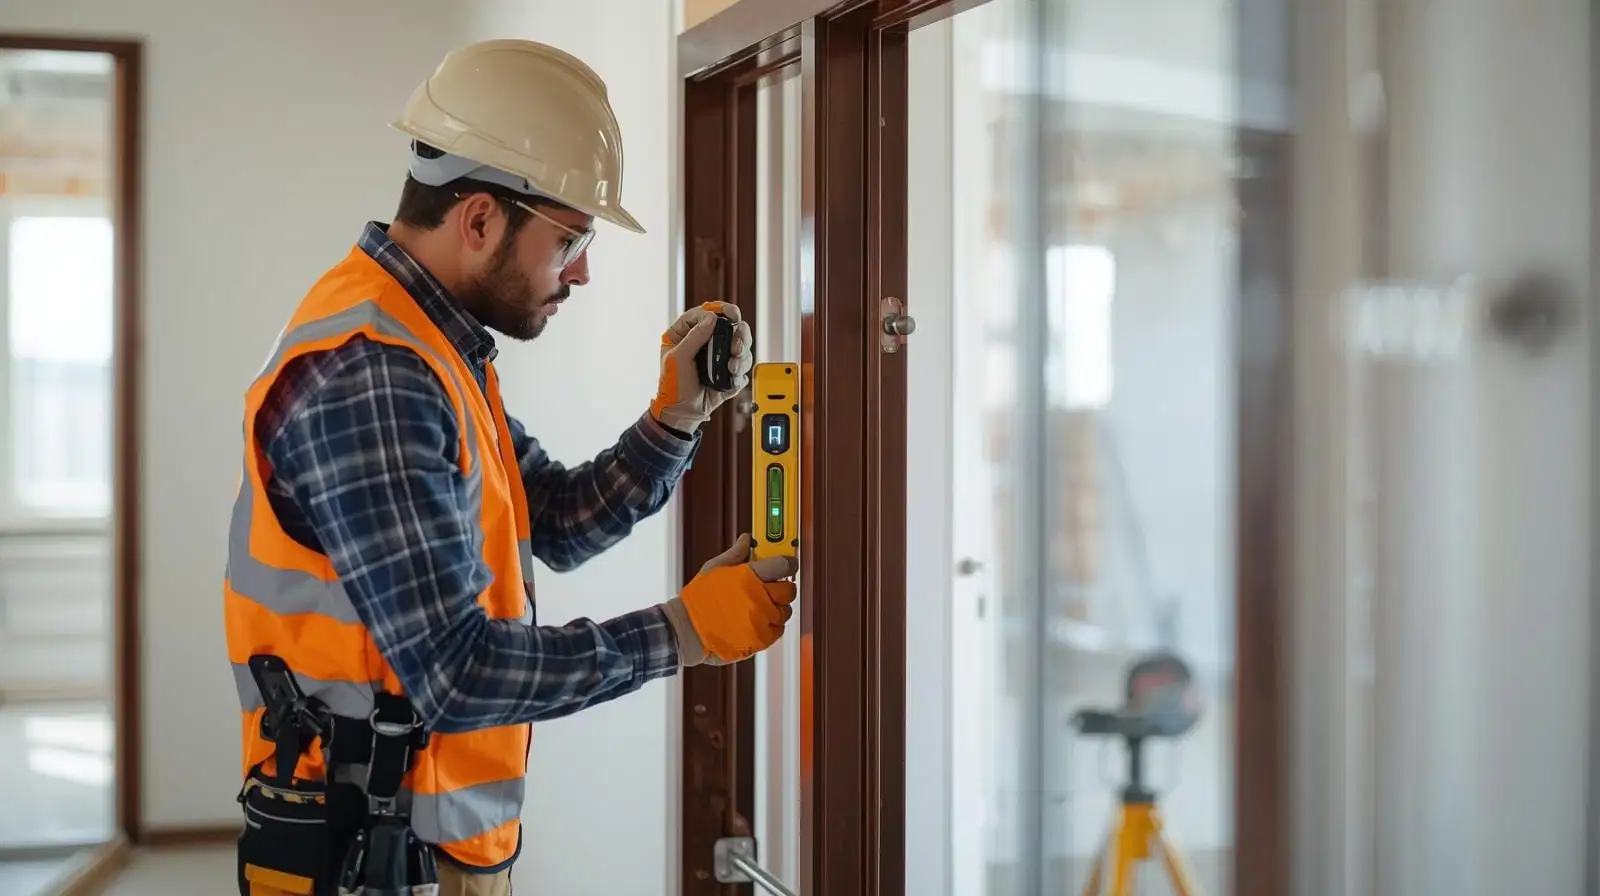
⚠️ Critical: Frame Alignment & Levelling
This is the most important section of any bifold door installation guide. Get this wrong, and nothing else matters.
The 1mm rule: A bifold frame must be level, square, and plumb within 1mm over the entire opening. Any deviation causes the doors to stack unevenly, bind, or fail to close properly.
Checking frame alignment:
- Use a laser level for accuracy – bubble levels aren’t precise enough for bifolds
- Check the header is perfectly level (left to right)
- Check both jambs are perfectly plumb (vertical)
- Check the opening is square (measure diagonally – both diagonals must be equal)
- Check the floor is level across the entire width
Common alignment problems and solutions:
- Header not level: Pack the lower side with shims before fixing. Cannot be fixed after frame is secured.
- Jamb not plumb: Adjust shims behind the frame. If the wall is significantly out of plumb, the opening may need rebuilding.
- Floor not level: Use self-levelling compound before installation. Adjustable bottom tracks can compensate for minor variations (up to 5mm).
- Opening not square: The diagonal measurement difference must be less than 3mm for a 3m opening. If more, the opening needs correction.
⚠️ Warning: Don’t Skip the Laser Level
I cannot stress this enough – how to install aluminium bifold doors requires a laser level. Bubble levels are not accurate enough for bifold alignment. A 1mm error at the frame becomes 5-10mm at the outer panels. Invest in or rent a laser level – or better, hire a professional who uses one.
🔧 Hinge, Track & Hardware Installation
The hardware is what makes bifold doors work. Proper bi-fold fitting depends on correct hardware setup.
Top track installation:
- Must be perfectly level and straight – any curve causes tracking problems
- Secure every 300-400mm with appropriate fixings
- Track should be continuous for the entire width of the opening
- For heavy panels, use reinforced tracks with thicker material
Bottom track installation:
- Must be perfectly parallel to the top track – use measurements at multiple points
- Floor track should be recessed for flush thresholds (requires floor cutting)
- Standard tracks sit on top of finished floor – creates a small lip (15-20mm)
- Ensure drainage holes are clear and functional
Hinge installation (critical for operation):
- Hinges must be perfectly aligned vertically – use a laser level
- Each pair of hinges must be exactly opposite each other
- Pre-drill hinge holes to prevent splitting (for timber jambs)
- Use stainless steel hinges for coastal areas – standard steel corrodes
Handle and lock installation:
- Handles should be at comfortable height (typically 900-1000mm from floor)
- Multi-point locks require precise strike plate alignment
- Test locks before final tightening – adjust as needed
Read our door jamming fix guide for troubleshooting hardware issues.
Need Professional Bifold Installation?
Get free quotes from verified aluminium fabricators who specialise in folding door install. Don’t risk DIY mistakes.
🚪 Hanging & Adjusting Bifold Panels
Hanging the panels is where how to install aluminium bifold doors becomes truly demanding.
The sequence (standard 4-panel bifold stacking to left):
- Hang panel 1 (the master panel that attaches to the jamb). Ensure it swings freely and is plumb.
- Attach hinge hardware to panel 1’s outer edge.
- Hang panel 2, connecting it to panel 1 via intermediate hinges.
- Check that both panels fold flat against each other.
- Repeat for panels 3 and 4.
- The final panel uses a pivot or carriage to stack fully.
Critical adjustments during hanging:
- Each panel must be perfectly vertical (plumb) – use a level
- Gaps between panels should be equal (typically 3-5mm)
- Panels should fold completely flat – no warping or twisting
- The stack should be neat – all panel faces aligned
- Weight distribution must be even – heavy panels may need additional support
Adjustment mechanisms:
- Most bifold hinges have 3D adjustment (up/down, left/right, in/out)
- Use Allen keys for fine-tuning – small turns make noticeable differences
- Adjust top pivots for panel plumb
- Adjust bottom pivots for panel height and door drop
- Adjust intermediate hinges for gap spacing
For repair guidance, read our hinge repair guide.
💧 Weather Sealing & Waterproofing
Proper sealing ensures your bifold doors keep out water, draughts, and dust.
Frame sealing (exterior):
- Apply high-quality exterior grade silicone sealant around the entire frame
- Seal both the frame-to-wall junction and the frame-to-track junction
- Use a tool to smooth the sealant – creates a professional finish
- Ensure sealant is continuous – gaps cause water ingress
- For coastal areas, use marine-grade sealant
Weather seals between panels:
- Install compression seals on each panel’s leading edge
- Seals should make contact when panels are aligned
- Check that seals compress evenly across the full height
- Replace any damaged or perished seals before final installation
Threshold sealing (bottom):
- Standard floor tracks: ensure seal sits flush against the track
- Recessed tracks: use brush seals or compression seals
- Check that water can drain – drainage holes must be clear
- For exposed locations, consider adding a weather bar
Testing for leaks:
- After installation, spray water with a hose. Check for any water ingress.
- Look for daylight through gaps – indicates seal failure
- Inspect after first heavy rain – address any leaks immediately
Read our waterproofing guide for more detail.
✅ Testing & Final Adjustments
Before finishing, thorough testing ensures your aluminium bifold doors installation is perfect.
Operation test:
- Open and close the doors at least 20 times
- Check for smooth operation – no sticking, grinding, or catching
- Test that the folding stack is straight and panels don’t rub
- Verify that the doors don’t self-open or self-close (should stay in position)
- Test that the doors lock securely with no movement when locked
Alignment checks:
- Check that all panels are parallel when closed
- Check that weather seals are contacting evenly
- Verify that gaps between panels are consistent (approx 3-5mm)
- Check that the doors don’t drag on the floor track
- Verify that top guides are correctly positioned
Adjustment process:
- Make small adjustments (1-2 turns of adjustment screws at a time)
- Re-test after each adjustment – don’t rush
- If problem persists, walk through the sequence from the first panel
- For persistent issues, consult manufacturer documentation
Final inspection checklist:
- All hardware is tight and secure
- All seals are continuous and uncompromised
- Glass is clean and undamaged
- Frames are free from scratches or dents
- Doors operate smoothly in all weather conditions (simulate rain if possible)
🚫 Common Aluminium Bifold Doors Installation Mistakes
⚠️ Warning: These Installation Mistakes Ruin Bifold Doors
Avoid these errors when attempting how to install aluminium bifold doors.
- Incorrect frame levelling: Using bubble levels instead of laser levels. 1mm error causes panel misalignment.
- Skipping structural assessment: Not checking lintel capacity. Wide bifolds are heavy – inadequate lintels cause sagging.
- Uneven floor not corrected: Installing on sloped floors. Bifold tracks require a perfectly level floor (within 2mm over 3m).
- Rushing panel hanging: Not checking each panel’s plumb before adding the next. Errors compound.
- Overtightening hardware: Stripping screws or crushing frame material. Use appropriate torque.
- Using standard steel hardware in coastal areas: Corrosion within 2-3 years. Stainless steel is essential within 5km of ocean.
- Poor weather sealing: Gaps in silicone or missing seals. Leads to water damage and draughts.
- Not allowing for thermal movement: Aluminium expands and contracts. Fixings should allow slight movement.
- DIY without experience: Bifolds are not a DIY project. The cost of professional installation is less than the cost of fixing mistakes.
For emergency repairs, see our emergency services and repair services.
🛠️ DIY vs Professional Installation – The Honest Truth
As a bifold door installation guide, I must be honest about DIY viability.
Why DIY is rarely successful:
- Bifold doors are heavy – a 4-panel system with double glazing can weigh 200-300kg
- Precision alignment within 1mm – requires experience and laser levels
- Multiple interdependent adjustments – one mistake affects all panels
- Structural knowledge – lintel capacity, load calculations, building regulations
- Specialised tools – laser level, glass suction cups, heavy-duty fixings
- Two-person minimum – heavy panels cannot be handled alone
- Warranty void – most manufacturers require professional installation for warranty
If you insist on DIY, you must have:
- Previous experience installing doors or windows
- Access to a laser level and other specialised tools
- A helper (two people minimum, three preferred for large panels)
- Understanding of building regulations and structural requirements
- Patience – expect 3-5 days for a 4-panel system, not 2 days
- Acceptance that mistakes will be costly and visible
What professional installation includes:
- Expertise from hundreds of installations
- Proper tools and equipment
- Structural assessment and compliance with SANS standards
- Warranty on workmanship (typically 1-5 years)
- Efficient installation (2-3 days vs 1-2 weeks DIY)
- Disposal of old doors and packaging
- Peace of mind
My honest advice: Hire a professional. The extra R5,000-15,000 is worth it for correct installation, warranty protection, and avoiding costly mistakes.
Read our contractor hiring guide to find qualified bifold specialists.
💰 Bifold Door Installation Cost Breakdown
Here’s what professional folding door install costs in South Africa.
| Service | Typical Cost | Notes |
|---|---|---|
| Site survey & measurement+RSU | R500 – R1,500 (often free with purchase) | Includes opening assessment and structural check+RSU |
| Removal & disposal of old doors+RSU | R1,000 – R3,000 per opening+RSU | Depends on old door type and access+RSU |
| Frame installation (4-panel)+RSU | R3,000 – R5,000+RSU | Includes levelling, shimming, fixing, foam sealing+RSU |
| Panel hanging & hardware (4-panel) | R4,000 – R7,000+RSU | Most labour-intensive – 6-10 hours+? |
| Weather sealing & finishing+? | R1,000 – R2,000+RSU | Silicone, seals, cleanup+RSU |
| Total installation labour (4-panel) | R9,000 – R15,000+RSU | 2-3 days work for 2 installers+RSU |
| Total installed cost including bifold doors (4-panel standard) | R50,000 – R90,000+RSU | Supply + installation – varies by size/quality+? |
Factors that increase installation cost:
- Corner bifold systems – add R5,000 – R15,000
- Lift-slide mechanisms – add 15-25% to labour
- Second-storey or difficult access – add R2,000 – R5,000
- Structural modifications (lintels, floor levelling) – add R5,000 – R15,000
- Coastal locations (stainless steel hardware, marine-grade seals) – add 10-15%
- Flush floor tracks (recessed installation) – add R3,000 – R8,000
For a complete pricing guide, read our bifold door cost guide.
❓ Frequently Asked Questions About Aluminium Bifold Doors Installation
How long does it take to install aluminium bifold doors?
Professional aluminium bifold doors installation takes 2-3 days for a standard 4-panel system: Day 1 – removal and frame installation (4-6 hours). Day 2 – panel hanging and hardware (6-8 hours). Day 3 – sealing, adjustments, finishing (3-5 hours). DIY installation typically takes 1-2 weeks and often requires adjustments after completion.
Can I install aluminium bifold doors myself?
How to install aluminium bifold doors is complex. While possible for experienced DIYers, I strongly recommend professional installation. Bifolds require precision alignment within 1mm, handling of heavy glass panels (200-300kg total for a 4-panel system), and structural knowledge. The cost of fixing DIY mistakes often exceeds professional installation fees. Most manufacturers void warranties on DIY installations.
What tools are needed for bifold door installation?
Essential tools for bi-fold fitting: laser level (critical – bubble levels aren’t accurate enough), impact driver, masonry bits, rubber mallet, Allen key set, measuring tape, shims, foam sealant gun, silicone gun, glass suction cups for heavy panels, and scaffolding for tall openings. Most homeowners don’t own these tools – renting costs R500-1,500 per day.
How much does bifold door installation cost in South Africa?
Professional bifold door installation guide labour costs R9,000 – R15,000 for a standard 4-panel system. Total installed cost (supply + installation) ranges from R50,000 – R90,000 depending on size, glass specification, and hardware quality. Factors that increase cost: corner systems, lift-slide mechanisms, structural modifications, and coastal upgrades. Read our cost guide for detailed pricing.
Why is my bifold door sticking after installation?
Common causes: track not level, floor uneven, hinges out of alignment, debris in track, or building settlement. First, clean the track thoroughly. Check that the floor hasn’t shifted – use a laser level. Adjust hinges using the 3D adjustment screws (small turns – 1-2 turns at a time). If problems persist, read our jamming fix guide or call a professional.
Do bifold doors need planning permission?
In South Africa, replacing existing doors with bifolds in the same opening typically doesn’t require planning permission. However, if you’re enlarging the opening, installing in a heritage property, or adding a new opening, you may need municipal approval. Always check with your local municipality. For new builds, your architect should handle approvals. Read our buying checklist for regulatory guidance.
How do I maintain bifold doors after installation?
Maintenance is minimal but essential: quarterly – clean tracks with a brush/vacuum, wipe frames with mild soap and water. Annually – lubricate hinges and tracks with silicone spray (never oil), check and tighten screws, inspect weather seals for damage, adjust hinges if needed. Coastal areas: clean hardware every 3 months to remove salt. Read our maintenance guide for detailed instructions.
How do I find a qualified bifold door installer?
Use ServiceLink SA’s free quote service to find verified aluminium fabricators who specialise in folding door install. Ask potential installers: How many bifold installations have you completed? Can you provide references? Do you use a laser level? What warranty do you offer? Avoid installers who quote significantly lower than competitors or don’t use laser levels. Read our contractor guide for more.
✅ Final Thoughts: Professional Installation Is Worth Every Rand
After reading this aluminium bifold doors installation guide, you understand why professional installation is essential.
Bifold doors are magnificent when installed correctly – smooth operation, perfect sealing, dramatic transformation of your home. But they unforgiving of mistakes. A frame 2mm out of level becomes a 10mm panel misalignment. A floor that slopes 5mm causes panels to drag. Skipping structural assessment risks sagging and failure.
My honest advice: invest in professional installation. The R9,000-15,000 labour cost is small compared to the R50,000-90,000+ door system. Protect your investment with experienced specialists who use laser levels, understand structural requirements, and offer workmanship warranties.
Key takeaways for bifold installation:
- Professional installation takes 2-3 days – DIY takes 1-2 weeks with higher risk
- Laser level alignment is non-negotiable – within 1mm tolerance
- Proper structural assessment prevents sagging and failure
- Weather sealing must be continuous – gaps cause water damage
- Hardware adjustments require patience – 1-2 turns at a time
- Most manufacturers require professional installation for warranty
- Coastal areas need stainless steel hardware and marine-grade seals
- Budget R9,000 – R15,000 for professional installation labour (4-panel system)
- Use ServiceLink SA to find verified bifold specialists
Your next step: Ready to install bifold doors? Get free quotes from verified aluminium fabricators specialising in bifold installation.
Ready to Install Bifold Doors?
Get free, no-obligation quotes from verified aluminium fabricators specialising in aluminium bifold doors installation. Protect your investment with professional installation.
📞 Call us: 073 138 4726 to discuss your bifold installation.
Free inspections •
Hiring tips •
Beat Your Quote •
Our guarantees •
Emergency services
📚 Official resources & standards referenced:
- SANS 10400 – South African National Standard for bifold door standards and building regulations.
- SABS – South African Bureau of Standards for hardware quality standards and product certification.
Information provided for general guidance. Bifold door installation requires professional expertise. Always hire certified installers and verify compliance with local building regulations.
Written by: ServiceLink SA Research Team
Specialist Aluminium Doors & Installation Experts
The ServiceLink SA Research Team has extensive experience with aluminium bifold door installations across thousands of South African homes. Our team has worked closely with certified fabricators, installation specialists, and homeowners to develop this comprehensive bifold door installation guide. This guide is based on real project data, installation best practices, and feedback from across Gauteng, Johannesburg, Pretoria, Sandton, Centurion, and nationwide. We update our information regularly to reflect current industry standards and best practices.
For more information about aluminium bifold doors, explore our related resources: bifold door cost guide, custom joinery guide, sliding vs stacking comparison, maintenance guide, jamming fix guide, and hinge repair guide. Learn about our process on what is ServiceLink SA and how ServiceLink SA works. Find fabricators in your area: Gauteng, Johannesburg, Pretoria, Sandton, Centurion, Midrand, and Fourways. For related services, see our building construction and tiling services guides.