Bathroom & Shower Waterproofing South Africa – Complete Guide to Dry Wet Areas
🚿 Renovating your bathroom in Sandton? Building a new shower in Cape Town? Here’s everything you need to know about bathroom waterproofing before tiling.
You’re renovating your bathroom in Fourways. The tiles look beautiful. But six months later, water stains appear on the ceiling below. The grout is cracking. You can smell mould. What went wrong? Most likely, the waterproofing failed – or was never properly installed.
Bathroom shower waterproofing South Africa isn’t optional – it’s a building regulation requirement under SANS 10400 Part R. Water in bathrooms is relentless. It seeps through grout, finds cracks, and destroys structures. Proper waterproofing before tiling is the only way to prevent this.
This guide covers everything: shower tray waterproofing, bathroom floor tanking, wet area membranes, puddle flanges, falls to drain, and movement joints. Whether you’re building new or renovating, you’ll learn what’s required and how to ensure it’s done right.
If you’re ready for professional help, explore our Services Overview or visit our Waterproofing Services page to find vetted contractors near you. For bathroom renovations, see our bathroom renovation page.
📋 REGULATORY STANDARDS: Bathroom waterproofing must comply with SANS 10400 Part R (wet areas). The NHBRC requires certified waterproofing for new homes. ECASA provides guidance on electrical safety near wet areas.
Planning a Bathroom Renovation?
Don’t let waterproofing be an afterthought. Get free, no-obligation quotes from vetted bathroom waterproofing specialists who know the regulations.
Find Bathroom Specialists Near Me
Servicing Johannesburg, Pretoria, Cape Town, Durban, and nationwide
📋 Table of Contents – Bathroom Waterproofing Guide
🚿 Why Bathroom Waterproofing is Essential
Bathrooms are the wettest areas in any home. Water is constantly splashed on floors and walls, seeps through grout, and finds any weakness in the structure.
What Happens Without Proper Waterproofing
- Structural damage: Water penetrates concrete slab or timber, causing rot, rust, and deterioration
- Mould and mildew: Damp conditions breed mould – health hazard and unsightly
- Leaks to floors below: Water stains on ceilings, damaged paint, potential ceiling collapse
- Tile failure: Tiles loosen, grout cracks, waterproofing fails completely
- Electrical hazards: Water reaching electrical fittings creates serious safety risks
- Reduced property value: Bathroom leaks are major defects in home inspections
According to NHBRC data, bathroom waterproofing failures are among the most common defects in new homes. Proper installation is essential.
Learn more about our approach on our About Us page or read why clients choose us on our Benefits page.
📋 SANS 10400 Part R Requirements for Wet Areas
SANS 10400 Part R is the South African building regulation covering wet areas. It specifies mandatory waterproofing requirements.
Key Requirements
- Shower areas: Must be waterproofed to at least 1.8m height on walls
- Bath surrounds: Waterproofing to at least 150mm above bath height
- Bathroom floors: Full floor waterproofing with upstands at walls
- Upstands: Waterproofing must extend up walls minimum 100mm
- Penetrations: All pipe penetrations must be properly sealed
- Drainage: Floors must have adequate fall to drain (1:60 to 1:100)
- Movement joints: Must be provided where different substrates meet
- Testing: Waterproofing should be tested before tiling (flood test)
These requirements apply to all new builds and renovations. Failure to comply can void your NHBRC warranty and create liability issues.
🛠️ Bathroom Waterproofing Methods
Several methods meet SANS 10400 requirements. The choice depends on substrate, budget, and installer preference.
Common Methods
- Liquid applied membranes: Polyurethane or acrylic liquids, applied by roller – seamless, flexible
- Sheet membranes: PVC or polyethylene sheets, bonded with adhesives – good for large areas
- Cementitious tanking: Cement-based slurry, applied by brush – rigid, good for concrete
- Waterproof cement board: Pre-manufactured boards with waterproof core – used in showers
- Bituminous coatings: Less common in bathrooms due to odour and appearance
We’ll cover each method in detail below.
💧 Liquid Rubber Membrane – Most Popular Choice
Liquid rubber membrane (liquid polyurethane) is the most common bathroom waterproofing method. It’s applied as a liquid and cures to form a seamless, flexible membrane.
How It Works
- Two-component liquid mixed on site
- Applied by roller or brush
- Reinforcement fabric embedded at corners and changes of plane
- Multiple coats build up to required thickness (typically 1.5-2mm)
- Cures to flexible, waterproof rubber
Pros
- Seamless – no joints to fail
- Flexible – accommodates movement
- Excellent adhesion to most substrates
- Good for complex shapes and details
- Can be flood tested before tiling
Cons
- Requires careful mixing and application
- Moisture sensitive during application
- Higher cost than some alternatives
- Needs protection from UV (but bathroom is indoors)
Cost: R180 – R280 per m² installed
📋 Sheet Membrane Systems
Sheet membranes are pre-manufactured sheets (PVC, polyethylene) bonded to the substrate with adhesive.
How It Works
- Sheets cut to size and laid in adhesive
- Seams overlapped and sealed with adhesive or welding
- Corners and penetrations detailed with pre-formed pieces
- Provides uniform thickness
Pros
- Consistent thickness
- Fast installation for large areas
- Good chemical resistance
- Some systems have primerless adhesion
Cons
- Seams are potential failure points
- Less flexible around complex shapes
- Requires careful detailing at corners
- Can be damaged during tiling
Cost: R200 – R300 per m² installed
🧱 Cementitious Tanking
Cementitious tanking is a cement-based slurry applied to concrete or masonry surfaces. It’s rigid and becomes part of the structure.
How It Works
- Powder mixed with water or polymer to form slurry
- Applied by brush or trowel in multiple coats
- Can be reinforced with mesh
- Forms rigid, waterproof layer
Pros
- Excellent bond to concrete
- Good for below-ground applications
- Breathable options available
- Can be tiled directly
- Lower cost than liquid
Cons
- Rigid – may crack with movement
- Not suitable for timber substrates
- Requires protection from early drying
- Less flexible at movement joints
Cost: R120 – R200 per m² installed
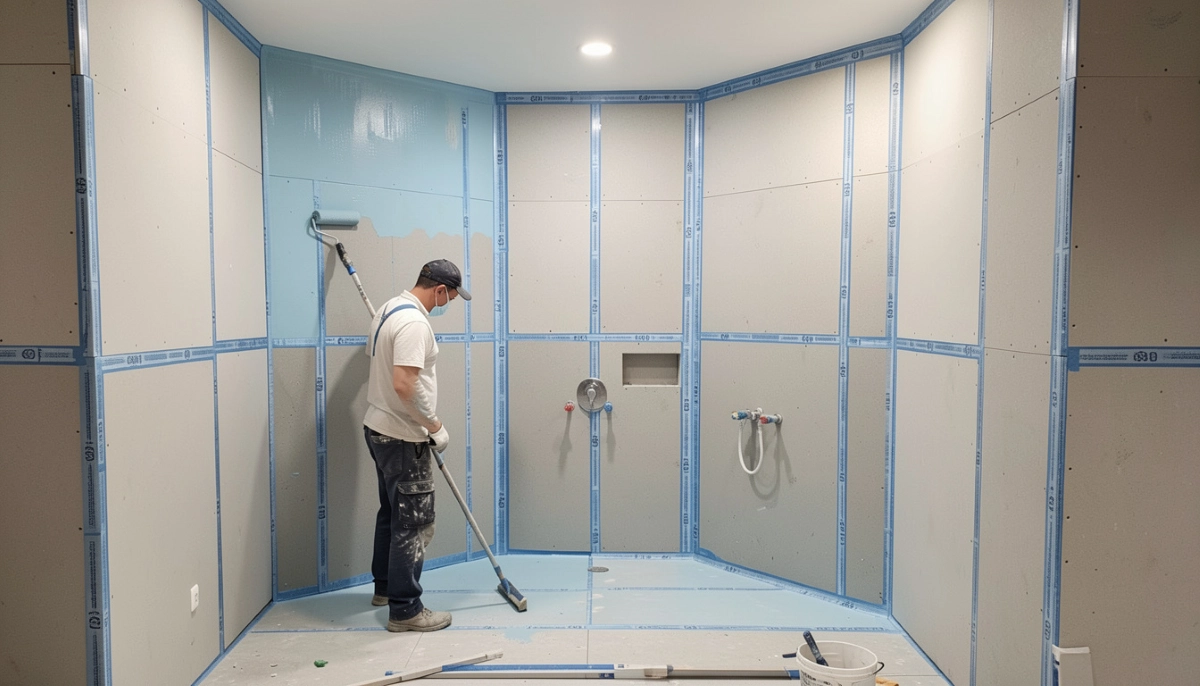
🪵 Waterproof Cement Board – Shower Walls
Waterproof cement board (like Wedi, Schluter Kerdi-board, or local equivalents) is a rigid foam board with a waterproof coating. Popular for shower walls.
How It Works
- Boards cut to size and fixed to walls
- Seams taped and sealed with proprietary sealant
- Integrated waterproofing – no separate membrane needed
- Provides insulation and waterproofing in one
Pros
- Integrated waterproofing and substrate
- Lightweight and easy to install
- Excellent for showers and wet rooms
- Pre-formed accessories (corners, niches) available
- Fast installation
Cons
- Higher material cost
- Requires proprietary sealing system
- Not suitable for all applications
- Must be installed correctly at seams
Cost: R300 – R500 per m² installed (higher than other methods, but includes substrate)
🚿 Shower Tray Waterproofing – Critical Area
Shower tray waterproofing is the most critical area – it receives the most water and must be perfect.
Key Requirements
- Waterproofing must extend up walls minimum 150mm (SANS requires 1.8m in shower areas)
- Reinforcement fabric at internal and external corners
- Proper detailing around drain with puddle flange
- Adequate fall to drain (minimum 1:60)
- Waterproofing must be continuous from floor up walls
Pre-formed Shower Trays
Pre-formed shower trays (acrylic, fibreglass) have built-in waterproofing. Installation must ensure:
- Tray properly supported (no flex)
- Flashing at walls seals against tray
- Drain connection watertight
- No penetrations through tray
For tiled showers (wet rooms), the waterproofing system must create the “tray” – this is where most failures occur.
🔧 Puddle Flange – Critical Drain Detail
A puddle flange (or drain flange) is a fitting that integrates the drain with the waterproofing membrane. It’s the most common point of failure in bathroom waterproofing.
How It Works
- Flange installed in substrate before waterproofing
- Compression ring or clamping collar secures membrane
- Drain grate fits on top
- Creates watertight seal at drain penetration
li>Waterproofing membrane lapped over flange
Why It’s Critical
- The drain is the only penetration through the waterproofing
- Without proper flange, water seeps around drain
- Leaks at drains are invisible until ceiling below stains
- Most common bathroom waterproofing failure point
Installation Checklist
- Flange properly embedded in substrate
- Membrane extends minimum 50mm onto flange
- Clamping ring tightens evenly
- No gaps or wrinkles at seal
- Test before tiling
📐 Fall to Drain – Getting the Slope Right
Fall to drain is the slope that directs water to the drain. Without proper fall, water ponds on the floor – a recipe for leaks.
Requirements
- Minimum fall: 1:60 (10mm per 600mm)
- Ideal fall: 1:50 to 1:80
- Fall should be consistent, no flat spots
- Drain at lowest point
- Check with spirit level before tiling
Creating Fall
- Screed laid to falls before waterproofing
- Pre-formed shower trays have built-in falls
- Wet room systems use sloping substrates
- Tiles must follow same fall – lipping creates ponding
Testing: Pour water on floor before tiling – it should flow quickly to drain with no ponding.
🔄 Movement Joints – Preventing Cracks
Movement joints accommodate expansion and contraction, preventing cracks in tiles and waterproofing.
Where Movement Joints Are Needed
- Where different substrates meet (concrete slab vs wall)
- At changes of plane (floor to wall)
- Around penetrations (pipes, drains)
- Over structural expansion joints
- Large areas (every 8-10m in each direction)
- At doorways transitioning to other flooring
How to Detail
- Waterproofing must accommodate movement – flexible membranes at joints
- Reinforcement fabric embedded but joint left free
- Joint filled with flexible sealant after tiling
- Tile joints aligned with movement joints below
Proper movement joints prevent stress cracks that breach waterproofing.
📐 Coving – Waterproofing Corners
Coving is the curved transition between floor and wall. It’s a critical detail in bathroom waterproofing.
Why Coving Matters
- Right-angled corners are stress points
- Movement concentrates at corners
- Water sits in corners, finding any weakness
- Coving creates smooth transition, reducing stress
- Reinforcement fabric easily embedded in coving
How to Create Coving
- Form fillet of mortar or proprietary coving compound
- Radius typically 25-50mm
- Waterproof membrane applied over, with reinforcement
- Creates continuous, stress-free detail
Many waterproofing failures occur at unsupported corners. Coving is the solution.
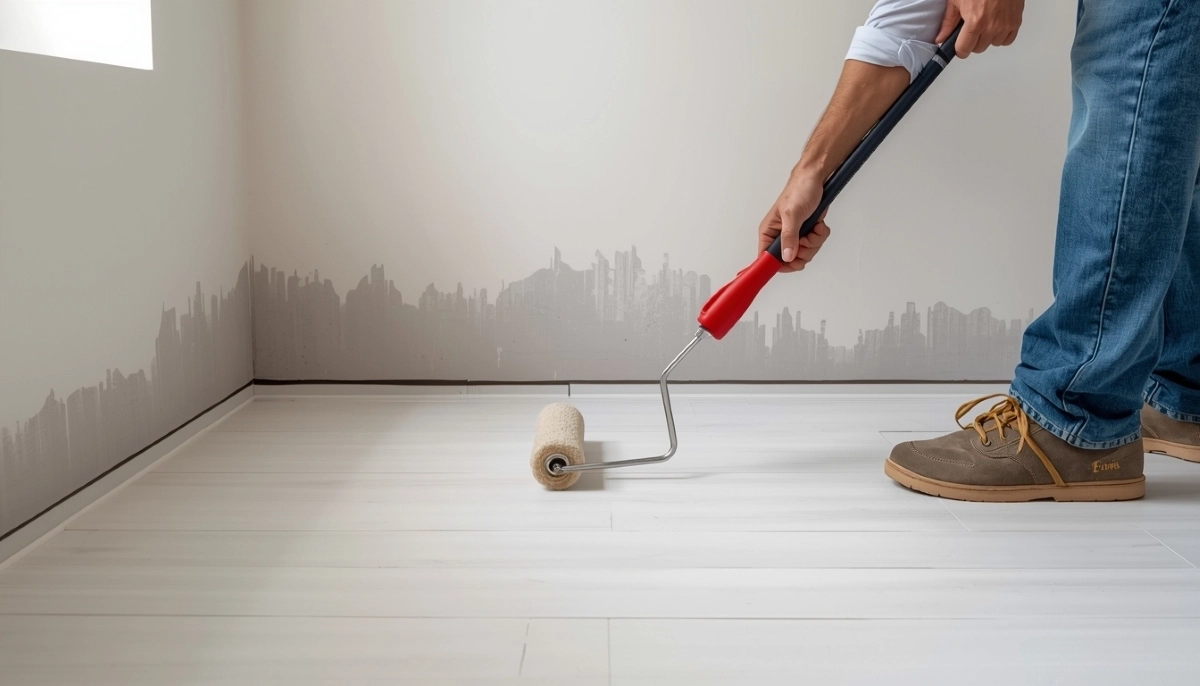
🔨 Waterproofing Before Tiling – Step by Step
Waterproofing before tiling follows a specific sequence:
- Substrate preparation: Clean, dry, repair cracks. Prime if required.
- Form coving: Create curved transitions at floor/wall junctions.
- Install puddle flange: At drain location.
- Apply first coat: Liquid membrane or tanking slurry.
- Reinforce corners: Embed reinforcement fabric at internal/external corners, changes of plane.
- Reinforce penetrations: Fabric around pipes, drains.
- Apply second coat: Ensure minimum thickness.
- Build up to required thickness: Multiple coats as needed.
- Flood test: Dam outlets, flood floor for 24-48 hours. Check for leaks.
- Protect: Allow to cure fully before tiling.
Never tile without flood testing. Once tiles are laid, you can’t verify the waterproofing.
💰 Bathroom Floor Waterproofing Cost
Bathroom floor waterproofing cost varies by size and method.
| Bathroom Size | Liquid Membrane | Cementitious Tanking | Sheet Membrane | Waterproof Board (walls) |
|---|---|---|---|---|
| Small bathroom (shower only) | R2,500 – R4,500 | R1,800 – R3,200 | R2,800 – R4,800 | R4,000 – R6,500 |
| Standard bathroom (3-5m²) | R4,500 – R7,500 | R3,200 – R5,500 | R4,800 – R8,000 | R6,500 – R10,000 |
| Large bathroom (6-8m²) | R6,500 – R10,000 | R4,800 – R7,500 | R7,000 – R11,000 | R9,000 – R14,000 |
| Wet room (full room) | R8,000 – R15,000 | R6,000 – R11,000 | R9,000 – R16,000 | R12,000 – R20,000 |
Note: These are installed costs including labour and materials. Shower wall waterproofing (1.8m height) adds to cost.
For detailed pricing, see our waterproofing cost guide.
📊 Complete Bathroom Waterproofing Cost Breakdown
| Item | Typical Cost | Notes |
|---|---|---|
| Liquid membrane (per m²) | R180 – R280 | Materials and labour |
| Cementitious tanking (per m²) | R120 – R200 | Materials and labour |
| Reinforcement fabric (per m²) | R50 – R100 | Extra for corners and details |
| Puddle flange | R300 – R800 | Materials only |
| Drain installation | R500 – R1,200 | Labour for drain connection |
| Coving (per linear metre) | R80 – R150 | Forming coving at walls |
| Flood test | Often included | Essential verification |
| Minimum call-out | R2,000 – R3,500 | For small jobs |
Example: A standard 5m² bathroom with liquid membrane, full floor, shower walls to 1.8m, puddle flange, and coving: R6,000 – R9,500.
📍 Regional Bathroom Considerations
📌 Johannesburg & Pretoria
In Johannesburg and Pretoria, concrete slabs are common. Movement joints between slab and walls are critical. High-altitude UV doesn’t affect indoor bathrooms.
📌 Durban & Umhlanga
In Durban and Umhlanga, high humidity means faster mould growth if waterproofing fails. Good ventilation is essential. Coastal homes may have timber floors needing special attention.
📌 Cape Town & Stellenbosch
In Cape Town and Stellenbosch, older homes may have suspended timber floors – different waterproofing approach needed. Heritage properties have specific requirements.
📌 Sandton & Fourways
In Sandton and Fourways, luxury bathrooms with complex designs need meticulous detailing. Multiple shower heads, steam showers, and niches all require careful waterproofing.
❌ 8 Common Bathroom Waterproofing Mistakes
Avoid these errors that lead to leaks and failures:
- Mistake #1: No flood test. Tiling over untested waterproofing is gambling. Always flood test for 24-48 hours before tiling.
- Mistake #2: Poor drain detail. No puddle flange or incorrect installation is the #1 cause of bathroom leaks.
- Mistake #3: No reinforcement at corners. Right-angled corners without reinforcement fabric will crack.
- Mistake #4: Insufficient upstands. Waterproofing must extend up walls minimum 100mm (1.8m in showers).
- Mistake #5: No coving. Sharp corners are stress points – coving prevents cracks.
- Mistake #6: Wrong fall to drain. Flat spots or incorrect slope cause ponding water, leading to leaks.
- Mistake #7: Tiling too soon. Waterproofing must be fully cured before tiling – follow manufacturer’s instructions.
- Mistake #8: Damaging membrane during tiling. Sharp tile edges can cut membranes. Protect waterproofing during tiling.
For more guidance, see our contractor selection guide and our failure signs guide.
❓ Frequently Asked Questions
Is bathroom waterproofing required by law in South Africa?
Yes, bathroom shower waterproofing South Africa is required by SANS 10400 Part R. All wet areas must be waterproofed. For new homes, the NHBRC requires certified waterproofing. Failure to comply can void your warranty.
How much does bathroom waterproofing cost?
Bathroom floor waterproofing cost ranges from R2,500-R4,500 for small bathrooms, R4,500-R7,500 for standard, and R6,500-R15,000 for large or wet rooms. Costs vary by method – liquid membrane (R180-R280/m²) is most common. See our cost guide for details.
What is the best shower waterproofing method?
Liquid rubber membrane is most popular for showers – seamless, flexible, and reliable. For shower walls, waterproof cement board systems are excellent. The key is proper detailing at corners and drains, not just the material choice.
Do I need to waterproof the entire bathroom floor?
Yes, the entire bathroom floor must be waterproofed, not just the shower area. Water can spread across the floor. Waterproofing must extend up walls as upstands (minimum 100mm) to create a waterproof tray.
What is a puddle flange and why is it important?
A puddle flange is a fitting that seals the drain to the waterproofing membrane. It’s the most critical detail – without it, water seeps around the drain. Ensure your contractor uses one and installs it correctly.
Can I tile directly over waterproofing?
Yes, tiles are installed over cured waterproofing. Use a flexible tile adhesive suitable for wet areas. Ensure waterproofing is fully cured before tiling. Never damage the membrane during tiling – protect with underlay if needed.
What fall should a shower floor have?
Fall to drain should be minimum 1:60 (10mm per 600mm). Ideal is 1:50 to 1:80. Check with a spirit level before tiling – water should flow quickly to drain with no ponding.
How long does bathroom waterproofing take to cure?
Liquid membranes typically take 24-48 hours to cure before flood testing. Full cure before tiling: 3-7 days depending on product and conditions. Follow manufacturer’s instructions – tiling too soon causes failure.
✅ Final Thoughts – Your Bathroom Waterproofing Action Plan
Bathroom waterproofing isn’t visible once tiles are laid – but it’s the most important part of your renovation. Cutting corners leads to expensive repairs and damage to your home.
Key takeaways:
- Follow SANS 10400: Know the requirements before starting
- Don’t skip flood testing: Verify before tiling
- Details matter: Drains, corners, and penetrations are critical
- Use qualified contractors: Waterproofing is not DIY
- Get it in writing: Warranty, materials, and scope
- Budget properly: Quality waterproofing costs but saves money
🚿 The Bottom Line:
R4,500 – R10,000
is what proper bathroom waterproofing costs – far less than repairing water damage to your home.
Your 5-Step Action Plan
- Plan ahead: Include waterproofing in renovation budget and timeline
- Choose method: Liquid, sheet, or cementitious based on your needs
- Get detailed quotes: From vetted waterproofing specialists – use our free quote system
- Verify credentials: Check insurance, warranties, and references
- Witness flood test: Be present when they test before tiling
Planning a Bathroom Renovation?
Don’t let waterproofing be an afterthought. Get free, no-obligation quotes from vetted bathroom waterproofing specialists who know the regulations.
📞 Call us: 073 138 4726 for personalised assistance
Free site inspections •
Beat-your-quote guarantee •
Our guarantees
📚 Official resources & standards:
- SANS 10400 Part R – Wet area waterproofing requirements
- NHBRC – Bathroom waterproofing warranty requirements
- ECASA – Electrical safety near wet areas
Information accurate as of publication. Prices are indicative and may vary by location and contractor. This guide is for informational purposes.
Written by: Innocent T Hanyani
21+ years construction and digital industry experience, ServiceLink SA
Innocent has overseen bathroom waterproofing on hundreds of residential projects across South Africa, ensuring compliance with SANS 10400 and NHBRC requirements. His expertise ensures this guide reflects current best practices.
For more detailed information, explore our waterproofing cost guide for comprehensive pricing, our failure signs guide to identify problems, our best products guide for brand recommendations, and our contractor selection guide for finding qualified specialists. For tiling after waterproofing, see our grouting and tiling guide. Together, these resources give you complete knowledge for a successful bathroom project.