Signs of Waterproofing Failure and How to Fix – Complete South African Guide
🏚️ Water stains on your ceiling in Johannesburg? Musty smell in your Durban basement? Peeling paint in Cape Town? Here’s how to spot waterproofing failure and what to do about it.
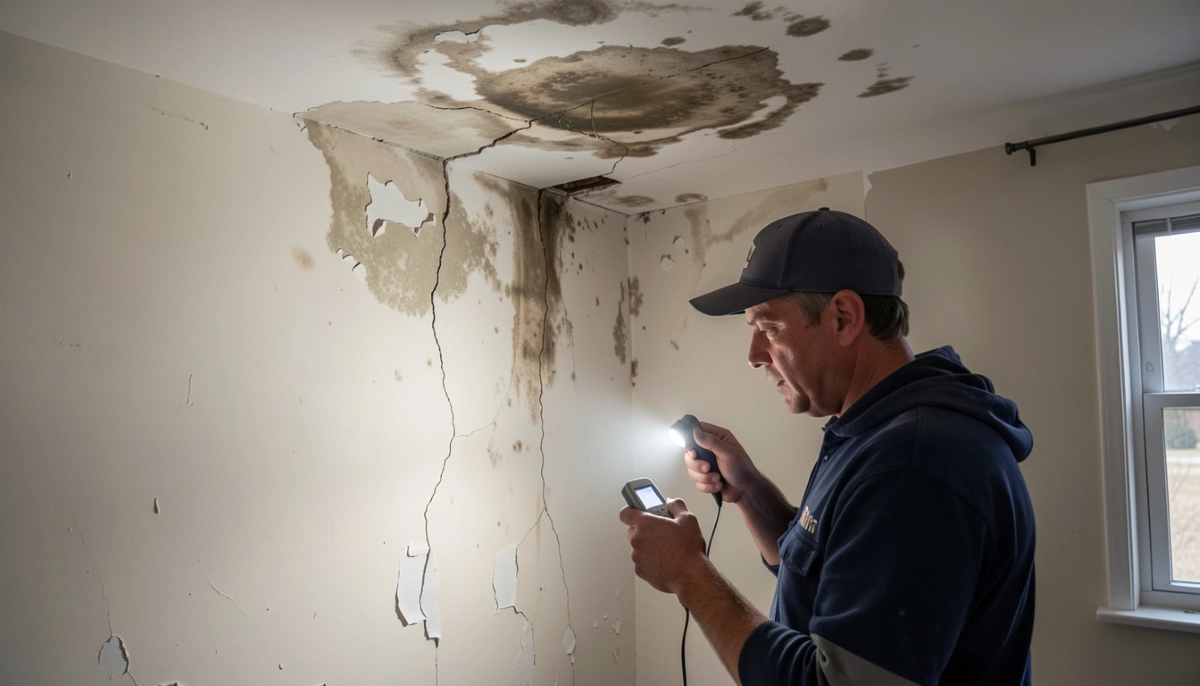
You notice a dark stain on the ceiling of your Pretoria home. The paint is bubbling near the window in your Umhlanga bathroom. Your Ballito basement smells musty. These are all signs of waterproofing failure – and ignoring them leads to much bigger problems.
Waterproofing doesn’t last forever. Membranes age, flashings fail, and water finds a way. The key is recognizing the symptoms early and taking corrective action before structural damage occurs.
This guide covers every sign of waterproofing failure – from obvious leaks to subtle indicators like efflorescence and rust stains. You’ll learn what each symptom means, how to diagnose the root cause, and what fixes are appropriate. We’ll cover roofs, basements, bathrooms, and walls.
If you need urgent help, our emergency services connect you with vetted contractors. For more information, explore our Services Overview or visit our Waterproofing Services page.
📋 INDUSTRY STANDARDS: The Corporation of Waterproofing Professionals provides failure diagnosis guides. Safeguard offers remedial waterproofing solutions. For consumer rights regarding defective workmanship, IOL has published helpful guides.
Spotting Signs of Waterproofing Failure?
Don’t wait for more damage. Get free, no-obligation quotes from vetted waterproofing specialists who can diagnose and fix the problem.
Find Waterproofing Experts Near Me
Emergency services available in Johannesburg, Pretoria, Cape Town, Durban, and nationwide
📋 Table of Contents – Failure Signs & Fixes
💧 Water Stains on Ceilings & Walls – The Obvious Sign
Water stains are the most visible sign of waterproofing failure. Yellow or brown patches indicate active or past leaks.
What It Means
- Ceiling stains: Usually from roof leaks or leaking pipes above
- Upper wall stains: Roof, gutter, or flashing issues
- Lower wall stains: Rising damp, failed DPC, or external ground issues
- Stains spreading after rain: Confirms waterproofing failure
How to Diagnose
- Check after rain – does stain grow?
- Trace upwards – where is water entering?
- Check roof, gutters, flashings above stain
- For lower walls, check ground levels and DPC
- Use moisture meter to confirm active damp
How to Fix
- Find and fix the source first
- Repair roof, flashing, or waterproofing as needed
- Allow area to dry completely (may take weeks)
- Repaint with stain-blocking primer
- If plaster damaged, may need replastering
Learn more about our approach on our About Us page or read why clients choose us on our Benefits page.
🎨 Peeling or Bubbling Paint – Hidden Moisture
Peeling or bubbling paint on interior walls is a classic sign of moisture behind the surface. Water pushes paint off the wall.
What It Means
- Moisture is penetrating the wall from outside
- Condensation issues (less common, usually bathrooms)
- Failed external waterproofing or rising damp
- Leaking pipes inside wall (if localized)
How to Diagnose
- Bubbling paint on wall after rain – indicates external waterproofing failure
- Check external walls for cracks, damaged render
- Check gutters and downpipes – are they discharging against wall?
- Test with moisture meter
- Check if problem is seasonal (rainy season)
How to Fix
- Address external cause first – repair render, fix gutters, apply waterproof coating
- Remove all loose paint
- Allow wall to dry thoroughly
- Replaster if necessary (salt contamination)
- Repaint with moisture-resistant paint
⚪ Efflorescence on Concrete – White Crystals
Efflorescence appears as white, powdery deposits on concrete, brick, or stone. It’s salt crystals left behind as water evaporates.
What It Means
- Water is moving through masonry or concrete
- Dissolved salts are carried to surface
- When water evaporates, salts crystallize
- Indicates active moisture movement
- Common in basements, retaining walls, foundations
How to Diagnose
- Efflorescence confirms water transmission
- Not harmful itself, but indicates moisture problem
- Check if it reappears after brushing off – confirms active moisture
- May indicate hydrostatic pressure in basements
How to Fix
- Address water source – improve drainage, repair waterproofing
- Brush off efflorescence (wear mask – salts can be irritant)
- For basements, may need cavity drain or tanking
- For walls, improve external waterproofing
- Allow to dry completely before painting
👃 Musty Smell in Basement – Mould and Decay
A musty smell in basement indicates persistent dampness, mould, and organic decay. Even if you can’t see water, the smell confirms moisture problems.
What It Means
- Persistent high humidity
- Active or past water ingress
- Mould growing behind walls or under floors
- Failed basement waterproofing
- Inadequate ventilation
How to Diagnose
- Check for visible mould
- Use moisture meter on walls and floors
- Check after heavy rain – does smell intensify?
- Inspect sump pump (if present) – is it working?
- Check for efflorescence on walls
How to Fix
- Address water source – external drainage, waterproofing
- Install or upgrade ventilation
- Dehumidifier for temporary relief
- May need cavity drain system for active ingress
- Remove mouldy materials, treat with biocide
For basement-specific issues, see our basement waterproofing guide.
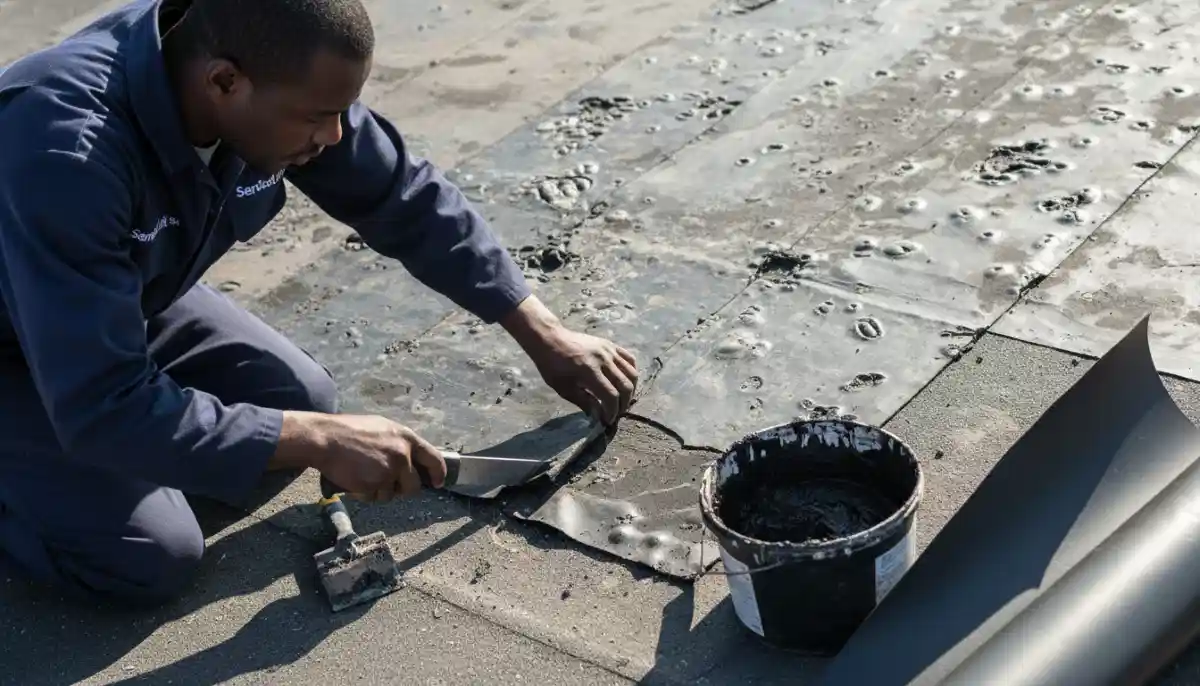
🫧 Blistering in Roof Membrane
Blistering appears as bubbles or blisters in torch-on or liquid membranes. Common on flat roofs.
What It Means
- Moisture trapped during installation
- Air pockets between layers
- Heat expansion of trapped moisture
- Poor adhesion to substrate
- Membrane weakening at those points
How to Diagnose
- Visual inspection – bubbles visible on roof surface
- May be soft when walked on
- Can be isolated or widespread
- Check if blisters are intact or ruptured
How to Fix
- Small blisters: Cut open with knife, allow to dry, patch with compatible material
- Large blisters: May need to cut out and replace section
- Widespread blistering: Indicates systemic installation problem – may need replacement
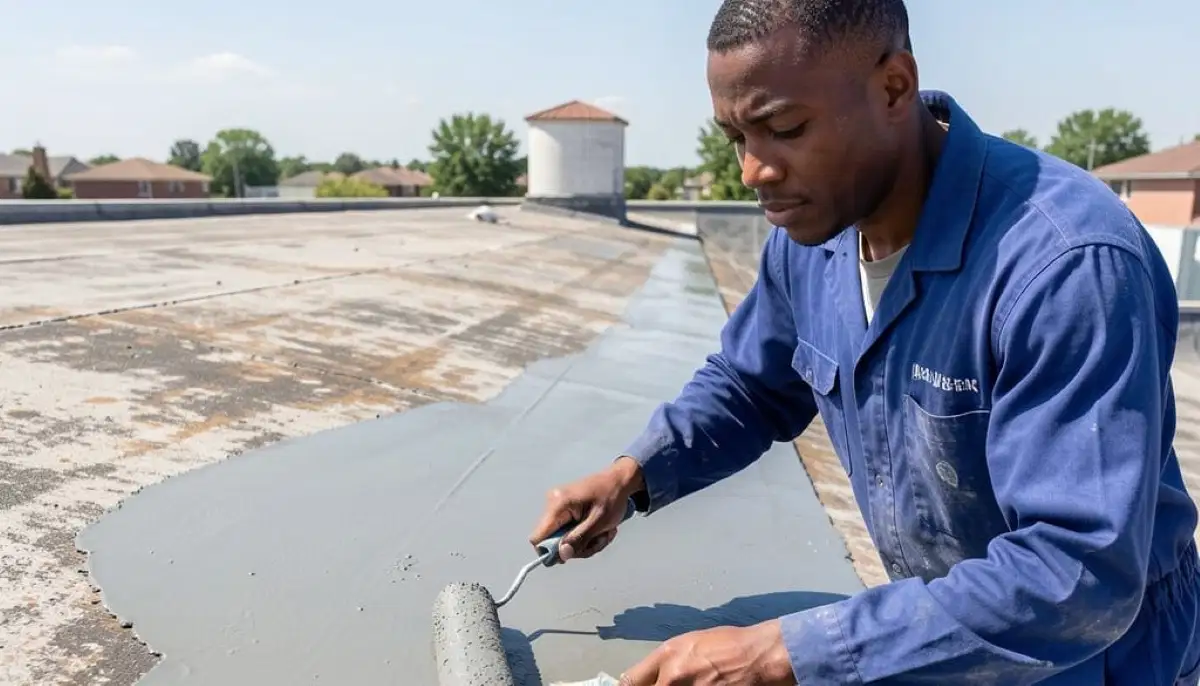
- Liquid systems: Grind down, reapply with proper primer
For detailed flat roof repair guidance, see our flat roof problems guide.
🐊 Cracking or Alligatoring – Membrane Deterioration
Cracking and alligatoring (pattern of cracks resembling alligator skin) indicate advanced membrane degradation.
What It Means
- UV degradation over time
- Loss of plasticizers – membrane becomes brittle
- Thermal cycling stress
- End of useful life approaching
- Water will soon penetrate
How to Diagnose
- Visual inspection – visible surface cracks
- Check if cracks extend through membrane
- Press on area – brittle? flexible?
- Check age of membrane – over 15 years likely end of life
How to Fix
- Surface cracking only: May be treatable with liquid coating/reinforcement
- Through-cracks: Need patching or replacement
- Widespread alligatoring: Membrane at end of life – replacement recommended
- Prevention: Regular maintenance coatings extend life
🔴 Rust Stains on Concrete
Rust stains on concrete indicate water is reaching steel reinforcement – a serious structural concern.
What It Means
- Water has penetrated to reinforcing steel
- Steel is corroding (rust expands 6-10x volume)
- Will cause spalling (concrete breaking away)
- Structural damage occurring
- Urgent attention needed
How to Diagnose
- Brown/orange stains on concrete surface
- Often accompanied by cracks along reinforcement lines
- May have popped-out concrete pieces (spalling)
- Check basements, retaining walls, concrete roofs
How to Fix
- Immediate: Address water source – repair waterproofing
- Structural assessment: Engineer may need to assess damage
- Repair: Remove spalled concrete, treat steel, patch with repair mortar
- Prevention: Proper waterproofing to keep water from steel
🧱 Spalling Concrete – Advanced Damage
Spalling concrete is when the surface flakes, peels, or breaks away. It’s advanced deterioration from water and corrosion.
What It Means
- Water has penetrated for extended period
- Reinforcement corroding, expanding
- Concrete cover is failing
- Structural integrity compromised
- Immediate action required
How to Diagnose
- Visible flaking, chipping of concrete surface
- Exposed reinforcement in advanced cases
- Hollow sound when tapped
- Often accompanied by rust stains
How to Fix
- Engineer assessment: Determine extent of damage
- Remove all spalled/damaged concrete
- Treat reinforcement: Clean, apply rust inhibitor
- Patch with repair mortar
- Address water source: Repair waterproofing
- Consider cathodic protection for severe cases
🍄 Mould and Mildew Growth
Mould and mildew thrive in damp conditions. Their presence confirms persistent moisture.
What It Means
- Persistent high humidity or dampness
- Poor ventilation
- Water ingress behind walls or under floors
- Health hazard – respiratory issues
How to Diagnose
- Visible black, green, or white growth
- Musty smell
- Check bathrooms, basements, kitchens
- Behind furniture, in corners
- On walls, ceilings, grout
How to Fix
- Address moisture source first – waterproofing, ventilation
- Remove mould with biocide (wear PPE)
- Discard porous materials if heavily infested
- Improve ventilation
- Consider dehumidifier
- Repaint with mould-resistant paint
📏 Rising Damp Signs
Rising damp has specific signs distinct from other moisture problems.
Characteristic Signs
- Tide marks: Horizontal line on wall, usually up to 1m high
- Peeling paint/paper below tide mark
- Flaking plaster – plaster bubbling and falling off
- Efflorescence – white salts on wall
- Rotting skirting boards
- Musty smell
- Hygroscopic salts – wall feels damp even in dry weather
How to Diagnose
- Check external ground levels – should be below DPC
- Look for bridging – earth or paving above DPC
- Moisture meter shows gradient (wetter at bottom)
- Salt test confirms hygroscopic salts
How to Fix
- Install or repair DPC – chemical injection for existing homes
- Remove contaminated plaster
- Replaster with salt-resistant render
- Ensure external ground levels are correct
- See our damp proofing guide for details
💧 Hydrostatic Marking – Water Under Pressure
Hydrostatic marking appears as water lines on basement walls, showing the height water has reached under pressure.
What It Means
- Groundwater is exerting pressure on walls
- Water table has risen above floor level
- External drainage is failing
- Waterproofing is overwhelmed
- Serious basement waterproofing failure
How to Diagnose
- Horizontal water lines on walls
- Dampness at consistent level
- Often after heavy rain
- May have efflorescence at that level
How to Fix
- Improve external drainage – French drains, sump pumps
- Cavity drain membrane system internally
- May need external tanking (requires excavation)
- Sump pump with backup essential
- See our basement waterproofing guide
📋 Delamination – Membrane Separation
Delamination is when waterproofing membrane separates from the substrate. Layers peel apart.
What It Means
- Poor adhesion during installation
- Moisture behind membrane
- Substrate movement
- Membrane failure – water will get behind
How to Diagnose
- Visible bubbling or loose areas
- Hollow sound when tapped
- Can lift edges easily
- Often at laps or edges first
How to Fix
- Cut out delaminated section
- Prepare substrate properly
- Reapply membrane with proper primer
- Extend patch beyond damaged area
- If widespread, may need replacement
💧 Ponding Water on Flat Roofs
Ponding water (water standing 48+ hours after rain) is both a sign of failure and a cause of future failure.
What It Means
- Insufficient fall to drains
- Structural deflection
- Blocked drains or scuppers
- Membrane degradation likely
- Leaks will follow
How to Diagnose
- Inspect after rain – standing water
- Check drains – are they clear?
- Measure depth of ponding
- Check for associated leaks inside
How to Fix
- Clear drains, scuppers
- Add additional drains at low points
- Install tapered insulation or screed to create fall
- For severe cases, may need re-roofing
- See our flat roof guide for details
🧱 Leaking Through Concrete
Leaking through concrete – water appearing on the other side of a concrete wall or slab – indicates serious failure.
What It Means
- Hydrostatic pressure forcing water through
- Concrete is porous or cracked
- Waterproofing has failed completely
- May indicate structural issues
How to Diagnose
- Active water flow or damp patches
- Often at construction joints, cracks
- Worse after rain
- May have efflorescence around leak
How to Fix
- Injection grouting for cracks
- Crystalline waterproofing for porous concrete
- Cavity drain membrane for active leaks
- External tanking if accessible
- Engineer may need to assess structural cracks
🔍 How to Diagnose the Root Cause
Identifying the signs of waterproofing failure is one thing – finding the root cause requires systematic investigation.
Step-by-Step Diagnosis
- Observe timing: Does it happen only after rain? Continuous? Seasonal?
- Trace the water: Follow stains upward – water runs down
- Check outside: Inspect roof, gutters, downpipes, ground levels
- Check flashings: At walls, pipes, penetrations – common failure points
- Moisture meter: Measure moisture levels in walls, floors
- Hygrometer: Check humidity levels
- Salt test: Check for hygroscopic salts (rising damp)
- Flood test: For bathrooms – dam drain, flood floor, check for leaks
- Professional inspection: Thermal imaging, moisture meters, borescopes
For complex cases, professional leak detection is recommended.
🛠️ Fixes by Failure Type
Different failures need different fixes:
| Failure Type | Common Fix | When to Call Professional |
|---|---|---|
| Roof membrane blistering | Cut and patch, or recoat | Widespread blistering |
| Cracked membrane | Patch with compatible material | Large cracks, structural movement |
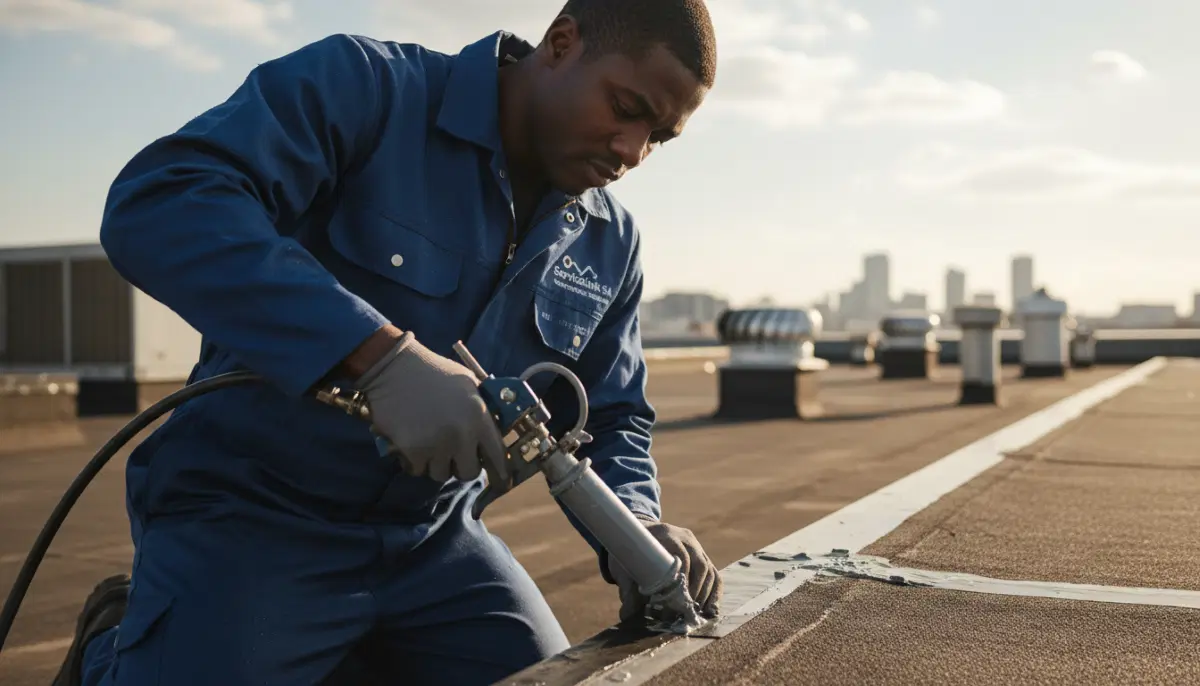
| Flashing failure | Re-seal or replace flashing | Complex details, high access |
| Rising damp | Chemical DPC, replaster | Always professional – not DIY |
| Basement water | Cavity drain, sump pump | Always professional – complex |
| Bathroom leaks | Re-do waterproofing before tiling | Requires tile removal, professional |
| Ponding water | Improve drainage, add drains | Structural changes may be needed |
| Efflorescence | Address water source, brush off | If recurring, need professional diagnosis |
⏱️ Temporary vs Permanent Fixes
Sometimes you need a quick fix to stop active leaking, but permanent solutions require proper repair.
Temporary Emergency Fixes
- Tarps over leaking roof areas
- Roof sealant tape for small cracks
- Hydraulic cement for active leaks in basements
- Water diversion (gutters, downpipes redirect)
- Dehumidifier for damp basements
Permanent Solutions
- Proper membrane repair or replacement
- Flashing replacement
- DPC installation
- Cavity drain systems
- External tanking
- Improved drainage systems
Warning: Temporary fixes are just that – temporary. They may void warranties and can mask underlying problems. Always follow up with permanent repair.
⚖️ When to Repair vs Replace
Knowing whether to repair or replace failed waterproofing saves money and frustration.
Repair is Appropriate When
- Isolated damage (one leak, small area)
- Membrane is otherwise sound (less than 10-15 years old)
- No widespread degradation
- Flashing failures only
- Budget is limited (temporary)
Replace is Necessary When
- Membrane near end of life (15-20+ years)
- Widespread blistering, cracking, alligatoring
- Multiple leaks in different areas
- Substrate damage or deterioration
- Repair costs exceed 50% of replacement
- Systematic installation failure
For help deciding, our free inspection service can provide professional assessment.
💰 Cost of Waterproofing Repairs
Repair costs vary widely by problem and location.
| Repair Type | Typical Cost Range | Notes |
|---|---|---|
| Small roof patch | R800 – R2,000 | Per patch, includes labour |
| Flashing repair (per metre) | R400 – R1,200 | Depends on complexity |
| Chemical DPC (per metre) | R800 – R1,500 | For rising damp |
| Basement crack injection | R1,000 – R2,500 per crack | Depends on depth, accessibility |
| Bathroom re-waterproofing | R4,500 – R12,000 | Plus tile removal/replacement |
| Cavity drain membrane (per m²) | R600 – R1,200 | For basements |
| Diagnostic inspection | R500 – R1,500 | Often free with repair |
For detailed pricing, see our waterproofing cost guide.
📍 Regional Considerations by City
📌 Johannesburg & Pretoria
In Johannesburg and Pretoria, hailstorms damage flat roofs. Look for impact damage, punctures. Thermal cycling causes membrane stress. Rising damp in older homes common.
📌 Durban & Umhlanga
In Durban and Umhlanga, high humidity and rainfall make mould and mildew common. Check bathrooms and basements carefully. Salt air affects coastal properties.
📌 Cape Town & Ballito
In Cape Town and Ballito, winter rain tests every flashing and detail. Heritage homes need breathable solutions. Rising damp common in older properties.
📌 Centurion & Hillcrest
In Centurion and Hillcrest, new developments may have hidden defects. Get professional inspections before purchase.
❌ 8 Common Waterproofing Repair Mistakes
Avoid these errors when fixing waterproofing failures:
- Mistake #1: Treating symptoms, not cause. Patching a leak without fixing ponding water or flashing failure means it will leak elsewhere.
- Mistake #2: Using incompatible materials. Mixing different membrane types or using wrong patching materials causes adhesion failure.
- Mistake #3: Poor surface preparation. Patches on dirty, wet, or poorly primed surfaces fail quickly.
- Mistake #4: Ignoring manufacturer instructions. Each product has specific application requirements – follow them.
- Mistake #5: Not addressing drainage first. Waterproofing without proper drainage will fail.
- Mistake #6: DIY when professional needed. Complex repairs (basements, structural) need expertise.
- Mistake #7: Not checking for hidden damage. Water travels – leak location may not be entry point.
- Mistake #8: Delaying repairs. Small problems become big leaks. Act promptly.
For more guidance, see our contractor selection guide.
❓ Frequently Asked Questions
What are the first signs of waterproofing failure?
Signs of waterproofing failure include water stains on ceilings, peeling or bubbling paint, efflorescence (white crystals) on walls, musty smells, and visible mould. On roofs, look for blisters, cracks, or ponding water. Early detection saves money.
What does efflorescence on concrete mean?
Efflorescence on concrete indicates water moving through the material, carrying dissolved salts that crystallize on the surface. It confirms moisture transmission and potential waterproofing failure. Address the water source, then brush off salts.
Why is my paint bubbling after rain?
Bubbling paint on wall after rain means water is penetrating the wall from outside. Check gutters, downpipes, external render, and waterproofing. Fix the external cause, let wall dry, then repaint with moisture-resistant paint.
What causes musty smell in basement?
Musty smell in basement indicates persistent dampness, mould, and decay. It’s caused by waterproofing failure, high humidity, or inadequate ventilation. Address water ingress, improve ventilation, use dehumidifier, and remove mould.
How do I fix a leaking flat roof?
First, identify the source – blisters, cracks, flashing failure, or ponding water. Small areas can be patched with compatible materials. For widespread issues, recoat or replace. See our flat roof guide for detailed steps.
What is spalling concrete?
Spalling concrete is when the surface flakes, peels, or breaks away. It’s caused by water reaching reinforcement, causing rust that expands and cracks the concrete. Urgent professional repair needed – address water source, repair concrete, and protect steel.
How much do waterproofing repairs cost?
Costs vary: small roof patches R800-R2,000, flashing repairs R400-R1,200 per metre, chemical DPC R800-R1,500 per metre, basement crack injection R1,000-R2,500. For accurate quotes, use our free quote system.
Can I repair waterproofing myself?
Small, simple repairs (like sealing a minor crack) may be DIY, but most waterproofing repairs need professional expertise. Incorrect repairs waste money and allow more damage. For complex issues, always use qualified contractors.
✅ Final Thoughts – Your Failure Action Plan
Waterproofing failure doesn’t improve with time – it gets worse. Recognizing the signs early and acting promptly saves your home from serious damage.
Key takeaways:
- Know the signs: Stains, peeling paint, efflorescence, musty smells, mould
- Diagnose correctly: Find the source, not just the symptom
- Act promptly: Small problems become big leaks
- Use proper materials: Compatible, quality products
- Get professional help: Complex repairs need expertise
- Document everything: For warranty, insurance, disputes
🏚️ The Bottom Line:
Early detection saves thousands
Don’t ignore the signs – waterproofing failure only gets worse and more expensive to fix.
Your 5-Step Action Plan
- Inspect regularly: Check ceilings, walls, roof, basement seasonally
- Document signs: Photos, notes on when problems appear
- Diagnose cause: Use our guide to identify likely source
- Get professional assessment: Use our free inspection service
- Repair properly: Don’t delay – fix the root cause
Spotting Signs of Waterproofing Failure?
Don’t wait for more damage. Get free, no-obligation quotes from vetted waterproofing specialists who can diagnose and fix the problem.
📞 Call us: 073 138 4726 for urgent assistance
Free site inspections •
Beat-your-quote guarantee •
Our guarantees
📚 Official resources & standards:
- Corporation of Waterproofing Professionals – Failure diagnosis guide
- Safeguard – Remedial waterproofing solutions
- IOL – Consumer rights regarding defective workmanship
Information accurate as of publication. Prices are indicative and may vary by location and contractor. This guide is for informational purposes.
Written by: Innocent T Hanyani
21+ years construction and digital industry experience, ServiceLink SA
Innocent has diagnosed thousands of waterproofing failures across South Africa, from leaking roofs to damp basements. His expertise with CWP guidelines and remedial solutions ensures this guide reflects real-world experience.
For more detailed information, explore our flat roof problems guide for roof-specific issues, our damp proofing guide for rising damp, our roof leak prevention guide for broader advice, and our contractor selection guide for finding qualified specialists. These resources work together to help you identify and fix waterproofing failures.