Laminate Flooring Installation Guide & Pricing in South Africa
🔨 Step-by-step DIY instructions, professional tips, and complete cost breakdowns for laminate floors in SA homes.
You’ve bought the beautiful laminate planks from a store in Fourways. The boxes are stacked in your living room. Now what? Installing laminate flooring yourself can save you thousands, but one mistake – like forgetting acclimation or getting the expansion gap wrong – can ruin your new floor. Whether you’re a confident DIYer in Pretoria or planning to hire a pro in Cape Town, understanding the full laminate flooring installation guide pricing South Africa landscape is essential.
This guide covers everything. You’ll learn the exact step-by-step process for click lock flooring installation, from preparing the subfloor to clicking the last plank into place. We detail the tools you’ll need – tapping block, pull bar, spacers – and explain critical concepts like acclimation and expansion gaps. We also provide a complete pricing breakdown: material costs (R150–R600/m²), labour (R100–R250/m²), underlay options (R30–R80/m²), and the total installed cost (R280–R930/m²). Plus, we cover laminate floor transition strips (T-mouldings, reducers) and how to avoid common floating floor installation problems.
If you’re ready to get started, explore our Services Overview or visit our Flooring Services page to find vetted installers near you. For more on how we work, see How It Works.
Not a DIYer? Get Free Quotes from Pros
Compare prices from registered, verified laminate flooring installers in your area. It’s free and obligation-free.
Servicing Johannesburg, Pretoria, Cape Town, Durban, and nationwide
📋 Table of Contents – Laminate Installation Guide
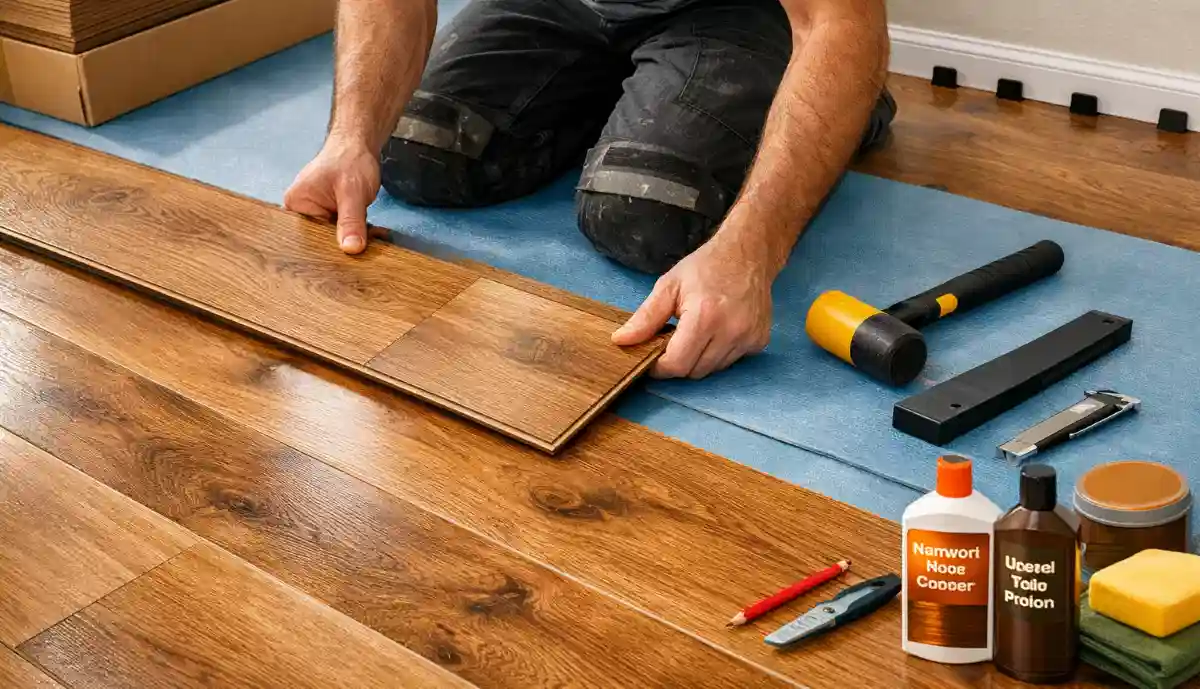
📦 Before You Start: Acclimation & Essential Tools
Rushing into installation is the biggest mistake. Preparation is everything.
- Acclimation: Laminate is made of wood fibers (HDF) and expands/contracts with humidity. You must let the planks sit in the room where they’ll be installed for at least 48 hours before starting. Open the boxes, stack them neatly, and let them adjust to the room’s temperature and humidity. This prevents buckling or gapping later.
- Essential Tools:
- Tapping block: A plastic block that protects the plank’s edge when tapping planks together.
- Pull bar: Used to tap the last row of planks into place against the wall.
- Spacers: Small wedges placed between the planks and the wall to maintain the required expansion gap (usually 8-10mm).
- Hammer, tape measure, pencil, spacer wedges, saw (jigsaw or circular saw for cutting).
Read more about our approach on our About Us page or see why clients choose us on our Benefits page.
⚙️ Subfloor Preparation for Laminate
Laminate is a floating floor – it’s not attached to the subfloor. This means the subfloor must be clean, dry, and flat.
- Levelness: The subfloor must be flat to within 3mm over a 2-metre span. Use a long straightedge to check. High spots need sanding; low spots need filling with self-levelling compound.
- Cleanliness: Sweep and vacuum thoroughly. Any grit or debris will cause crunching noises and can damage the underlay.
- Moisture: For concrete subfloors, especially in Durban or Umhlanga, consider a moisture barrier if recommended by the underlay manufacturer.
- Existing flooring: Laminate can sometimes be installed over old vinyl or tiles if they are sound and flat. Never install over carpet.
Our free inspection can assess your subfloor condition.
🧻 Laminate Underlayment Options
Underlay is a critical component. It provides cushioning, sound absorption, and a moisture barrier.
- Foam Underlay: The most common and affordable. Provides basic cushioning and helps smooth minor subfloor imperfections. Cost: R30 – R50/m².
- Combination Underlay (with built-in moisture barrier): Foam with a plastic layer. Essential for concrete subfloors. Cost: R40 – R60/m².
- Acoustic Underlay: Thicker, denser foam or rubber composite. Excellent for soundproofing in townhouses or apartments. Cost: R60 – R80/m².
- Underlay with Integrated Vapour Barrier: Some premium underlays include a vapour barrier, saving you an extra step.
Choose based on your subfloor type and need for sound reduction. Check SANS 1529 for laminate standards.
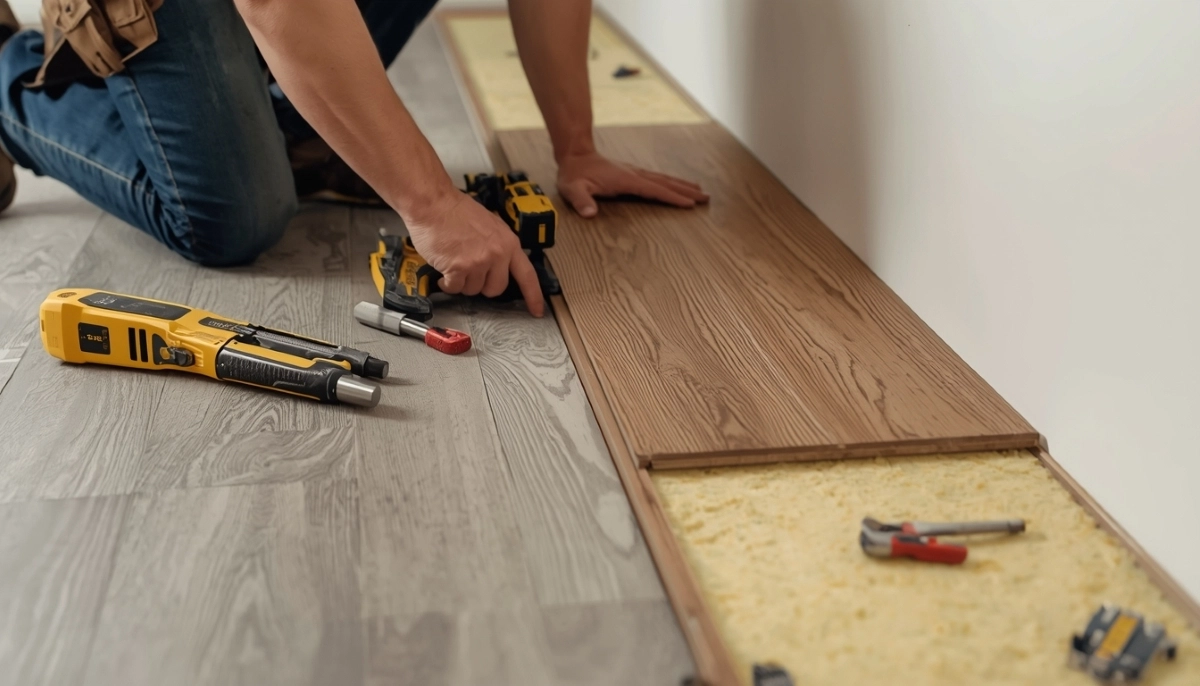
🔨 Step-by-Step Laminate Installation
Here’s how professional installers and successful DIYers do it.
- Lay the Underlay: Roll out the underlay across the entire floor, butting edges together and taping seams. Trim excess around edges.
- Start the First Row: Place spacers against the wall. Lay the first row of planks with the tongue facing the wall. Cut the last plank to length, remembering to maintain the expansion gap.
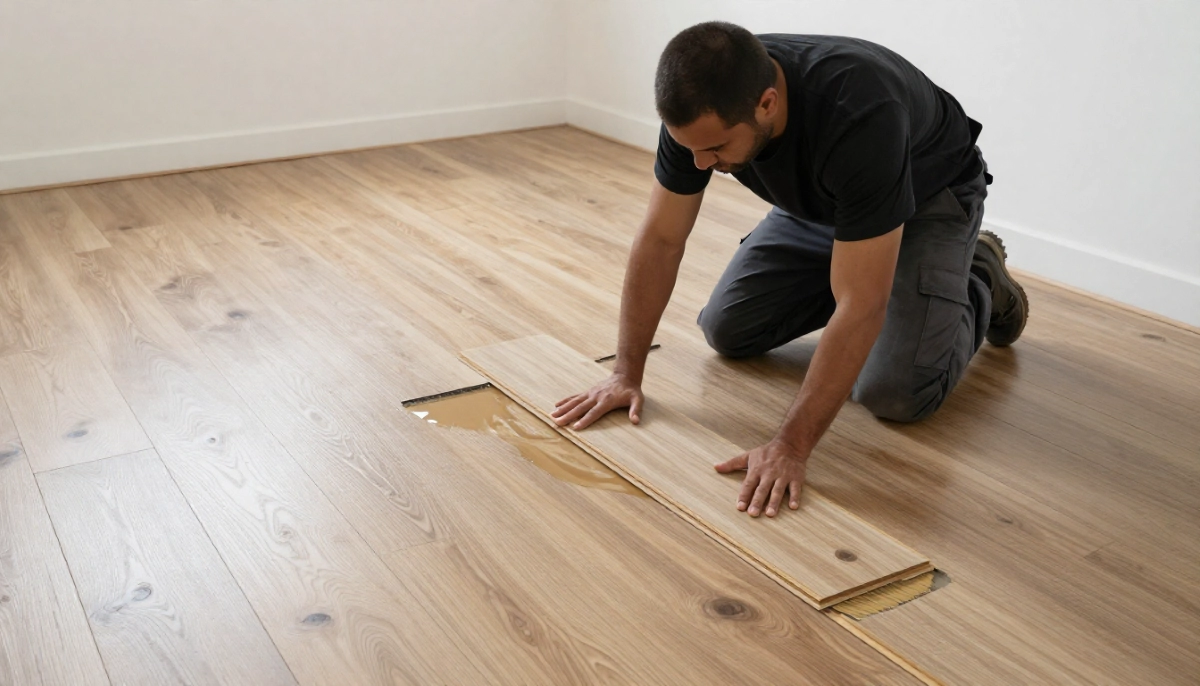
- Build the Second Row: Start with the offcut from the first row (if it’s at least 30cm long) to stagger the joints. Click the planks into the first row by holding them at a 20-30 degree angle, engaging the tongue and groove, then lowering flat. Use the tapping block if needed to close gaps.
- Continue Across the Room: Work row by row. Stagger end joints by at least 30cm for stability and appearance.
- The Last Row: You’ll likely need to cut planks lengthwise to fit. Measure the width needed at several points (walls aren’t always straight). Use a pull bar to gently tap the last row into place.
- Remove Spacers: Once the floor is laid, remove the spacers. The expansion gap will be covered by skirting or quarter round moulding.
Pro tip: Always maintain the required expansion gap (usually 8-10mm) around the entire perimeter, including door frames and pipes.

🚪 Transition Strips & Finishing Touches
Where your laminate meets another floor type or a doorway, you’ll need transition strips.
- T-moulding: Used to join two hard surfaces of equal height (e.g., laminate to tile).
- Reducer: Used where laminate meets a lower floor (e.g., laminate to carpet).
- Quarter round / Scotia: Moulding used to cover the expansion gap if you’re not replacing skirting boards. It’s attached to the skirting, not the floor, allowing the floor to float freely.
- Threshold strip: Used in doorways to cover the join.
Measure door frames carefully. You may need to undercut the door casing so the laminate slides underneath for a clean look. See our laminate installation service page for professional help.
💰 Complete Laminate Flooring Cost Breakdown
Your total cost is made up of several components. Here are the South African ranges.
- Materials (Laminate planks): R150 – R600 per m². Driven by AC rating, thickness, and design.
- Underlayment: R30 – R80 per m².
- Labour (if hiring a pro): R100 – R250 per m².
- Transition strips & mouldings: R150 – R400 each, depending on type and length.
- Skirting removal/replacement (if needed): R50 – R100 per linear metre.
- Old floor removal: R50 – R100 per m² (for carpet or vinyl).
- Waste factor: You must order 10-15% more than the room area for cuts and mistakes.
Always ask for a detailed quote that breaks these items down. See our main cost guide for more.
📊 Laminate Material Costs by AC Rating
The AC rating is the best indicator of durability and price.
- AC3 (Moderate residential): Suitable for bedrooms and low-traffic areas. Cost: R150 – R300/m².
- AC4 (High traffic residential / light commercial): The recommended choice for most South African homes – living rooms, hallways, family areas. Cost: R250 – R450/m².
- AC5 (Heavy commercial): Extremely durable, overkill for most homes. Cost: R400 – R600/m².
AC4 vs AC3 laminate for homes – AC4 is worth the extra cost for longevity, especially if you have kids or pets. Check AC rating standards for more details.
👷 Professional Laminate Installation Labour Costs
If you’re not doing it yourself, here’s what to expect.
- Standard installation (straight lay, rectangular room): R100 – R180 per m².
- Complex installation (many cuts, angles, herringbone pattern): R180 – R250 per m².
- Skirting installation: R50 – R100 per linear metre.
- Furniture moving: Some installers charge extra – ask upfront.
Always verify the installer’s credentials. Check CIDB grading for larger projects. See our contractor selection guide for tips.

📐 Total Installed Cost per m² (DIY vs Pro)
Here’s what you’ll actually pay to have a finished floor.
- DIY Installation (you buy materials only): R180 – R680 per m² (laminate + underlay).
- Professional Installation (materials + labour): R280 – R930 per m².
- Mid-range typical total (AC4, standard underlay, pro install): R450 – R650 per m².
These ranges cover the vast majority of residential projects in South Africa.
📍 Installation Costs by Major City (50m², AC4 mid-range)
- Johannesburg & Fourways: R24,000 – R36,000 total installed.
- Pretoria & Centurion: R23,000 – R34,000.
- Cape Town & Bellville: R25,000 – R38,000.
- Durban & Umhlanga: R23,000 – R35,000.
- Paarl & Winelands: R24,000 – R36,000.
Get local quotes via our request-a-quote page.
🏘️ Realistic Pricing Examples
🏡 40m² Apartment in Midrand
DIY Project: AC4 laminate (R350/m²), quality underlay (R50/m²).
- Materials: 40m² x R400 = R16,000
- Waste (10%): R1,600
- Transitions & trim: R800
- Total DIY Cost: R18,400
🏠 80m² House in Cape Town
Professional Install: AC4 laminate (R380/m²), underlay (R50/m²), labour (R180/m²).
- Materials + underlay: 80m² x R430 = R34,400
- Labour: 80m² x R180 = R14,400
- Waste & transitions: R2,500
- Total Installed: R51,300
📊 Complete Laminate Cost Comparison Table
| Component | Budget Range | Mid-Range | Premium |
|---|---|---|---|
| Laminate Material | R150 – R250/m² (AC3) | R250 – R400/m² (AC4) | R400 – R600/m² (AC5) |
| Underlayment | R30 – R40/m² | R40 – R60/m² | R60 – R80/m² |
| Professional Labour | R100 – R150/m² | R150 – R200/m² | R200 – R250/m² |
| Total DIY (materials only) | R180 – R290/m² | R290 – R460/m² | R460 – R680/m² |
| Total Installed (with labour) | R280 – R440/m² | R440 – R660/m² | R660 – R930/m² |
⚠️ Common Floating Floor Installation Problems
Even with careful installation, issues can arise. Here’s how to identify and fix them.
- Problem: Gaps between planks. Cause: Often due to not tapping planks fully together, or humidity changes. Fix: For minor gaps, try using the tapping block to gently close them. For persistent gaps, you may need to disassemble and re-lay that section.
- Problem: Buckling or tenting. Cause: No expansion gap, or the floor is pinned by heavy furniture or door frames. Fix: Trim the affected planks to restore the expansion gap. This may require removing skirting.
- Problem: Creaking or crunching noises. Cause: Debris under the underlay, or an uneven subfloor. Fix: Unfortunately, this often means lifting the affected area to clean or level the subfloor.
- Problem: Clicking when walked on. Cause: Loose joint, often from not clicking fully into place. Fix: May require tapping the joint closed or replacing the plank.
- Problem: Laminate floor water damage repair – swollen planks. Cause: Water ingress. Fix: The affected planks must be removed and replaced. You cannot reverse swelling.
If you encounter major issues, our floor repair service can help.
⚖️ AC4 vs AC3 Laminate for Homes – Which to Choose?
This is a common dilemma. Here’s our advice based on South African家庭条件.
- AC3: Suitable for low-traffic areas like formal lounges, spare bedrooms, or studies. It’s a budget-friendly option if you expect light use.
- AC4: The sweet spot for most homes. It handles the traffic of living rooms, family rooms, hallways, and stairs. It’s more resistant to wear from kids and pets. The extra cost (typically 20-30% more than AC3) is worth it for longevity.
- AC5: Overkill for residential use unless you have a very large family with extreme traffic. More common in light commercial settings.
Verdict: For primary living areas in Johannesburg or Pretoria homes, choose AC4.
💰 Laminate vs Engineered Wood Cost Comparison
Laminate is often compared to engineered wood. Here’s how costs stack up.
- Laminate (AC4, mid-range): Total installed: R440 – R660/m².
- Engineered Wood (mid-range): Total installed: R690 – R1,200/m². The real wood veneer costs significantly more.
- Laminate (budget): From R280/m² installed. Engineered wood rarely goes below R600/m².
Laminate is the clear winner for budget. However, engineered wood offers a real wood surface that can be sanded (once or twice). For a full comparison, see our vinyl vs laminate guide.
❌ 8 Common DIY Laminate Installation Mistakes
- Mistake #1: Skipping acclimation. Planks that haven’t acclimated can expand or contract after installation, causing gaps or buckling.
- Mistake #2: Forgetting the expansion gap. No gap = buckling. Measure and use spacers diligently.
- Mistake #3: Uneven subfloor. Crunching, clicking, and joint failure are guaranteed.
- Mistake #4: Wrong underlay. Using underlay that’s too thick or not suitable for your subfloor can cause joint failure.
- Mistake #5: Not staggering joints. Joints that line up create a weak point and look terrible. Stagger by at least 30cm.
- Mistake #6: Hammering directly on planks. Always use a tapping block. Direct blows damage the locking mechanism.
- Mistake #7: Poor cutting. Rough cuts or inaccurate measurements lead to visible gaps.
- Mistake #8: Ignoring door frames. Not undercutting door casings results in ugly cuts and prevents proper expansion.
Avoid these and your DIY project will look professional. If you’re unsure, our contractor guide can help you find a pro.
❓ Frequently Asked Questions
What is the cost of laminate flooring per m2 in South Africa?
Laminate floor cost per m2 ranges from R150 to R600 for materials alone. Total installed cost with underlay and professional labour is R280 to R930 per m². For a typical AC4 installation, budget R450-R650/m².
Can I install laminate flooring myself?
Yes, DIY laminate installation is very common. The click-lock systems are designed for homeowners. Success depends on careful preparation – acclimation, subfloor flatness, and maintaining expansion gaps. Follow our step-by-step guide above.
What underlayment is best for laminate on concrete?
For concrete subfloors, choose laminate underlayment options with a built-in vapour barrier (a plastic layer). This prevents moisture from the concrete reaching the laminate. Combination underlay with foam + vapour barrier is ideal.
What is the difference between AC4 and AC3 laminate?
AC4 vs AC3 laminate for homes – AC4 has a thicker, more durable wear layer, making it suitable for high-traffic areas like living rooms and hallways. AC3 is for moderate traffic like bedrooms. AC4 costs more but lasts longer in busy homes.
What are transition strips for laminate flooring?
Laminate floor transition strips (T-mouldings, reducers) are used to create a neat finish where laminate meets another floor type (tile, carpet) or in doorways. They allow for expansion and cover the gap.
How much does it cost to install laminate in a 50m2 house?
For a 50m² area with AC4 mid-range laminate, expect to pay R22,000 – R35,000 for professional installation (materials + labour). DIY would be R14,000 – R25,000 for materials only.
What causes laminate floor buckling?
Floating floor installation problems like buckling are almost always caused by insufficient expansion gaps around the perimeter or the floor being trapped by heavy furniture. The floor expands with humidity and has nowhere to go.
Can laminate flooring be repaired after water damage?
Laminate floor water damage repair is possible by replacing the affected planks. You must have spare planks from the same batch. Swollen planks cannot be restored to their original shape and must be cut out and replaced.
What tools do I need for laminate installation?
Essential tools: tapping block, pull bar, spacers, hammer, tape measure, pencil, and a saw (jigsaw or circular saw) for cutting planks. A pull bar is crucial for the last row.
How long should laminate flooring last?
With proper installation and care, a quality AC4 laminate should last 15-25 years. AC3 may last 10-15 years in average conditions. The finish wears over time, and it cannot be sanded.
✅ Final Thoughts – Your Laminate Flooring Action Plan
Laminate flooring offers an excellent balance of affordability, durability, and style. Whether you’re a confident DIYer or prefer professional help, success comes down to preparation and understanding the process. This laminate flooring installation guide pricing South Africa resource gives you all the information you need to budget accurately and avoid costly mistakes.
Key takeaways:
- Always acclimatise your planks for at least 48 hours.
- Prepare the subfloor – it must be flat, clean, and dry.
- Choose the right underlay for your subfloor and needs.
- Maintain the expansion gap – it’s not optional.
- For DIY, invest in the right tools (tapping block, pull bar).
- For professional installs, verify credentials and get detailed quotes.
Your 5-Step Action Plan
- Measure accurately and calculate m². Add 10-15% waste.
- Choose your laminate – AC4 is recommended for most homes.
- Select underlay based on subfloor and acoustic needs.
- Decide DIY or Pro – be honest about your skill level.
- Book a free inspection if hiring a pro, or gather your tools and start prepping.
Ready to Start Your Laminate Project?
Get free, no-obligation quotes from veted laminate flooring specialists, or book a free inspection to assess your subfloor.
📞 Call us: 073 138 4726 for personalised assistance
Free site inspections •
Beat-your-quote guarantee •
Our guarantees
📚 Official resources & standards:
- SABS – SANS 1529 for laminate flooring standards.
- CIDB – Verify contractor grading for laminate installers.
- AC Rating Standards – Information on abrasion criteria for laminate.
Information accurate as of publication. Prices are indicative and may vary by supplier and location. This guide is for informational purposes.
Written by: Innocent T Hanyani
21+ years construction and digital industry experience, ServiceLink SA
Innocent has overseen hundreds of laminate flooring installations across South Africa, from DIY homeowner projects to large-scale commercial jobs. His expertise in subfloor preparation, click-lock systems, and cost estimation ensures this guide reflects real-world best practices.
For more detailed information, explore our related guides: flooring installation costs for a broader budget view, our vinyl vs laminate comparison to help you choose, and our common problems guide for troubleshooting issues. For finding the right professional, see our contractor selection guide and ensure they have proper liability insurance and understand dispute resolution procedures. These resources work together to give you complete knowledge for your laminate flooring project.