
Not Sure Which Adhesive to Use?
Get free quotes from verified tiling specialists who understand thinset vs mortar and can recommend the right tile bonding solution for your project.
Servicing Gauteng, Johannesburg, Pretoria, Centurion, and across South Africa
Tile Adhesives Explained: Thinset vs Mortar – Which to Use SA
🩹 From thinset to epoxy – everything you need to know about bonding tiles to surfaces
You’ve chosen your tiles. You’ve prepared your subfloor. Now comes the question that can make or break your entire project: what adhesive should you use? I’ve seen beautiful, expensive tiles fail within months because someone used the wrong adhesive – or worse, used the right adhesive incorrectly.
Over two decades of tiling across Gauteng, from Johannesburg to Pretoria and Centurion, I’ve learned that tile adhesives explained properly is one of the most important lessons for any DIYer or professional. The difference between thinset vs mortar isn’t just semantics – it’s about using the right product for the right job.
In this complete guide to tile bonding, I’ll answer what is the difference between thinset and mortar and cover all the adhesive types you need to know. You’ll learn about thinset (the most common), mastic (the easy but limited option), epoxy (the ultimate in durability), and specialty adhesives. I’ll explain which adhesive works for which tile type, substrate, and location. By the end, you’ll know exactly which adhesive to buy – and which to avoid.
For more installation guidance, check out our guides on essential tile installation tools, tile spacers and leveling systems, tile lippage guide, hollow sounding tiles, and why tiles crack after installation.
📋 Table of Contents – Tile Adhesives Guide
⚠️ Why Adhesive Choice Matters
Using the wrong adhesive leads to:
- Tile failure: Tiles loosen, crack, or pop off completely
- Hollow sounds: Insufficient bond creates drumminess (read hollow tiles guide)
- Cracked tiles: Movement not accommodated by rigid adhesive
- Water damage: Wrong adhesive in wet areas fails quickly
- Mould growth: Adhesive that retains moisture promotes mould
- Wasted money: Expensive tiles ruined by cheap adhesive
Proper tile bonding requires matching:
- Adhesive type to tile material (ceramic, porcelain, glass, stone)
- Adhesive to substrate (concrete, wood, cement board, existing tiles)
- Adhesive to location (dry, wet, outdoor, heated floors)
- Adhesive to tile size (small tiles need different trowel notches)
For standards, refer to SANS 10400 adhesive standards and SABS material specifications.
🧱 Thinset Mortar – The Industry Standard
Thinset (also called thinset mortar) is the most common adhesive for tile installation. Here’s what you need to know about thinset vs mortar:
What Is Thinset?
A cement-based adhesive mixed with water (or liquid latex polymer) to create a paste. It’s applied with a notched trowel and cures to form a hard, durable bond.
Types of Thinset:
- Unmodified thinset: Just cement and sand – mix with water. Basic, affordable. Use on concrete slabs and with porcelain (when primer is used).
- Modified thinset (polymer-modified): Contains latex or polymer additives. More flexible, stronger bond, better water resistance. Recommended for most applications.
- Large format tile (LFT) thinset: Specially formulated for tiles over 600x600mm. Higher bond strength, better non-sag properties. Essential for large format.
- Rapid-setting thinset: Cures in 2-4 hours instead of 24+. Good for time-sensitive projects but less forgiving.
Best Uses for Thinset:
- ✓ Floor tiles (all types)
- ✓ Wall tiles (all types)
- ✓ Wet areas (bathrooms, showers, outdoor)
- ✓ Large format tiles (with LFT thinset)
- ✓ Natural stone (with white thinset)
- ✓ Porcelain tiles (with modified thinset)
- ✓ Underfloor heating systems
Pros: Strong, durable, versatile, water-resistant, affordable (R150-R400 per 20kg bag).
Cons: Requires mixing, must be used within pot life (2-4 hours), heavier to work with, more skill required.
🫙 Mastic (Pre-Mixed Adhesive) – Convenience with Limits
Mastic is a pre-mixed, organic-based adhesive that comes ready to use in a bucket.
What Is Mastic?
An organic, acrylic-based adhesive that’s pre-mixed and ready to apply. No mixing required – simply open and spread.
Best Uses for Mastic (Limited!):
- ✓ Small wall tiles (under 300x300mm)
- ✓ Kitchen backsplashes (dry area)
- ✓ Bathroom walls (above shower splash zone)
- ✓ Dry indoor walls only
- ✓ DIY small projects (convenient)
Where NOT to Use Mastic (Critical!):
- ❌ Any floor tiles – never on floors
- ❌ Wet areas (showers, bathroom floors, outdoors) – re-emulsifies and fails
- ❌ Large tiles (over 300x300mm) – not strong enough
- ❌ Porcelain tiles (too heavy, mastic won’t hold)
- ❌ Natural stone – can stain
- ❌ Underfloor heating – mastic degrades with heat
Pros: Convenient (no mixing), easy to use, less messy, good for small DIY backsplashes.
Cons: NOT waterproof (re-emulsifies), weak bond, long drying time, expensive per m², limited applications. I rarely recommend mastic – thinset is almost always better.
⚠️ Critical Warning:
NEVER use mastic in showers, on bathroom floors, or outdoors. It re-emulsifies when wet – meaning it turns back into a sticky paste and your tiles will fall off. I’ve seen entire shower walls collapse because someone used mastic. Use modified thinset instead.
Need Professional Tile Installation?
Get free quotes from verified tiling specialists who understand thinset vs mortar and will use the right adhesive for your specific project.
Free inspections available. Beat Your Quote guarantee.
🔬 Epoxy Adhesive – Maximum Durability
Epoxy adhesive is a two-part (resin + hardener) system that creates an incredibly strong, waterproof bond.
What Is Epoxy Adhesive?
A chemical-based, two-part adhesive that cures by chemical reaction, not evaporation. Extremely strong, completely waterproof, and chemical-resistant.
Best Uses for Epoxy:
- ✓ Commercial kitchens and food processing areas
- ✓ Laboratories and medical facilities
- ✓ Industrial areas with chemical exposure
- ✓ Tile over tile installations (strong bond)
- ✓ Areas requiring maximum durability
- ✓ Glass tile installations (white epoxy only)
- ✓ Mosaic installations
Pros: Extremely strong, completely waterproof, chemical-resistant, no mixing with water, consistent quality.
Cons: Expensive (R500-R1,000+ per kit), difficult to work with (pot life 30-60 minutes), requires precise mixing, difficult to clean, overkill for most residential applications.
Note: For most homes, modified thinset is sufficient. Epoxy is usually reserved for commercial or specialty applications.
⚖️ Thinset vs Mortar – The Confusion Cleared
Many people are confused about thinset vs mortar. Here’s the clarification:
| Term | What It Actually Means | Use For |
|---|---|---|
| Thinset | Cement-based adhesive applied in thin layers (typically 3-12mm) | Tile installation (what most people call “tile adhesive”) |
| Mortar (general) | Broader term for cement-sand mixtures | Bricklaying, stone setting, thick-bed applications |
| Medium-bed mortar | Thinset variant for uneven substrates (up to 20mm thick) | Leveling uneven floors before tiling |
| Thick-bed mortar | Traditional mortar for setting stone or pavers (25-50mm) | Pavers, stone walls, not typical tile installation |
The Short Answer: For 99% of tile installations, “thinset” is the correct adhesive. When people ask about thinset vs mortar, they usually mean “is thinset the right product?” – and the answer is yes, for tile. Don’t use bricklaying mortar for tile.
📋 Adhesive Selection Guide – By Tile and Surface
Use this adhesive types guide to choose the right product:
| Application | Recommended Adhesive | Alternative | Avoid |
|---|---|---|---|
| Ceramic floor (standard) | Modified thinset | Unmodified thinset + primer | Mastic |
| Porcelain floor | Modified thinset (polymer) | LFT thinset for large format | Mastic, unmodified |
| Large format tiles (600mm+) | LFT modified thinset | Standard modified + back-buttering | Unmodified |
| Wall tiles (dry area) | Modified thinset OR mastic (small tiles) | Epoxy (overkill) | Unmodified thinset |
| Shower walls (wet) | Modified thinset | Epoxy (overkill) | Mastic (will fail) |
| Shower floor | Modified thinset | Epoxy (best) | Mastic, unmodified |
| Outdoor tiles | Modified thinset (exterior grade) | Epoxy | Mastic, unmodified |
| Glass tiles | White modified thinset | White epoxy | Grey thinset (shows through) |
| Natural stone | White modified thinset | White epoxy | Grey thinset (stains) |
| Tile over existing tile | Epoxy OR modified thinset with primer | Special crack-isolation thinset | Standard thinset |
| Underfloor heating | Modified thinset (flexible) | Epoxy | Unmodified, mastic |
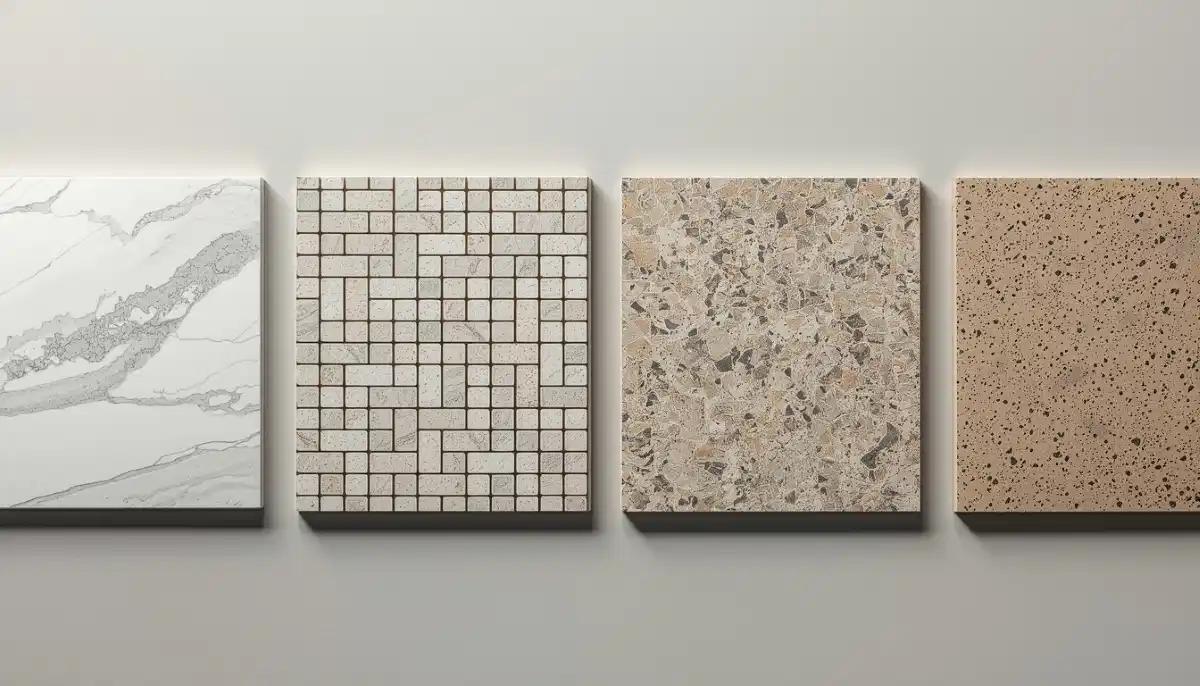
For more on tile types, see the tile type comparison chart.
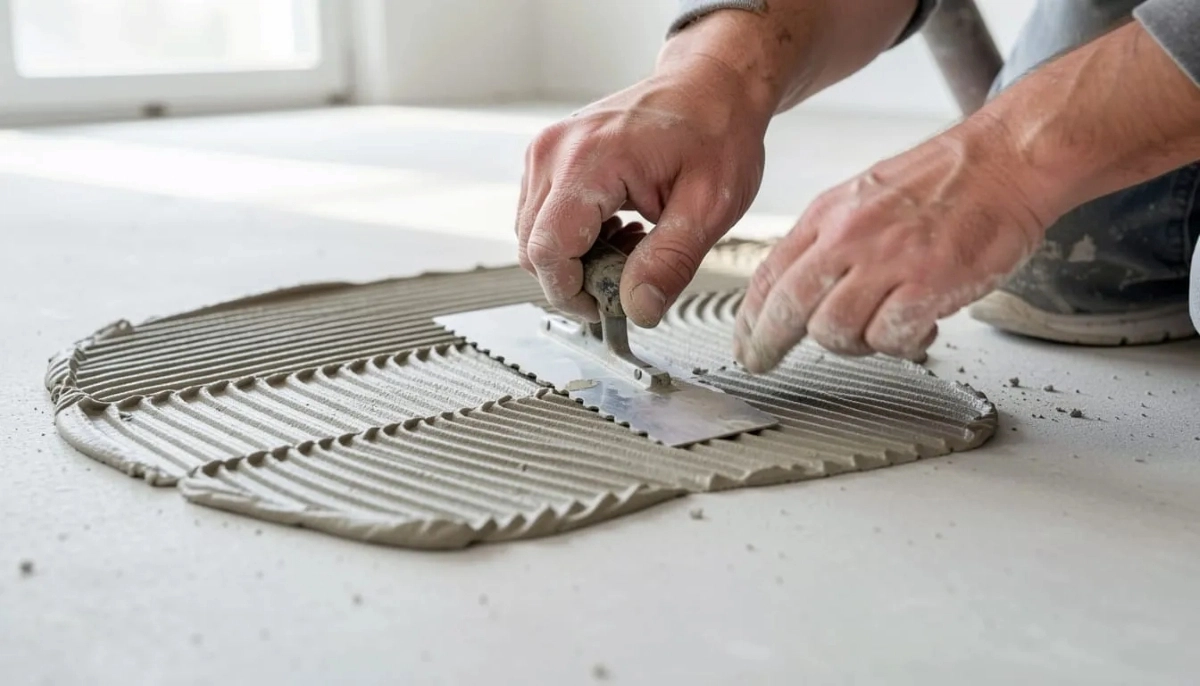
🥣 Mixing and Application Techniques
Proper mixing and application are as important as choosing the right tile bonding adhesive:
Mixing Thinset (Dry Powder):
- Pour clean, cool water into a clean bucket (follow manufacturer’s water ratio)
- Add powder slowly while mixing with a heavy-duty drill and mixing paddle
- Mix until smooth, like peanut butter – no dry lumps
- Let slake (rest) for 10 minutes – this allows chemicals to activate
- Mix again briefly – do not add more water
- Use within pot life (usually 2-4 hours, less in hot weather)
Important Mixing Tips:
- Never add water to already-mixed thinset to extend pot life – it weakens the bond
- Mix only what you can use in 30 minutes (hot weather) to 2 hours (cool weather)
- Discard any thinset that has started to set – don’t try to re-mix
- Use a margin trowel to scrape sides and bottom of bucket
Application Technique:
- Spread adhesive onto substrate using the straight side of the trowel
- Comb adhesive with notched side, holding trowel at 45-degree angle
- Only spread as much as you can tile in 15-20 minutes
- If adhesive skins over (forms a dry film), scrape off and reapply
- For large format tiles, also back-butter (apply thin layer to tile back)
For more on application, read our tile installation tools guide.
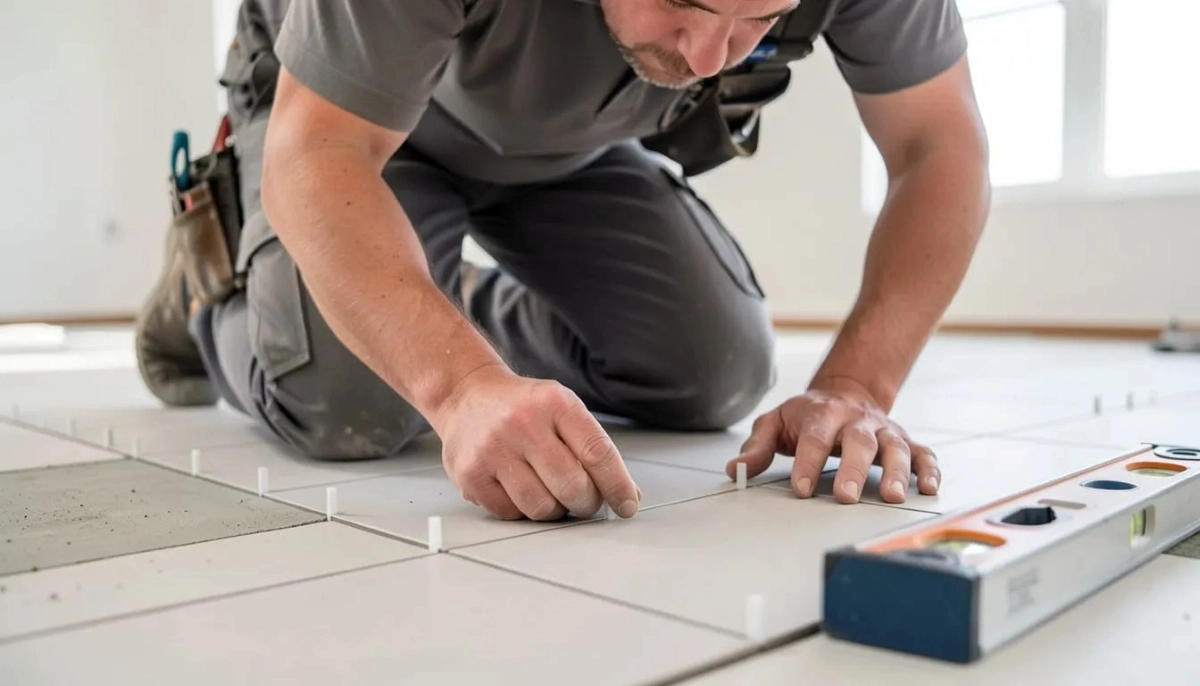
🪛 Trowel Notch Sizes – Getting Coverage Right
The right trowel notch size ensures proper adhesive coverage:
| Tile Size | Trowel Notch Size | Notch Type | Coverage (approx) |
|---|---|---|---|
| Mosaic (under 50mm) | 4mm | Square or U-notch | 2-3 m² per bag |
| Small (75-150mm) | 6mm | Square-notch | 3-4 m² per bag |
| Standard (150-300mm) | 6-8mm | Square-notch | 4-5 m² per bag |
| Large (300-600mm) | 8-10mm | U-notch or slant-notch | 5-6 m² per bag |
| Extra large (600mm+) | 10-12mm | U-notch | 6-8 m² per bag |
Coverage Notes: One 20kg bag of thinset typically covers 4-6 m² depending on trowel notch size and substrate flatness. Always buy extra – you’ll use more than you think.
🚫 Common Adhesive Mistakes to Avoid
⚠️ Warning: These Mistakes Ruin Tile Installations
Avoid these errors when working with tile bonding adhesives.
- Using mastic in wet areas: Guaranteed failure. Mastic re-emulsifies when wet. Always use modified thinset in bathrooms, showers, and outdoors.
- Adding water to setting thinset: “It’s getting stiff – I’ll add more water” – NO. This weakens the bond significantly. Discard and mix fresh.
- Spreading too much adhesive at once: Adhesive skins over in 15-20 minutes. Tiles placed on skinned adhesive won’t bond. Work in small sections.
- Wrong trowel notch size: Too small = insufficient coverage (hollow tiles). Too large = excessive squeeze-out (messy, lippage). Match notch to tile size.
- No back-buttering for large tiles: Large format tiles (300x300mm+) need back-buttering for full coverage. Skipping this creates hollow spots.
- Not mixing properly: Dry lumps = weak spots. Mix thoroughly and let slake (rest) for 10 minutes before final mix.
- Using grey thinset under glass or light stone: Grey shows through translucent materials. Always use white thinset for glass, marble, and light natural stone.
- Not checking thinset compatibility: Some adhesives aren’t suitable for certain substrates (e.g., standard thinset on plywood needs additive). Read the bag.
For consequences of poor bonding, read our why tiles crack after installation guide.
📦 Storage and Shelf Life
Proper storage preserves adhesive quality:
Thinset (Dry Powder):
- Shelf life: 6-12 months (unopened), 3-6 months (opened)
- Store in cool, dry place – moisture ruins it
- Seal bag tightly after opening (use clip or transfer to airtight container)
- Discard if hard lumps have formed – don’t use
Mastic (Pre-Mixed):
- Shelf life: 12-24 months (unopened), 3-6 months (opened)
- Store in cool place – heat causes skinning and separation
- Remove skin from surface before using opened bucket
- Discard if separated or foul-smelling
Epoxy:
- Shelf life: 12-24 months (unopened)
- Store at room temperature – extreme cold or heat affects curing
- Once opened, use within pot life (typically 30-60 minutes)
- Can’t store mixed epoxy – discard unused
Note: Always check expiration dates before buying – old adhesive is a common cause of failure.
❓ Frequently Asked Questions About Tile Adhesives
What is the difference between thinset and mortar?
What is the difference between thinset and mortar? Thinset is a specific type of cement-based adhesive designed for tile installation – it’s applied in thin layers (3-12mm). “Mortar” is a broader term that includes bricklaying mortar, stone mortar, and other cement-sand mixtures. For tile installation, you want thinset, not general-purpose mortar. Don’t use bricklaying mortar for tiles – it’s the wrong product.
Can I use thinset on plywood?
Yes, but with precautions. Use modified thinset (polymer-modified) on exterior-grade plywood. The subfloor must be clean, dry, and structurally sound. For best results, install cement backer board or an uncoupling membrane over plywood before tiling. Never use unmodified thinset directly on plywood – it won’t bond properly.
How long does thinset take to dry?
Thinset typically takes 24-48 hours to cure fully. Factors affecting drying time: temperature (warm = faster, cold = slower), humidity (low = faster, high = slower), substrate porosity (concrete dries slower than cement board), and tile porosity (porcelain takes longer than ceramic). Wait 24 hours minimum before grouting; 48 hours for large format or porcelain tiles.
Can I use mastic on bathroom walls?
Only in dry areas (above shower splash zone). NEVER use mastic inside showers, on shower walls, or on bathroom floors – it re-emulsifies when wet and tiles will fall off. For shower walls, use modified thinset. For bathroom floors, use modified thinset. Mastic is only suitable for kitchen backsplashes and dry walls.
What’s the best adhesive for porcelain tile?
The best adhesive for porcelain tile is modified (polymer-enhanced) thinset. Porcelain is dense and non-porous, so it needs a strong, flexible bond. Standard unmodified thinset may not adhere properly. For large format porcelain (600x600mm+), use LFT (large format tile) thinset with even higher bond strength. Avoid mastic – it won’t hold heavy porcelain.
Can I tile over existing tiles?
Yes – but use epoxy adhesive or modified thinset with a primer designed for “tile over tile” applications. The existing tiles must be perfectly bonded (no hollow sounds), clean, and free of wax or sealers. Rough up glossy surfaces with sandpaper. This is advanced work – consider hiring a professional. Read our tile adhesives guide for more.
How do I remove thinset from tiles?
For fresh thinset (still wet): wipe immediately with a damp sponge. For dried thinset: use a plastic scraper or rubbing stone – never metal (scratches tiles). For stubborn thinset, use a commercial thinset remover (follow instructions). On natural stone, be extra careful – acids damage stone. Prevent squeeze-out by using the correct trowel notch size and cleaning as you go.
Why is my thinset cracking after drying?
Thinset cracks usually indicate: too much water in the mix (weakens bond), mixed too thickly, applied too thick (over 12mm), substrate movement (no expansion joints), or thinset applied over a dirty or contaminated surface. Also check: was the thinset too old? Did it freeze? For proper tile bonding, follow mixing instructions precisely and prepare substrate correctly.
✅ Final Thoughts: The Right Adhesive Makes All the Difference
Tile adhesives explained properly: for 90% of residential tile installations, modified thinset is the right choice. It’s strong, water-resistant, flexible, and affordable. Mastic has limited uses (dry walls only). Epoxy is overkill for most homes but essential for commercial applications.
The key to success is matching the adhesive to your specific project – tile type, substrate, location, and tile size. Don’t cut corners on adhesive. The cheapest bag might save you R100 today, but a failed installation costs thousands.
Key takeaways for tile adhesives:
- Modified thinset is the best choice for most residential tile installations
- NEVER use mastic in wet areas – it will fail
- Use white thinset for glass tiles, marble, and light natural stone
- Match trowel notch size to tile size – critical for proper coverage
- Don’t spread more adhesive than you can tile in 15-20 minutes
- Back-butter large format tiles (300x300mm+) for full coverage
- When in doubt, hire a professional – adhesive mistakes are expensive to fix
Your next step: Ready to start your tiling project? Get free quotes from verified tiling specialists who understand thinset vs mortar and will use the right adhesive for your specific project.
Ready to Start Your Tiling Project?
Get free quotes from verified tiling specialists who understand tile adhesives explained and will use the right tile bonding solution for your project.
📞 Call us: 073 138 4726 to discuss your tiling project.
Free inspections •
Beat Your Quote guarantee •
Workmanship guarantees
Are You a Tiling Professional?
Join ServiceLink SA’s network of verified tiling contractors. Get qualified leads and grow your business.
📚 Official resources & standards referenced:
- SANS 10400 – South African National Standard for adhesive standards and installation requirements.
- SABS – South African Bureau of Standards for material specifications and quality standards for tile adhesives.
Information provided for general guidance. Always follow manufacturer instructions for specific adhesive products.
Written by: Innocent T Hanyani
Construction & Home Services Industry Specialist | 21+ Years Experience
Innocent T Hanyani has over two decades of experience working across South Africa’s construction and home improvement sectors. Throughout his career, he has specified and applied thousands of bags of thinset, mastic, and epoxy. His practical experience helps homeowners understand the critical differences between adhesive types – and the costly consequences of choosing wrong. He has seen beautiful marble floors stained by grey thinset, shower walls collapse from mastic failure, and porcelain tiles pop loose from unmodified adhesive. His advice emphasises using the right product for the right application.
For more information about tile installation, explore our related resources: essential tile installation tools, tile spacers and leveling systems, tile lippage guide, hollow sounding tiles, and why tiles crack after installation. Learn about our process on what is ServiceLink SA and how we verify contractors. Find tilers in your area: Gauteng, Johannesburg, Pretoria, and Centurion. For related services, see our building construction and waterproofing guides.