Common Plastering Mistakes & How to Avoid Them – A South African Guide
🧱 From cracking to delamination: learn the errors that ruin plasterwork and how to ensure a professional result.
You’ve just had the walls in your Johannesburg home plastered, but within weeks, unsightly cracks appear. Or perhaps a DIY project in Cape Town ended with plaster that won’t stick to the wall. These are classic signs of common plastering mistakes how to avoid South Africa – problems that are entirely preventable with the right knowledge and techniques.
This guide is your essential reference for quality control in plastering. We’ve compiled the **TOP 10 PLASTERING MISTAKES** based on industry experience and feedback from manufacturers like Samson and Paintcor. Each mistake is explained with its causes, the problems it leads to, and, most importantly, the solutions to avoid it. You’ll learn about critical issues like inadequate substrate preparation, incorrect mix proportions (the difference between a fatty mix and a lean mix), the importance of curing, and why painting green plaster is a recipe for disaster. We also cover the dangers of over-trowelling, the necessity of movement joints, and how weather conditions affect your work. Whether you’re a homeowner overseeing a project in Durban or a DIYer in Pretoria, this guide will help you spot potential problems and ensure a high-quality, long-lasting plaster finish.
If you’re ready for professional, mistake-free plastering, explore our Services Overview or visit our Plastering Services page to find vetted contractors near you. For more on how we work, see How It Works.
Avoid Costy Mistakes – Hire a Pro
Get free, no-obligation quotes from vetted, experienced plasterers who know how to avoid common errors.
Find Plastering Experts Near Me
Servicing Johannesburg, Pretoria, Cape Town, Durban, and nationwide
📋 Table of Contents – Plastering Mistakes Guide
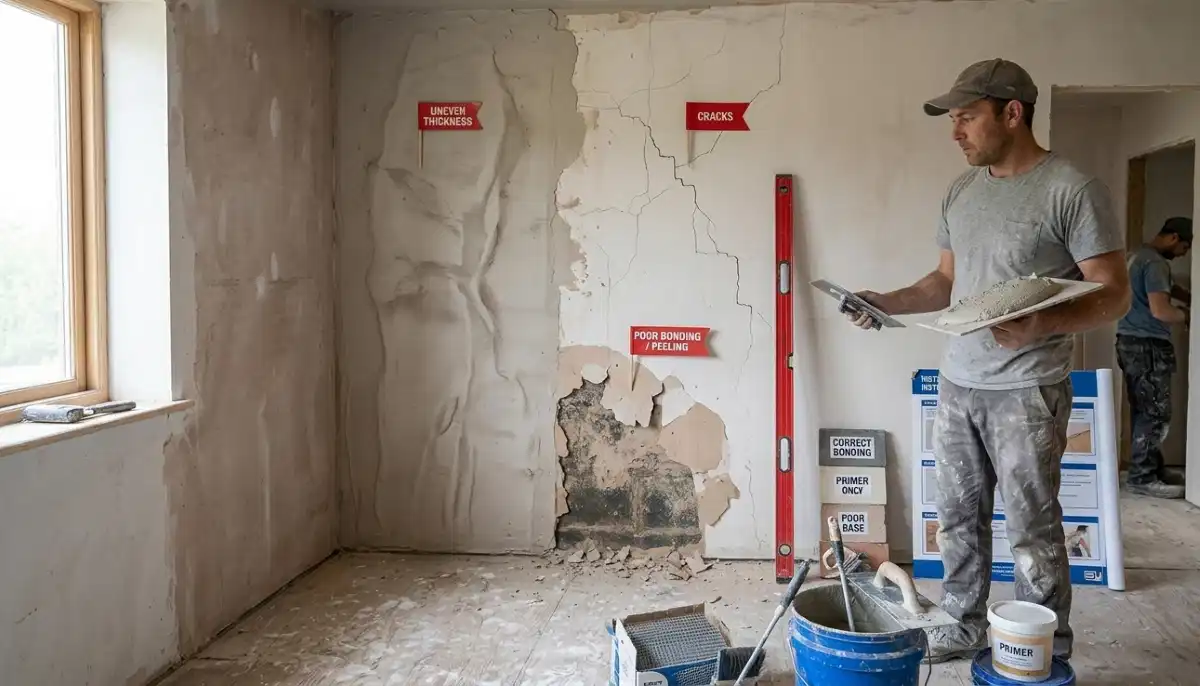
❌ MISTAKE #1: Inadequate Substrate Preparation
Problem: Skipping critical steps like raking out joints, hacking back smooth surfaces, or failing to clean off dust. Not using a bonding agent on smooth substrates.
Result: Plaster delamination, hollow sounds when tapped, and the plaster eventually falling off the wall.
Solution: Follow proper wall preparation procedures. Rake out mortar joints to a depth of 10mm to create a mechanical key. Clean all dust and loose material with a wire brush and vacuum. For smooth surfaces like concrete, apply a slurry coat or a bonding agent like SBR. This ensures the plaster has something to grip onto.
Read more on our About Us page or see why clients choose us on Benefits.
❌ MISTAKE #2: Incorrect Mix Proportions
Problem: Using a mix that is too rich (too much cement) or too lean (too much sand).
Result: A rich mix leads to excessive shrinkage and cracking. A lean mix results in a weak, friable (dusty) surface with low strength.
Solution: For standard wall plastering, use a mix ratio of 1 part cement to 6 parts plaster sand (1:6). For waterproofing or base coats, a stronger mix like 1:3 may be used. Always measure accurately and mix thoroughly. Pre-mixed plasters from reputable brands can eliminate this risk.
❌ MISTAKE #3: No Curing
Problem: Allowing plaster to dry out too quickly, especially in hot, sunny, or windy conditions. No effort to retain moisture.
Result: Plastic shrinkage cracks appear on the surface. The plaster also fails to reach its full strength, becoming weak and prone to further damage.
Solution: Curing is the process of keeping the plaster moist while it gains strength. For cement-based plasters, damp cure for at least 3-7 days. This can be done by lightly spraying with water, covering with damp hessian, or applying a curing membrane. Protect fresh work from direct sun and wind with shade netting or plastic sheeting.
❌ MISTAKE #4: Insufficient Drying Time Before Painting
Problem: Painting over new plaster that is still “green” – before it has fully dried. This traps moisture inside the wall.
Result: Blistering and peeling paint, efflorescence (white salts) on the surface, and potential mould growth. As Paintcor states: “Walls should be left to dry for at least 21 – 28 days, moisture levels should be 10% or below, before painting.”
Solution: Be patient. Allow the plaster to cure for the recommended time. Test moisture levels with a moisture meter or the plastic sheet test (tape plastic to the wall for 24 hours; if condensation forms, it’s too wet). Use breathable primers designed for new plaster.
❌ MISTAKE #5: Wrong Primer Selection
Problem: Using the wrong primer for the substrate. A common example is applying standard primer to powdery Rhinolite, or using Fillercoat directly onto untreated Rhinolite.
Result: Adhesion failure, with the paint or filler peeling off the wall.
Solution: Match the primer to the substrate. For powdery Rhinolite, use 2 coats of RhinoSeal. For sound Rhinolite, PlasterPrime may be suitable. If using Fillercoat on Rhinolite, a coat of Top Paints’ Bonding Liquid (24 hours drying) is required first. Always read the manufacturer’s instructions.
❌ MISTAKE #6: No Movement Joints
Problem: Plastering large, uninterrupted wall areas (over 5-6 metres) without incorporating expansion or movement joints.
Result: Uncontrolled cracking occurs at stress points as the wall expands and contracts with temperature changes. This is a common issue on the Highveld with its large temperature swings.
Solution: Incorporate movement joints at 5-6 metre intervals on large walls. These are deliberate gaps in the plaster (and often the masonry) that are later filled with a flexible sealant. They allow the wall to move without cracking.
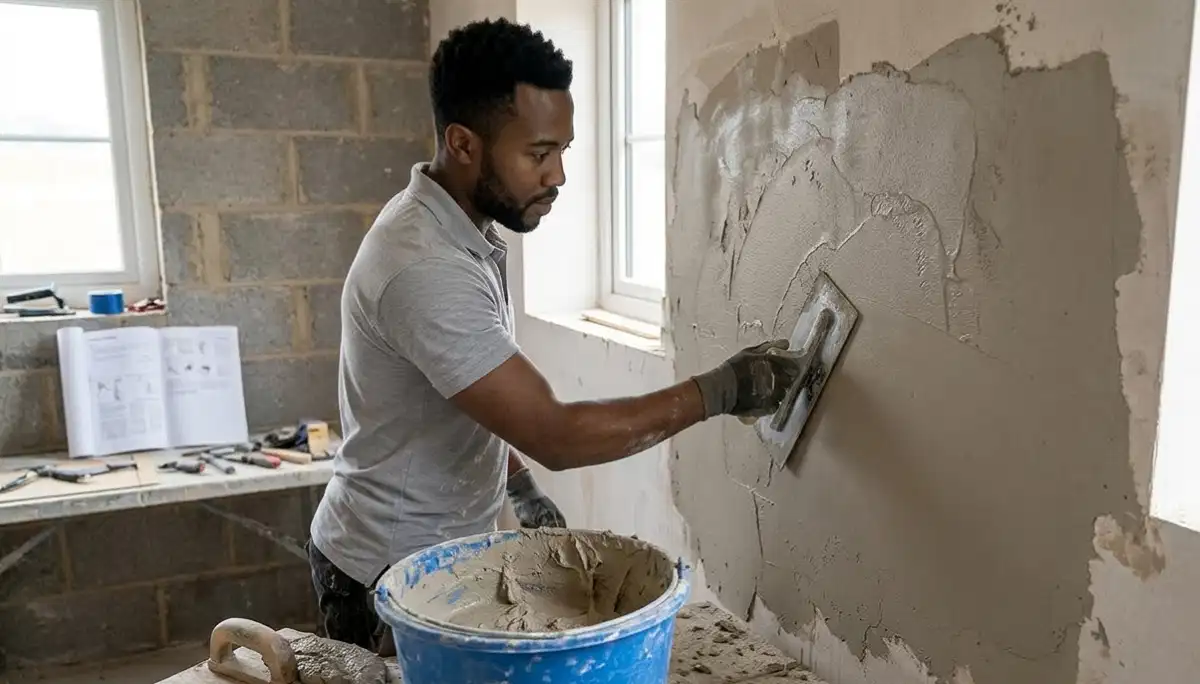
❌ MISTAKE #7: Over-trowelling
Problem: Excessive trowelling of the plaster surface, especially when it’s nearly dry.
Result: This brings excess cement fines to the surface, which then shrink and cause a network of fine cracks known as crazing or map cracking. It also creates a surface that is too dense and may have poor permeability.
Solution: Finish the plaster at the right time. Stop trowelling once the surface is flat and closed. Avoid overworking the plaster.
❌ MISTAKE #8: Weather Ignorance
Problem: Plastering in unsuitable weather conditions – during rain, in freezing temperatures, or in the extreme heat of a summer afternoon.
Result: Rain will wash out fresh plaster. Freezing can cause the water in the mix to expand and crack the plaster. Extreme heat and sun cause rapid drying and shrinkage cracks. As a guide from the painting industry, which applies equally to plastering: “During Winter months painting should be restricted to between 09H00 and 15H00, in Summer painting can be done between 08H00 and 16H00. Exterior surfaces – Do not paint if rain is imminent.”
Solution: Check the weather forecast before you start. Avoid plastering if rain is forecast within 24 hours. In summer, work in the cooler morning hours. In winter, work during the warmest part of the day. Protect fresh work from sun and wind with shade cloth.
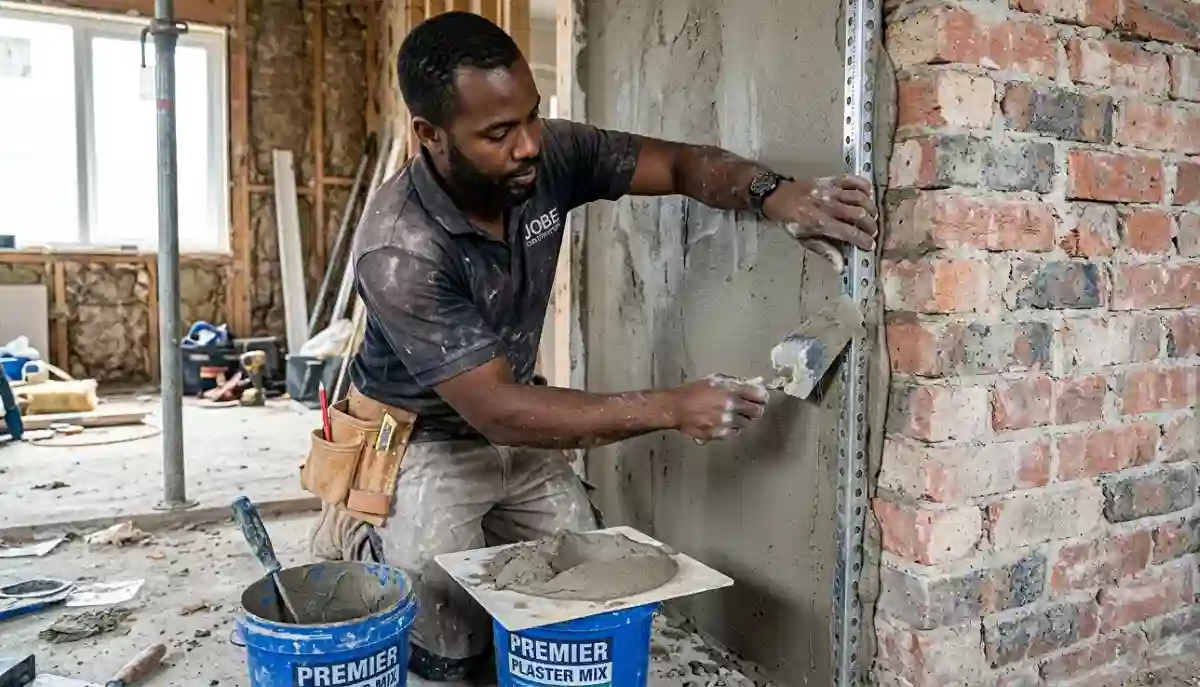
❌ MISTAKE #9: DIY by Unskilled Labour
Problem: Hiring a “handyman” or attempting complex plastering yourself without the necessary skills and experience. There is a common misconception that plastering is low-skill work.
Result: Patchy finishes, long-term issues like cracking and delamination, and cost overruns to fix the poor work. As one industry source notes: “Relatively low-skill work such as painting, plastering, gardening etc. doesn’t require a formal qualification and as a client, one can get fairly cheap labour to handle such work. Although as is with most things, going the cheap route doesn’t always pay you.”
Solution: Plastering is a skilled trade. For a quality, lasting result, hire a professional. Verify their credentials: check for CIDB grading, ask for references, and view their previous work. See our guide on how to choose a reliable plastering contractor.
❌ MISTAKE #10: No On-Site Advisory
Problem: Using products incorrectly because the applicator didn’t seek or receive proper guidance. This is especially common with specialized materials like repair mortars or waterproofing plasters.
Result: Premature failure of the plaster, voiding of product warranties, and costly repairs.
Solution: Engage contractors who are familiar with the products they use. Manufacturers like Samson state: “We also offer on-site advisory services (training) to ensure effective usage of the products on site, thus reducing site failure.” Look for contractors who are manufacturer-approved applicators or who are willing to seek advice from technical representatives.
❓ Frequently Asked Questions
What are the most common plastering mistakes?
Common plastering mistakes how to avoid South Africa – the top errors include poor substrate preparation, incorrect mix ratios, no curing, painting too soon, and ignoring movement joints. See our list of 10 mistakes above.
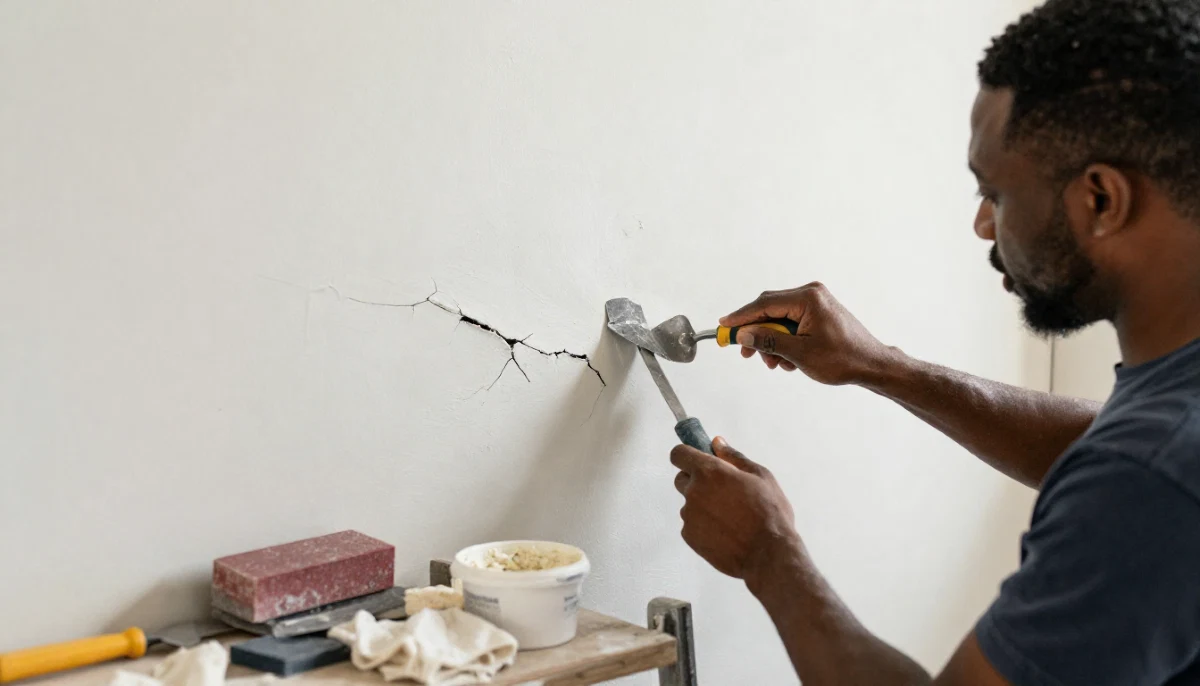
Why does plaster crack after drying?
Why does plaster crack after drying – cracks are usually caused by rapid drying (no curing), a mix that was too rich in cement, or movement in the substrate. Using the right mix and curing properly prevents most cracks.
Why is my plaster not sticking to the wall?
Plaster not sticking to wall causes – this is usually due to inadequate substrate preparation: dusty walls, no mechanical key, or lack of a bonding agent on smooth surfaces.
What is over-trowelling and why is it bad?
Over-trowelling plaster problems – excessive trowelling brings cement fines to the surface, causing fine crazing cracks. It also creates a surface that may be too dense. Finish early to avoid this.
How long should plaster dry before painting?
Plaster must dry for 21-28 days before painting, and moisture levels should be below 10%. Painting green plaster traps moisture, leading to blistering and peeling.
What is the correct mix for plaster?
The standard mix for wall plastering is 1 part cement to 6 parts plaster sand (1:6). For waterproofing or base coats, a 1:3 mix may be used.
What is efflorescence on new plaster?
Efflorescence on new plaster fix – these white salts are caused by moisture migrating through the plaster. The fix is to identify and stop the moisture source, brush off the salts, and ensure the wall dries out completely.
Can you plaster in winter?
Yes, but with care. In winter, plaster between 09:00 and 15:00 when temperatures are highest. Protect fresh work from frost. Avoid plastering if the temperature is below 5°C.
What are movement joints in plastering?
Movement joints are deliberate gaps in large plastered areas (every 5-6m) that allow the wall to expand and contract without cracking. They are filled with flexible sealant.
How can I ensure good plastering quality control?
Ensure plastering quality control by using experienced, CIDB-registered contractors, following proper preparation and curing procedures, using the correct materials, and allowing sufficient drying time before painting.
✅ Final Thoughts – Your Mistake-Free Action Plan
Understanding common plastering mistakes how to avoid South Africa is the best way to ensure your project is a success. By knowing what can go wrong, you can ask the right questions, supervise effectively, and choose contractors who follow best practices.
Key takeaways:
- Preparation is everything – don’t skip it.
- Use the correct mix ratios and quality materials.
- Curing and drying times are non-negotiable for a durable finish.
- Match your primers and paints to the substrate.
- Always hire experienced, insured professionals for complex work.
Your 5-Step Action Plan
- Educate yourself: Use this guide to understand the potential pitfalls.
- Check contractor credentials: Verify CIDB grading and ask for references. See our contractor guide.
- Get detailed quotes: Ensure the quote includes preparation, materials, and a clear scope of work.
- Monitor the work: Check that key steps (preparation, curing) are not being skipped.
- Allow proper drying: Be patient and let the plaster cure fully before painting.
Ready for a Flawless Plastering Job?
Get free, no-obligation quotes from vetted, experienced plasterers who know how to avoid common mistakes and deliver a perfect finish.
📞 Call us: 073 138 4726 for personalised assistance
Free site inspections •
Beat-your-quote guarantee •
Our guarantees
📚 Official resources & standards:
- Paintwise – Drying times, moisture content, and seasonal application guides.
- Paintcor – Rhinolite testing, RhinoSeal, and moisture level guidelines.
- Samson – On-site advisory services and product training to reduce site failure.
- CIDB – Contractor grading for plastering works.
- NHBRC – Plaster specifications for new homes.
- SABS – SANS 10400 plastering tolerances and standards.
Information accurate as of publication. This guide is for informational purposes. For specific advice, consult a professional.
Written by: Innocent T Hanyani
21+ years construction and digital industry experience, ServiceLink SA
Innocent has overseen thousands of plastering projects and has seen every mistake imaginable. His experience with manufacturers like Samson and Paintcor ensures this guide provides practical, field-tested advice to help homeowners and contractors avoid costly errors.
For more detailed information, explore our related guides: plastering costs to budget your project, our preparation guide for ensuring a perfect base, our crack repair guide for fixing existing problems, and our contractor selection guide for finding the right professional. For help finding the right professional, see our contractor guide and ensure they have proper liability insurance. Our dispute resolution page is there if needed. Free inspections and beat-your-quote services are also available.