Preparing Walls for Plastering South Africa – The Complete Step-by-Step Guide
🧱 From new brickwork to old painted walls: the essential checklist for a flawless plaster finish.
You’re about to plaster the walls of your new home in Midrand. The bricks are up, and you’re eager to see the transformation. But wait – if you rush into plastering without proper preparation, you’re setting yourself up for cracks, delamination, and costly repairs down the line. Whether you’re dealing with new masonry in Pretoria or renovating an old house in Cape Town, knowing how to properly prepare walls for plastering South Africa is the secret to a professional, long-lasting result.
This guide provides a comprehensive, step-by-step plaster surface preparation checklist for every scenario. You’ll learn the critical tasks for new brickwork: why raking out joints and creating a mechanical key is essential, how to apply a slurry coat or spatterdash for better adhesion, and the importance of proper curing time for new plaster and masonry. For renovation projects, we cover how to perform a soundness test, repair damaged areas, and treat problems like efflorescence and mould. We also include the crucial Rhinolite preparation steps you learned in our previous guide, and a simple moisture test for plaster before painting. We also address practical considerations like temperature & weather conditions for plastering, ensuring your work isn’t ruined by the elements. Whether you’re in Durban, George, or Roodepoort, this guide ensures your walls are ready for a perfect finish.
If you’re ready for professional help with your plastering project, explore our Services Overview or visit our Plastering Services page to find vetted contractors near you who understand the importance of preparation. For more on how we work, see How It Works.
Need Expert Wall Preparation?
Get free, no-obligation quotes from local plastering specialists who know exactly how to prep your walls for a flawless finish.
Find Plastering Experts Near Me
Servicing Johannesburg, Pretoria, Cape Town, Durban, and nationwide
📋 Table of Contents – Wall Preparation Guide
❓ Why Wall Preparation Matters
Plaster is only as good as the surface it’s applied to. Skipping or rushing preparation is the leading cause of plaster failure.
- Adhesion: Plaster needs a clean, rough surface to grip. Dust, loose material, or smooth surfaces prevent bonding, leading to delamination.
- Crack prevention: Proper preparation, including curing new masonry and repairing existing cracks, minimises the risk of shrinkage and movement cracks.
- Uniform suction: Priming and wetting control the substrate’s suction, ensuring the plaster dries evenly and doesn’t crack or weaken.
- Long-term durability: A well-prepared wall ensures the plaster will last for decades, not fail within months.
Read more about our approach on our About Us page or see why clients choose us on our Benefits page.
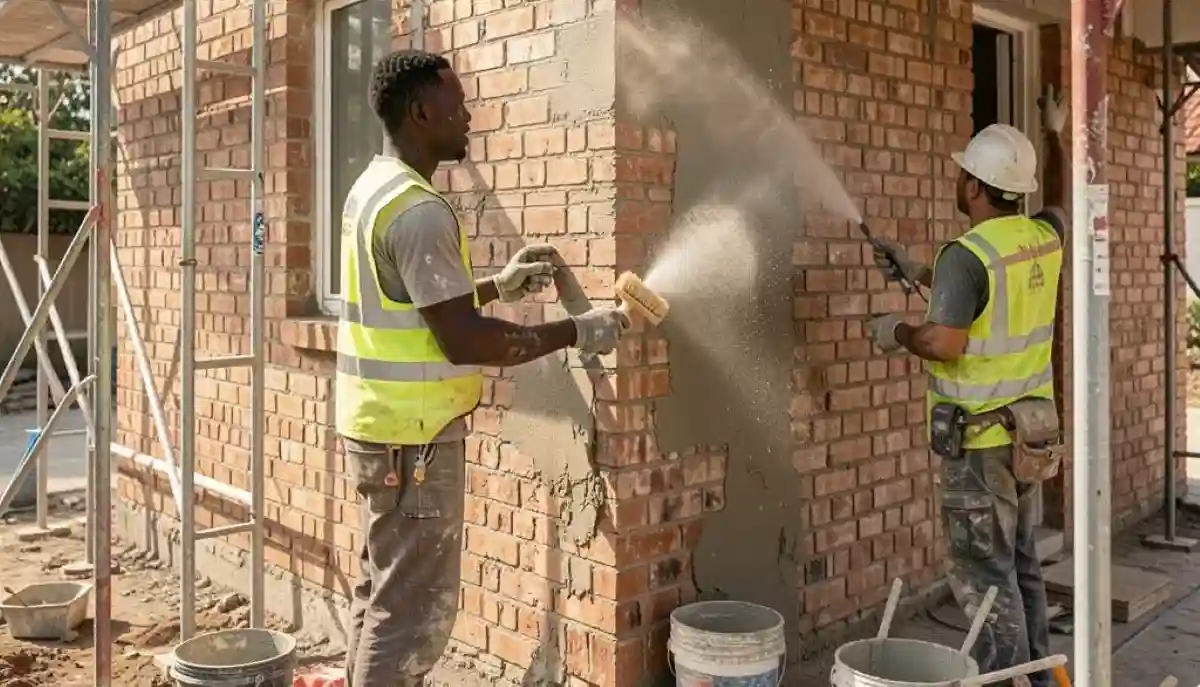
🆕 PHASE 1: New Masonry / Brickwork
If you’re plastering newly built walls, follow these essential steps.
| Task | Specification | Why It Matters |
|---|---|---|
| Curing | Minimum 14-21 days for brickwork | Prevents differential movement and shrinkage after plastering. |
| Joint Raking | Rake out mortar joints to 10mm depth | Creates a mechanical key for the plaster to grip into. |
| Surface Cleaning | Wire brush to remove loose mortar, dust | Ensures adhesion by removing anything that could form a barrier. |
| Wetting | Dampen substrate night before and morning of plaster | Prevents rapid suction, which can dehydrate the plaster and cause cracks. |
| Slurry Coat / Spatterdash | 1:3 cement:fine sand + SBR/acrylic | Enhances bond on smooth surfaces like concrete or dense blocks. |
For smooth surfaces like concrete columns or dense blocks, a slurry coat or spatterdash (a rough, wet-mix dashed onto the wall) is highly recommended to create a key for the plaster.
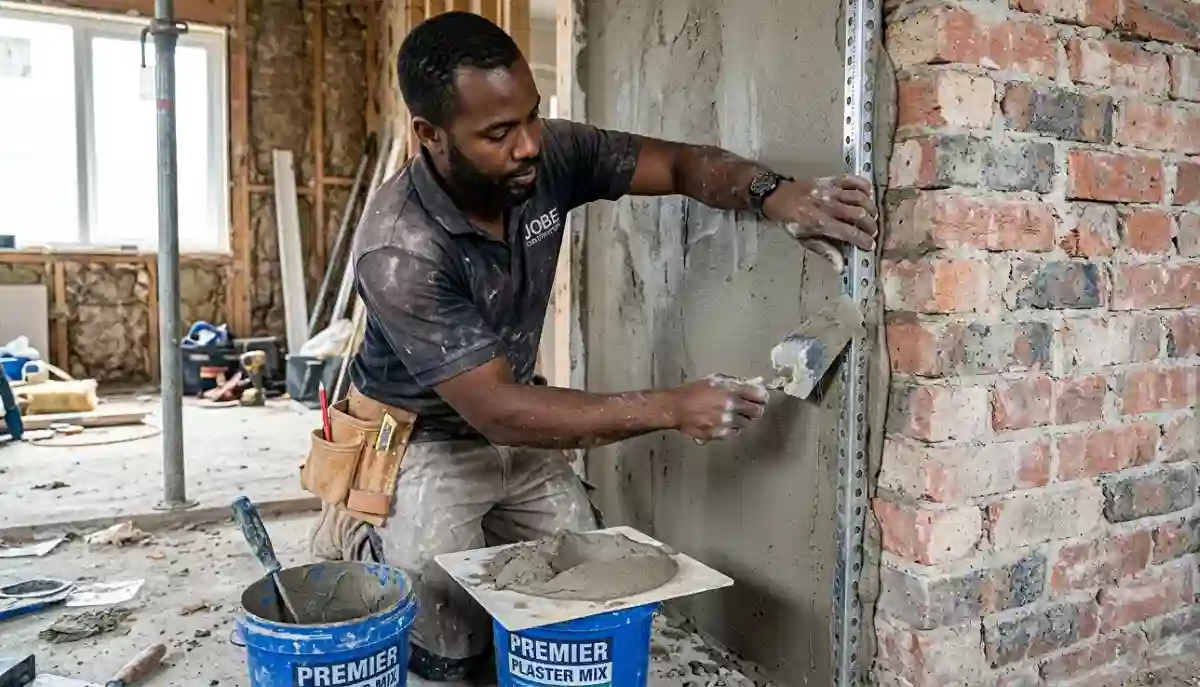
🔨 PHASE 2: Existing Plaster Repair
When replastering old walls or patching damaged areas, you must first create a sound base.
| Task | Specification | Why It Matters |
|---|---|---|
| Soundness Test | Tap test – hollow sound indicates delamination | Identify areas where plaster has detached and needs removal. |
| Loose Plaster Removal | Cut back to sound substrate, undercut edges | Prevents further detachment and creates a key for new filler. |
| Crack Repair | Widen crack, prime, fill with repair mortar | Prevents crack from reappearing through new plaster. Use Samson repair mortars for best results. |
| Efflorescence Treatment | Wire brush dry salts, identify moisture source | Stops salt migration which can push paint off. Fix the moisture source first. |
| Mould Treatment | Fungicidal wash, dry completely | Prevents regrowth under new plaster or paint. |
🦏 PHASE 3: Special Procedure for Rhinolite
As detailed in our cement vs Rhinolite guide, Rhinolite requires specific preparation. Follow this step-by-step.
- Quality Test: Perform the damp cloth wipe test. If an initial layer of white powder comes off but does not continue, the quality is good. If it keeps dusting, it’s powdery.
- If powdery: Apply 2 coats of Paintcor’s RhinoSeal, allowing 48 hours drying between coats. This seals the surface.
- If sound: Apply 1 coat of PlasterPrime, allow 6 hours drying.
- ⚠️ Important: Never apply Fillercoat directly to Rhinolite. A coat of Top Paints’ Bonding Liquid must be applied first and left for 24 hours.
💧 PHASE 4: Moisture Testing
Plaster must be dry before painting, and the substrate must be at the right moisture level before plastering. The rule is the same.
- The Golden Rule: “Walls should be left to dry for at least 21 – 28 days, moisture levels should be 10% or below, before painting.” – Paintcor. This applies to both new plaster and the substrate.
- DIY Moisture Test: Tape a square of plastic sheeting firmly to the wall. Leave it for 24 hours. If condensation forms on the plastic or the wall underneath darkens, there is excess moisture. The wall needs more drying time and ventilation.
- Professional test: Moisture meters give a precise reading. A reputable contractor will use one.
🌡️ PHASE 5: Temperature & Weather
Plastering is weather-sensitive. These guidelines from the painting industry apply equally to plastering.
- Winter: “During Winter months painting should be restricted to between 09H00 and 15H00.” Plastering should also be done during the warmest part of the day. Ambient temperature should be above 5°C and rising.
- Summer: “In Summer painting can be done between 08H00 and 16H00.” Avoid plastering in direct, scorching sun, which can cause rapid drying and cracking. Use shade nets if necessary.
- Rain: “Exterior surfaces – Do not paint if rain is imminent.” The same applies to plastering. Fresh plaster must be protected from rain for at least 24-48 hours. Never plaster if rain is forecast.
- Protection: Have tarpaulins or plastic sheeting ready to protect fresh work from sun, wind, or rain.
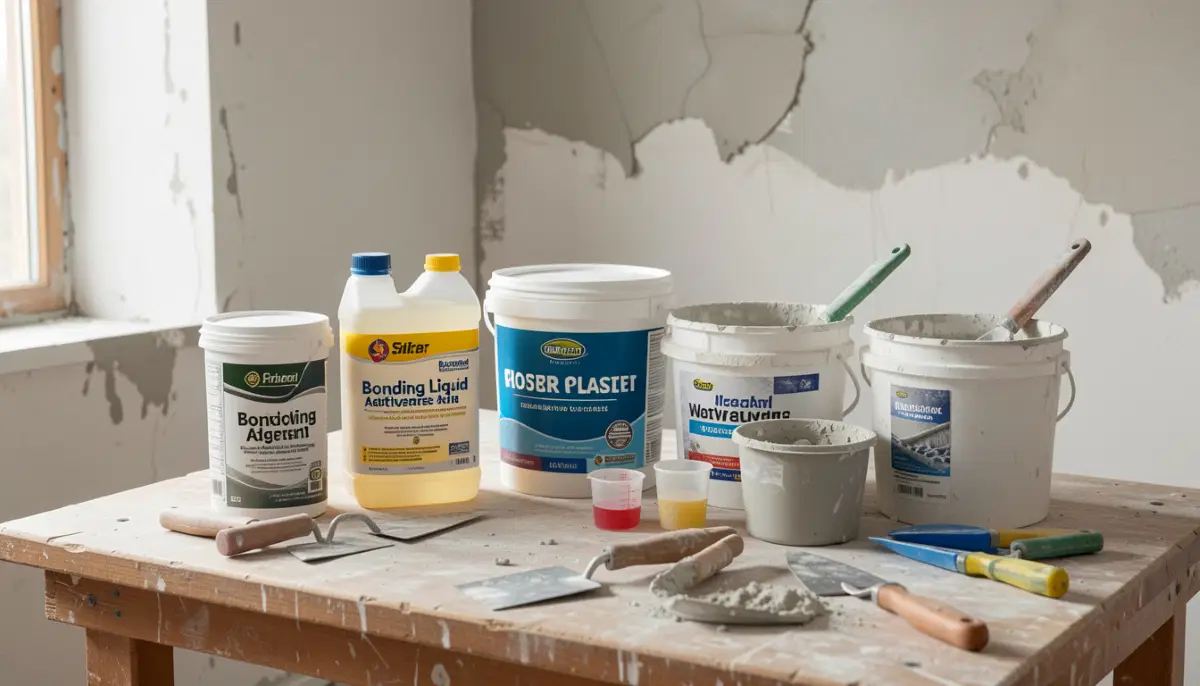
🧴 Bonding Agents & Primers
These products are your insurance policy for good adhesion. Use them as recommended.
- SBR (Styrene Butadiene Rubber): A liquid bonding agent added to plaster mixes or used as a neat primer coat. Excellent for improving adhesion on smooth or difficult surfaces. Ideal for slurry coats.
- PVA (Polyvinyl Acetate): A cheaper bonding agent, but not water-resistant. Suitable for interior use only. Can be used to prime dusty surfaces or as an additive.
- Acrylic Bonding Agents: Versatile and water-resistant. Good for both interior and exterior use.
- Specialised Primers: Products like PlasterPrime are formulated specifically for plaster surfaces, controlling suction and providing a good base for paint.
- Where to buy: These are available from manufacturers like Weber, Paintcor, and Paintwise, as well as major hardware stores.

🛠️ Tools & Materials Checklist
Having the right tools on hand makes preparation efficient.
- Tools:
- Wire brush, stiff broom, or industrial vacuum for cleaning.
- Hammer and bolster chisel, or grinder with masonry disc for cutting out damaged plaster.
- Bucket and mixing paddle for bonding agents and repair mortars.
- Plastic sheeting, tape for moisture test.
- Sprayer or brush for wetting walls.
- Trowels and floats for applying patches.
- Materials:
- Bonding agents: SBR, PVA, or acrylic bonding liquid.
- Repair mortars: Pre-mixed or site-mixed (cement, sand, bonding agent). Samson offers excellent pre-mixed options.
- Primers: PlasterPrime, RhinoSeal, or appropriate primer for the surface.
- Waterproofing additive (for wet areas).
See our full guide on plastering tools and materials for more details.
❌ 8 Common Wall Preparation Mistakes
- Mistake #1: Plastering on green (uncured) brickwork. New brickwork must cure for at least 14-21 days. Plastering too early leads to shrinkage cracks and movement.
- Mistake #2: Not raking out joints. Smooth, flush joints don’t give the plaster a mechanical key. Always rake to at least 10mm depth.
- Mistake #3: Plastering on dusty walls. Dust is a bond breaker. Always wire brush and vacuum or blow off all dust.
- Mistake #4: Ignoring suction. Failing to dampen very dry, porous walls causes the plaster to dehydrate, leading to cracks and poor adhesion.
- Mistake #5: Patching old plaster without undercutting edges. Straight edges will show a crack line. Undercut to create a key for the filler.
- Mistake #6: Not testing Rhinolite. Painting or plastering over powdery Rhinolite without sealing is a guaranteed failure.
- Mistake #7: Plastering in poor weather. Plastering in rain, freezing temperatures, or direct scorching sun ruins the work. Check the forecast.
- Mistake #8: Skipping the moisture test. Trapped moisture will eventually destroy the plaster or paint. Test before you start.
Many of these mistakes are covered in our guide on common plastering mistakes.
❓ Frequently Asked Questions
How do you prepare a brick wall for plastering?
How to prepare brick wall for plastering: rake out mortar joints to 10mm, clean off all dust and loose particles, dampen the wall evenly, and apply a bonding agent if needed (e.g., on smooth bricks). See Phase 1 above.
How long before plastering new brickwork?
How long before plastering new brickwork is at least 14-21 days. This allows the mortar in the brickwork to cure and any initial shrinkage to occur, preventing cracks in your new plaster.
What is a bonding agent for plaster?
A bonding agent for plaster is a liquid (like SBR or PVA) applied to the wall or added to the plaster mix to improve adhesion, especially on smooth or difficult surfaces. It creates a sticky, mechanical key.
How do I test for moisture before plastering?
The DIY moisture test for plaster before painting (or plastering) is to tape a plastic sheet to the wall for 24 hours. If condensation forms, the wall is too damp. For a new plastered wall, it must dry 21-28 days before painting.
How do you prepare old walls for replastering?
Preparing old walls for replastering involves: tap test to find hollow areas, remove all loose plaster, widen cracks, clean, treat any efflorescence or mould, and apply a bonding agent before plastering.
What is raking out joints?
Raking out joints is the process of scraping mortar out of the brick joints to a depth of about 10mm before plastering. This creates a mechanical key for the new plaster to grip into, preventing it from sliding off.
Do I need to wet the wall before plastering?
Yes, you should dampen the wall before plastering, especially on porous surfaces like brick. This controls suction, preventing the plaster from drying out too quickly and cracking. The wall should be damp, not soaking wet.
What is efflorescence and how do I remove it before plastering?
Removing efflorescence before plastering involves dry brushing the white salts off the surface with a stiff wire brush. Crucially, you must also identify and fix the source of moisture causing the efflorescence, or it will return.
Can I plaster in winter?
Yes, but with caution. In winter, restrict plastering to between 09:00 and 15:00 when temperatures are highest. Avoid plastering if the ambient temperature is below 5°C or if frost is expected. Protect fresh work from cold.
How do I prepare Rhinolite for plastering or painting?
Rhinolite preparation is critical. First, do the damp cloth test. If it’s powdery, apply 2 coats of RhinoSeal. If sound, PlasterPrime may suffice. Never use Fillercoat without first applying Top Paints’ Bonding Liquid.
✅ Final Thoughts – Your Preparation Action Plan
Taking the time to properly prepare walls for plastering South Africa is an investment in the longevity and quality of your finish. It’s the difference between a plaster job that looks good for a few months and one that lasts for decades.
Key takeaways:
- Never skip the basics: rake joints, clean, and dampen new walls.
- For renovations, test for soundness and treat any underlying issues (efflorescence, mould) before plastering.
- Follow the special Rhinolite procedure – the damp cloth test is non-negotiable.
- Check moisture levels and weather conditions before you start.
- Use the right bonding agents and primers for your specific substrate.
Your 5-Step Action Plan
- Assess your wall type: Is it new brickwork, old plaster, or a special surface like Rhinolite?
- Follow the relevant phase: Use our checklists for new masonry, repairs, or Rhinolite.
- Perform essential tests: Soundness test, Rhinolite test, moisture test.
- Gather the right materials: Bonding agents, repair mortars, and primers from trusted brands.
- Check the weather: Ensure conditions are suitable for plastering and curing.
Ready to Get Your Walls Plastered?
Get free, no-obligation quotes from vetted plastering specialists who understand that perfect preparation leads to a perfect finish.
📞 Call us: 073 138 4726 for personalised assistance
Free site inspections •
Beat-your-quote guarantee •
Our guarantees
📚 Official resources & standards:
- Paintwise – Surface preparation, new plaster, and bonding liquid guidelines.
- Paintcor – Rhinolite preparation, moisture testing, and RhinoSeal.
- Weber South Africa – Mason Wall Putty application and technical guides.
- Samson – Repair mortars, crack repairs, and corrosion blocking products.
- SABS – SANS 10064 Surface preparation standards.
- NHBRC – New home plaster specifications and requirements.
Information accurate as of publication. This guide is for informational purposes. For specific advice, consult a professional.
Written by: ServiceLink SA Research Team
Industry research and analysis team, ServiceLink SA
The ServiceLink SA Research Team has compiled best practices from leading manufacturers and experienced plasterers across South Africa. This guide reflects the collective knowledge needed to achieve a professional, durable plaster finish.
For more detailed information, explore our related guides: plastering costs to budget your project, our cement vs Rhinolite guide for material selection, our crack repair guide for fixing existing issues, and our mistakes guide to ensure a high-quality job. For help finding the right professional, see our contractor guide and ensure they have proper liability insurance. Our free inspection and beat-your-quote services are also available. Our dispute resolution page is there if needed.