
Planning a Herringbone Tile Project?
Get free quotes from verified tiling specialists who have experience with herringbone installation – this pattern requires skill and precision.
Servicing Gauteng, Sandton, Fourways, and across South Africa
Herringbone Tile Pattern Installation Guide: Step-by-Step SA
〰️ Master the classic V-shaped pattern that adds elegance, movement, and value to any floor
There’s something about a herringbone floor that stops people in their tracks. The way the V-shaped pattern draws your eye across the room. The sense of movement and sophistication. It’s a pattern that says quality, craftsmanship, and timeless style.
I’ve installed herringbone tile pattern floors across Gauteng, from Sandton to Fourways, for over two decades. And I can tell you this: a herringbone floor is always a showstopper. But here’s the thing – herringbone is not for beginners. It requires precision, planning, and patience. One wrong cut, one misaligned row, and the whole pattern looks off.
In this complete guide to how to lay herringbone tile pattern, I’ll share everything I’ve learned. You’ll learn the difference between herringbone and chevron (a common point of confusion), how to plan your layout, step-by-step installation techniques, cutting methods, and common mistakes to avoid. Whether you’re hiring a professional or considering DIY, this guide will help you understand what’s involved in creating this stunning parquet pattern.
For more design inspiration, check out our guides on modern tile design trends, tile patterns for small bathrooms, hexagon tiles design ideas, large vs small tiles design, and subway tile installation.
📋 Table of Contents – Herringbone Tile Pattern Guide
〰️ What Is Herringbone Tile Pattern?
The herringbone tile pattern is a classic V-shaped arrangement where rectangular tiles are laid at 45 or 90-degree angles to create a continuous zigzag effect. The pattern is named after the skeleton of a herring fish, which has a similar bone structure.
Key Characteristics:
- Rectangular tiles (not parallelogram-shaped – that’s chevron)
- Tiles laid at 45 or 90-degree angles to each other
- Creates a broken V-shape (the ends are staggered, not mitered)
- Continuous zigzag pattern across the floor
- Works with wood-look planks, stone-look rectangles, and classic tiles
Why It’s So Popular:
- Adds movement and direction to a room
- Creates a sense of luxury and craftsmanship
- Can make narrow rooms appear wider or longer (depending on orientation)
- Timeless – never looks dated
- Works in traditional and contemporary spaces
For a visual comparison with other patterns, read our tile patterns guide.
⚖️ Herringbone vs Chevron – Key Differences
Many people confuse these two patterns. Here’s the difference between chevron vs herringbone:
| Feature | Herringbone | Chevron |
|---|---|---|
| Tile/Rectangle Shape | Standard rectangle (ends cut at 90°) | Parallelogram (ends cut at 45° angle) |
| V-shape appearance | Broken V – ends are staggered | Continuous V – ends meet perfectly |
| Installation complexity | Moderate – requires careful layout | High – requires angled cuts on every tile |
| Waste percentage | 10-15% | 15-20% |
| Best for | Floors, walls, feature areas | Floors, often wood or wood-look |
| Appearance | Subtle, textured, traditional | Sharp, formal, modern |
Which Should You Choose?
- Choose herringbone for a classic, timeless look with moderate installation complexity. Works with standard rectangular tiles.
- Choose chevron for a sharp, formal, continuous V-shape. Requires specially cut tiles or a lot of cutting. More expensive and complex.
For most homeowners and tilers, herringbone is the more practical and popular choice.
✨ Why Choose Herringbone? Benefits
The herringbone tile pattern offers several advantages:
Visual Benefits:
- Creates movement – draws the eye across the floor
- Adds perceived value – looks custom and high-end
- Can make rooms feel larger when oriented correctly
- Hides slight subfloor imperfections better than straight lay
- Works with many tile types – wood-look, stone-look, solid colours
Practical Benefits:
- Timeless – never goes out of style
- Versatile – works in entryways, living rooms, kitchens, bathrooms
- Can be laid at different angles to suit room shape
- Adds character to new homes and period properties
When to Use Herringbone:
- Entryways and foyers (makes a statement)
- Living rooms and dining rooms (adds elegance)
- Kitchen floors (adds interest to functional spaces)
- Bathroom floors (small spaces – use larger tiles for fewer cuts)
- Fireplace surrounds and feature walls
🧱 Best Tiles for Herringbone Patterns
Not all tiles work well for how to lay herringbone tile pattern. Here are the best options:
| Tile Type | Best Size Ratio | Pros | Cons | Best For |
|---|---|---|---|---|
| Wood-Look Planks | 150x600mm, 150x900mm | Classic herringbone look, warm aesthetic | Can be busy – use in larger rooms | Living rooms, dining rooms, bedrooms |
| Large Format Rectangles | 300x600mm, 400x800mm | Fewer grout lines, modern look | Heavy, requires perfect subfloor | Contemporary homes, large spaces |
| Subway-Style Rectangles | 100x200mm, 75x150mm | Classic scale, works in small and large rooms | More grout lines, more cutting | Bathrooms, kitchens, small entryways |
| Stone-Look Rectangles | 300x600mm, 400x800mm | Elegant, timeless, hides dirt | Heavier, requires sealing for natural stone | Luxury bathrooms, grand entries |
Key Requirements for Herringbone Tiles:
- Rectangular shape: Herringbone requires rectangles, not squares
- Length-to-width ratio: Ideal is 2:1 to 4:1 (e.g., 150x300mm, 200x400mm, 300x600mm)
- Rectified edges: Recommended for narrow, consistent grout lines
- Through-body colour: Not essential but helps if edges are visible
- PEI rating: 3+ for floors, 4+ for high-traffic areas
Want a Perfect Herringbone Floor?
Get free quotes from verified tiling specialists who have extensive experience with herringbone tile pattern installation – this pattern requires real skill.
Free inspections available. Benefits of choosing us.
📐 Layout Planning – The Most Critical Step
Proper layout planning is the difference between a stunning herringbone floor and a frustrating mess. Here’s how to do it:
Step 1: Choose Your Herringbone Angle
Two common angles:
- 45-degree herringbone: More traditional, creates sharper V-shape
- 90-degree herringbone: More subtle, creates flatter pattern
- For most spaces, 45-degree is recommended – it’s the classic look
Step 2: Find the Centre Line
Measure your room and mark the centre point. Snap a chalk line down the centre of the room. This is your reference line for the herringbone spine.
Step 3: Determine Orientation
- Run herringbone parallel to long wall: Makes a narrow room feel wider
- Run herringbone perpendicular to long wall: Makes a room feel longer
- Run herringbone at 45 degrees to walls: Adds most visual interest but creates more waste
Step 4: Dry-Lay a Test Area
Lay out a small herringbone pattern (about 1m x 1m) in the centre of the room. Check how cuts will fall at walls. Adjust starting point to avoid “sliver” cuts (less than half a tile width).
Step 5: Mark Guidelines
Based on your dry-lay, snap chalk lines across the floor to guide installation. Herringbone requires more guidelines than straight lay.
✅ Pro Tip:
For parquet pattern layouts like herringbone, use a laser level. It projects lines across the entire floor, ensuring perfect alignment even in large rooms.
🛠️ Tools and Materials for Herringbone Installation
Proper tools are essential for herringbone installation:
Essential Tools:
- Wet saw with diamond blade: Essential for cutting tile ends at precise angles
- Manual tile cutter: For straight cuts on larger tiles
- Laser level or chalk lines: For layout guidelines
- Notched trowel (8-10mm): For adhesive application
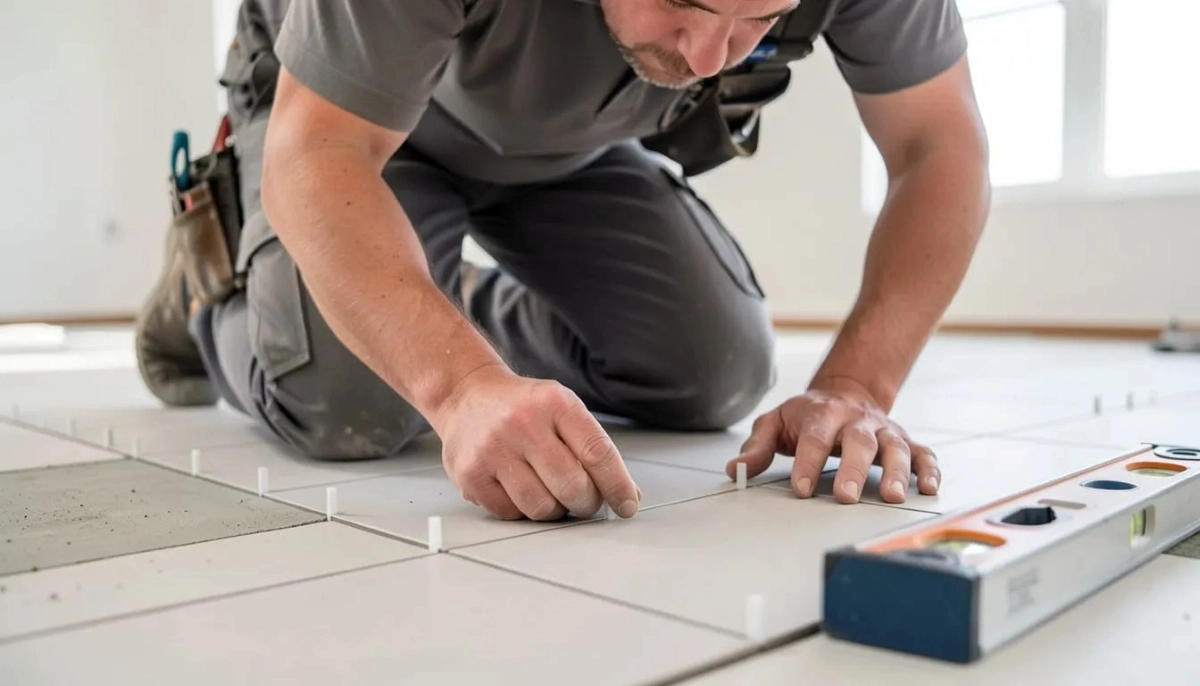
- Tile spacers (2-3mm): For consistent grout lines
- Rubber mallet and beating block: To seat tiles evenly
- Tile leveling system: Highly recommended for large format herringbone
- Measuring tape, square, and pencil
- Safety glasses and gloves
Materials Needed:
- Rectangular tiles (2:1 to 4:1 ratio)
- Polymer-modified thin-set adhesive
- Polymer-modified grout (sanded for joints 3mm+)
- Tile spacers
- Grout float and sponge
- Sealer (for natural stone and grout)
For more on tools, read our tile leveling systems guide.
📝 Step-by-Step Herringbone Installation
Here’s the complete process for how to lay herringbone tile pattern:
Step 1: Prepare the Subfloor
Ensure subfloor is flat (3mm over 2m), clean, and primed. Herringbone is unforgiving – any imperfection shows.
Step 2: Establish Layout Lines
Snap chalk lines or use laser level to mark your herringbone guidelines. Include the centre spine and reference lines.
Step 3: Mix Adhesive
Use polymer-modified thin-set. Mix to peanut butter consistency. Only mix what you can use in 30 minutes.
Step 4: Apply Adhesive
Using 8-10mm notched trowel, spread adhesive in small sections (about 1m²). Work along your guidelines.
Step 5: Start at the Centre
Begin at the centre point. Lay the first tile along your reference line. Place the second tile perpendicular to form the first V. Check alignment constantly.
Step 6: Build Outward
Work outward from the centre in both directions. Each tile must align perfectly with its neighbours. Use spacers (2-3mm) between tiles. Check the pattern frequently – herringbone can drift if not corrected.
Step 7: Back-Butter Each Tile
For full coverage, apply a thin layer of adhesive to the back of each tile before placing. This prevents hollow spots.
Step 8: Cut Edge Tiles
As you reach walls, measure each cut carefully. Herringbone creates many angled cuts – patience is essential. Mark each tile individually (don’t assume they’re identical).
Step 9: Use Tile Leveling System
For large format herringbone, use a tile leveling system to prevent lippage. This is highly recommended.
Step 10: Allow Adhesive to Cure
Wait 48-72 hours before grouting. Keep foot traffic off during curing.
Step 11: Grout
Apply polymer-modified sanded grout (for joints 3mm+). Work diagonally across tiles. Clean with damp sponge after 15-30 minutes.
Step 12: Seal (If Needed)
Natural stone requires sealing. Grout should also be sealed (unless epoxy grout). Wait 72 hours after grouting before sealing.
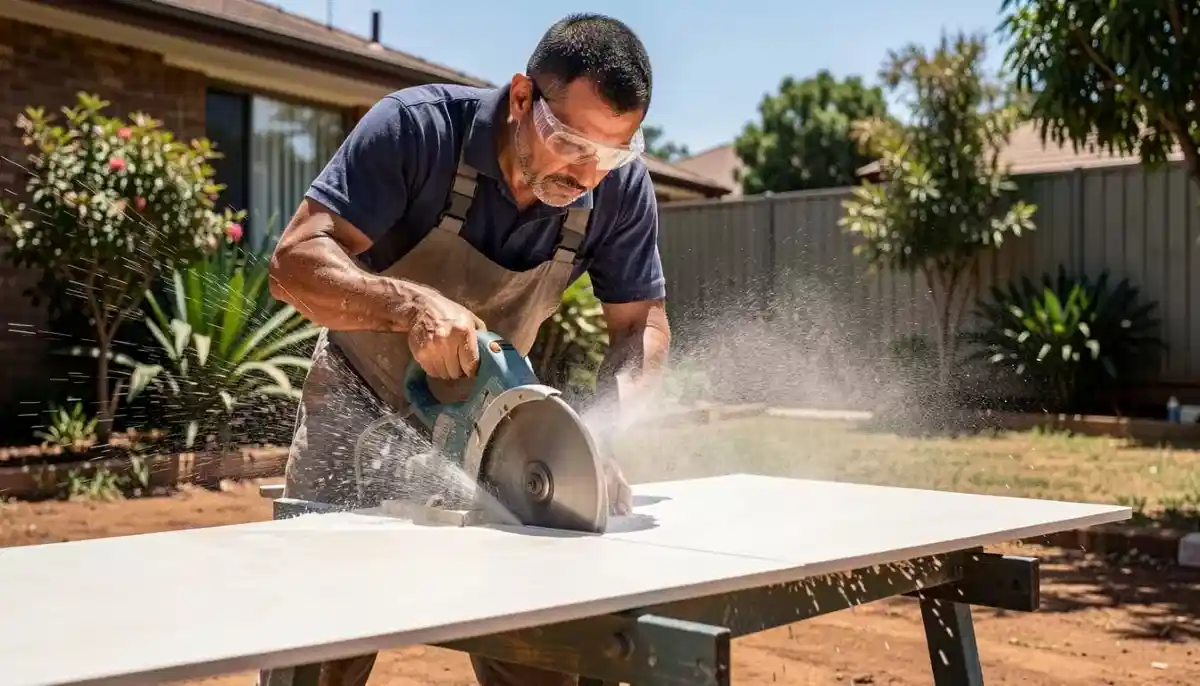
✂️ Cutting Techniques for Herringbone
Cutting for herringbone requires precision:
Straight Cuts (Ends):
Use a wet saw for clean, square cuts. Herringbone relies on precise 90-degree ends – any deviation will show in the pattern. For smaller tiles, a manual snap cutter works.
Angled Cuts (Walls and Obstacles):
Herringbone creates many angled cuts at walls. Measure each tile individually – don’t assume they’re the same. Use a wet saw with a mitre guide for accurate angles. Mark the tile clearly before cutting.
Cutting Around Obstacles:
For pipes, outlets, and corners, use a combination of straight cuts and nibbling with tile nippers. For complex cuts, consider a diamond hole saw. Always test-fit before applying adhesive.
Minimising Waste:
Herringbone creates 10-15% waste. To minimise waste:
- Plan layout carefully before cutting
- Use larger tiles in larger rooms (fewer cuts per m²)
- Save usable offcuts for edge pieces
- Buy 15% extra tiles (more than straight lay)

🚫 Common Mistakes to Avoid in Herringbone Installation
⚠️ Warning: These Mistakes Ruin Herringbone Floors
Avoid these errors when planning your herringbone tile pattern project.
- Wrong tile ratio: Square tiles don’t work for herringbone. Use rectangles with 2:1 to 4:1 ratio. Tiles that are too short (close to square) create a muddy, unclear pattern.
- No layout planning: Starting without guidelines guarantees a crooked herringbone. Always dry-lay and snap chalk lines first.
- Not starting at the centre: Starting at a wall creates uneven cuts at the opposite wall. Always start at the room’s centre.
- Inconsistent grout lines: Herringbone relies on consistent spacing. Use spacers every time – don’t eyeball.
- Poor cutting accuracy: Herringbone requires precise 90-degree ends and accurate angled cuts. A wetsaw is essential – manual cutters often produce slightly angled ends.
- No back-buttering: Hollow spots under herringbone tiles are common without back-buttering. Apply adhesive to the tile back for full coverage.
- Pattern drift: Herringbone can drift if not checked constantly. Use guidelines and check alignment every few rows.
- DIY without experience: Herringbone is NOT a beginner pattern. If you haven’t tiled before, practice on a small area first or hire a professional.
⭐ Pro Tips for Perfect Herringbone
These insider techniques will elevate your herringbone installation:
- Use rectified tiles: Precision-cut tiles allow narrow (2mm) grout lines, which look cleaner and more modern.
- Number your cut tiles: When cutting multiple edge tiles, number them and lay them out in order. This prevents confusion during installation.
- Check orientation constantly: It’s easy to accidentally rotate a tile 90 degrees. The pattern will look wrong immediately. Mark the back of each tile with an arrow showing direction.
- Use a tile leveling system: For large format herringbone, a leveling system prevents lippage and ensures a flat floor.
- Mix tiles from multiple boxes: Colour variation across boxes is common. Mix tiles during installation for a blended look.
- Seal natural stone before grouting: Stone absorbs grout colour. Pre-sealing prevents staining and makes cleanup easier.
- Practice on a board first: If you’re new to herringbone, practice laying a small pattern on a piece of plywood before tackling your floor.
💰 Herringbone Installation Cost Guide
Here’s what you can expect to pay for herringbone tile pattern installation in South Africa:
| Cost Factor | Typical Range | Notes |
|---|---|---|
| Herringbone labour premium | +30% to +50% vs straight lay | More cuts, more time, more skill required |
| Standard tiles (material)/m² | R200 – R600 | Ceramic, porcelain, wood-look |
| Premium tiles (material)/m² | R600 – R1,200 | Natural stone, designer porcelain |
| Installation (labour)/m² | R300 – R600 | Includes herringbone premium |
| Subfloor preparation | R100 – R300/m² | Herringbone requires very flat substrate |
| Total installed (50m²) – standard tile | R25,000 – R55,000 | Labour + materials + prep |
| Total installed (50m²) – premium tile | R45,000 – R90,000+ | Natural stone or designer porcelain |
For a complete breakdown of tile costs, read our tile installation cost per square meter guide.
❓ Frequently Asked Questions About Herringbone Tile Pattern
Is herringbone tile pattern difficult to install?
Yes – herringbone tile pattern is significantly more difficult than straight lay. It requires precise cutting, careful layout planning, and constant alignment checking. Herringbone is not recommended for beginners. Even experienced tilers charge 30-50% more for herringbone installation. If you’re determined to DIY, practice on a small board first.
What’s the difference between herringbone and chevron?
The difference between chevron vs herringbone is the tile shape and V appearance. Herringbone uses standard rectangles with 90-degree ends – the V is broken (ends staggered). Chevron uses parallelogram tiles with 45-degree angled ends – the V is continuous (ends meet perfectly). Chevron is more complex and expensive to install. Herringbone is more common for tile.
What size tiles are best for herringbone pattern?
Best tile sizes for how to lay herringbone tile pattern have length-to-width ratios of 2:1 to 4:1. Examples: 150x300mm, 200x400mm, 300x600mm, 150x600mm (wood-look planks). Avoid tiles that are close to square (e.g., 300x300mm) – they won’t create a clear herringbone pattern.
How much more does herringbone cost than straight lay?
Herringbone installation typically costs 30-50% more than straight lay due to more cuts, more waste (10-15% vs 10%), and slower installation. For a 50m² floor, straight lay might cost R25,000-35,000; herringbone costs R35,000-55,000 (standard tiles). Premium tiles and natural stone increase costs further.
Can herringbone be laid on walls?
Yes – herringbone looks stunning on feature walls, fireplace surrounds, and shower walls. Installation is similar to floors but lighter (no foot traffic). Use smaller tiles for wall herringbone (e.g., 100x200mm) to reduce weight and simplify cutting. Ensure walls are perfectly flat and primed.
Does herringbone make a room look bigger or smaller?
Herringbone can make rooms appear larger when oriented correctly. Running herringbone parallel to a long wall makes a narrow room feel wider. Running perpendicular makes a short room feel longer. The pattern creates movement that draws the eye across the space, generally making rooms feel more expansive than straight lay.
What grout colour works best with herringbone?
For herringbone, grout colour depends on the effect you want. Matching grout (same colour as tiles) makes the pattern more subtle and seamless. Contrasting grout (darker or lighter) highlights each individual tile and emphasises the V-shape. For wood-look herringbone, matching grout looks more like real wood flooring. For stone-look, contrasting grout adds definition.
Is herringbone tile pattern outdated?
Not at all – herringbone is a timeless classic that has been used for centuries. While trends come and go, herringbone remains popular because it adds elegance, movement, and perceived value. It works in both traditional and contemporary spaces. Modern large-format herringbone (e.g., 300x600mm tiles) offers a fresh, updated take on this classic parquet pattern.
✅ Final Thoughts: A Pattern Worth the Effort
The herringbone tile pattern is not the easiest floor to install. It requires more time, more skill, and more patience than straight lay. But the result – a floor that draws the eye, adds movement, and feels custom-crafted – is worth every extra hour.
If you’re hiring a professional, ask to see examples of their herringbone work. Not every tiler has experience with this pattern. If you’re attempting DIY, practice first, plan meticulously, and don’t rush.
Key takeaways for herringbone tile pattern:
- Use rectangular tiles with 2:1 to 4:1 ratio – avoid squares
- Herringbone vs chevron: herringbone uses rectangles, chevron uses parallelograms
- Layout planning is critical – dry-lay and snap guidelines first
- Expect 30-50% higher labour cost than straight lay
- Budget 15% extra tiles for waste (10-15% waste typical)
- Use a wet saw for precise cuts – manual cutters risk angled ends
- Back-butter each tile for full coverage
- This is not a beginner pattern – practice or hire a professional
Your next step: Ready to install a stunning herringbone floor? Get free quotes from verified tiling specialists who have proven experience with herringbone installation.
Ready to Install a Stunning Herringbone Floor?
Get free quotes from verified tiling specialists who have extensive experience with herringbone tile pattern installation – this pattern requires real skill and precision.
📞 Call us: 073 138 4726 to discuss your herringbone project.
Are You a Tiling Specialist with Herringbone Experience?
Join ServiceLink SA’s network of verified tiling contractors. Get qualified leads for herringbone, chevron, and other specialty pattern projects.
📚 Official resources & standards referenced:
- SANS 10400 – South African National Standard for pattern installation standards, subfloor requirements, and building regulations.
- Tile Association of South Africa – Industry guidelines for herringbone and other patterned tile installations.
Information provided for general guidance. Herringbone installation requires specialist skills – always consult qualified professionals.
Written by: Innocent T Hanyani
Construction & Home Services Industry Specialist | 21+ Years Experience
Innocent T Hanyani has over two decades of experience working across South Africa’s construction and home improvement sectors. Throughout his career, he has installed hundreds of herringbone floors – from classic wood-look patterns in Sandton homes to modern large-format herringbone in Fourways apartments. His practical experience helps homeowners understand the precision, planning, and patience required for this beautiful pattern. He has seen stunning herringbone floors that add immense value – and poorly executed ones that detract. His advice emphasises proper layout, accurate cutting, and knowing when to hire a professional.
For more information about tile patterns and design, explore our related resources: modern tile design trends, tile patterns for small bathrooms, hexagon tiles design ideas, large vs small tiles design, and subway tile installation guide. Learn about our process on what is ServiceLink SA and how our service works. Find tilers in your area: Gauteng, Sandton, and Fourways. For related services, see our flooring services and building construction guides.