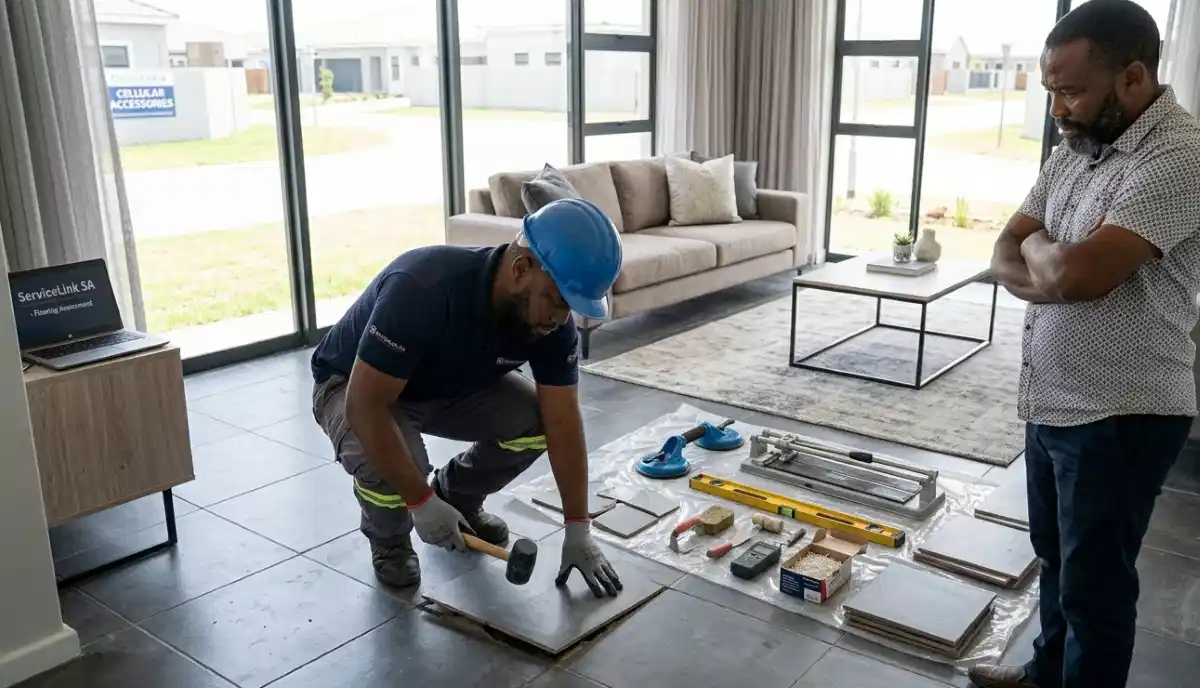
Got Loose Tiles That Need Professional Attention?
Get free quotes from verified tiling specialists who can diagnose and fix loose tiles properly. Available for emergency services.
Get Free Quotes for Loose Tile Repair
Servicing KwaZulu-Natal, Durban, Ballito, and across South Africa
Loose Tiles: Causes, Repair Methods & Prevention SA
🔄 From wobbly floor tiles to shifting wall tiles – everything you need to know about fixing loose tiles
You feel it every time you walk across that one spot in your kitchen. A slight movement underfoot. A disconcerting click. Maybe you’ve even noticed a tile that rocks when you step on one corner. That’s a loose tile – and it’s not something to ignore.
I’ve seen what happens when homeowners dismiss loose tiles as “just a minor annoyance.” A tile that’s coming loose today will be a cracked tile tomorrow. And that cracked tile? It can damage adjacent tiles, create trip hazards, and in wet areas like bathrooms, allow water to seep through and rot your subfloor.
In this complete guide to loose tile repair, I’ll show you how to identify loose tiles, understand why they became loose in the first place, and walk you through repair methods ranging from simple DIY injections to full replacement. Whether you’re in Durban, Ballito, or anywhere across KwaZulu-Natal, this guide will help you fix loose tiles before they become a bigger problem.
For related issues, check out our guides on cracked tile repair, hollow sounding tiles, and why tiles crack after installation.
📋 Table of Contents – Loose Tile Repair Guide
👂 How to Identify Loose Tiles Before They Break
Early detection of tile movement saves you money and prevents damage. Here’s what to look for:
The Tap Test (Most Reliable)
Walk across your tiled floor with a screwdriver or a coin. Tap each tile gently. A securely bonded tile produces a sharp, high-pitched “click” sound. A loose tile produces a hollow, drum-like “thud” or “dull” sound. This hollow sound indicates the adhesive has lost its bond underneath that area.
The Rock Test
Stand at the edge of a tile and press down on the opposite corner. If the tile rocks or moves even slightly, the adhesive has failed. This is especially common with large format tiles where the center wasn’t properly bonded.
Visual Signs
- Cracked grout lines around a specific tile
- Grout that has crumbled or turned to powder
- A tile that sits slightly higher or lower than surrounding tiles (lippage)
- Visible cracks in the tile itself (often follows a loose tile)
- Movement when you walk on the tile
The Water Test (For Bathrooms)
Pour a small amount of water on the grout lines around a suspect tile. If the water disappears quickly (seeps under the tile), the grout has failed and the tile is likely loose.
If you detect any of these signs, you need loose tile repair before the problem worsens. For more diagnostic help, read our guide on hollow sounding tiles.
🔍 7 Common Causes of Loose Tiles
Understanding why your tile is coming loose is essential for effective repair and prevention:
1. Adhesive Failure (Most Common)
Thin-set adhesive loses its bond over time due to age, moisture exposure, or incorrect mixing. Using pre-mixed adhesive (mastic) in wet areas is a guaranteed failure. Read our tile adhesives explained guide to understand the right adhesive for your project.
2. Poor Subfloor Preparation
If the subfloor wasn’t properly cleaned, primed, or leveled before installation, adhesive won’t bond properly. Dust, grease, or old paint creates a barrier. Uneven floors create voids where tiles flex and loosen.
3. Subfloor Movement or Settlement
Wooden subfloors that flex under load, or concrete slabs that are settling or cracking, will break the adhesive bond. This is a structural issue that requires professional building construction assessment.
4. Incorrect Trowel Size or Technique
Using a trowel with notches that are too small means insufficient adhesive coverage. Using notches that are too large creates voids. Not holding the trowel at the correct angle (45 degrees) creates uneven adhesive ridges.
5. No Back-Buttering on Large Tiles
Large format tiles (600x600mm and larger) require back-buttering – applying a thin layer of adhesive to the tile back before setting. Without this, the adhesive can’t achieve full coverage. See our large format tiles guide for proper technique.
6. Walking on Tiles Too Soon After Installation
Adhesive needs 24-48 hours to cure. Walking on tiles too early can shift them and break the bond. This is especially common with large format tiles that require longer curing times.
7. Water Damage or Moisture Intrusion
Water seeping through cracked grout or failed waterproofing can soften adhesives, especially on wooden subfloors. In bathrooms, this often requires waterproofing repairs alongside loose tile repair.
⚠️ Critical Warning:
If multiple tiles are loose across a large area, or if the subfloor feels spongy or wet, STOP. This indicates widespread adhesive failure or structural issues. DIY repairs will not fix the root cause – call a professional immediately.
🩺 How to Diagnose the Severity of Your Loose Tile
Before attempting how to fix loose tiles without removing them, determine how severe the problem is:
Mild Case (DIY-Friendly)
- Single tile with hollow sound but no movement
- Tile doesn’t rock when pressed
- No cracked grout yet
- Tile is in a dry area (not a shower or bathroom floor)
- Solution: Adhesive injection (see Method 1 below)
Moderate Case (DIY Possible, but Tricky)
- Single tile that rocks slightly when pressed
- Grout has cracked or crumbled around the tile
- No movement in adjacent tiles
- Solution: Remove the tile, clean the substrate, re-bond (see Method 2 below)
Severe Case (Call a Professional)
- Multiple loose tiles in one area
- Tiles have cracked or shifted position
- Subfloor feels spongy or shows water damage
- Loose tiles in a wet area (shower, bathroom floor, pool surround)
- Tiles are large format (600x600mm or larger)
- Solution: Professional tiling services with substrate assessment
For severe cases, get a free inspection from a verified tiler through ServiceLink SA.
💉 How to Fix Loose Tiles Without Removing Them (Adhesive Injection Method)
For mild cases where the tile is hollow but not moving, you can fix loose tiles without removing them using this adhesive injection technique:
Tools and Materials Needed:
- Syringe or adhesive injection kit (available at tile shops)
- Thin-set adhesive or tile repair epoxy (low-viscosity, injection-grade)
- Drill with 3mm-5mm bit
- Vacuum
- Weights or heavy objects
- Wax paper or plastic sheeting
- Grout (colour-matched)
Step-by-Step Process:
Step 1: Drill Injection Holes
Drill 3-4 small holes (3mm-5mm) through the grout lines around the loose tile, not through the tile itself. The holes should go through the grout and into the void beneath the tile. Space holes evenly around the perimeter.
Step 2: Vacuum Dust
Vacuum thoroughly to remove all dust from drilling. Any debris left will prevent adhesive from bonding.
Step 3: Mix Adhesive
Mix a small batch of low-viscosity thin-set or injection-grade epoxy. It should be runnier than standard adhesive – it needs to flow into the void.
Step 4: Inject Adhesive
Fill your syringe with adhesive. Insert the tip into one of the drilled holes. Inject slowly until you see adhesive starting to come out of the adjacent holes. This means the void is filling.
Step 5: Repeat for All Holes
Continue injecting through each hole until adhesive appears at the other holes. This ensures full coverage under the tile.
Step 6: Apply Weight
Place a heavy object (stack of books, weight plate, or a bucket of water) on top of the tile. Cover the tile with wax paper first to protect the surface. The weight presses the tile down into the wet adhesive.
Step 7: Let Cure
Leave the weight in place for 24-48 hours. Do not walk on the tile during this time.
Step 8: Fill Injection Holes
Once cured, fill the drilled holes with colour-matched grout. Allow to dry, then clean the area.
✅ When This Method Works Best:
Adhesive injection is ideal for how to fix loose tiles without removing them when the tile is hollow but still intact, the grout is only partially failed, and the tile is in a dry area. It works well for floor tiles that have lost bond in the center but still have perimeter adhesion.
Not Confident About Fixing Loose Tiles Yourself?
Get free quotes from verified tiling specialists who can diagnose and repair loose tiles properly – with workmanship guarantees.
Get Professional Repair Quotes
Available for emergency callouts across South Africa.
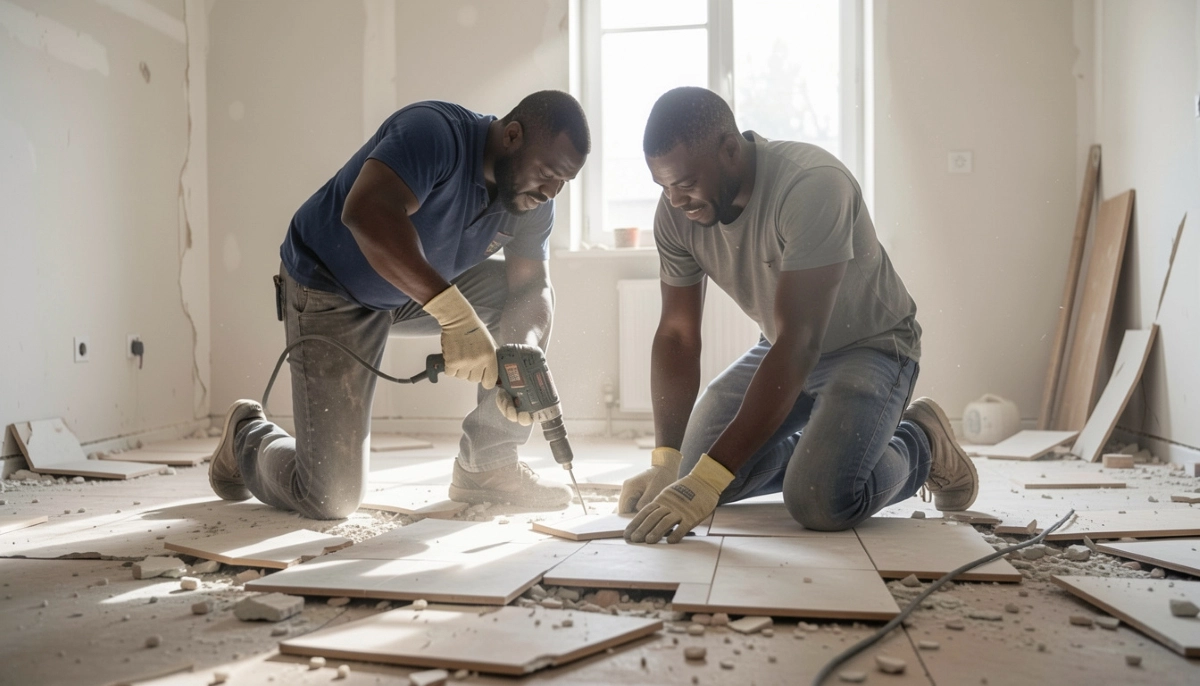
🔨 How to Remove and Re-Bond a Loose Tile (Full Replacement Method)
For moderate cases where the tile rocks or has cracked grout, you’ll need to remove and re-bond the tile. Here’s how to do loose tile repair by full replacement:
Tools Needed:
- Cold chisel and hammer (or oscillating multi-tool)
- Safety glasses and gloves
- Vacuum
- Notched trowel (4-6mm for small tiles, 6-8mm for larger tiles)
- Tile adhesive (polymer-modified thin-set)
- Grout and grout float
- Rubber mallet and beating block
- Tile spacers
- Replacement tile (if original breaks during removal)
Step-by-Step Process:
Step 1: Remove the Grout Around the Tile
Use a grout saw or oscillating tool with a grout removal blade to cut the grout around all four sides of the loose tile. This prevents damage to adjacent tiles during removal.
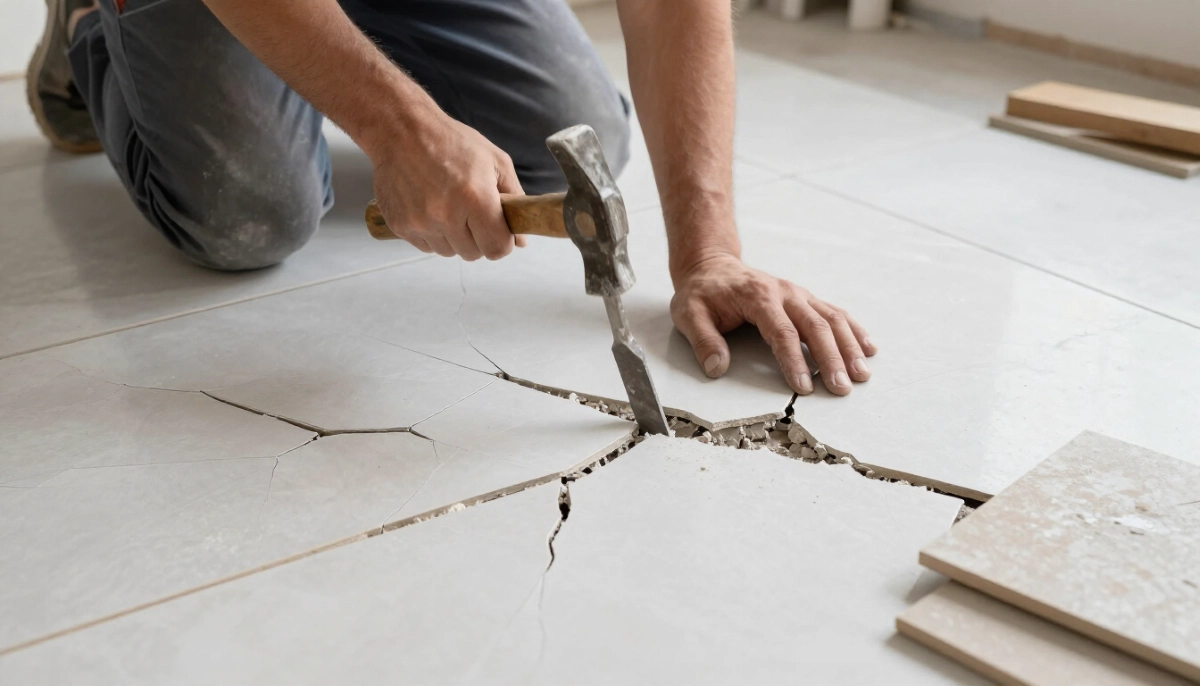
Step 2: Remove the Loose Tile
Insert your chisel at a low angle (almost flat) under the tile edge. Tap gently with a hammer. Work your way around the tile. If the tile is already loose, it should pop up easily. If it resists, you may need to break it (carefully) and remove pieces.
Step 3: Clean the Substrate
Scrape away all old adhesive from the substrate. The surface should be clean, flat, and slightly rough (for adhesion). Vacuum thoroughly.
Step 4: Check the Substrate Condition
Look for signs of moisture, mould, or damage. If the substrate is damaged, you may need subfloor repair. For waterproofing issues in bathrooms, call a professional.
Step 5: Dry-Fit the Tile
Place the tile (or new replacement tile) in the opening. It should sit flush or slightly below surrounding tiles. If it’s too high, remove more substrate. If too low, you’ll need more adhesive.
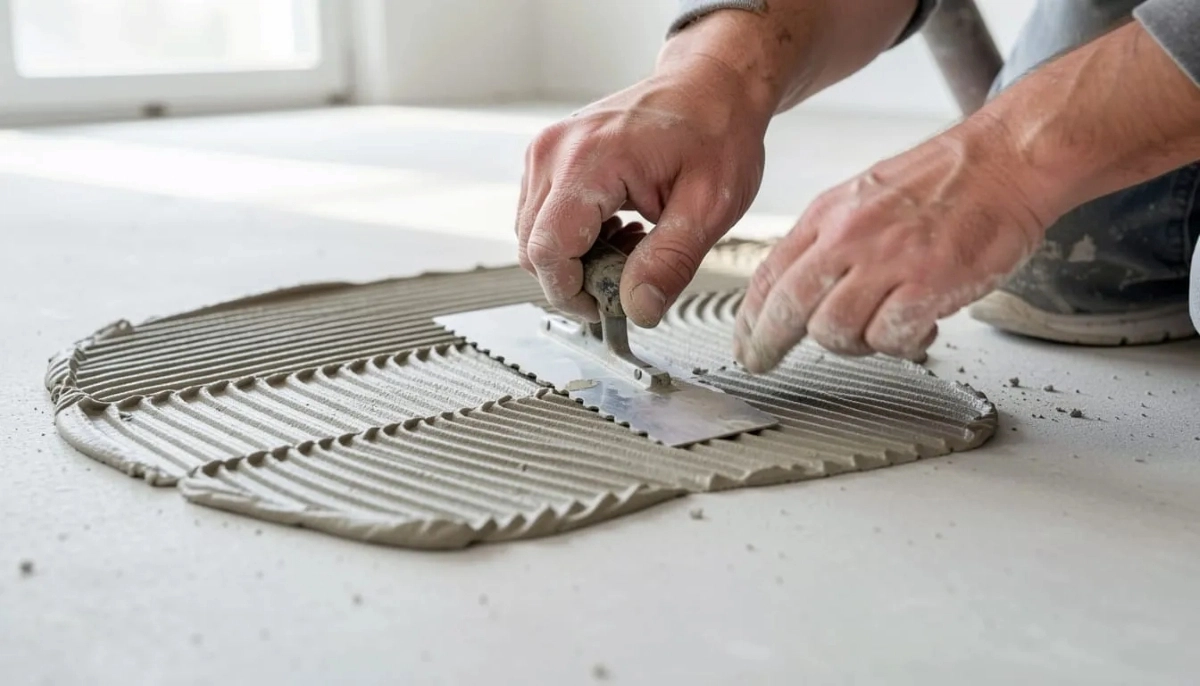
Step 6: Apply Adhesive
Spread adhesive on the substrate using a notched trowel. For tiles 300x300mm or larger, also back-butter the tile (apply a thin layer to the back).
Step 7: Set the Tile
Press the tile into place with a twisting motion. Use a rubber mallet and beating block to seat it flush with surrounding tiles. Insert spacers to maintain consistent grout lines.
Step 8: Check Level
Use a level to ensure the tile is flat with adjacent tiles. Adjust immediately if needed.
Step 9: Let Adhesive Cure
Wait 24-48 hours. Keep weight off the new tile. Do not walk on it.
Step 10: Grout
Apply colour-matched grout to the joints around the tile. Clean with a damp sponge after 15-30 minutes. For wet areas, seal the grout after 72 hours.
For a complete guide on removal costs, read tile removal and replacement cost guide.
📞 When to Call a Professional for Loose Tile Repair
Some situations require professional loose tile repair – DIY will only make things worse:
- Multiple loose tiles in a pattern or area: Indicates widespread adhesive failure or subfloor movement. A professional can assess whether the entire floor needs replacement.
- Subfloor feels spongy, wet, or shows damage: This suggests structural issues or water damage requiring building construction and waterproofing expertise.
- Loose tiles in a wet area (shower, bathroom floor, pool surround): Waterproofing must be reinstated correctly – improper repair leads to leaks and mould.
- Tiles are large format (600x600mm or larger): These require proper back-buttering and leveling systems. DIY removal and re-bonding often fails.
- You don’t have matching replacement tiles: If the original tile breaks during removal, a professional can help source matches or create a design solution.
- The tile is valuable or historic: Mosaic, natural stone, or antique tiles require specialist handling to avoid damage.
- You’ve tried DIY repair and the tile came loose again: This indicates an underlying issue you haven’t addressed.
ServiceLink SA connects you with verified tiling specialists who carry workmanship guarantees. Learn more about how our service works and how we verify contractors.
🛡️ How to Prevent Tiles from Coming Loose
Prevention is always cheaper than loose tile repair. Here’s how to protect your tiles:
- Ensure proper subfloor preparation before installation: Clean, level, and prime the substrate. Read our floor leveling guide.
- Use the correct adhesive for your tile type and location: Polymer-modified thin-set for large tiles and wet areas. Never use pre-mixed adhesive (mastic) in bathrooms. See tile adhesives explained.
- Back-butter large format tiles (300x300mm and larger): This ensures full adhesive coverage and prevents hollow spots.
- Wait 24-48 hours before walking on new tiles: Adhesive needs time to cure. For large format tiles, wait 48 hours minimum.
- Maintain grout lines: Cracked or missing grout allows water and debris to reach the adhesive. Re-grout when needed.
- Address subfloor movement: If your wooden subfloor flexes, add reinforcement before tiling. For concrete, fill cracks before installation.
- Fix leaks promptly: Water under tiles destroys adhesive bonds. Address plumbing leaks and waterproofing failures immediately.
- Use expansion joints in large areas: For floors larger than 8 meters in any direction, install expansion joints to accommodate tile movement from temperature changes.
💰 Loose Tile Repair Cost Guide
Here’s what you can expect to pay for loose tile repair in South Africa:
| Repair Type | DIY Cost | Professional Cost | Notes |
|---|---|---|---|
| Adhesive injection (single tile) | R150 – R300 | R500 – R900 | Includes injection kit and adhesive |
| Remove and re-bond (single tile) | R200 – R500 + tile cost | R800 – R1,500 | Labour, adhesive, grout included |
| Multiple tiles (3-5 tiles) | R500 – R1,500 + tiles | R2,000 – R4,000 | Per job, not per tile |
| Widespread adhesive failure (over 5m²) | Not recommended | R5,000 – R15,000+ | May require full floor replacement |
| Subfloor repair + re-tiling | Not recommended | R10,000 – R30,000+ | Depends on damage extent |
| Emergency call-out (after hours) | N/A | R500 – R1,000 + repair | See emergency services |
For a detailed breakdown of removal and replacement costs, read our tile removal and replacement cost guide.
🚫 Common Mistakes to Avoid When Fixing Loose Tiles
⚠️ Warning: These Mistakes Make Loose Tiles Worse
Avoid these errors when attempting loose tile repair.
- Walking on a loose tile before repair: Each step flexes the tile, cracking grout and potentially damaging the tile itself. Stay off it until repaired.
- Using the wrong adhesive for injection: Standard thin-set is too thick to flow through injection holes. Use low-viscosity, injection-grade epoxy or thin-set specifically designed for this purpose.
- Not removing all old adhesive before re-bonding: Old adhesive creates an uneven surface and prevents proper bonding. Scrape clean before applying fresh adhesive.
- Applying weight directly on the tile surface: Without wax paper protection, weights can scratch or stain tiles. Always use a protective barrier.
- Grouting before adhesive cures fully: Adhesive needs 24-48 hours. Grouting too early can shift the tile out of alignment.
- Ignoring the root cause: Fixing a loose tile without addressing subfloor movement, water damage, or adhesive failure means it will come loose again – often within weeks.
- Using too much force during tile removal: Breaking the tile aggressively can damage adjacent tiles or the subfloor. Work slowly and carefully.
- Not matching grout colour: A mismatched grout line draws attention to the repair. Take a sample of existing grout to the tile shop for colour matching.
❓ Frequently Asked Questions About Loose Tile Repair
How do I fix a loose tile without removing it?
To fix loose tiles without removing them, use the adhesive injection method: drill small holes through the grout lines, inject low-viscosity epoxy or thin-set into the void, apply weight for 24-48 hours, then fill the holes with colour-matched grout. This works best for tiles that are hollow but not yet rocking or cracked.
Why do my floor tiles keep coming loose?
If your tile is coming loose repeatedly, the underlying cause hasn’t been addressed. Common causes include subfloor movement (flexing or settling), inadequate adhesive for the tile type, missing back-buttering on large tiles, water damage under the tiles, or improper subfloor preparation. Read why tiles crack after installation to diagnose the root problem.
Can I just glue a loose tile back down with regular glue?
No. Regular construction adhesive, wood glue, or superglue will fail quickly – they aren’t designed for tile installation. Use proper polymer-modified thin-set adhesive or tile repair epoxy. These products accommodate tile movement from temperature changes and provide the bonding strength tiles need. Read our tile adhesives explained guide for the right product.
How much does professional loose tile repair cost?
Professional loose tile repair costs R800-R1,500 for single tile removal and re-bonding, R500-R900 for adhesive injection (no removal), and R2,000-R4,000 for multiple tiles. Widespread adhesive failure over large areas costs R5,000-R15,000+. Get a free quote from verified tilers through ServiceLink SA for accurate pricing.
How can I tell if a tile is loose without tapping it?
While the tap test (using a screwdriver or coin) is most reliable, other signs include cracked or crumbling grout around a specific tile, visible movement when you step on a tile corner, a tile that sits higher or lower than neighbours (lippage), or water that disappears quickly when poured on grout lines. Any of these signs warrant investigation.
Is a loose tile a sign of foundation problems?
Sometimes. Multiple loose tiles in a straight line or pattern can indicate subfloor movement or foundation settlement. However, a single loose tile is usually an installation issue (poor adhesive coverage, no back-buttering). If you have multiple loose tiles across different areas, or if you see foundation cracks, get a professional building construction assessment.
Can I walk on a loose tile?
No. Avoid walking on loose tiles whenever possible. Each step flexes the tile, which can crack it, damage adjacent tiles, and widen the area of adhesive failure. If you must cross the area, step over the loose tile or place a piece of plywood over it to distribute weight. For urgent situations, use emergency services.
How long does it take for adhesive to cure after loose tile repair?
Standard thin-set adhesive requires 24 hours minimum cure time before light foot traffic. For large format tiles, wet areas, or in cool conditions, wait 48 hours. For adhesive injection repairs, wait 24-48 hours with weight applied. Do not grout until adhesive is fully cured. Always follow manufacturer instructions on your specific adhesive product.
✅ Final Thoughts: Don’t Ignore Loose Tiles
A loose tile isn’t just an annoyance – it’s a warning sign. That hollow sound or slight movement today will become a cracked tile tomorrow, and that cracked tile can lead to trip hazards, water damage, and expensive subfloor repairs.
The good news? Most loose tiles are fixable. For mild cases, adhesive injection offers a non-invasive how to fix loose tiles without removing them solution. For moderate cases, removing and re-bonding the tile provides a permanent fix. And for severe cases, professional repair ensures the root cause is addressed.
Key takeaways for loose tile repair:
- Tap test regularly – a hollow sound means adhesive has failed
- Fix loose tiles immediately – don’t wait for them to crack
- Adhesive injection works for mild cases (no movement yet)
- Remove and re-bond for moderate cases (rocking or cracked grout)
- Call a professional for multiple loose tiles or subfloor issues
- Prevention through proper installation is always cheaper than repair
Your next step: If you have a loose tile that needs professional attention, get free quotes from verified tiling specialists. For emergencies, our network includes tilers available for urgent call-outs across South Africa.
Need Professional Loose Tile Repair?
Get free quotes from verified tiling specialists who can diagnose and fix loose tiles properly – with workmanship guarantees.
📞 Call us: 073 138 4726 for immediate assistance with loose tile emergencies.
Free inspections •
Workmanship guarantees •
Verified contractors
📚 Official resources & standards referenced:
- SANS 10400 – South African National Standard for adhesive standards, subfloor requirements, and tile installation specifications.
- SABS – South African Bureau of Standards for material standards, including adhesive strength and tile bonding specifications.
Information provided for general guidance. For widespread loose tiles or structural issues, always consult a qualified professional.
Written by: Innocent T Hanyani
Construction & Home Services Industry Specialist | 21+ Years Experience
Innocent T Hanyani has over two decades of experience working across South Africa’s construction and home improvement sectors. Throughout his career, he has diagnosed and repaired thousands of loose tile issues – from single tiles that lost bond due to poor installation to widespread adhesive failure from subfloor movement. His practical experience helps homeowners understand when a simple injection will work and when the entire floor needs professional attention. He has seen how ignoring a loose tile leads to cracked tiles, water damage, and costly subfloor replacement.
For more information about tile repairs and troubleshooting, explore our related resources: cracked tile repair guide, hollow sounding tiles, tile removal and replacement costs, tile adhesives explained, and why tiles crack after installation. Learn about our process on how ServiceLink SA works and how we verify contractors. Find tilers in your area: KwaZulu-Natal, Durban, and Ballito. For related services, see our building construction and waterproofing guides.