Got a Cracked Tile That Needs Urgent Attention?
Get free quotes from verified tiling specialists who can diagnose and repair cracked tiles quickly. Available for emergency services.
Get Free Quotes for Tile Repair
Servicing Gauteng, Johannesburg, Pretoria, and across South Africa
Cracked Tile Repair: Causes, Solutions & When to Replace SA
🔨 From hairline fractures to full breaks – everything you need to know about fixing cracked tiles
You’re walking across your kitchen floor when you feel it. That slight dip. That unsettling sound. You look down and there it is – a crack running across one of your beautiful floor tiles. Your heart sinks. “How did this happen? Is the whole floor failing? How much is this going to cost me?”
I’ve answered these questions hundreds of times for homeowners across Gauteng, Johannesburg, and Pretoria. The good news? Not every cracked tile is a disaster. Some cracks are purely cosmetic and can be fixed in minutes. Others signal serious underlying problems that need immediate attention.
In this complete guide to cracked tile repair, I’ll show you how to diagnose the cause of your tile fracture, walk you through DIY repair options for minor cracks, explain when you need professional broken tile repair, and help you decide whether to fix cracked tile or replace it entirely. By the end, you’ll know exactly what to do – and what NOT to do.
For related issues, check out our guides on why tiles crack after installation, loose tile repair, and hollow sounding tiles. If you have water damage, read our emergency tile repair guide.
📋 Table of Contents – Cracked Tile Repair Guide
🔍 Types of Tile Cracks – What They Mean
Not all cracks are created equal. The appearance of your tile fracture tells you a lot about the underlying cause:
| Crack Type | Appearance | Likely Cause | Urgency |
|---|---|---|---|
| Hairline Crack | Very thin, barely visible, straight or slightly curved | Thermal stress, minor subfloor movement, or manufacturing defect | Low – monitor |
| Single Straight Crack | One clean line across a single tile | Impact (dropped object), point load (heavy furniture leg) | Medium – repair soon |
| Multiple Parallel Cracks | Several straight cracks running parallel across multiple tiles | Subfloor movement, settlement, or expansion joint missing | High – investigate immediately |
| Spiderweb/Crazing | Network of fine cracks across tile surface | Manufacturing defect, improper adhesive, or glaze failure | Medium – tile may need replacement |
| Corner Crack | Crack starting at tile corner and extending inward | Poor installation – tile not fully embedded in adhesive | Medium-High |
| Hollow Sound + Crack | Cracked tile sounds hollow when tapped | Adhesive bond failure – tile was never properly bonded | High – replacement needed |
Understanding your crack type is the first step to effective cracked tile repair. For more diagnostic help, read our guide on hollow sounding tiles.
⚠️ 7 Common Causes of Cracked Tiles
Before attempting cracked tile repair, you need to understand why it happened. Fixing the symptom without addressing the cause means the crack will return.
1. Subfloor Movement or Settlement
This is the most serious cause. If your concrete slab or wooden subfloor is moving, settling, or flexing, tiles will crack – often in straight lines across multiple tiles. This requires structural investigation and professional building construction expertise.
2. Impact or Point Load
Dropping a heavy object (cast iron pan, hammer, heavy vase) or placing heavy furniture with small legs directly on a tile can cause a single cracked tile. This is usually isolated and easiest to fix.
3. Missing or Inadequate Expansion Joints
Tiles expand and contract with temperature changes. Without proper expansion joints at walls and每隔 5-8 meters, tiles can press against each other and crack. This often shows as parallel cracks or tenting (tiles lifting in the middle).
4. Poor Subfloor Preparation
Tiles need a flat, stable substrate. If your floor wasn’t properly leveled or primed before installation, hollow spots develop. When weight is applied, the tile flexes into the void and cracks. For more, read our guide on floor leveling and surface preparation.
5. Incorrect Adhesive or Coverage
Using the wrong adhesive (standard vs large format) or applying it incorrectly can cause bonding failure. The tile adhesives guide explains which adhesive to use for different tiles.
6. Heavy Loads Beyond Tile Rating
Wall tiles installed on floors will crack under foot traffic. Floor tiles with insufficient PEI rating (durability) will crack under heavy use. Always check tile specifications before installation.
7. Water Damage or Leaks
Water seeping under tiles can soften adhesives, rot wooden subfloors, or cause efflorescence (salt crystal growth) that pushes tiles up from below. See our waterproofing and emergency tile repair guides for water-related issues.
⚠️ Critical Warning:
If you have multiple cracked tiles in a line or pattern, DO NOT just replace the cracked tiles. This indicates subfloor movement or expansion joint failure. Call a professional immediately – ignoring this can lead to widespread tile failure costing tens of thousands to fix.
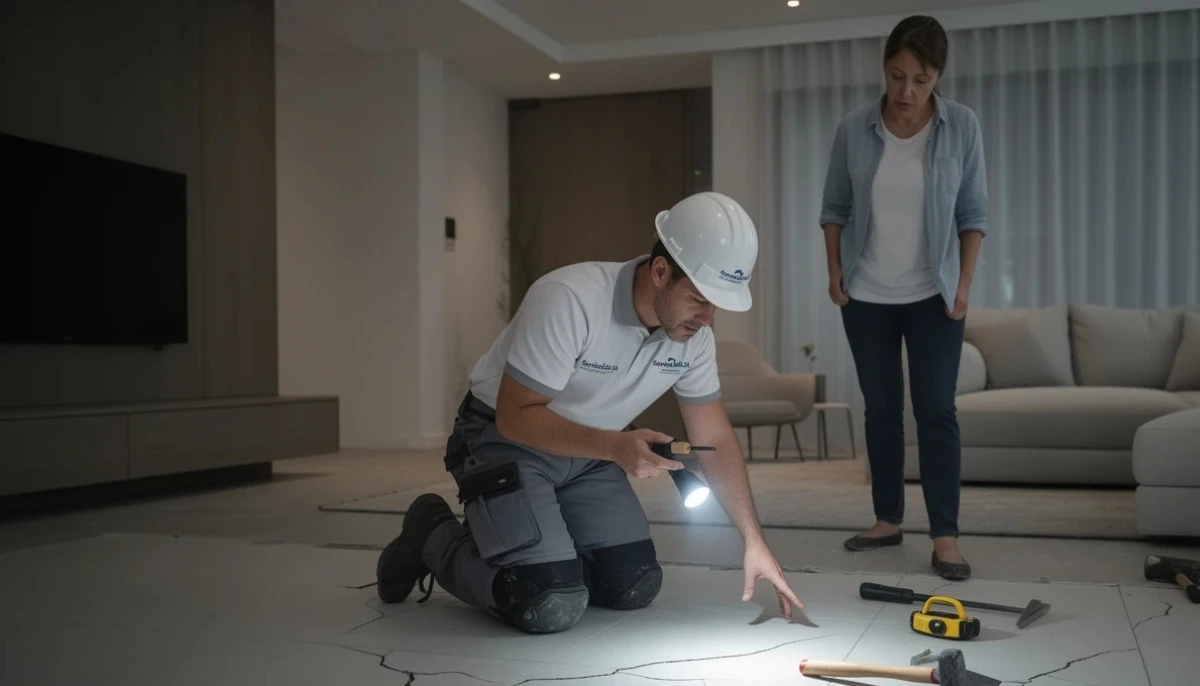
🩺 How to Diagnose Your Cracked Tile
Follow this diagnostic process to determine the right approach for how to repair a cracked tile without replacing or if replacement is necessary:
Step 1: Tap Test
Use a screwdriver handle or a coin to tap the cracked tile and the surrounding tiles. A solid, high-pitched sound means good bond. A hollow, drum-like sound means the adhesive has failed. Read hollow tiles problem for more details.
Step 2: Check for Movement
Press firmly on the cracked area. Does the tile move or flex? Any movement means the bond has failed completely – replacement is required.
Step 3: Examine the Pattern
Is the crack isolated to one tile? Or does it continue across multiple tiles in a line? Multiple cracked tiles in a line suggest subfloor movement or missing expansion joints.
Step 4: Look for Water Damage Signs
Check for discolouration, efflorescence (white powdery residue), or musty odours. These indicate moisture problems. See water damage under tiles for diagnosis.
Step 5: Consider Recent Events
Did someone drop something heavy? Did you just install heavy new furniture? Was there recent construction nearby that could have caused vibrations?
Based on your diagnosis, choose the appropriate repair method below.
🛠️ DIY Cracked Tile Repair – When You Can Fix It Yourself
For minor hairline cracks or small chips, you can attempt how to repair a cracked tile without replacing it using these methods:
Method 1: Hairline Crack Filling (Best for cosmetic cracks)
For thin cracks that don’t affect tile stability:
- Clean the crack thoroughly with a vacuum and rubbing alcohol
- Apply colour-matched grout or tile repair epoxy into the crack
- Use a credit card or squeegee to scrape excess flat
- Wipe with a damp sponge before it fully hardens
- Let cure for 24 hours
Method 2: Epoxy Filler (For wider cracks or chips)
Tile repair epoxy comes in various colours and can be mixed to match:
- Clean the damaged area thoroughly
- Mix two-part epoxy according to instructions
- Apply with a toothpick or fine applicator
- Overfill slightly, then scrape level once partially set
- Once fully cured (24 hours), buff with fine sandpaper
Method 3: Tile Touch-Up Paint (For glazed ceramic)
For tiny chips that don’t go through the glaze:
- Clean the chip area
- Apply matching tile touch-up paint or nail polish
- Let dry, apply second coat if needed
- Seal with clear acrylic sealer
✅ When DIY Works Best:
These DIY cracked tile repair methods work well for hairline cracks, small chips, and tiles that are securely bonded (no hollow sound). They will NOT work for cracks caused by subfloor movement, hollow tiles, or structural issues.
Need Professional Cracked Tile Repair?
Don’t risk making the problem worse. Get free quotes from verified tiling specialists who can diagnose the root cause and provide lasting broken tile repair.
Available for emergency callouts across South Africa.
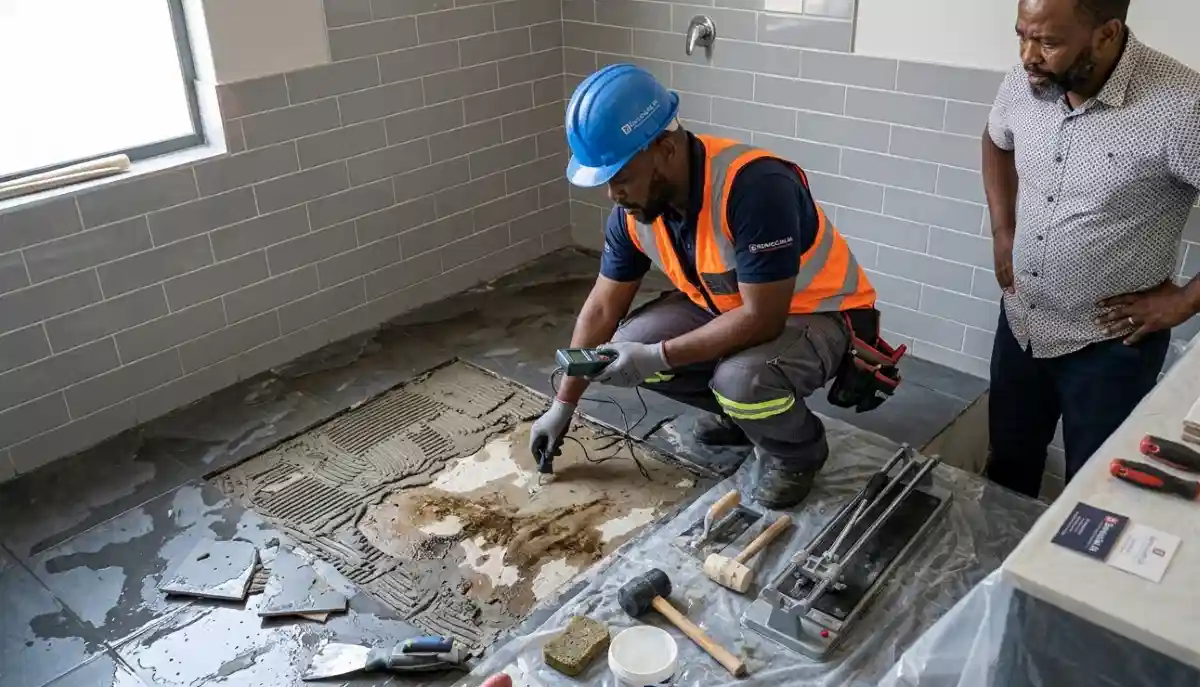
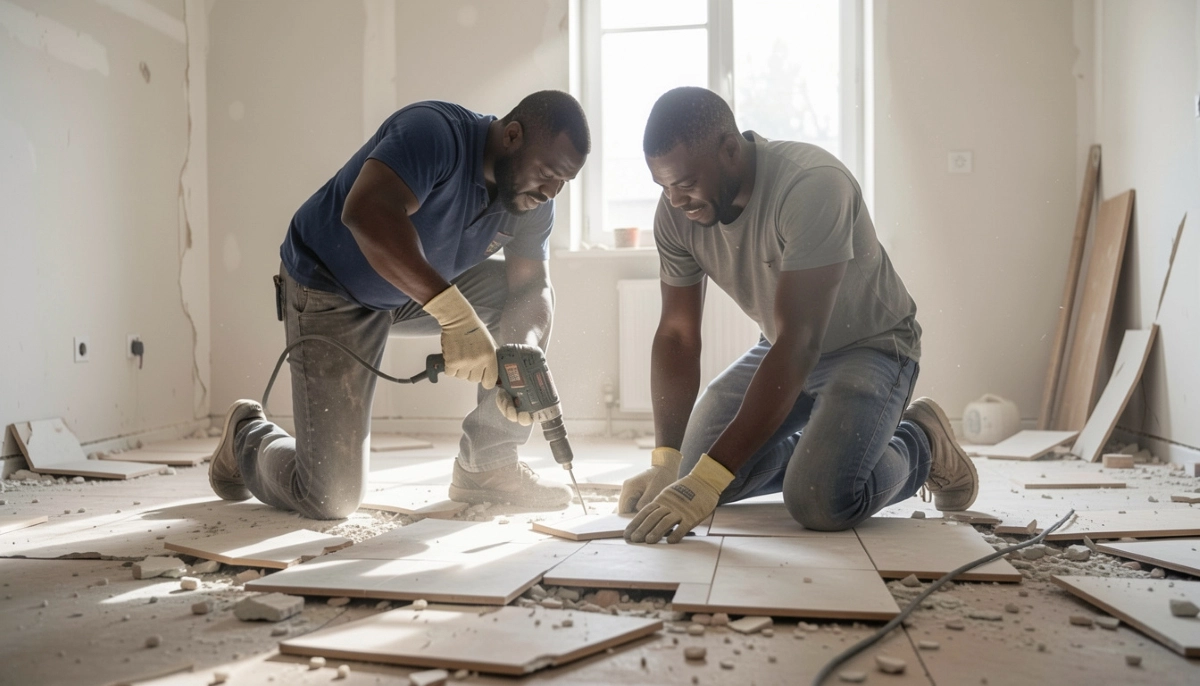
🔨 How to Replace a Cracked Tile (Step-by-Step)
When DIY filler isn’t enough, you’ll need to replace the tile entirely. Here’s how to do broken tile repair by replacement:
Tools Needed:
- Cold chisel and hammer (or oscillating multi-tool)
- Safety glasses and gloves
- Vacuum
- Notched trowel
- Tile adhesive
- Grout and grout float
- Replacement tile (matching size, colour, and batch if possible)
Step-by-Step Process:
Step 1: Protect Surrounding Tiles
Use masking tape and cardboard to protect adjacent tiles from damage during removal.
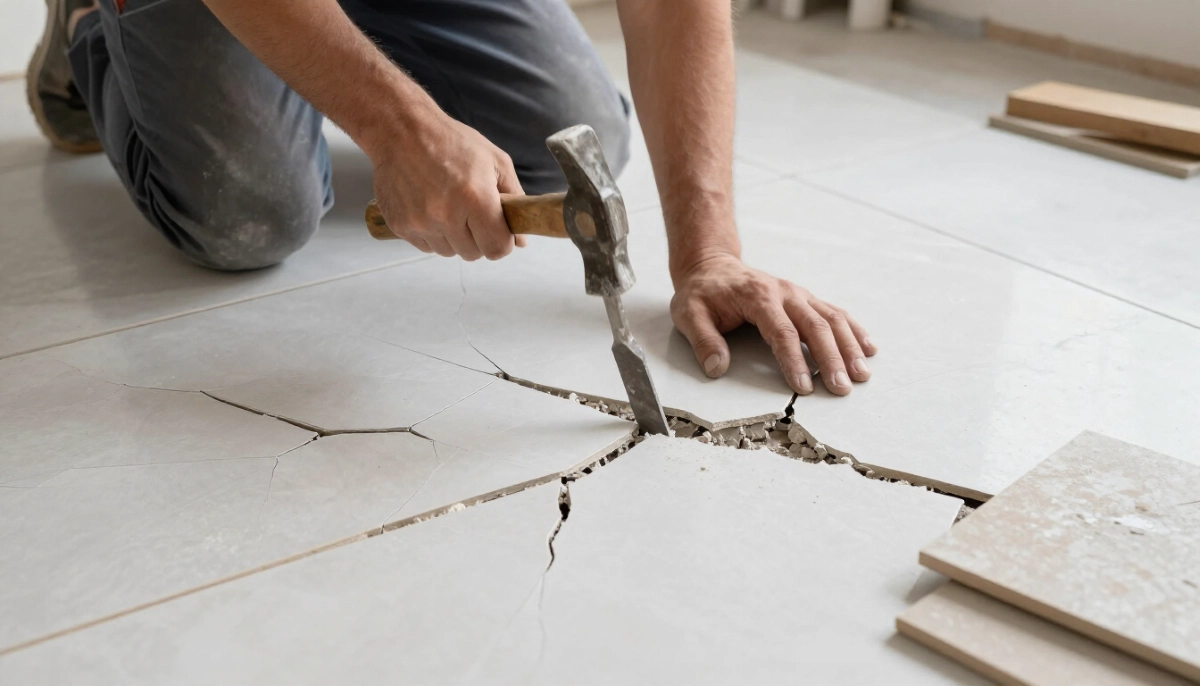
Step 2: Remove the Cracked Tile
Place your chisel at the center of the cracked tile and hit firmly with a hammer. Work outward from the center. Remove large pieces first, then chip away smaller fragments. An oscillating multi-tool with a grout removal blade makes this easier.
Step 3: Clean the Substrate
Vacuum all debris. Scrape away old adhesive until you have a clean, flat surface. The substrate should be slightly recessed (about the thickness of the tile).
Step 4: Dry-Fit the New Tile
Place the new tile in the opening. It should sit flush or slightly below the surrounding tiles. If it’s too high, remove more substrate. If it’s too low, you’ll need more adhesive.
Step 5: Apply Adhesive
Spread adhesive on the substrate using a small notched trowel. For larger tiles, also back-butter the tile (apply a thin layer to the back).
Step 6: Set the Tile
Press the tile into place. Use a rubber mallet and beating block to seat it flush with surrounding tiles. Check with a level.
Step 7: Let Adhesive Cure
Wait 24 hours minimum. Keep weight off the new tile.
Step 8: Grout
Apply grout to the joints around the new tile. Match the colour of existing grout as closely as possible. Clean with a damp sponge after 15-30 minutes.
Step 9: Seal (If Needed)
For natural stone or in wet areas, seal the grout after 72 hours.
For a complete guide on removal costs and process, read tile removal and replacement cost guide.
📞 When to Call a Professional for Cracked Tile Repair
Some situations require professional cracked tile repair – DIY will only make things worse:
- Multiple cracked tiles in a line or pattern: Indicates subfloor movement, missing expansion joints, or structural issues. A professional from our tiling services can diagnose the root cause.
- Tiles sound hollow when tapped: This means the adhesive bond has failed. The crack is just a symptom – the whole tile needs replacement with proper bonding.
- Cracks accompanied by lippage (uneven tiles): See our tile lippage guide – this often requires re-levelling the entire area.
- Water damage signs: If you see mould, musty smells, or wet subfloor, you need waterproofing and emergency services to address the leak first.
- No matching replacement tile available: A professional can help source matching tiles or create a design feature that incorporates the mismatch.
- Cracks in a wet area (shower, bathroom floor): Water can seep through cracks and cause structural damage. Professional repair with proper waterproofing is essential.
- You don’t have the tools or confidence: Tile removal is dusty, noisy, and risks damaging adjacent tiles. Professional tilers in Gauteng have the right tools and experience.
ServiceLink SA connects you with verified tiling specialists who carry contractors liability insurance and offer workmanship guarantees. Learn more about how our service works and how we protect homeowners.
🛡️ How to Prevent Future Tile Cracks
Prevention is always better than cracked tile repair. Here’s how to protect your tiles:
- Ensure proper subfloor preparation before installation: Flat, stable, and primed substrate prevents most cracks. Read our floor leveling guide.
- Install expansion joints at walls and每隔 5-8 meters: This allows tiles to expand and contract without cracking. Required by SANS 10400 standards.
- Use the correct adhesive for your tile type: Large format tiles need flexible, polymer-modified adhesives. See tile adhesives explained.
- Don’t install wall tiles on floors: They’re not strong enough. Always check tile ratings before buying.
- Use felt pads under heavy furniture legs: Distributes weight and prevents point-load cracks.
- Avoid dropping heavy objects on tiles: Use rugs or mats in high-risk areas (kitchen near stove, garage).
- Fix hollow tiles promptly: A hollow tile is a ticking time bomb. Read our loose tile repair guide.
- Maintain consistent indoor temperature: Extreme temperature swings cause thermal stress. Avoid blasting heaters directly on tile floors.
💰 Cracked Tile Repair Cost Guide
Here’s what you can expect to pay for broken tile repair in South Africa:
| Repair Type | DIY Cost | Professional Cost | Notes |
|---|---|---|---|
| Hairline crack filler | R50 – R150 | R300 – R600 | Professional call-out fee applies |
| Epoxy chip repair | R100 – R250 | R400 – R800 | Colour matching adds cost |
| Single tile replacement | R200 – R500 + tile cost | R800 – R1,500 | Includes labour, adhesive, grout |
| Multiple tile replacement (3-5 tiles) | R500 – R1,500 + tiles | R2,000 – R4,000 | Per job, not per tile |
| Subfloor repair + tile replacement | Not recommended | R5,000 – R15,000+ | Depends on damage extent |
| Emergency call-out (after hours) | N/A | R500 – R1,000 + repair | See emergency services |
For a detailed breakdown of removal and replacement costs, read our tile removal and replacement cost guide. If you have water damage, see water damage under tiles for specific pricing.
🚫 Common Mistakes to Avoid When Repairing Cracked Tiles
⚠️ Warning: These Mistakes Make Things Worse
Avoid these errors when attempting cracked tile repair.
- Using caulk or silicone to fill cracks: Caulk is flexible and will collect dirt – it looks terrible and doesn’t bond to tile edges properly. Use proper tile repair epoxy or grout.
- Replacing a tile without fixing the underlying cause: If your subfloor is moving, the new tile will crack too – often within weeks. Diagnose first, then repair.
- Damaging adjacent tiles during removal: Using too much force or the wrong tools can crack perfectly good neighbouring tiles. Go slowly and protect surrounding tiles.
- Using mismatched grout colour: A different grout colour draws attention to the repair. Try to match existing grout as closely as possible.
- Ignoring hollow sounds: A hollow tile is already failing. Filling the crack without addressing the bond failure is temporary at best.
- Not wearing safety gear: Tile shards are sharp. Dust contains silica. Wear safety glasses, gloves, and a mask when cutting or removing tiles.
- Walking on a newly replaced tile too soon: Adhesive needs 24 hours to cure. Walking on it earlier can shift the tile or crack the grout.
❓ Frequently Asked Questions About Cracked Tile Repair
Can I repair a cracked tile without replacing it?
Yes – for hairline cracks and small chips, you can use tile repair epoxy or colour-matched grout to fill the damage. This works best for cosmetic cracks on securely bonded tiles (no hollow sound). For how to repair a cracked tile without replacing, clean the crack thoroughly, apply epoxy, scrape flat, and let cure for 24 hours. However, cracks caused by subfloor movement or hollow spots require full replacement.
Why do my tiles keep cracking after repair?
If you’ve repaired or replaced a tile and it cracks again, the underlying cause hasn’t been addressed. Common recurring causes include subfloor movement (settling foundation), missing expansion joints, inadequate subfloor preparation, or incorrect adhesive. Read why tiles crack after installation to diagnose the root problem before attempting another repair.
How much does professional cracked tile repair cost?
Professional cracked tile repair costs R300-R600 for epoxy filler repairs, R800-R1,500 for single tile replacement, and R2,000-R4,000 for multiple tiles. Emergency call-outs add R500-R1,000. Subfloor repairs cost significantly more (R5,000-R15,000+). Get a free quote from verified tilers through ServiceLink SA for accurate pricing.
Can a cracked tile cause water damage?
Yes – especially in bathrooms, showers, or kitchens. Water can seep through cracks in floor tiles and damage the subfloor, leading to rot, mould, and structural issues. In showers, cracks in wall tiles can allow water to penetrate behind the tiles, damaging waterproofing membranes. If you have cracks in wet areas, read water damage under tiles and schedule professional repair promptly.
What’s the best product for filling hairline cracks in tiles?
For hairline cracks, use colour-matched tile repair epoxy (R50-R150) or unsanded grout mixed with a bonding agent. Epoxy is more durable and waterproof. Avoid standard caulk or silicone – they attract dirt, don’t bond well to tile edges, and look terrible. For larger cracks or chips, two-part epoxy filler provides structural strength.
How do I find a matching replacement tile for a cracked one?
Check if you have spare tiles from the original installation – many homeowners keep extras. If not, check the tile brand and colour code (usually on the box). Visit the original supplier with a sample if possible. If the tile is discontinued, consider using a contrasting tile as a design feature, or contact a professional who can help source discontinued stock. Read how to match discontinued tiles.
Is a cracked tile covered by home insurance?
It depends on the cause. Most home insurance policies cover “sudden and accidental” damage – like dropping a heavy object on a tile. They typically do NOT cover gradual damage – like cracks from subfloor movement, poor installation, or age. Check your policy and contact your insurer before proceeding with repairs. See our tiling insurance claim guide for the claims process.
Can I prevent tiles from cracking in my new home?
Yes – proper installation prevents most cracks. Ensure your contractor uses a flat, stable subfloor, installs expansion joints at walls and 5-8 meters, uses the correct adhesive for your tile type, and back-butter large tiles. After installation, use felt pads under heavy furniture and avoid dropping heavy objects. For existing homes, read our floor leveling guide for prevention tips.
✅ Final Thoughts: Fix Cracks the Right Way
A cracked tile is frustrating, but it’s rarely a disaster. By understanding the cause of your tile fracture, you can choose the right repair method – from simple DIY epoxy filling to professional replacement.
The key is honest diagnosis. A hairline crack in a well-bonded tile? Fill it and move on. Multiple cracks in a line, hollow sounds, or water damage? Call a professional immediately. Ignoring structural issues will only lead to more damage and higher costs.
Key takeaways for cracked tile repair:
- Diagnose the cause before attempting any repair
- Hairline cracks can be filled with epoxy or grout (DIY-friendly)
- Hollow tiles or subfloor movement require professional attention
- Always wear safety gear when removing tiles
- Match replacement tiles and grout colour carefully
- Prevention through proper installation is always cheaper than repair
Your next step: If you have a cracked tile that needs professional attention, get free quotes from verified tiling specialists. For emergencies, our network includes tilers available for urgent call-outs across South Africa.
Need Cracked Tile Repair?
Get free quotes from verified tiling specialists who can diagnose and repair your cracked tiles properly – with workmanship guarantees.
📞 Call us: 073 138 4726 for immediate assistance with cracked tile emergencies.
Free inspections •
Fully insured contractors •
Homeowner protection
📚 Official resources & standards referenced:
- SANS 10400 – South African National Standard for tile repair standards, subfloor requirements, and expansion joint specifications.
- SABS – South African Bureau of Standards for material standards, including tile strength and adhesive specifications.
Information provided for general guidance. For structural issues or extensive damage, always consult a qualified professional.
Written by: Innocent T Hanyani
Construction & Home Services Industry Specialist | 21+ Years Experience
Innocent T Hanyani has over two decades of experience working across South Africa’s construction and home improvement sectors. Throughout his career, he has diagnosed and repaired thousands of cracked tile issues – from simple hairline fractures to complex subfloor failures. His practical experience helps homeowners distinguish between cosmetic cracks and structural problems, saving them from unnecessary repairs or dangerous delays. He has seen how ignoring the root cause of a tile fracture can lead to catastrophic floor failures and expensive remediation.
For more information about tile repairs and troubleshooting, explore our related resources: why tiles crack after installation, loose tile repair guide, tile removal and replacement costs, hollow sounding tiles, and emergency tile repair service. Learn about our process on how ServiceLink SA works and how we protect homeowners. Find tilers in your area: Gauteng, Johannesburg, and Pretoria. For related services, see our building construction and waterproofing guides.