
Planning a Large Format Tile Project?
Get free quotes from verified tiling specialists who have experience with oversized tiles. Compare prices and hire with confidence.
Get Free Quotes from Large Tile Specialists
Servicing Gauteng, Sandton, Fourways, and across South Africa
Large Format Tiles Installation Guide: Tips & Techniques SA
📐 Everything you need to know about installing oversized tiles – from subfloor prep to perfect lippage control
You’ve seen them in design magazines. Those massive, seamless floors with hardly any grout lines. They look stunning, modern, and incredibly luxurious. And you want them in your home. But here’s the thing most homeowners don’t realise: large format tiles installation is completely different from standard tiling.
I’ve watched too many DIY enthusiasts (and even some inexperienced tilers) ruin beautiful, expensive oversized tiles because they didn’t understand the special requirements. Warped floors, lippage you can stub your toe on, hollow sounds, and cracked tiles within months. It’s heartbreaking – and expensive.
In this guide, I’ll walk you through everything you need to know about large tile installation. From why your subfloor needs to be flatter than a pancake, to the specialised leveling systems that prevent lippage, to the techniques that ensure those massive tiles bond properly. Whether you’re in Sandton, Fourways, or anywhere in Gauteng, this guide will help you get the stunning results you’re after.
For cost information, check out our tile installation cost per square meter guide. And for design inspiration, read our comparison of large vs small tiles design.
📋 Table of Contents – Large Format Tiles Guide
📏 What Are Large Format Tiles?
Before we dive into big tile laying techniques, let’s define what “large format” actually means.
In the tiling industry, large format tiles (often called LFT or oversized tiles) are any tile with at least one side measuring 600mm or more. Common sizes include:
- 600 x 600mm (the smallest considered large format)
- 600 x 1200mm (very popular for modern homes)
- 800 x 800mm
- 900 x 900mm
- 1200 x 1200mm
- 1200 x 2400mm (slab-sized, requires specialist installation)
Why are they so popular? Fewer grout lines create a seamless, expansive look that makes rooms appear larger. They’re also easier to keep clean (less grout to scrub) and offer a more modern aesthetic that adds significant home value.
But here’s the catch: the very qualities that make them beautiful also make them challenging to install. A small 300 x 300mm tile can flex and accommodate minor subfloor imperfections. A 1200mm tile? Not so much.
⚠️ Why Large Format Tile Installation Is Completely Different
Large tile installation presents unique challenges that standard tiling doesn’t:
| Challenge | Why It’s Different | Consequence of Ignoring |
|---|---|---|
| Subfloor Flatness | Large tiles won’t bend to follow uneven floors | Lippage (uneven edges), cracked tiles, hollow spots |
| Adhesive Coverage | Massive surface area requires perfect adhesive distribution | Hollow sounding tiles, eventual cracking or tenting |
| Weight | A single 1200x1200mm tile can weigh 25-35kg | Difficult to handle, risk of injury or tile damage |
| Lippage Control | Even 1mm height difference is visible and feels bad underfoot | Trip hazard, looks terrible, collects dirt |
| Cutting | Standard manual cutters don’t work on large tiles | Requires wet saw or bridge saw, more waste |
Understanding these challenges is the first step to successful large format tiles installation. The good news? With proper preparation and the right techniques, the results are spectacular.
🏗️ Subfloor Preparation – The Most Critical Step
If you take away only one thing from this guide, make it this: your subfloor must be FLAT. Not “mostly flat.” Not “close enough.” FLAT.
✅ Key Requirement:
For standard tiles (300x300mm), subfloor flatness tolerance is 5mm over 2 meters. For large format tiles (600x600mm+), the requirement is 3mm over 2 meters – and ideally 2mm. That’s significantly flatter.
Step 1: Assess Your Existing Subfloor
Use a long spirit level (at least 2 meters) or a straight edge. Place it in multiple directions across the floor. Mark any high spots or low spots.
Step 2: Grind Down High Spots
Use an angle grinder with a diamond cup wheel or a floor grinder to remove high spots. This is dusty work – wear a proper respirator.
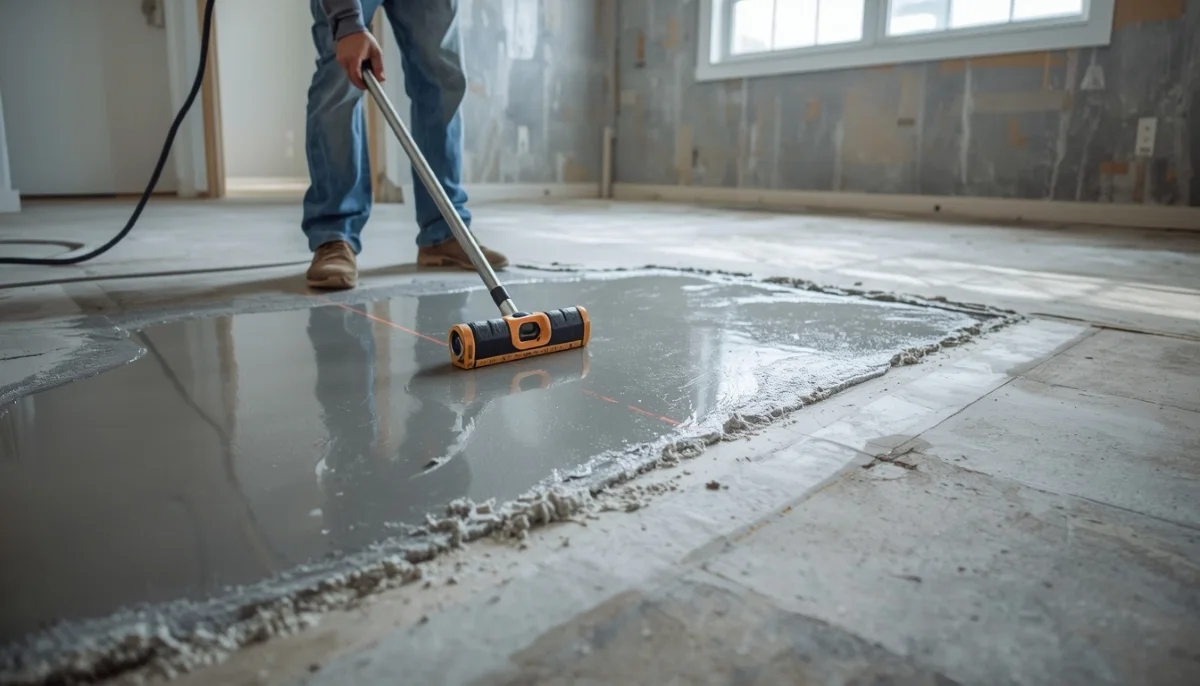
Step 3: Fill Low Spots with Self-Levelling Compound
This is where most large format projects require professional help. Self-levelling compound is a liquid that flows to create a perfectly flat surface. But it requires proper mixing, priming, and technique.
For a complete guide, read our article on self-levelling compounds for tile floors.
Step 4: Prime the Subfloor
Before applying adhesive, prime the subfloor. This improves adhesion and prevents the substrate from sucking moisture out of the adhesive too quickly.
Warning: Don’t skip subfloor preparation. I’ve seen beautiful, expensive large format tiles removed within months because the installer thought the floor was “flat enough.” It wasn’t. The homeowner paid twice – once for the failed installation, once for the redo.
🩹 Adhesive and Back-Buttering – The Secret to Full Coverage
For standard tiles, many tilers get away with applying adhesive only to the floor. For large format tiles installation, that’s a recipe for hollow spots and cracked tiles.
The Two-Step Process:
1. Apply adhesive to the floor using a notched trowel. Use a larger notch than standard – 12mm or 15mm U-notch or slant-notch trowel. The larger notches ensure enough adhesive to support the full tile.
2. Back-butter every single large tile. This means applying a thin, flat layer of adhesive to the back of the tile before placing it. Use the flat side of your trowel to skim-coat the entire back.
Why back-buttering is essential:
- Ensures 100% adhesive coverage (industry standard requires 80% for interior floors, 95% for wet areas)
- Compensates for minor tile warpage (all large tiles have some bowing)
- Creates a stronger bond between tile and substrate
- Prevents hollow spots that cause cracking
Adhesive type matters: Use a premium, polymer-modified thin-set mortar rated for large format tiles. Standard adhesive doesn’t have the bonding strength or flexibility needed. Read our tile adhesives explained guide for more details.
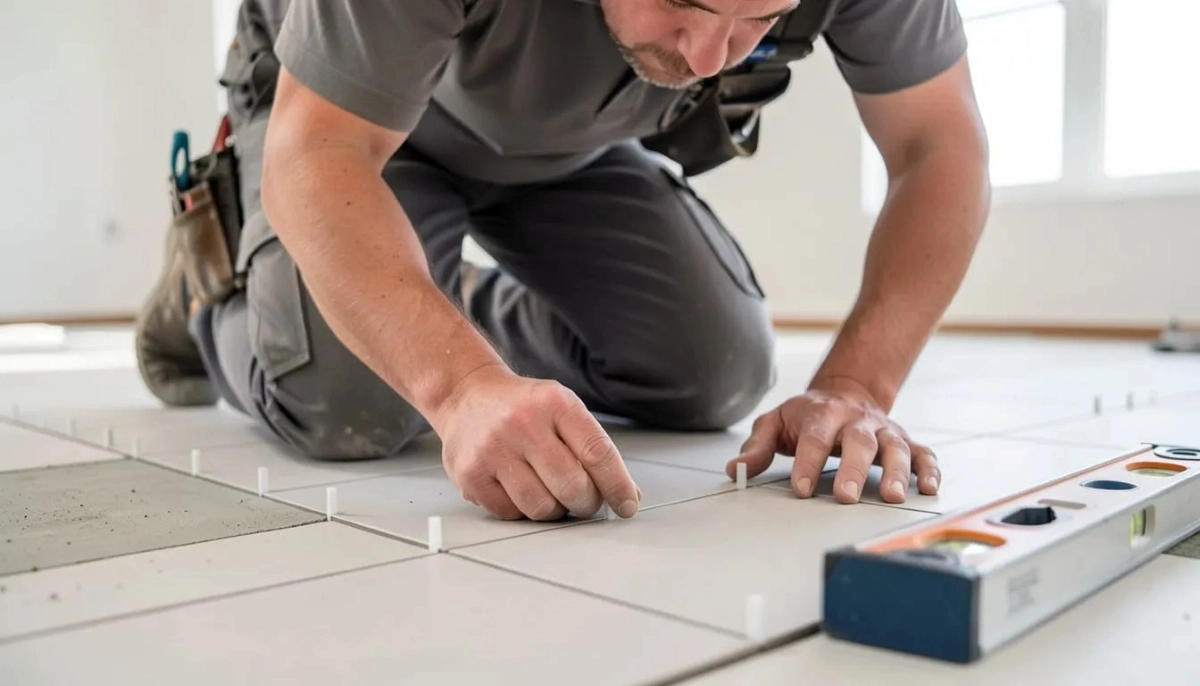
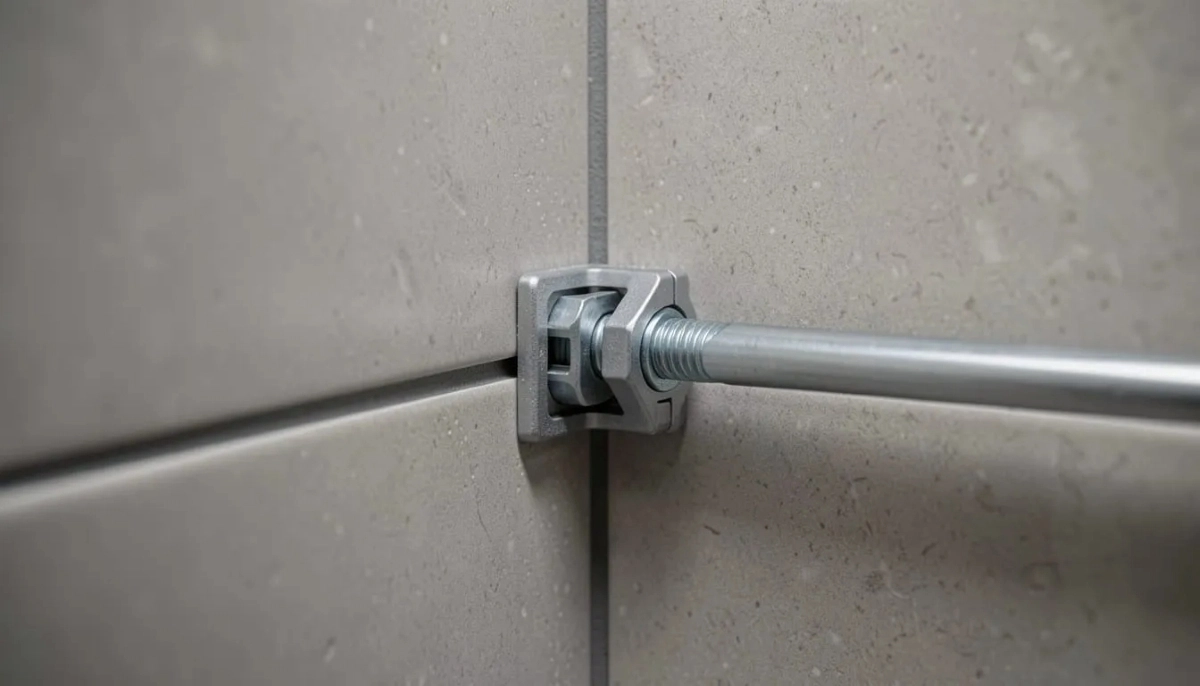
🔧 Tile Leveling Systems – Essential for Large Tiles
If you’ve never seen a tile leveling system, you’re about to discover a game-changer for large tile installation.
Standard plastic spacers only control grout line width – they don’t control lippage (height differences between adjacent tiles). For large format tiles, even a 1mm height difference is visible and feels terrible underfoot.
A tile leveling system uses:
- Base clips placed between tiles
- Wedges or caps that tighten down
- A specialized tool (pliers or gun) that applies tension
When tightened, the system pulls both tiles perfectly flush, eliminating lippage before the adhesive sets. After the adhesive cures (typically 24 hours), you break off the tops of the clips or remove the wedges.
For a complete breakdown, read our tile spacers and leveling systems explained guide.
⚠️ Warning:
Some tilers will claim they don’t need a leveling system because they’re “experienced enough.” This is a red flag. Even the most experienced tilers use leveling systems on large format tiles. It’s not about skill – it’s about physics. Large tiles have inherent warpage that leveling systems correct. Don’t hire a tiler who refuses to use them.
Looking for a Tiler Who Specialises in Large Format Tiles?
Not every tiler has experience with oversized tiles. ServiceLink SA connects you with verified specialists who understand leveling systems, back-buttering, and proper subfloor preparation.
Find Large Tile Specialists Near You
Free quotes. Verified contractors. Beat Your Quote guarantee.
✂️ Cutting Large Format Tiles – Not Your Standard Cutter
You can’t cut a 1200mm tile with a standard manual snap cutter. It simply won’t fit, and even if it did, the scoring wheel isn’t designed for that length.
Cutting options for oversized tiles:
- Wet saw (bridge saw): The professional choice. A bridge saw has a sliding table and overhead motor that can handle tiles up to 1200mm or more. Water cooling prevents dust and keeps the blade from overheating.
- Angle grinder with diamond blade: Works for straight cuts and curves, but requires a steady hand. Dust is a major issue – use a dust shroud or work outside.
- Manual snap cutter (large format version): Some manufacturers make heavy-duty cutters for tiles up to 1200mm. These work for straight cuts on porcelain but not for L-shaped cuts around corners.
- Tile scribe and snap: Only works on softer ceramic tiles, not porcelain. Not recommended for beginners.
Pro tip for cutouts: For electrical outlets, pipes, or irregular shapes, use a diamond hole saw for circles and an angle grinder for straight cuts. Make a template from cardboard first to avoid wasting expensive tiles.
For a detailed comparison of cutting tools, read wet tile saw vs manual cutter.
📝 Step-by-Step Large Format Tiles Installation Process
Here’s the complete workflow for successful how to install large format tiles properly:
Step 1: Subfloor Preparation (Day 1)
- Clean subfloor thoroughly
- Grind down high spots
- Pour self-levelling compound on low spots
- Wait 24 hours for compound to cure
Step 2: Layout Planning
- Find the center of the room
- Dry-lay tiles to check cuts at walls
- Avoid “sliver cuts” (less than half a tile width)
- Plan for expansion gaps at walls (8-10mm)
Step 3: Apply Primer
- Apply primer to subfloor
- Wait for it to dry (follow manufacturer instructions)
Step 4: Mix Adhesive
- Use a heavy-duty mortar mixer (not a drill with a paddle – too slow)
- Mix to peanut butter consistency
- Let it slake (rest) for 10 minutes, then remix
Step 5: Apply Adhesive to Floor
- Use 12mm or 15mm notched trowel
- Apply in straight lines (not arcs)
- Only cover area you can tile in 15-20 minutes
Step 6: Back-Butter the Tile
- Apply thin, flat layer to entire back of tile
- Check for any missed spots
Step 7: Place and Beat In the Tile
- Place tile into adhesive
- Use a rubber mallet and beating block to bed it in
- Check level in all directions
Step 8: Install Leveling System
- Place clips between tiles
- Tighten wedges or caps
- Continue for each tile
Step 9: Cut and Fit Edge Tiles
- Measure carefully (measure twice, cut once)
- Cut with wet saw or angle grinder
- Back-butter and install
Step 10: Let Adhesive Cure (24-48 hours)
- No foot traffic during curing
- Maintain room temperature (not too hot or cold)
Step 11: Remove Leveling System Tops
- Kick or tap tops to break them off
- Remove wedges
Step 12: Grout
- Use unsanded or fine-sanded grout for narrow joints
- Apply with rubber float
- Clean with sponge after 15-30 minutes

🚫 Common Mistakes That Ruin Large Format Tile Installations
⚠️ Warning: Avoid These Costly Errors
These mistakes are responsible for most failed large format tiles installation projects.
- Skipping self-levelling compound: Assuming your floor is “flat enough” is the #1 mistake. Even new concrete slabs often exceed the 3mm/2m tolerance. Check before you start.
- Not back-buttering tiles: Adhesive applied only to the floor won’t achieve full coverage. Hollow spots lead to cracked tiles under furniture or foot traffic.
- Using standard spacers instead of a leveling system: Spacers control width, not height. You need both. Leveling systems are not optional – they’re essential.
- Wrong adhesive type: Standard thin-set isn’t strong enough for large tiles. Use a premium, polymer-modified mortar rated for large format tiles.
- Walking on tiles too soon: Large tiles need full adhesive cure before any weight. Wait 48 hours minimum before grouting or foot traffic.
- No expansion gaps at walls: Large tiles expand and contract more than small tiles. Without 8-10mm gaps at walls, tiles can tent (lift up in the middle) during temperature changes.
- Attempting DIY without proper tools: If you don’t own a wet saw or bridge saw and have never used a leveling system, this is not a beginner project. Hire a professional.
For lippage issues, read our guide on tile lippage – causes and fixes.
💰 Cost Considerations for Large Format Tiles
Large format tiles installation costs more than standard tiling. Here’s why and how much to expect:
| Cost Factor | Standard Tile (300x300mm) | Large Format Tile (600x1200mm) |
|---|---|---|
| Tile Material Cost/m² | R150 – R300 | R300 – R800+ |
| Labour Cost/m² | R150 – R200 | R250 – R400 |
| Subfloor Preparation | Often minimal | R1,500 – R4,000 for levelling |
| Leveling System Materials | Not needed | R500 – R1,500 |
| Premium Adhesive | R200 – R400 | R400 – R800 |
| Total Estimated/m² | R350 – R550 | R650 – R1,500+ |
For a 50m² open-plan living area, expect to pay:
- Standard tiles: R17,500 – R27,500
- Large format tiles: R32,500 – R75,000+
The higher upfront cost is offset by a more luxurious look, fewer grout lines to maintain, and increased home value. Read our tile installation cost per square meter guide for more detailed pricing.
❓ Questions to Ask Before Hiring a Tiler for Large Format Tiles
Not every tiler has experience with oversized tiles. Ask these questions to find the right specialist:
- “How many large format tile projects have you completed?” (Look for specific examples, not “lots.”)
- “Do you use a tile leveling system?” (If they say no, walk away.)
- “Will you back-butter every tile?” (The answer must be yes.)
- “Do you own a wet saw or bridge saw that can cut 1200mm tiles?” (Renting is acceptable, but they must have access.)
- “How will you check subfloor flatness before starting?” (They should mention a 2m level or straight edge.)
- “What adhesive brand and type do you recommend for my tiles?” (Should be a specific premium product, not “whatever’s cheap.”)
- “Can you provide references from recent large format projects?” (And actually call those references.)
For more hiring guidance, read our how to choose the right contractor guide and learn about our Beat Your Quote guarantee.
❓ Frequently Asked Questions About Large Format Tiles
How flat does my floor need to be for large format tiles?
For large format tiles installation, your subfloor must be flat within 3mm over 2 meters (ideally 2mm). Standard tiles allow 5mm over 2 meters. This is significantly flatter. Most concrete slabs don’t meet this requirement and need self-levelling compound before installation.
Can I install large format tiles myself?
If you have tiling experience and access to proper tools (wet saw, leveling system, mixing equipment), yes. But this is not a beginner DIY project. The tiles are heavy (25-35kg each), subfloor requirements are strict, and mistakes are expensive. Many homeowners hire professionals for large tile installation – the peace of mind is worth the cost.
What size grout line for large format tiles?
Industry standards recommend 3mm minimum for large format tiles, but many installers use 2-3mm. The exact size depends on tile calibration (how consistent the tile dimensions are). Rectified tiles (precision-cut) can use 2mm joints. Non-rectified tiles need 3-5mm joints to accommodate size variations.
Why do I need a tile leveling system for large tiles?
All large tiles have some warpage or bowing – it’s unavoidable in manufacturing. A tile leveling system pulls adjacent tiles flush, eliminating lippage (height differences). Standard spacers only control grout width, not height. Without a leveling system, you’ll feel edges underfoot and see shadows at each joint.
What’s the best adhesive for large format tiles?
Use a premium, polymer-modified thin-set mortar specifically labelled for large format tiles (LFT mortar). These have higher bonding strength, better flexibility, and longer open times. Avoid standard thin-set or pre-mixed adhesives – they aren’t strong enough. Read our tile adhesives explained guide for specific product recommendations.
Can large format tiles be installed on walls?
Yes, large format wall tiles are very popular for modern bathrooms and feature walls. However, wall substrate strength is critical – plasterboard may not support heavy tiles. Use cement backer boards or ensure proper reinforcement. Also, back-buttering is even more important on walls to prevent tiles from sliding before adhesive sets.
How much waste should I budget for large format tiles?
Budget 15-20% waste for large format tiles, compared to 10% for standard tiles. The larger size means more offcuts, and complex layouts (diagonal, herringbone) increase waste further. Always buy all tiles from the same dye lot to avoid colour variations between batches.
Are large format tiles more likely to crack?
No – when installed correctly, large format tiles are very durable. They crack only when subfloor preparation is inadequate (causing movement or hollow spots) or when expansion gaps are omitted (causing tenting). Proper installation prevents cracking. The tiles themselves are typically stronger than smaller tiles because they’re thicker and denser.
✅ Final Thoughts: Large Format Tiles Are Worth the Extra Effort
Let’s be honest: large format tiles installation is more demanding than standard tiling. The subfloor must be flatter, the adhesive technique must be perfect, and you need specialized tools and leveling systems.
But the results? Absolutely stunning. Fewer grout lines, a seamless modern look, easier cleaning, and increased home value. Once you’ve lived with a properly installed large format tile floor, you’ll never want to go back to small tiles.
Key takeaways for success:
- Subfloor flatness is non-negotiable – check and correct before starting
- Back-butter every single tile for 100% coverage
- A tile leveling system is essential – don’t let anyone tell you otherwise
- Use premium adhesive rated for large format tiles
- Leave 8-10mm expansion gaps at all walls
- This is not a beginner DIY project – hire experienced professionals
Your next step: Ready to transform your home with beautiful oversized tiles? Get free quotes from verified tiling specialists who have proven experience with large format installations.
Ready to Install Large Format Tiles?
Get free quotes from verified tilers who specialise in oversized tiles. Compare prices, check experience, and hire with confidence.
📞 Call us: 073 138 4726 to discuss your large format tile project.
Free site inspections •
Beat Your Quote guarantee •
Pay-later options
📚 Official resources & standards referenced:
- SANS 10400 – South African National Standard for large format tile installation standards, subfloor requirements, and expansion joint specifications.
- Tile Association of South Africa – Industry guidelines for large format tile installation, including recommended adhesives, leveling systems, and best practices.
Information provided for general guidance. Large format tile installation requires specialist skills – always consult a qualified professional.
Written by: Innocent T Hanyani
Construction & Home Services Industry Specialist | 21+ Years Experience
Innocent T Hanyani has over two decades of experience working across South Africa’s construction and home improvement sectors. Throughout his career, he has specialised in advanced tiling techniques, including large format and slab installations. He has trained numerous tilers on proper subfloor preparation, leveling systems, and back-buttering techniques. His practical experience helps homeowners understand why large format tiles require different approaches and how to find installers who truly understand the craft.
For more information about large format tiling, explore our related resources: tile installation cost per square meter, tile spacers and leveling systems explained, self-levelling compounds for tile floors, tile lippage – causes and fixes, and large vs small tiles design comparison. Learn about our process on what is ServiceLink SA and how our service works. Find tilers in your area: Gauteng, Sandton, and Fourways.