
Planning a Flooring Transition?
Get free quotes from verified tiling specialists who understand floor transition strips and can ensure seamless tile to wood transition installations.
Servicing Gauteng, Johannesburg, Sandton, and across South Africa
Tile Transition Strips to Wood & Carpet: Complete Guide SA
🔗 The essential guide to seamless, safe, and beautiful flooring transitions
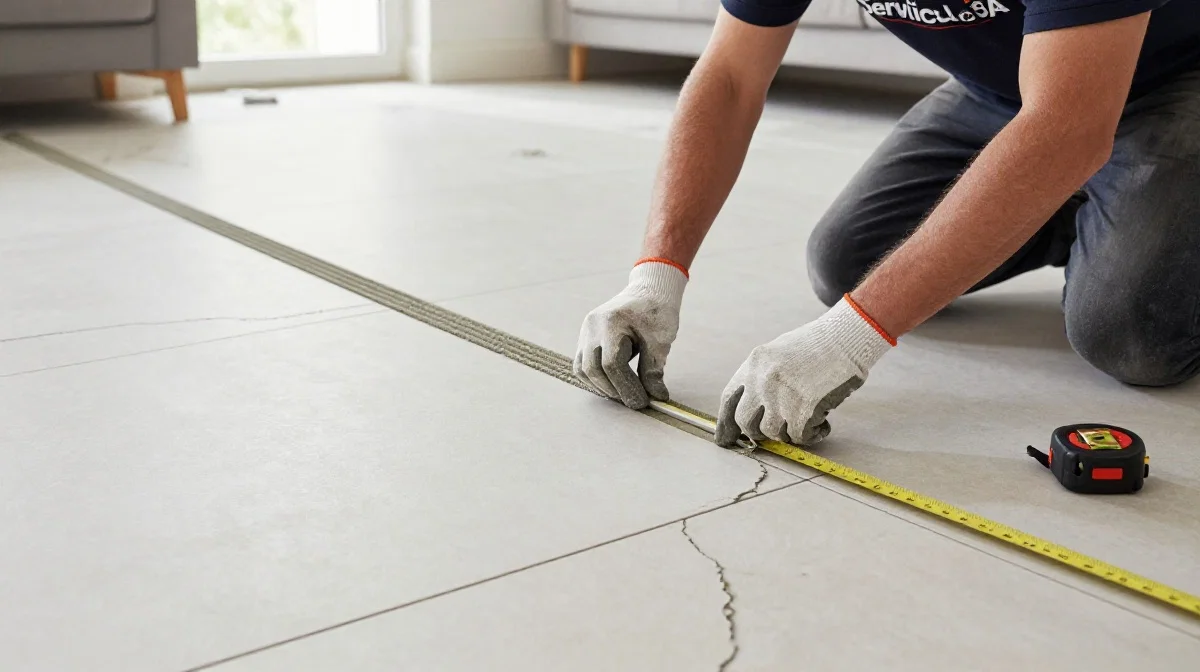
You’ve just installed beautiful new tiles. They meet your existing wood floor or carpet. But the join is ugly – uneven, with a gap or a trip hazard. You need a transition strip. But which one? Metal? Wood? Rubber? And how do you install it properly?
I’ve installed thousands of transition strips across Gauteng, Johannesburg, and Sandton. A good transition strip is invisible – you don’t notice it. A bad one is a trip hazard, an eyesore, and a dust trap. The difference is knowing which threshold strips to use and how to install them correctly.
In this complete guide to tile transition strips to wood carpet, I’ll cover everything you need to know. You’ll learn about different types of floor transition strips (reducer, T-molding, end cap, stair nose, carpet trim), how to choose the right one for your height difference, materials (aluminium, wood, brass, rubber), installation techniques, and common mistakes to avoid. By the end, you’ll know exactly how to create seamless, safe transitions between any flooring types.
For more installation guidance, check out our guides on tile installation tools, tile spacers and leveling systems, tile lippage guide, and floor leveling guide.
📋 Table of Contents – Floor Transition Strips Guide
⚠️ Why Transition Strips Matter
Before diving into types of tile transition strips to wood carpet, understand why they’re essential:
Purposes of Transition Strips:
- Safety: Eliminates trip hazards between floors of different heights
- Appearance: Creates clean, professional finish between different flooring types
- Protection: Prevents edges from chipping, fraying, or damage
- Coverage: Hides expansion gaps (required by building standards)
- Water barrier: Some transitions help prevent water migration between rooms
- Movement accommodation: Allows different flooring materials to expand/contract independently
When Transitions Are Required:
- Between tile and wood flooring
- Between tile and carpet
- Between tile and vinyl/laminate
- At doorways between different rooms
- Where flooring changes direction
- Where expansion gaps need covering
According to SANS 10400 transition standards and SABS material standards, proper transitions are required for safety and compliance.
📋 Types of Floor Transition Strips – Complete Overview
Different floor transition strips serve different purposes:
| Type | Best For | Height Difference | Appearance | Price/m |
|---|---|---|---|---|
| T-Molding | Same height floors (tile to wood/laminate) | 0-3mm | Low profile, clean | R150 – R400 |
| Reducer | Tile higher than wood/vinyl | 3-10mm | Gradual slope | R180 – R450 |
| End Cap / Threshold | Tile ending at doorway or to exterior | 0-5mm | Finished edge | R120 – R350 |
| Carpet Trim / Z-Bar | Tile to carpet | 0-15mm | Hides carpet edge | R100 – R250 |
| Stair Nose | Tile on stairs (top edge) | 0-5mm | Rounded front edge | R200 – R500 |
| Baby Threshold | Tile to carpet (low profile) | 0-8mm | Subtle, modern | R120 – R300 |
For more on spacing requirements, read our tile spacers and leveling systems guide.
🪵 Tile to Wood Transitions – Seamless Tile to Wood Transition
Best transition strips between tile and wood floor depend on height difference:
Same Height (0-3mm difference):
T-Molding is the best choice. It bridges both floors, creating a flat transition. Choose colour that complements both flooring types – matching wood or neutral metal (silver, bronze, black).
Installation: Track system (screwed to subfloor) with strip snapped in, or glue-down.
Tile Higher than Wood (3-10mm difference):
Reducer strip slopes down from tile to wood. Essential for safety – eliminates trip hazard. Choose wood colour matching wood floor or neutral metal.
Installation: Usually glue-down or track system.
Wood Higher than Tile (rare but possible):
Use a reducer strip on the wood side, or consider sanding wood to match height. If wood is significantly higher, a ramp transition may be needed.
Material Recommendations for Tile to Wood:
- Aluminium: Most durable, many colours, good for high-traffic areas
- Wood: Matches wood floor beautifully, less durable than metal
- Brass: Elegant, traditional look, more expensive
Pro Tip: When possible, plan flooring heights before installation to minimise height differences. Read our floor leveling guide.
Need Help with Flooring Transitions?
Get free quotes from verified tiling specialists who understand tile transition strips to wood carpet and can ensure seamless, safe installations.
Free inspections available. Workmanship guarantees.
🧶 Tile to Carpet Transitions – Clean Edges
Tile transition strips to wood carpet – here’s how to handle carpet edges:
Carpet Trim / Z-Bar (Most Common):
Metal strip that holds carpet edge down while providing finished edge. Carpet tucks under the lip. Works for most height differences (0-15mm). Available in silver, gold, bronze, black.
Baby Threshold (Low Profile):
Slimmer profile than Z-bar. Good for modern, minimalist looks. Carpet butts up against the strip rather than tucking under.
Reducer with Carpet (Different Heights):
If tile is higher than carpet, a reducer strip slopes down to carpet level. Carpet is trimmed to meet the reducer.
Installation Tips for Tile to Carpet:
- Ensure carpet is stretched tight – loose carpet will pull away from transition
- Cut carpet slightly long, then tuck under Z-bar lip
- Use carpet kicker to stretch carpet into place
- For baby thresholds, carpet should be cut flush to the strip
Pro Tip: In high-traffic areas, choose metal transitions over plastic – they’re more durable and won’t crack.
🔲 Tile to Tile Transitions – Expansion Joints
Even between same tiles, transitions are sometimes needed:
When You Need a Transition Between Tiles:
- Large areas (over 8-10 meters in any direction) – expansion joints required
- Between different tile types (ceramic to porcelain, different colours)
- Between different installation patterns
- At doorways between rooms (optional but often cleaner)
Best Options for Tile to Tile:
- T-Molding: For same height tiles – low profile, clean look
- End Cap: For finishing tile edge where it meets another surface
- Schiene profile: Very low profile metal strip – almost invisible
Expansion Joints: In large tiled areas (over 8-10m), expansion joints are required by building standards. These can be filled with flexible sealant (colour-matched) or covered with metal transition strips. Read our expansion joints guide for requirements.
For large format tiles, read our large format tile guide.

🔩 Materials – Aluminium, Wood, Brass, Rubber
Choosing the right material for your threshold strips:
| Material | Pros | Cons | Best For | Price/m |
|---|---|---|---|---|
| Aluminium | Very durable, lightweight, many colours, affordable | Can dent with heavy impact | High-traffic areas, most applications | R120 – R350 |
| Wood | Matches wood flooring beautifully, natural look | Less durable, can warp, higher maintenance | Wood to wood, wood to tile (matching) | R200 – R600 |
| Brass | Elegant, traditional, very durable | Expensive, can tarnish, limited styles | Period homes, luxury finishes | R400 – R1,200 |
| Stainless Steel | Very durable, modern look, easy to clean | More expensive than aluminium, shows scratches | Contemporary homes, commercial | R250 – R600 |
| Rubber | Flexible, soft, slip-resistant, affordable | Less attractive, can discolour | Garages, utility areas, gyms | R80 – R200 |
| PVC/Plastic | Very affordable, easy to cut | Can crack, looks cheap, less durable | Budget projects, temporary solutions | R50 – R150 |
For most homes, aluminium is the best balance of durability, appearance, and cost. For tile to wood where the wood floor colour is important, wood transitions can be stained to match perfectly.
📏 Handling Height Differences – Reducers vs Ramps
Different tile to wood transition height differences require different solutions:
0-3mm Difference (Same Height):
Use T-molding or flat threshold. Both sides are level. Simple, clean installation.
3-10mm Difference (Tile Higher):
Use reducer strip. Slopes gradually from tile height down to lower floor. Essential for safety – prevents tripping. Choose reducer width appropriate for height difference (wider for larger difference).
3-10mm Difference (Wood Higher):
Less common, but possible. Use reducer on wood side, or consider sanding wood to match tile height. If wood is significantly higher, a ramp transition may be needed.
Over 10mm Difference:
Reducer may be too steep – still a trip hazard. Best solution is to level floors before installation. If impossible, use a wider ramp transition or a custom-made wooden ramp. Read our floor leveling guide for prevention.
Pro Tip: Always plan floor heights during installation to minimise differences. When possible, make tile and wood the same height – eliminates need for reducers.

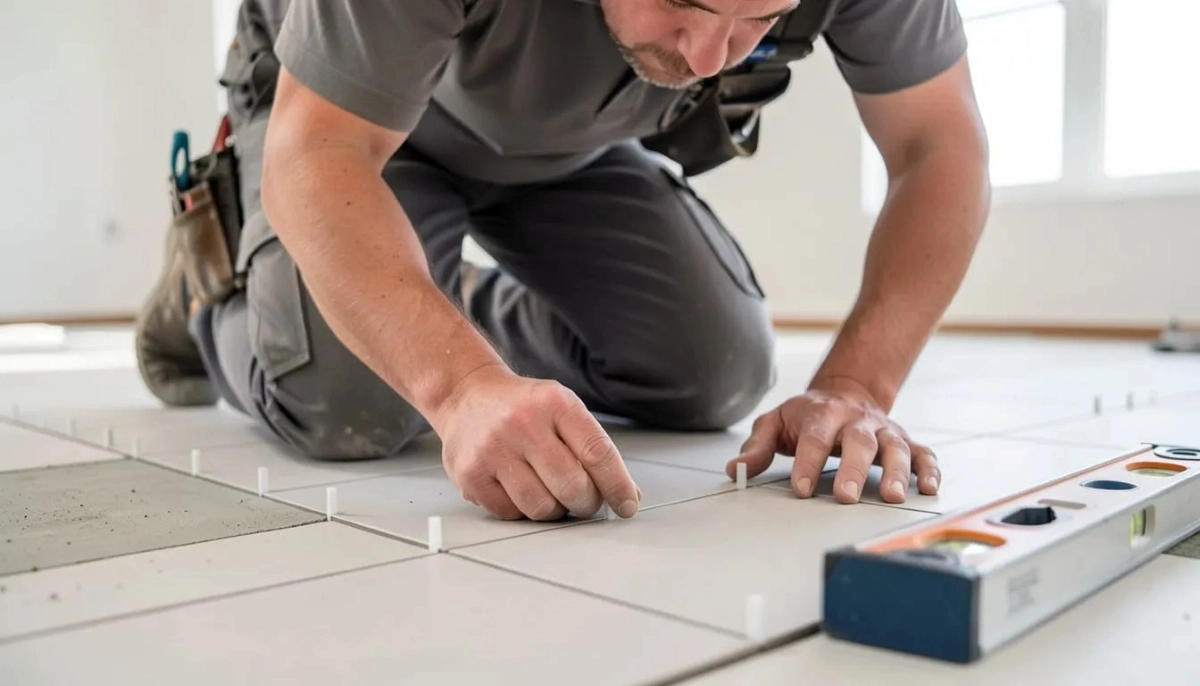
🔧 Installation Methods – Glue-Down vs Track Systems
Two main installation methods for tile transition strips to wood carpet:
Track System (Recommended for High-Traffic):
A metal track is screwed into the subfloor. The transition strip snaps into the track. Allows replacement if damaged. Provides secure hold. Best for doorways and high-traffic areas.
Installation Steps:
- Cut track to length with hacksaw
- Position track in gap between floors (centered)
- Drill pilot holes and screw track to subfloor
- Snap transition strip into track
- Tap gently with rubber mallet if needed
Glue-Down Method (For Low-Traffic or Existing Floors):
Construction adhesive is applied to the back of the transition strip, which is then pressed into place. Weights hold it while adhesive cures (24 hours). Less secure than track system. Good for retrofits where you can’t screw into subfloor.
Installation Steps:
- Clean gap thoroughly
- Apply construction adhesive to strip back
- Press strip into place
- Place weights on strip for 24 hours
- Keep traffic off during curing
For Carpet Transitions (Z-Bar):
- Nail or screw Z-bar to subfloor (flange side toward carpet)
- Tuck carpet edge under the lip
- Use carpet kicker to stretch carpet tight
- Trim excess carpet with utility knife
For tool requirements, read our tile installation tools guide.
🚫 Common Mistakes to Avoid with Transition Strips
⚠️ Warning: These Mistakes Create Trip Hazards and Ugly Transitions
Avoid these errors when installing floor transition strips.
- Wrong type for height difference: Using a T-molding when tile is 5mm higher than wood – creates ramp in wrong direction. Always match strip type to height difference.
- No expansion gap: Butting tile directly against wood without gap – expansion causes cracking or tenting. Leave 8-10mm gap covered by transition strip.
- Strip too narrow for gap: Transition strip doesn’t fully cover the gap between floors. Measure gap width before buying.
- Cutting strip too short: Leaves gaps at ends – looks unfinished, collects dirt. Cut slightly long and trim to fit.
- Using wrong adhesive: Standard glue fails – use construction adhesive or track system. Read our adhesives guide.
- Not accounting for floor movement: Different materials expand/contract at different rates. Use flexible sealant where needed – read expansion joints guide.
- Poor carpet trimming: Carpet not tucked properly – frays or pulls away. Use carpet kicker for tight fit.
- Ignoring transition strips entirely: Leaving gap between floors or butting them together – trip hazard and expansion issues. Always use appropriate transition.
For lippage issues, read our tile lippage guide.
💰 Transition Strip Cost Guide
Here’s what you can expect to pay for tile transition strips to wood carpet:
| Item | Cost Range | Notes |
|---|---|---|
| Aluminium T-molding (per meter) | R150 – R350 | Most common, durable |
| Aluminium Reducer (per meter) | R180 – R450 | For height differences |
| Carpet Z-Bar (per meter) | R100 – R250 | Tile to carpet |
| Wood transition (per meter) | R200 – R600 | Stain to match wood floor |
| Brass transition (per meter) | R400 – R1,200 | Premium, traditional |
| Installation (per transition) | R200 – R500 | Labour only |
| DIY installation (your time) | R0 – R200 | Materials only |
| Typical doorway (1m) – aluminium T-molding | R350 – R850 | DIY vs professional |
Cost-Saving Tips:
- DIY installation saves R200-500 per transition
- Buy aluminium – best value, very durable
- Measure carefully – buying the right length reduces waste
- Shop at building material warehouses (not just tile shops)
- Use our Beat Your Quote guarantee for professional installation
For a complete breakdown of tile costs, read our tile installation cost per square meter guide.
❓ Frequently Asked Questions About Tile Transition Strips
What is the best transition strip between tile and wood floor?
The best transition strips between tile and wood floor depends on height difference. For same height (0-3mm), use T-molding. For tile higher than wood (3-10mm), use a reducer strip. Aluminium is the most durable and affordable material. For seamless look, choose a colour that complements both floors – silver, bronze, black, or wood-toned.
How do I transition from tile to carpet?
For tile transition strips to wood carpet, use a carpet trim (Z-bar) or baby threshold. The Z-bar has a lip that holds the carpet edge down. Install by screwing the strip to the subfloor (flange toward carpet), then tucking carpet under the lip and stretching tight with a carpet kicker. For modern looks, baby thresholds work well – carpet butts up against the strip.
Do I need a transition strip between tile and wood?
Yes – you need a transition strip between tile and wood for several reasons: safety (prevents tripping on height differences), appearance (covers expansion gaps), protection (prevents edge damage), and compliance (building standards require expansion gaps). Never butt tile directly against wood without a transition – wood expands/contracts and will damage the tile.
What height difference can a reducer handle?
A standard reducer strip handles height differences of 3-10mm. For differences under 3mm, use T-molding. For differences over 10mm, a reducer may be too steep – still a trip hazard. Best solution is to level floors before installation. If impossible, use a wider ramp transition or custom-made wooden ramp. Read our floor leveling guide.
Can I install transition strips myself?
Yes – DIY installation is possible. Use a track system (screw track to subfloor, snap strip in) or glue-down method (construction adhesive). Cut strip to length with hacksaw. For carpet transitions, use Z-bar screwed to subfloor. Professional installation costs R200-500 per transition. If you have tools and patience, DIY saves money. Read our tools guide for requirements.
What colour transition strip should I choose?
Choose a colour that complements both flooring types. Options: silver (aluminium) – works with most floors; bronze/dark – good for dark wood or tiles; black – versatile, hides dirt; wood-toned – matches wood floor; brass – traditional, elegant. For tile to wood, matching the wood floor colour or choosing a neutral metal works best. Avoid colours that clash with either floor.
How do I fix a loose transition strip?
If glued: scrape off old adhesive, clean both surfaces, reapply construction adhesive, weigh down for 24 hours. If track system: check if strip is snapped in fully – tap with rubber mallet. If track is loose, screw track to subfloor more securely. For damaged strips, replace with new one – they’re affordable. Never walk on loose strips – trip hazard.
Do I need transition strips in every doorway?
Not necessarily. If the same flooring continues through the doorway with no height change, you don’t need a transition. However, expansion gaps may still be needed in large areas (over 8-10m). Transitions are required when: different flooring types meet, there’s a height difference, or you need an expansion joint. For floor transition strips, use them where safety or appearance demands.
✅ Final Thoughts: Small Detail, Big Impact
Tile transition strips to wood carpet might seem like a small detail, but they make a huge difference. A proper transition is safe (no tripping), beautiful (clean finish), and functional (covers expansion gaps, protects edges).
Match the type to your height difference – T-molding for same height, reducer when tile is higher, carpet trim for carpet edges. Choose aluminium for most applications – durable, affordable, and available in many colours. And always leave expansion gaps between different flooring types.
Key takeaways for transition strips:
- T-molding: same height floors (0-3mm difference)
- Reducer: tile higher than wood/vinyl (3-10mm difference)
- Carpet trim/Z-bar: tile to carpet
- Aluminium is best value – durable and affordable
- Always leave expansion gaps (8-10mm) between different floors
- Track system is more secure than glue-down
- DIY possible with basic tools, or hire a professional
- Use ServiceLink SA to find verified tilers for complex transitions
Your next step: Ready to install transitions or need help with your flooring project? Get free quotes from verified tiling specialists who understand tile transition strips to wood carpet and can ensure seamless, safe installations.
Need Help with Flooring Transitions?
Get free quotes from verified tiling specialists who understand floor transition strips and can ensure seamless tile to wood transition installations.
📞 Call us: 073 138 4726 to discuss your flooring transition needs.
Are You a Tiling Professional?
Join ServiceLink SA’s network of verified tiling contractors. Get qualified leads for residential and commercial tiling projects.
📚 Official resources & standards referenced:
- SANS 10400 – South African National Standard for transition standards, expansion joint requirements, and building regulations.
- SABS – South African Bureau of Standards for material standards and quality specifications for transition strips.
Information provided for general guidance. Always follow manufacturer instructions for specific transition strip products.
Written by: ServiceLink SA Research Team
Flooring Installation & Finishing Specialists
The ServiceLink SA Research Team has installed thousands of transition strips across residential and commercial projects. Our team understands the critical role of proper transitions – preventing trips, accommodating expansion, and creating professional finishes. This guide distills years of practical experience into actionable advice for homeowners and DIYers. We believe that small details like transition strips make the difference between an amateur and professional installation.
For more information about tile installation and finishing, explore our related resources: tile installation tools guide, tile spacers and leveling systems, tile lippage guide, and floor leveling guide. Learn about our process on what is ServiceLink SA and how we verify contractors. Find tilers in your area: Gauteng, Johannesburg, and Sandton. For related services, see our flooring services and building construction guides.