
Planning a Driveway Tiling Project?
Get free quotes from verified tiling specialists who have experience with vehicle access flooring and understand load-bearing requirements.
Get Free Driveway Tiling Quotes
Servicing Gauteng, Johannesburg, Pretoria, and across South Africa
Driveway Tiling Installation Guide: Durable & Stylish Options SA
🚗 From boring concrete to stunning entrance – everything you need to know about tiling your driveway
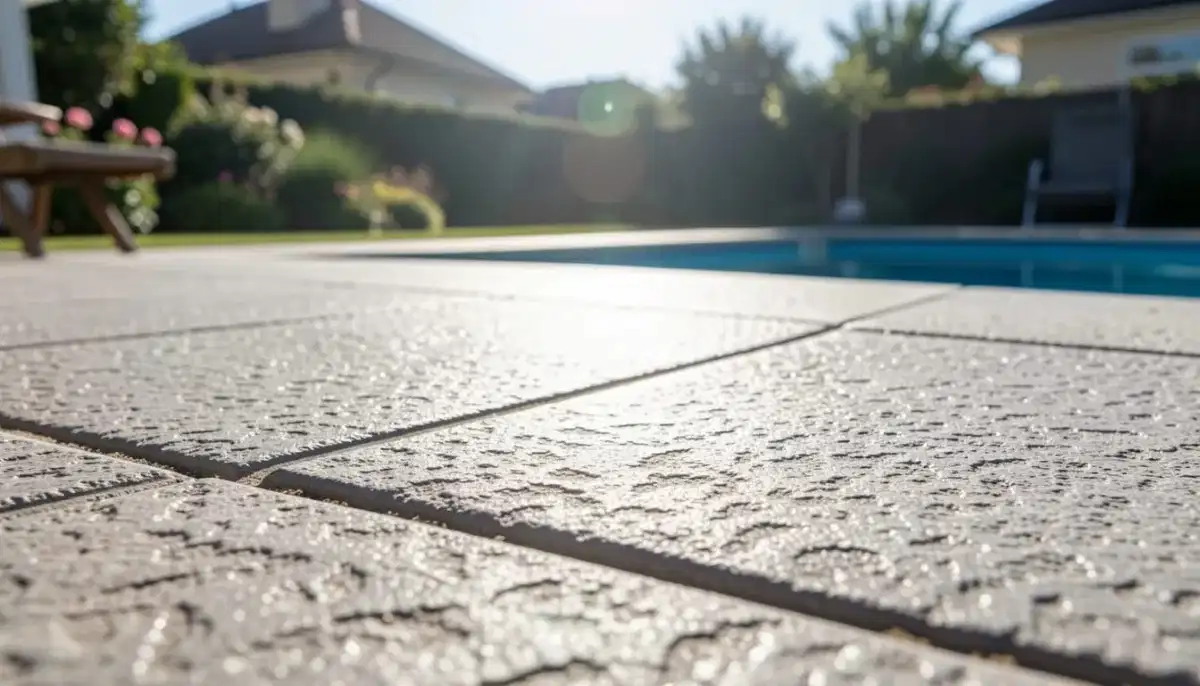
Your driveway is the first thing people see when they arrive at your home. It’s also one of the hardest-working surfaces on your property – supporting thousands of kilograms of vehicle weight, withstanding oil spills, weathering sun and rain, and handling constant traffic. Yet most driveways are boring grey concrete or uneven paving.
I’ve transformed countless driveways across Gauteng, from Johannesburg to Pretoria, with durable, beautiful tiling. And the difference is remarkable. A tiled driveway elevates your entire property’s curb appeal, adds significant home value, and lasts for decades with proper installation.
But driveway tiling is NOT the same as patio tiling. The loads are different, the requirements are stricter, and the consequences of failure are more serious. A failed patio tile is an annoyance. A failed driveway tile can damage your vehicle or cause someone to trip.
In this complete driveway tiling guide, I’ll cover everything: choosing the right tiles for vehicle access flooring, substrate preparation, load-bearing requirements, drainage, slip resistance, and installation techniques. You’ll learn how to tile a driveway properly – and understand the paving vs tiling debate once and for all.
For more outdoor tiling advice, check out our guides on best materials for outdoor tiling, non-slip outdoor tiles guide, and patio tiling guide. For cost comparisons, read tile vs vinyl flooring cost.
📋 Table of Contents – Driveway Tiling Guide
🚗 Why Tile Your Driveway? Benefits Overview
Before diving into driveway tile installation, let’s look at why it’s worth the investment:
Benefits of Tiling Your Driveway:
- Stunning curb appeal: A tiled driveway makes an immediate positive impression
- Increases home value: Quality driveway tiling adds significant resale value
- Durable and long-lasting: Properly installed tiles last 20-30+ years
- Easy to clean: Hose down or sweep – oil spills wipe up easily
- Stain-resistant: Quality porcelain tiles resist oil, grease, and tyre marks
- Wide design options: Stone-look, concrete-look, pattern designs, borders
- Seamless transition: Match your patio or entrance tiles for cohesive design
- No weed growth: Unlike paving, tiles have no joints for weeds (minimal joints)
Is driveway tiling DIY or professional? Driveway tiling is NOT a DIY project. The loads are high, the preparation is critical, and mistakes are expensive. Hire a verified professional with experience in vehicle access flooring.
⚖️ Paving vs Tiling – Which Is Better for Driveways?
The paving vs tiling debate is common among homeowners. Here’s the honest comparison:
| Factor | Tiled Driveway | Paved Driveway (Blocks) |
|---|---|---|
| Appearance | Premium, seamless, modern or traditional options | Functional but less premium, visible joint lines |
| Durability | 20-30+ years with proper installation | 15-25 years (blocks can shift, settle) |
| Maintenance | Low – sweep, occasional wash | Moderate – weeds grow in joints, blocks may need re-sanding |
| Load capacity | Excellent with proper substrate | Good – depends on base preparation |
| Oil/stain resistance | Excellent (porcelain) | Poor – pavers absorb oil, permanent stains |
| Weed growth | Minimal – tight grout joints | Significant – weeds grow between pavers |
| Cost (50m² installed) | R25,000 – R60,000 | R15,000 – R35,000 |
| Installation time | 5-10 days (includes curing) | 2-5 days |
Verdict: Tiling is superior for appearance, stain resistance, and longevity. Paving is more affordable upfront but requires more maintenance and looks less premium. For homeowners who want a stunning entrance and plan to stay long-term, tiling is worth the investment.
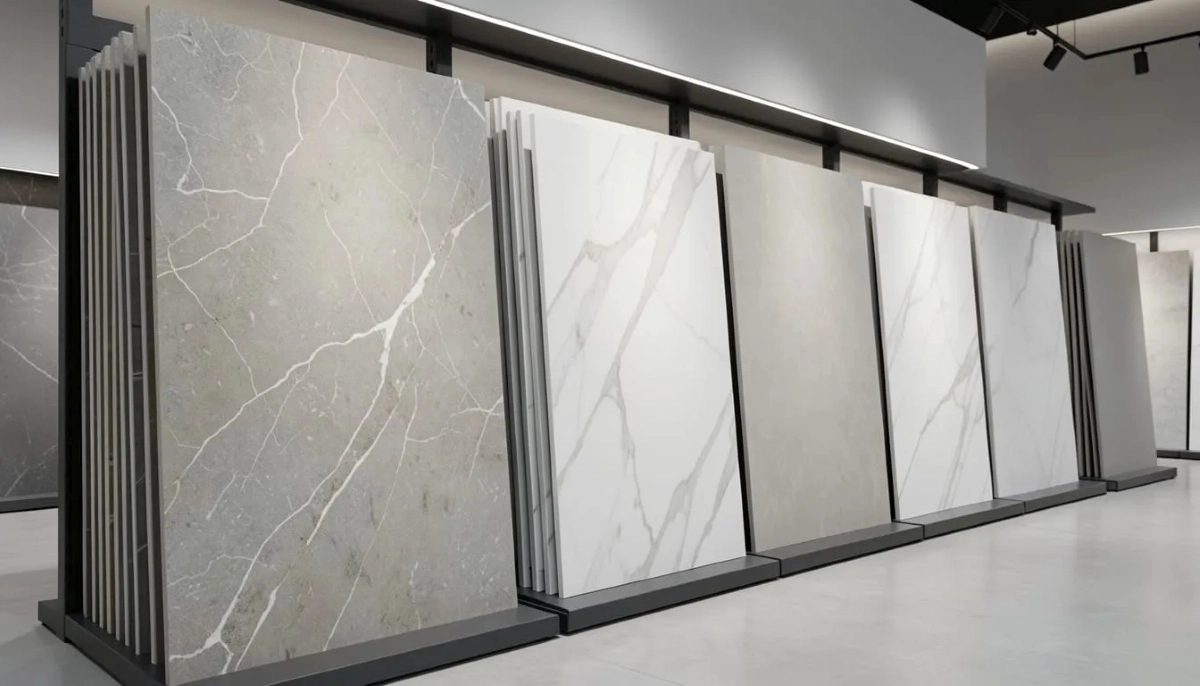
🧱 Best Tiles for Driveways – Material Guide
Choosing the right tiles is critical for this driveway tiling guide. Here are the best options:
| Tile Type | Load Rating | Slip Resistance | Stain Resistance | Price/m² | Best For |
|---|---|---|---|---|---|
| Textured Porcelain | Excellent (PEI 4-5) | R11-R12 | Excellent | R300 – R800 | Most driveways – best all-around choice |
| Quarry Tiles | Excellent | R11-R12 | Good | R200 – R400 | Utility driveways, budget option |
| Natural Stone (Granite) | Excellent | R10-R11 | Good (when sealed) | R500 – R1,200 | Luxury driveways, premium homes |
| Natural Stone (Slate) | Good | R11-R12 | Fair (porous) | R300 – R700 | Decorative driveways, low traffic |
| Concrete Pavers (not tile) | Good | R10-R11 | Poor | R150 – R350 | Budget alternative to tiling |
Top Recommendation: Textured porcelain tiles with PEI rating 4 or 5 (commercial/heavy traffic rating) and R11 slip resistance. Porcelain is non-porous, stain-resistant, and extremely durable. Available in stone-look, concrete-look, and pattern designs.
What to AVOID for Driveways:
- ❌ Polished or glossy tiles – dangerously slippery for vehicles
- ❌ Thin tiles (under 8mm) – can crack under vehicle weight
- ❌ Soft natural stone (marble, travertine) – too soft, scratches, stains
- ❌ Ceramic tiles (not porcelain) – too weak for vehicle loads
- ❌ Glass tiles – would crack immediately
For a complete material comparison, read our best materials for outdoor tiling guide.
Ready to Transform Your Driveway?
Get free quotes from verified tiling specialists who have experience with vehicle access flooring and understand load-bearing requirements.
Get Free Driveway Tiling Quotes
Free inspections available. Workmanship guarantees.
⚖️ Load-Bearing Requirements for Vehicle Access Flooring
Driveway tiles must withstand significant loads. Here’s what’s required:
Typical Vehicle Loads:
- Small car (Toyota Corolla): 1,200-1,500 kg total weight
- SUV (Toyota Fortuner): 2,000-2,500 kg total weight
- Double-cab bakkie: 2,000-3,000 kg total weight
- Point load at tyre: 300-500 kg over approximately 100cm² contact patch
- Pressure at tyre contact: 30-50 kg per cm² (very high)
Tile Requirements for Vehicle Loads:
- Tile thickness: Minimum 9mm for driveways (12mm recommended)
- PEI rating: Minimum 4 (residential heavy traffic), PEI 5 preferred (commercial)
- Breaking strength: Must exceed 1,500 N (manufacturer spec)
- Water absorption: Under 0.5% (prevents freeze-thaw cracking)
Substrate Requirements for Vehicle Loads:
- Concrete slab thickness: Minimum 100mm reinforced concrete (150mm for heavy vehicles)
- Compressive strength: Minimum 25 MPa (30 MPa recommended)
- Reinforcement: Steel mesh or rebar required
- Curing time: Minimum 28 days before tiling
Warning: Tiling over existing paving or thin concrete will fail under vehicle weight. The substrate must be designed for the loads.
For structural requirements, read our building construction guide.

🏗️ Substrate Preparation – The Critical Foundation
Proper substrate preparation is the most important step in how to tile a driveway:
For New Driveways (Recommended):
- Excavate to required depth (typically 200-300mm)
- Install compacted gravel base (G5 or G7 material)
- Install steel reinforcement mesh or rebar
- Pour 100-150mm reinforced concrete (25-30 MPa strength)
- Create proper slope for drainage (2% minimum)
- Allow to cure for 28 days minimum
- Apply concrete primer before tiling
For Existing Concrete Driveways:
- Inspect for cracks, spalling, or deterioration
- Repair all cracks with concrete patching compound
- Grind down any high spots (lippage)
- Fill low spots with self-levelling compound
- Clean thoroughly – remove all oil, grease, dirt
- Etch or shot-blast to create profile for adhesive
- Apply concrete primer
For Tiling Over Existing Paving (NOT Recommended for Driveways):
Tiling over existing paving blocks is risky for driveways. The paving can settle or shift under vehicle weight, cracking tiles. Best practice: remove paving, pour new reinforced concrete slab.
For more on preparation, read our floor leveling guide.
💧 Drainage and Slope Requirements
Proper drainage prevents water pooling, which can damage tiles and create slip hazards:
Slope Requirements:
- Minimum slope: 2% (20mm drop per 1 meter)
- Ideal slope: 2-3% for most driveways
- Slope should direct water to street, drains, or garden
- Never slope water toward house foundation
Drainage Solutions:
- Linear drains: Installed across driveway width to capture water
- Channel drains: Along edges of driveway
- Slope to street: Most common – water runs to gutter
- Slope to garden: Works if garden is lower than driveway
How to Check Slope:
Place a 2-meter level on the concrete slab. Lift the low end until the bubble is centered. Measure the gap. For 2% slope, the gap should be 40mm over 2 meters (20mm per meter).
Warning: Driveways with inadequate slope will have standing water. Standing water on tiles is a slip hazard, promotes algae growth, and can penetrate grout over time.
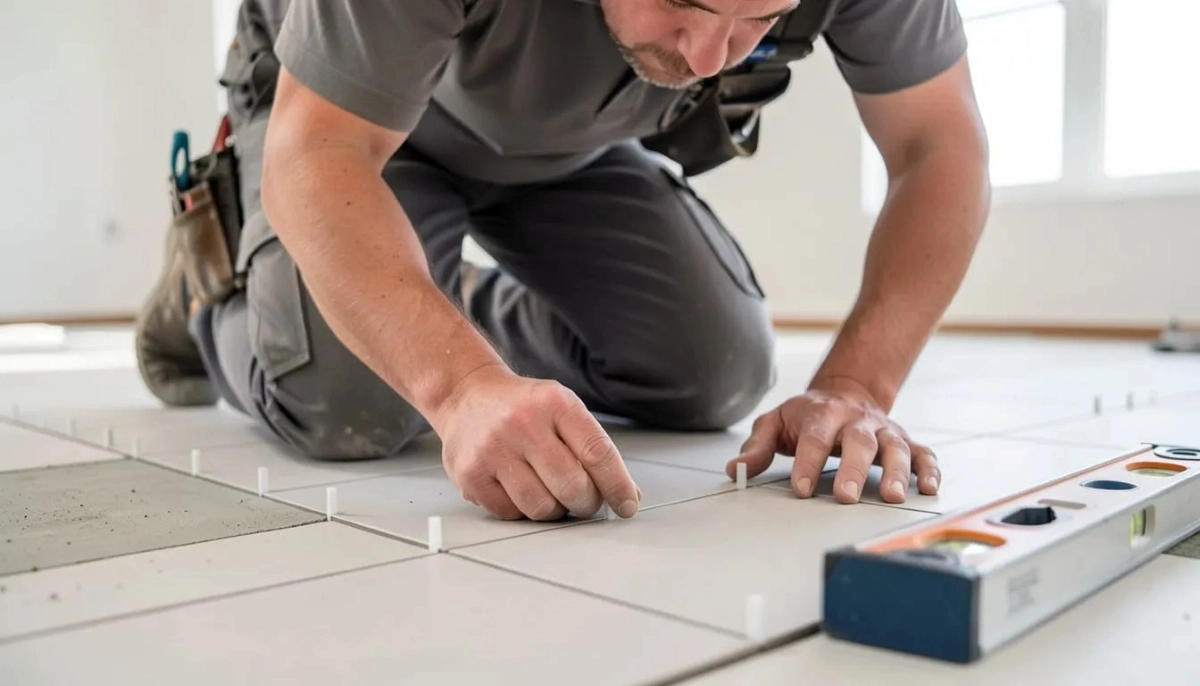
🔧 Step-by-Step Driveway Tiling Installation
Here’s the complete process for professional driveway tile installation:
Tools and Materials Needed:
- PEI 4-5 rated porcelain tiles (9-12mm thick)
- Heavy-duty polymer-modified thin-set adhesive
- Polymer-modified grout (outdoor-rated)
- Tile spacers (3-5mm)
- Rubber mallet and beating block
- Level and straight edge (2m minimum)
- Wet saw with diamond blade
- Grout float and sponge
- Concrete primer
Step 1: Prepare Substrate
Clean, repair, and prime the concrete slab. Ensure proper slope for drainage. Allow primer to dry completely.
Step 2: Plan Layout
Measure driveway and plan tile placement. Avoid “sliver cuts” at edges. Consider pattern (straight lay, brick bond, or herringbone). For curved driveways, mark guidelines.
Step 3: Mix Adhesive
Use heavy-duty, polymer-modified thin-set. Mix according to instructions. Only mix what you can use in 30 minutes.
Step 4: Apply Adhesive
Using 10-12mm notched trowel, spread adhesive on a small section. Work in 1-2m² sections. Hold trowel at 45-degree angle.
Step 5: Back-Butter Tiles
For driveway tiles, ALWAYS back-butter (apply thin adhesive layer to tile back) for 100% coverage. Vehicle loads require full support.
Step 6: Install Tiles
Press tiles into adhesive with twisting motion. Use spacers (3-5mm – wider than indoor joints for expansion). Check level constantly with 2m level.
Step 7: Cut Edge Tiles
Measure and cut tiles to fit edges. Use wet saw with diamond blade. Back-butter cut tiles before placing.
Step 8: Allow Adhesive to Cure
Wait 48-72 hours before grouting. Keep vehicle traffic off for minimum 7 days. Protect from rain during curing.
Step 9: Grout
Mix polymer-modified outdoor grout. Apply with rubber float, pushing firmly into joints. After 15-30 minutes, wipe with damp sponge.
Step 10: Final Cure
Wait 7 days before driving on the tiled driveway. Grout needs full cure time to achieve strength.
🧹 Grouting and Sealing for Driveways
Driveway grout must withstand vehicles, weather, and oil:
Grout Requirements for Driveways:
- Use polymer-modified sanded grout (stronger than unsanded)
- Wider joints: 3-5mm minimum (accommodates expansion and vehicle stress)
- Epoxy grout is best (completely waterproof, chemical-resistant, strongest) but expensive
- Standard cement grout is NOT strong enough for driveways
Sealing Requirements:
- Porcelain tiles: Do not need sealing (tile itself)
- Grout lines: MUST be sealed (even with polymer-modified grout)
- Natural stone tiles: Must be sealed before and after grouting
- Sealer type: Penetrating sealer only – never topical/film-forming
Sealing Process:
- Wait 72 hours after grouting for full cure
- Clean tiles thoroughly, allow to dry completely (24 hours)
- Apply penetrating sealer to grout lines (use small brush)
- Wipe excess from tile surfaces before it dries
- Apply second coat for maximum protection
- Reseal grout every 1-2 years
For more on sealing, read our tile sealing guide.
🚫 Common Mistakes to Avoid in Driveway Tiling
⚠️ Warning: These Mistakes Ruin Driveway Tile Installations
Avoid these errors when planning your driveway tiling guide project.
- Using tiles not rated for vehicle loads: Thin tiles (under 9mm) or low PEI rating (under 4) will crack under vehicle weight. Always check specs.
- Inadequate concrete substrate: Tiling over existing paving or thin concrete (under 75mm) guarantees failure. Driveways need 100-150mm reinforced concrete.
- No back-buttering: Without full adhesive coverage, vehicle loads will crack tiles. Always back-butter driveway tiles.
- Narrow grout joints: Indoor-sized joints (2mm) crack under vehicle stress. Use 3-5mm joints.
- No expansion joints: Large driveways (over 5m) need expansion joints every 3-5 meters to prevent cracking.
- Poor drainage slope: Standing water damages grout, creates slip hazards, and promotes algae. Ensure 2% minimum slope.
- Driving on tiles too soon: Adhesive needs 7-14 days to fully cure under vehicle loads. Driving early cracks tiles.
- Using polished or glossy tiles: Dangerous for vehicle traction – especially on slopes. Choose textured, R11+ tiles.
🧽 Maintaining Your Tiled Driveway
Proper maintenance keeps your driveway tile installation beautiful for decades:
Regular Maintenance:
- Weekly: Sweep or hose down to remove dirt and debris
- Monthly: Check for cracked or loose tiles – repair immediately
- Quarterly: Check grout for cracks or deterioration
- Annually: Reseal grout lines (if not epoxy grout)
Cleaning Oil Spills:
- Fresh oil: Absorb with kitty litter or baking soda immediately. Wipe up residue with degreaser.
- Dried oil stain: Use commercial oil stain remover for porcelain. For natural stone, use poultice.
- Porcelain advantage: Non-porous – oil won’t penetrate if cleaned promptly.
What to Avoid:
- ❌ Pressure washers on high setting – can damage grout
- ❌ Acid-based cleaners – damage grout and natural stone
- ❌ Wire brushes – scratch tile surfaces
- ❌ Parking heavy vehicles on edges – point loads can crack tiles
Winter Care (for areas with freezing):
- Use sand for traction – never salt (salt damages grout)
- Remove snow with plastic shovel – metal blades scratch
For more cleaning guidance, read our tile cleaning methods guide.
💰 Driveway Tiling Cost Guide
Here’s what you can expect to pay for driveway tile installation in South Africa:
| Item | Cost Range | Notes |
|---|---|---|
| Textured porcelain tiles (PEI 4-5)/m² | R300 – R800 | 9-12mm thickness, R11 slip rating |
| Quarry tiles/m² | R200 – R400 | Durable, affordable, limited colours |
| Natural stone (granite)/m² | R500 – R1,200 | Premium option, requires sealing |
| Installation (professional)/m² | R250 – R450 | Specialist outdoor tiler required |
| Concrete substrate (new)/m² | R500 – R800 | 100-150mm reinforced concrete, including excavation and base |
| Substrate repair (existing) | R2,000 – R8,000 | Crack repair, levelling, priming |
| Total new driveway (50m²) – porcelain | R55,000 – R90,000+ | Includes concrete substrate + tiling |
| Total existing driveway (50m²) – porcelain | R27,500 – R62,500+ | Assuming existing concrete is sound |
Example Project Costs:
- New 50m² driveway with textured porcelain: R55,000 – R90,000
- Existing 50m² driveway (concrete sound) with porcelain: R27,500 – R62,500
- New 50m² driveway with quarry tiles (budget): R45,000 – R65,000
- New 50m² driveway with granite (premium): R70,000 – R120,000+
For a complete breakdown of tile costs, read our tile installation cost per square meter guide.
❓ Frequently Asked Questions About Driveway Tiling
Can you tile a driveway with porcelain tiles?
Yes – porcelain tiles are excellent for driveways if they have PEI rating 4 or 5 (heavy traffic/commercial rating), are at least 9mm thick (12mm recommended), and have R11 slip resistance. Textured porcelain is ideal. Avoid polished or glossy porcelain – they become slippery when wet. Porcelain is non-porous, stain-resistant, and extremely durable.
What is better for a driveway – paving or tiling?
In the paving vs tiling debate, tiling wins for appearance, stain resistance, and longevity. Paving is more affordable upfront but requires more maintenance (weeds, re-sanding) and stains easily from oil. For homeowners who want a premium look and plan to stay long-term, tiling is worth the investment. For budget-conscious or rental properties, paving is adequate.
How thick should tiles be for a driveway?
Driveway tiles should be minimum 9mm thick, with 12mm recommended for heavy vehicles (SUVs, bakkies, trucks). Standard indoor tiles (6-8mm) will crack under vehicle loads. Always check manufacturer specifications for load-bearing capacity. Thicker tiles also provide better resistance to cracking from point loads (tyre contact patches).
How much does it cost to tile a driveway in South Africa?
Driveway tile installation costs R27,500 – R62,500 for a 50m² existing concrete driveway with porcelain tiles. New driveways (including concrete substrate) cost R55,000 – R90,000+. Budget quarry tiles cost R45,000 – R65,000 for new driveway. Premium natural stone (granite) costs R70,000 – R120,000+. Get a free quote from verified specialists.
Can you drive on tiles immediately after installation?
No. Adhesive needs significant cure time for vehicle loads. Wait minimum 7 days before driving on tiled driveway. For heavy vehicles, wait 14 days. Walking is fine after 48 hours. Driving too early cracks tiles and damages grout. Professional installers will specify cure times based on adhesive type and weather conditions.
What substrate is needed for a tiled driveway?
A tiled driveway requires a reinforced concrete slab of at least 100mm thickness (150mm for heavy vehicles) with 25-30 MPa compressive strength. The slab must have 2% slope for drainage, steel reinforcement mesh or rebar, and proper curing (minimum 28 days). Tiling over existing paving or thin concrete will fail under vehicle loads.
Do driveway tiles need to be sealed?
Porcelain driveway tiles do not need sealing – they’re non-porous. However, grout lines MUST be sealed to prevent water penetration, oil stains, and mould growth. Natural stone driveway tiles require sealing before and after grouting, then annually. Use penetrating sealer – never topical/film-forming sealers on driveways (they become slippery).
Can I tile my driveway myself?
Not recommended. How to tile a driveway requires specialist knowledge: load-bearing calculations, proper substrate preparation (100-150mm reinforced concrete), heavy-duty adhesives, back-buttering techniques, and drainage planning. Mistakes are extremely expensive – cracked tiles, failed substrate, drainage problems. Hire a verified professional with vehicle access flooring experience through ServiceLink SA.
✅ Final Thoughts: Transform Your Home’s First Impression
A tiled driveway is an investment in your home’s curb appeal, functionality, and value. Yes, it costs more than paving. Yes, it requires professional installation. Yes, the substrate must be properly engineered. But the result – a stunning, durable, easy-to-maintain entrance that makes every arrival feel special – is worth it.
The key to success in this driveway tiling guide is understanding that driveways have unique requirements: thicker tiles (9-12mm), higher PEI ratings (4-5), reinforced concrete substrate (100-150mm), proper slope (2% minimum), and wider grout joints (3-5mm). Cut corners on any of these, and your beautiful driveway will fail.
Key takeaways for driveway tiling:
- Use PEI 4-5 rated porcelain tiles, 9-12mm thick, R11 slip resistance
- Reinforced concrete substrate: 100-150mm thick, 25-30 MPa strength
- Minimum 2% slope for drainage – never slope toward house
- Back-butter every tile for full adhesive coverage
- Wider grout joints: 3-5mm with polymer-modified grout
- Wait 7-14 days before driving on new tiled driveway
- Professional installation is essential – this is not a DIY project
Your next step: Ready to transform your driveway? Get free quotes from verified tiling specialists who have experience with vehicle access flooring and understand load-bearing requirements.
Ready to Transform Your Driveway?
Get free quotes from verified tiling specialists who have experience with driveway tile installation and understand load-bearing requirements.
📞 Call us: 073 138 4726 to discuss your driveway project.
Are You an Outdoor Tiling Specialist?
Join ServiceLink SA’s network of verified tiling contractors. Get qualified leads for driveway, patio, and outdoor tiling projects.
📚 Official resources & standards referenced:
- SANS 10400 – South African National Standard for driveway standards, load-bearing requirements, and construction specifications.
- SABS – South African Bureau of Standards for load-bearing standards and tile strength testing.
Information provided for general guidance. Driveway tiling requires professional structural assessment – always consult qualified engineers and tilers.
Written by: Innocent T Hanyani
Construction & Home Services Industry Specialist | 21+ Years Experience
Innocent T Hanyani has over two decades of experience working across South Africa’s construction and home improvement sectors. Throughout his career, he has managed hundreds of driveway tiling projects – from residential driveways to commercial vehicle access areas. His practical experience helps homeowners understand the critical importance of proper substrate engineering, load-bearing calculations, and tile selection for vehicle access. He has seen beautiful driveways fail due to inadequate concrete thickness and others last decades due to proper preparation. His advice prioritises safety, durability, and long-term value.
For more information about driveway and outdoor tiling, explore our related resources: best materials for outdoor tiling, non-slip outdoor tiles guide, patio tiling guide, and tile vs vinyl flooring cost. Learn about our process on what is ServiceLink SA and how our service works. Find tilers in your area: Gauteng, Johannesburg, and Pretoria. For related services, see our building construction and waterproofing guides.