Skip the DIY Headaches!
Get a free, no-obligation quote from a verified, accredited DSTV installer near you.
Same-day service available across South Africa.
Find a DSTV Installer Near You
Servicing Johannesburg, Pretoria, Cape Town, Durban, and across South Africa
How to Install DSTV Yourself: A Complete Step-by-Step DIY Guide
📡 Save on installation costs with this comprehensive DIY guide – or skip the hassle and hire a pro
Let me be honest with you. I’ve installed DSTV dishes for friends, helped neighbours troubleshoot signal issues,
and watched countless YouTube tutorials. And after all that experience, here’s what I can tell you:
how to install dstv properly is both easier than you think AND more complicated than most DIYers realize.
The good news? You can absolutely do this yourself and save R800-R1,500 on installation fees.
The bad news? One small mistake – a misaligned dish, a loose cable connection, or poor waterproofing –
can leave you with pixelated pictures, DSTV no signal errors during thunderstorms,
and frustrating service callouts that cost more than professional installation would have.
In this step by step dstv installation guide, I’ll walk you through everything you need to know:
from choosing the right equipment to aligning your dish for perfect signal strength.
I’ll also show you when it’s smarter to call a professional instead of going the DIY route.
For those in Centurion and Pretoria East, accredited local technicians
offer same-day service with a 12-month warranty. But if you’re determined to DIY, let’s do this right.
📋 Table of Contents – Complete DSTV Installation Guide
🤔 DIY vs Hiring a Professional: Which Is Right for You?
Before we dive into the dstv self installation process, let’s have an honest conversation.
Not everyone should install their own DSTV dish. Here’s a quick decision guide:
| Factor | DIY Installation | Professional Installation |
|---|---|---|
| Cost | R300-R600 (tools + cable) | R800-R1,500 |
| Time Investment | 3-6 hours (learning + doing) | 1-3 hours (sit back and relax) |
| Signal Quality Guarantee | ❌ No guarantee | ✅ 85%+ signal strength guaranteed |
| Warranty Protection | ❌ DIY voids DSTV warranty | ✅ 12-month warranty on workmanship |
| Safety Risk | ⚠️ Roof work = fall risk | ✅ Insured professionals with safety gear |
| Best For | Handy homeowners, ground-floor installations | Anyone wanting peace of mind |
💡 Key Takeaway:
If your dish needs to go on a second-story roof, you have complex multi-room requirements,
or you simply value your weekend time, hiring a professional installer
is almost always worth the cost.
For a deeper dive into this decision, read our complete guide:
DIY vs Hiring a Professional DSTV Installer.
And if you’re in Centurion or Pretoria East, accredited local technicians
can have you up and running the same day.
🛠️ Tools & Equipment Checklist: Don’t Start Without These
Before you even think about climbing a ladder, gather all your tools and equipment.
Nothing is more frustrating than being halfway through installation and realizing you’re missing a critical component.
Essential Tools You’ll Need:
- Adjustable wrench – For tightening dish mounting bolts
- Phillips screwdriver – For decoder connections and bracket assembly
- Spirit level – Critical for ensuring your dish pole is perfectly vertical
- Power drill with masonry bits – For drilling into brick, concrete, or tile roofs
- Coaxial cable stripper – A proper stripper (not a knife!) prevents signal-killing nicks
- Compression tool for F-connectors – Screw-on connectors are unreliable; compression is professional-grade
- Satellite signal meter – The #1 tool that separates amateurs from pros. R300-R800 at electronics stores.
- Compass or smartphone inclinometer app – For finding the correct azimuth direction
- Safety harness – If you’re going on any roof higher than a single story. Your life is worth more than R800.
- Silicone sealant – Waterproofing is NOT optional
- UV-resistant cable clips – To secure cables every 50cm
Required DSTV Components (What You’ll Need to Buy):
- Satellite dish – 60cm diameter for most areas, 80cm recommended for signal-challenged regions or 4K viewing
- LNB (Low Noise Block) – Single LNB for one decoder, Quad LNB for Extra View setups
- DSTV decoder – HD, Explora, or Explora Ultra depending on your package
- RG6 coaxial cable – Buy 10-20 meters more than you think you need
- Wall or pole mounting bracket – With heavy-duty anchors for your wall type
- F-connectors (compression type) – One for each cable end
For a complete breakdown of what’s included in a standard installation (so you know what you’re replicating),
read what’s included in a standard DSTV installation.
⚠️ Warning: Don’t Skimp on Cable Quality
Cheap, low-quality coaxial cable from unknown brands will degrade your signal significantly.
Always buy RG6 cable from reputable South African suppliers. The R200 you save today will cost you
R800 in service calls tomorrow.
📋 DSTV Installation Requirements: What You Need Before You Start
Before you drill a single hole, make sure you meet all the dstv installation requirements.
Missing these can lead to failed installations, voided warranties, or conflict with your body corporate.
Technical Requirements:
- Clear line of sight to the northeast – No trees, buildings, or other obstructions
- Stable mounting surface – Brick, concrete, or sturdy roof trusses (not asbestos or fragile tiles)
- Power outlet near decoder location – Within 1.5 meters of where your decoder will sit
- TV with available HDMI or AV input – Most modern TVs use HDMI
- Active DSTV subscription – You’ll need your smartcard number for activation
Legal & Body Corporate Requirements (Very Important!):
- For complex/estate residents: Check your body corporate rules. Many require written approval before dish installation.
- For townhouse complexes: Some have communal DSTV systems that you MUST use instead of individual dishes.
- For apartments: Balcony mounting may be restricted. Check with your landlord or body corporate first.
- Heritage or conservation areas: Additional restrictions may apply to external equipment.
For a complete pre-installation checklist, read
DSTV Installation Requirements in South Africa.
Changed Your Mind? Let a Pro Handle It.
We get it – DIY isn’t for everyone. Get free quotes from verified, accredited DSTV installers near you.
Compare prices, read reviews, and book with confidence.
Get Free Quotes from Local Installers
No obligation. Free to use. Your information is safe with us.
📍 Choosing the Perfect Dish Location: The #1 Most Important Decision
Where you place your satellite dish determines 80% of your signal quality.
You can have the most expensive LNB, the best decoder, and the highest-quality cable,
but if your dish is in the wrong spot, you’ll constantly battle DSTV no signal errors.
The Non-Negotiable Rule:
Your dish MUST have an unobstructed view of the northeastern sky.
In South Africa, the Eutelsat satellites that carry DSTV are located at approximately 36° East.
This means your dish needs to face northeast, with a clear line of sight at an elevation angle of roughly 35° above the horizon.
Location Options Compared:
| Location | Pros | Cons | Best For |
|---|---|---|---|
| Roof Mount | Best signal, minimal obstructions | Safety risk, requires professional gear | Urban areas with tall buildings/trees |
| Wall Mount | Easier access, safer for DIY | May need longer cable runs | Single-story homes, DIY installations |
| Ground Pole Mount | Highly adjustable, no roof work | Requires concrete foundation, vulnerable to animals | Rural areas, large properties |
| Balcony Mount | Only option for apartments | Often restricted by body corporate, signal challenges | Apartment dwellers (check rules first!) |
For detailed guidance on mounting methods, read
roof vs wall DSTV dish installation.
And if you’re in Centurion and unsure about your property’s specific challenges,
local technicians can provide a free site assessment.
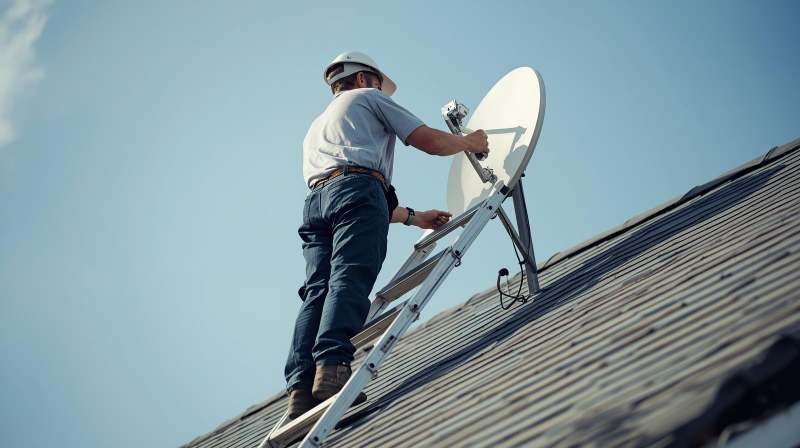
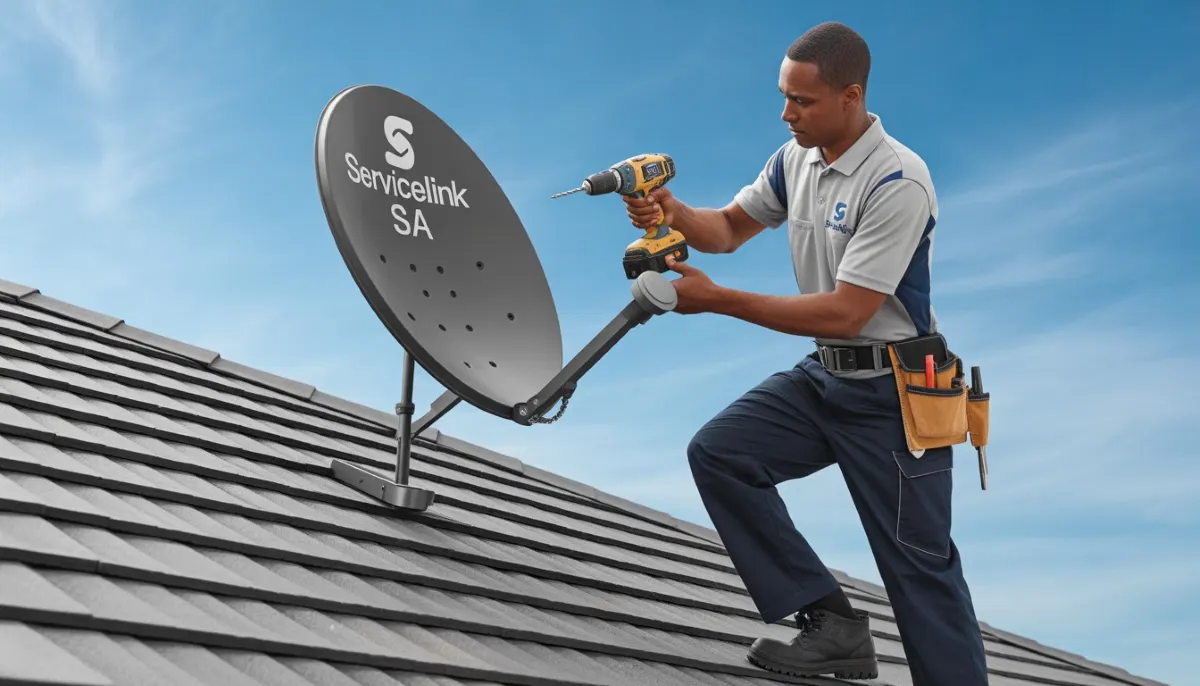
🔨 How to Mount Your Satellite Dish (Step-by-Step)
Once you’ve chosen your location, it’s time to mount the bracket and attach the dish.
Take your time here – rushed mounting leads to wobbly dishes that lose alignment in the wind.
Step 1: Mark Your Mounting Holes
Hold your mounting bracket against the wall or roof rafter. Use a spirit level to ensure it’s perfectly vertical.
Mark the drill holes with a pencil or marker.
Step 2: Drill Pilot Holes
Use a masonry bit if you’re drilling into brick or concrete. For wooden roof rafters, use a standard wood bit.
Drill holes slightly smaller than your wall anchors for a tight fit.
Step 3: Insert Wall Anchors (For Brick/Concrete)
Tap the anchors into place with a hammer. They should be flush with the wall surface.
For roof mounting, use appropriate roof screws with rubber washers to prevent leaks.
Step 4: Attach the Bracket
Secure the bracket using heavy-duty bolts. Tighten firmly – but don’t over-tighten and strip the threads.
Double-check that the bracket is still level after tightening.
Step 5: Attach the Dish to the Bracket
Most dishes have adjustment bolts for elevation (up/down angle) and azimuth (left/right rotation).
Leave these slightly loose for now – you’ll need to adjust them during alignment.
📐 Pro Tip: Use a Spirit Level
Even if your wall looks straight, always use a spirit level. A bracket that’s off by even 2 degrees
will make dish alignment significantly harder and may prevent you from ever achieving optimal signal.
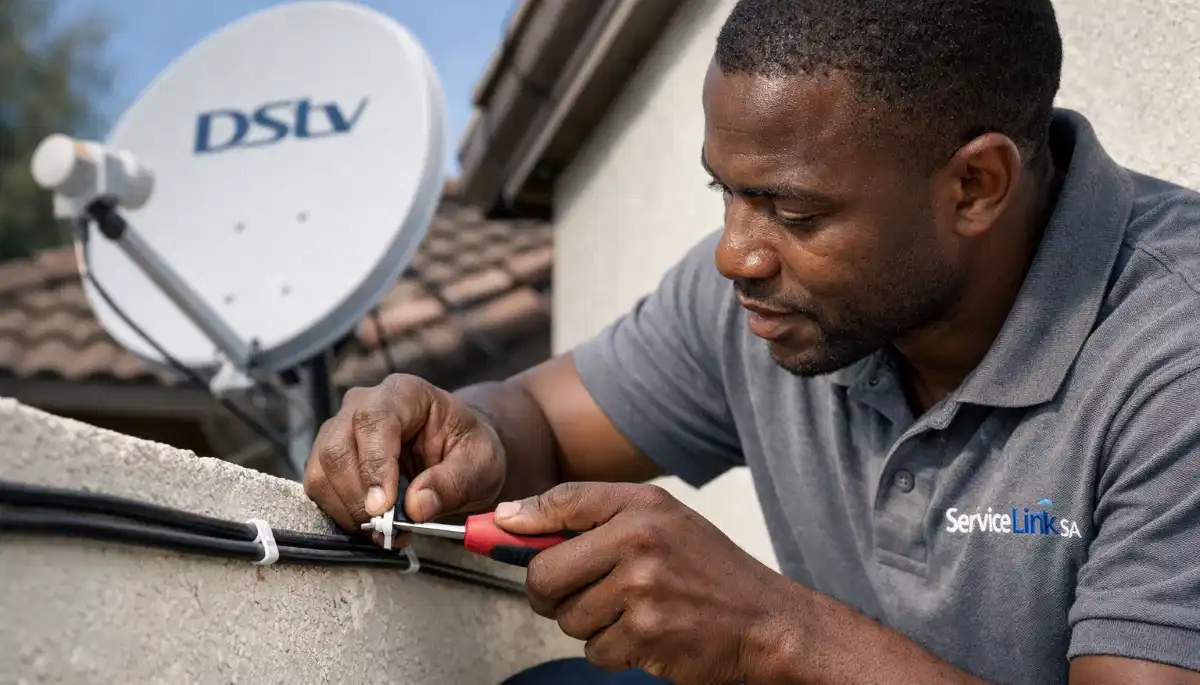
🔌 Running Coaxial Cable: Where Most DIY Installations Fail
I’ve seen it a hundred times: perfect dish alignment, good signal at the dish,
but terrible signal at the decoder. The culprit? Poor cable installation.
Cable Routing Rules (Follow These or Regret It):
- Keep cables away from electrical wiring – Electrical interference destroys satellite signals. Maintain at least 15cm separation.
- Use UV-resistant cable clips every 50cm – Prevents sagging and damage from wind or animals.
- Create a “drip loop” at entry points – Before the cable enters your wall, let it dip down then back up. Water runs off the loop instead of tracking into your home.
- Seal ALL wall penetrations with silicone – Water ingress is the #2 cause of signal problems (after bad alignment).
- Leave a 2-meter service loop near the decoder – Extra slack makes future troubleshooting and decoder moves much easier.
- Don’t kink or sharply bend the cable – The minimum bend radius is about 5cm. Tighter bends damage the internal conductor.
How to Attach F-Connectors (Compression Method – The Professional Way):
- Use a coaxial stripper to remove the outer jacket, exposing about 1cm of braided shielding
- Fold the shielding back over the outer jacket
- Strip the inner dielectric, leaving about 2-3mm of copper conductor exposed
- Slide the compression F-connector onto the cable
- Use a compression tool to crimp the connector firmly in place
- Gently tug on the connector to ensure it’s secure
For detailed guidance on cable types and troubleshooting, read
best coaxial cable for DSTV installations.
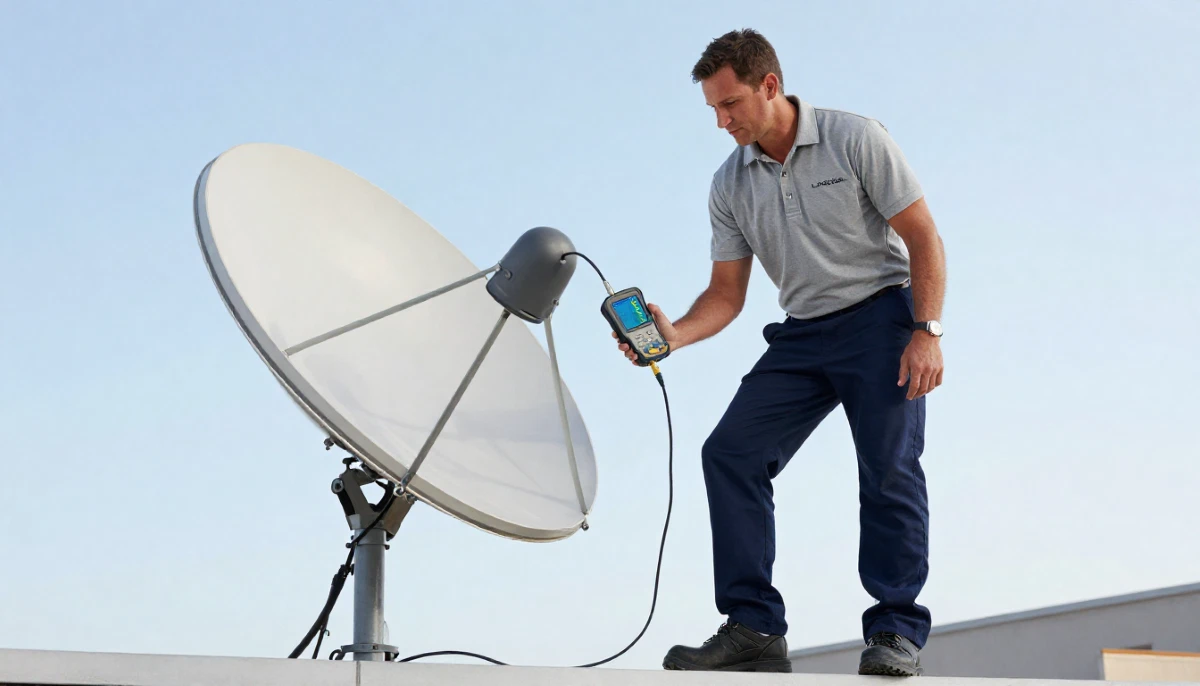
🎯 Satellite Dish Alignment Guide: Getting That Perfect Signal
This is the moment of truth. You’ve mounted the dish, run the cables, and connected everything.
Now it’s time to align the dish and lock onto the satellite signal.
Optimal Alignment Parameters for South Africa:
- Azimuth (compass direction): Approximately 45° magnetic northeast
- Elevation (vertical angle): Approximately 35° above the horizon
- LNB Skew (rotation): Approximately -7° clockwise (looking from behind the dish)
Professional Alignment Technique (Using a Signal Meter):
- Connect your satellite signal meter between the LNB and your decoder
- Set your decoder to a known working channel (like SABC 1 or a DSTV promo channel)
- Access the signal meter screen: Menu > Settings > Signal Strength > Signal Meter
- Loosen the dish’s azimuth and elevation bolts just enough to allow slow movement
- Start with the dish pointing roughly northeast at a 35° angle
- Slowly sweep the dish left and right while watching the signal meter
- When you see signal appear (even 20-30%), stop and tighten the azimuth bolt slightly
- Fine-tune elevation by moving the dish up/down in tiny increments (2mm at a time)
- Target at least 85% signal quality (not just strength)
- Once optimized, tighten all bolts firmly while continuously monitoring the signal
- If signal drops during tightening, loosen and re-adjust
No Signal Meter? Use Your Decoder’s Built-In Meter:
If you don’t have a standalone signal meter, you can use your decoder’s built-in meter.
The challenge? You’ll need a second person or a very long HDMI cable to see the screen while you’re at the dish.
Place a small TV near the dish or use a portable monitor for real-time feedback.
For complete alignment instructions, read our
DSTV dish alignment guide.
And if you’re struggling after 45 minutes, it’s time to call a professional.
In Centurion, accredited technicians
can typically align a dish in under 30 minutes.
⚠️ Warning: Don’t Force the Dish
If you’re not finding a signal after 20-30 minutes of careful sweeping, STOP.
Forcing the dish or over-tightening bolts can damage the mounting bracket or LNB.
Take a break, double-check your azimuth and elevation angles, and try again.
If still no success, request a professional installer.

📺 Connect & Configure Your DSTV Decoder
With your dish aligned and signal locked, it’s time to connect your decoder and complete the setup.
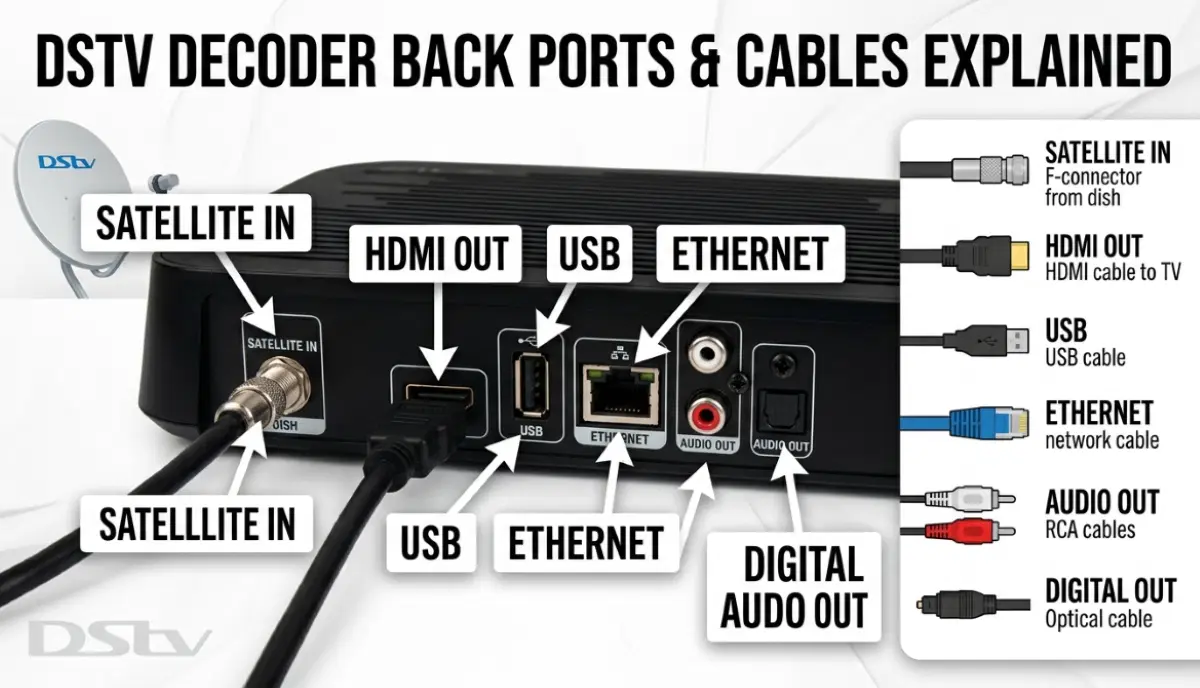
Step 1: Connect the Cables
- Satellite cable: Connect to the “SAT IN” or “LNB IN” port on your decoder
- HDMI cable: Connect from your decoder’s HDMI OUT to your TV’s HDMI IN
- Power cable: Plug into a surge-protected power strip (load shedding protection is highly recommended)
- Ethernet cable (optional but recommended): Connect to your home router for streaming and Catch Up features
Step 2: Power On and Scan for Channels
Turn on your TV and decoder. Select the correct HDMI input on your TV.
The decoder will automatically scan for channels. This takes 2-5 minutes.
If you see a “No Signal” error, double-check your cable connections and dish alignment.
Step 3: Activate Your Decoder (If New or Replaced)
If you have a new decoder or have replaced your smartcard, you’ll need to activate it.
Call DSTV customer care or activate online via the MyDSTV app.
You’ll need your smartcard number (on the card itself) and your ID number.
Step 4: Update Software (If Needed)
Go to Menu > Settings > Software Update. If an update is available, let it run.
This can take 10-20 minutes. Do not power off during the update.
For help with decoder issues, read
DSTV decoder not booting troubleshooting guide.
❌ 7 Common DIY DSTV Installation Mistakes (And How to Avoid Them)
After helping hundreds of homeowners troubleshoot their DIY installations, I’ve seen the same mistakes over and over.
Avoid these and you’ll save hours of frustration.
- Skipping the signal meter: “I’ll just guess” never works. A satellite signal meter costs R300-R800 and pays for itself in saved time.
- Using screw-on F-connectors: These are unreliable and degrade over time. Use compression connectors with a proper crimping tool.
- Not waterproofing connections: A little silicone today prevents “no signal” errors during the first thunderstorm.
- Mounting the dish on a flexing surface: Gutters, thin metal sheeting, or loose roof tiles will move in the wind, killing your signal.
- Running cable parallel to electrical wiring: Electrical interference is real. Separate by at least 15cm.
- Over-tightening bolts: Stripped threads or crushed components mean starting over. “Snug plus a quarter turn” is usually enough.
- Not checking body corporate rules first: You could be forced to remove the dish at your own expense. Always check first.
📞 When to Call a Professional DSTV Installer Instead
Let me be clear: DIY is great, but it’s not always the right answer.
Here are the situations where calling a professional is not just easier – it’s actually cheaper in the long run.
-
Your dish needs to go on a second-story or higher roof:
Falls from height are no joke. Professional installers have safety harnesses, ladders, and insurance.
Your life is worth more than the R800 installation fee. -
You need Extra View (multi-room) installation:
Multiple decoders, smart LNBs, and complex cabling require experience. One mistake affects all your rooms. -
You live in a complex with communal DSTV:
Communal systems require specialized knowledge and often body corporate approval. -
You’ve tried aligning for over an hour with no success:
Sometimes the satellite is blocked by something you can’t see (like a tree just out of sight).
Professionals have spectrum analyzers that can diagnose invisible obstructions. -
You want a warranty:
Professional installations come with a 12-month warranty on workmanship.
If something fails, they come back and fix it for free.
For a complete comparison, read
DIY vs hiring a professional DSTV installer.
And if you’re in Centurion or Pretoria East,
accredited local technicians
offer same-day service with a 12-month warranty – and they’re fully insured.
💰 DSTV Installation Cost Breakdown (DIY vs Professional)
Let’s talk money. Here’s what you’ll actually spend for dstv installation cost in South Africa.
| Item | DIY Cost | Professional (incl. in quote) |
|---|---|---|
| Satellite dish (60cm) | R400-R600 | Included |
| LNB (Single or Quad) | R150-R350 | Included |
| RG6 Coaxial cable (20m) | R200-R350 | Included |
| Mounting bracket | R150-R250 | Included |
| F-connectors & tools | R200-R500 | Included |
| Signal meter (one-time) | R300-R800 | N/A (pro has own) |
| Your time (4-6 hours) | Priceless / Frustrating | Zero (relax) |
| Total Out-of-Pocket | R1,400 – R2,850 | R800 – R1,500 |
Realistic example: A 3-bedroom house in Johannesburg with standard single-view installation.
DIY cost: ~R1,800 for equipment + 5 hours of your Saturday.
Professional cost: R1,200 with a 12-month warranty, done in 2 hours while you watch rugby.
For complete pricing details, read
DSTV installation and repair costs.
❓ Frequently Asked Questions About DSTV Installation
How long does it take to install DSTV yourself?
A first-time DIY dstv self installation typically takes 3-6 hours, including setup, mounting, alignment, and troubleshooting.
Professionals complete the same job in 1-3 hours. The time difference comes from experience and having the right tools (especially signal meters).
What tools do I need to install DSTV myself?
Essential tools: adjustable wrench, Phillips screwdriver, spirit level, power drill with masonry bits, coaxial cable stripper,
compression tool for F-connectors, satellite signal meter (strongly recommended), compass or inclinometer app, silicone sealant,
and UV-resistant cable clips. For roof work, add a safety harness and proper ladder.
Can I install DSTV Extra View myself?
While possible, Extra View installation is significantly more complex than single-view.
You’ll need a Quad LNB, additional cabling to each room, and proper multiswitch configuration if you have more than 4 decoders.
For most homeowners, professional installation is worth the cost to avoid signal distribution problems.
What causes DSTV signal loss after DIY installation?
The most common causes are: poor dish alignment (most frequent), loose F-connectors, water ingress in cables,
damaged coaxial cable, electrical interference from nearby wiring, or a faulty LNB.
Read our complete troubleshooting guide for diagnostic steps.
Do I need permission to install a DSTV dish in my complex?
Yes, most body corporates and homeowners’ associations require written approval before dish installation.
Some complexes have communal DSTV systems that you must use instead of individual dishes.
Always check your complex’s rules before drilling any holes to avoid fines or forced removal.
What size satellite dish do I need for DSTV in South Africa?
A 60cm dish is standard for most of South Africa. In signal-challenged areas (deep valleys, far northern regions),
an 80cm or even 1m dish may be required. For 4K viewing or Explora Ultra, an 80cm dish is recommended.
Read our satellite dish size guide for regional recommendations.
How much does professional DSTV installation cost?
Professional dstv installation cost ranges from R800 to R1,500 for standard single-view installation.
Extra View (multi-room) costs R1,200-R2,500. These prices typically include the dish, LNB, cabling, mounting hardware,
professional alignment, and a warranty. For a detailed breakdown, see our
complete pricing guide.
Can I use my existing satellite dish for DSTV?
Possibly, but you’ll need to check compatibility. The LNB must be DSTV-compatible (Universal or Smart LNB),
and the dish must be properly aligned to the correct satellite (Eutelsat 36° East). An existing dish from a different provider
(like TopTV or international systems) likely won’t work without significant modifications.
What should I do if my DIY installation has no signal?
First, double-check all cable connections. Then verify your dish alignment using a signal meter.
If you still have no signal after an hour of troubleshooting, it’s time to
request a professional installer.
Continuing to guess can damage your equipment or roof.
✅ Final Thoughts: DIY or Hire a Pro?
Installing your own DSTV dish is absolutely possible. With the right tools, patience, and this guide,
many homeowners successfully complete their own installations and save R800-R1,500 in the process.
But here’s my honest advice: if your dish needs to go on a high roof, if you want multi-room viewing,
or if you simply value your weekend time more than the installation fee – hire a professional.
The peace of mind, warranty protection, and guaranteed signal quality are worth every rand.
For readers in Centurion and Pretoria East,
accredited local technicians
offer same-day service with a 12-month warranty. And across all of South Africa,
ServiceLink SA connects you with verified, accredited DSTV installers for free.
Ready to Get DSTV Installed?
Whether you want to DIY or hire a pro, we’re here to help.
Get free quotes from verified, accredited DSTV installers near you.
📞 Call us: 073 138 4726 for immediate help finding a DSTV installer near you.
Free site inspections •
Beat Your Quote guarantee •
Our guarantees
📚 Official resources & standards referenced:
- Official DSTV installation guide – Official installation requirements and best practices.
- SABS – South African Bureau of Standards installation safety standards.
- DSTV Installers Centurion – Accredited local technicians (Centurion & Pretoria East).
Information provided for general guidance. DSTV is a registered trademark of MultiChoice.
Always verify installer accreditation directly with MultiChoice when possible.
Written by: Innocent T Hanyani
Construction & Home Services Industry Specialist | 21+ Years Experience
Innocent T Hanyani has over two decades of experience working across South Africa’s construction,
maintenance, and home services sectors. Throughout his career, he has worked closely with contractors,
service providers, and property owners, gaining practical insight into how projects are quoted, managed,
and completed. His work focuses on helping homeowners understand how to find reliable contractors,
compare quotes, and avoid common industry pitfalls when hiring service professionals.
His insights are based on practical industry experience as well as ongoing research into contractor platforms,
service marketplaces, and hiring trends across South Africa.
For more information about DSTV installation, explore our related resources:
DSTV installation requirements,
satellite dish installation guide,
dish alignment guide,
installation and repair costs,
how to choose the right DSTV installer,
what’s included in DSTV installation,
free DSTV installation quote,
DSTV installation near me.
See our service areas page for coverage in your region.