Want to Save Money on Tiling?
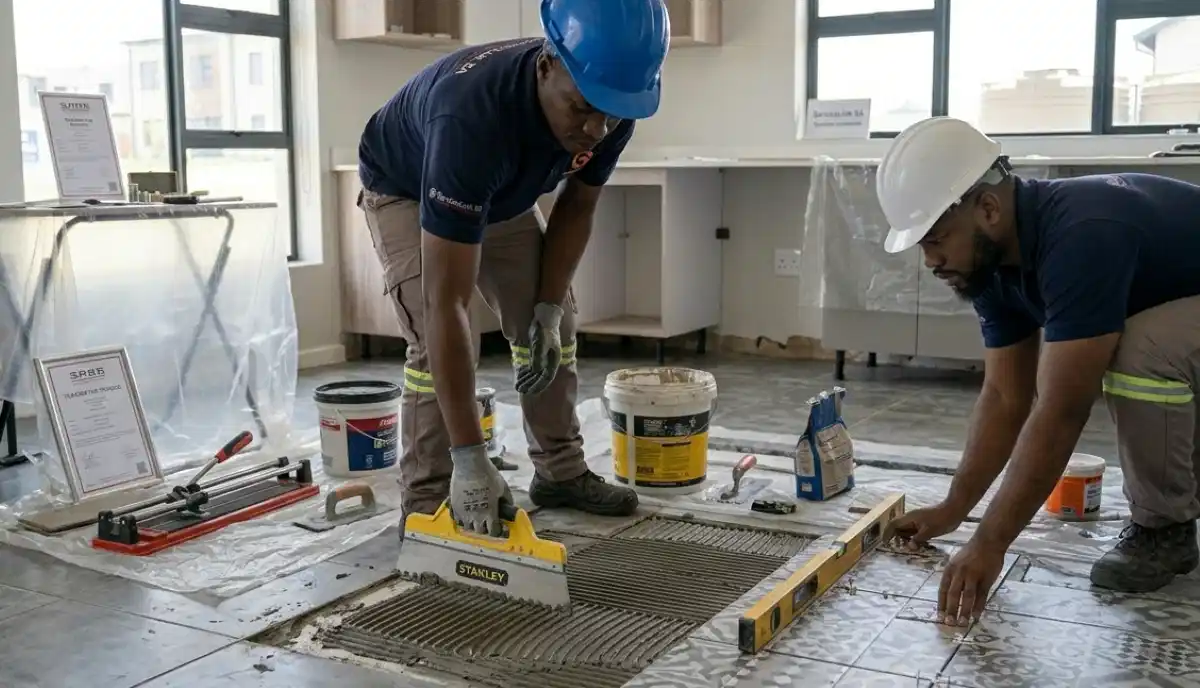
Get free quotes from verified tiling specialists who can assess if tiling over your existing tiles is the right choice for your home.
Servicing Gauteng, Johannesburg, Pretoria, and across South Africa
Tiling Over Existing Tiles: Pros, Cons & When It’s Safe
🏠 Can you tile over old tiles? The short answer is YES — but only if you know what you’re doing.
You look at your old, dated floor tiles. They’re ugly, but they’re solid. Removing them means dust, noise, and a big demo bill. So you ask yourself: can you tile over existing tiles pros and cons?
I’ve seen this question hundreds of times. Homeowners in Gauteng, Johannesburg, and Pretoria want a faster, cheaper renovation. And sometimes, tile over tile is the answer. But other times, it’s a disaster waiting to happen.
In this guide to overlay tiling, I’ll walk you through every pro, every con, and exactly when it’s safe to tile over existing tiles. By the end, you’ll know whether tiling over existing tiles pros cons lean in your favour or if you should remove and start fresh.
For more tiling guidance, check out tile removal and replacement cost, tile adhesives explained, floor leveling guide, and tile installation cost per square meter.
📋 Table of Contents – Tiling Over Existing Tiles Guide
🏠 What Is Tiling Over Existing Tiles?
Tiling over existing tiles (also called tile overlay or tile over tile) is exactly what it sounds like: installing new tiles directly on top of your old ones without removing the original layer.
Instead of spending days chipping up old tiles, hauling away debris, and preparing a bare substrate, you clean the existing tiles, rough up the surface, and apply new tiles with special high-bond adhesives.
Why do homeowners consider overlay tiling?
- Faster renovation: Skip the demolition phase entirely
- Lower cost: No disposal fees, no skip hire, less labour
- Less mess: No dust from breaking up tiles
- No subfloor exposure: Existing tiles act as a stable base
But tile over tile isn’t always possible. According to SANS 10400 overlay standards and SABS adhesive standards, the existing substrate must meet strict criteria for overlay to be safe and durable.
✅ The Pros of Tiling Over Existing Tiles
Let’s start with the good news. When conditions are right, tiling over existing tiles pros cons heavily favour the overlay approach.
✅ Pro #1: Significant Cost Savings
Removing old tiles costs R150-R300 per square meter for demolition, plus R500-R1,500 for skip hire and disposal. Overlay eliminates these costs entirely. On a 50m² floor, you save R7,500-R15,000 before you even buy new tiles.
✅ Pro #2: Much Faster Installation
Demolishing old tiles takes 1-3 days depending on area. Overlay skips this entirely. A standard room that would take 5 days (demo + prep + tiling) takes 2-3 days with overlay. Less disruption to your daily life.
✅ Pro #3: No Dust or Debris
Tile removal is incredibly dusty. Dust travels through your entire house, settling on furniture, in carpets, and in your HVAC system. Overlay produces almost no dust — just light surface preparation.
✅ Pro #4: Existing Tiles Provide a Stable Base
If your existing tiles are sound, fully bonded, and level, they provide an excellent substrate for new tiles. You don’t need to worry about subfloor issues because the old tiles act as a protective layer.
✅ Pro #5: No Subfloor Damage Risk
Removing tiles risks damaging the subfloor — especially on wooden substrates or older screeds. Overlay eliminates this risk completely. Your original subfloor remains untouched.
✅ Pro #6: Ideal for Rental Properties
Landlords love overlay tiling because it minimizes property downtime. Tenants don’t need to move out for days of demolition. The job is faster, cleaner, and less disruptive.
✅ Pro #7: Adds Height (Sometimes a Benefit)
In some cases, raising the floor level helps match adjacent flooring heights or covers uneven subfloors. Overlay adds 8-12mm total height (tile + adhesive), which can be strategically beneficial.
Want a Fast, Affordable Tile Update?
Get free quotes from verified tiling specialists who can assess your existing floor and give you an honest answer: overlay or remove?
❌ The Cons of Tiling Over Existing Tiles
Now for the reality check. Tiling over existing tiles pros cons can swing dramatically the other way when conditions aren’t perfect.
❌ Con #1: Height Issues with Doors and Appliances
Adding 8-12mm of height can cause doors to scrape, dishwashers to not fit under counters, and transitions to adjacent floors to become tripping hazards. You may need to cut doors down or replace thresholds.
❌ Con #2: Existing Tile Problems Transfer to New Tiles
If your old tiles have cracks, hollow spots, or loose sections, those problems WILL transfer to your new tiles. New tiles will crack in the same places or become loose over time. Overlay doesn’t fix underlying issues — it hides them temporarily.
❌ Con #3: Reduced Ceiling Height (In Basements)
In basements or rooms with low ceilings, adding even 10mm can be noticeable. For standard 2.4m ceilings, it’s fine. For 2.2m basements, every millimeter counts.
❌ Con #4: Not Suitable for All Tile Types
You cannot tile over soft tiles (vinyl, rubber, cork), glossy tiles without proper roughening, or tiles with heavy texture that prevents bonding. Read tile adhesives explained for more details.
❌ Con #5: Future Removal Is Much Harder
What happens in 10-15 years when these new tiles date? You’ll have two layers of tiles to remove. Removal costs double, and disposal fees double. You’re passing the problem to your future self or the next homeowner.
✅ When Is It Safe to Tile Over Existing Tiles?
Tiling over existing tiles is safe ONLY when ALL these conditions are met:
📋 The 5 Golden Rules for Safe Overlay Tiling
- Rule 1: Existing tiles are 100% solid — no hollow sounds when tapped, no cracks, no loose edges
- Rule 2: Existing tiles are ceramic or porcelain (not vinyl, rubber, cork, or carpet)
- Rule 3: Existing tiles are clean, dry, and free from wax, oil, or sealers
- Rule 4: The floor is level within 3mm over 2 meters (use a long level)
- Rule 5: Door clearances and appliance fits are confirmed before starting
Additional safety checks:
- The existing tile surface must be roughened (etched or sanded) to accept new adhesive
- Use a high-bond, polymer-modified adhesive specifically rated for “tile over tile” applications
- Consider using a primer designed for glossy surfaces before applying adhesive
- The substrate beneath the existing tiles must be stable (no movement or deflection)
According to SANS 10400 and SABS adhesive standards, failing any of these checks means overlay is not recommended.
🚫 When You Should NEVER Tile Over Existing Tiles
⚠️ WARNING: Do NOT Tile Over Existing Tiles If…
- Any tiles are loose or hollow-sounding — This indicates bonding failure. New tiles will fail too. Read hollow tiles guide.
- There are any cracks in the existing tiles or grout — Cracks indicate movement or substrate issues. New tiles will crack in the same places.
- The existing tiles are vinyl, rubber, cork, or carpet — These materials flex and move. Adhesive won’t bond properly. Remove them first.
- The floor has moisture problems or water damage — Read water damage under tiles before proceeding.
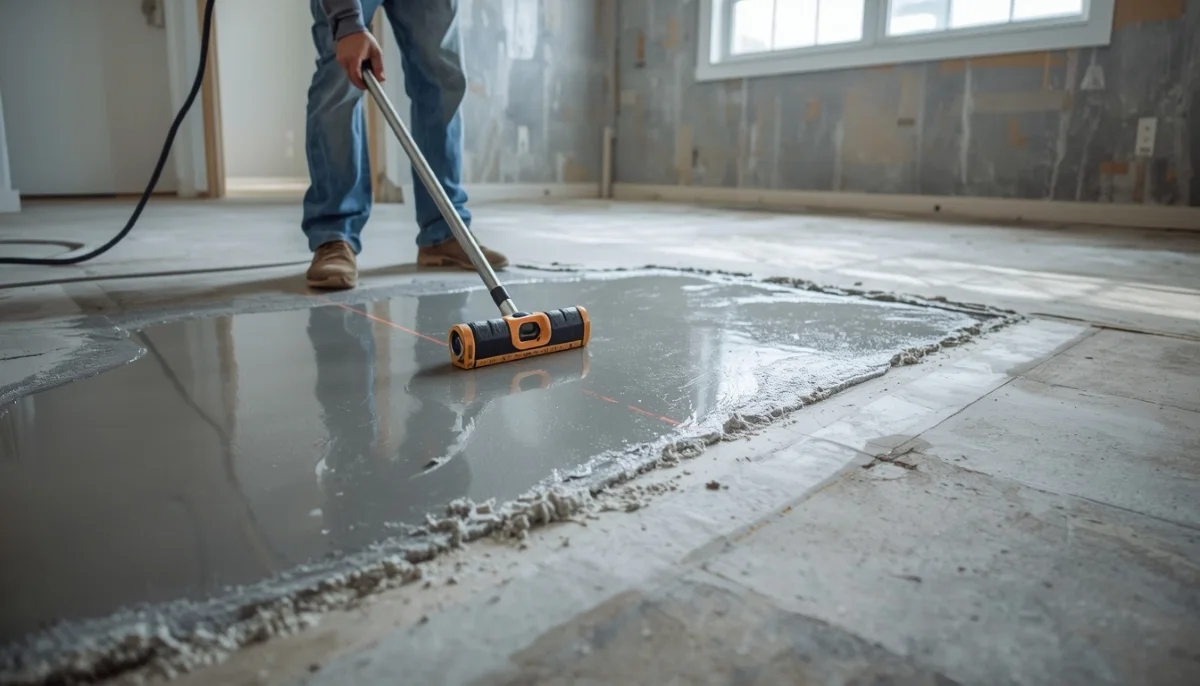
- The floor is uneven by more than 3mm over 2 meters — Use self-leveling compound instead of overlay.
- The existing tiles are heavily textured or patterned — Adhesive needs a flat surface to bond properly. Heavily textured tiles won’t work.
- Doors won’t clear or appliances won’t fit after adding height — Cutting doors is possible but not always practical.
🔍 7-Point Inspection Checklist Before Overlay Tiling
Before committing to tile over tile, run through this inspection checklist. If you fail any point, reconsider overlay or consult a professional from ServiceLink SA’s tiling services.
| Check # | Inspection Item | Pass Condition | Fail Condition |
|---|---|---|---|
| 1 | Tap test (hollow sounds) | Solid, consistent sound across entire floor | Any hollow or drum-like sounds |
| 2 | Visual crack inspection | No cracks in tiles or grout lines | Any hairline or structural cracks |
| 3 | Levelness test (2m level) | Within 3mm over 2 meters | More than 3mm variance |
| 4 | Tile type identification | Ceramic or porcelain only | Vinyl, rubber, cork, carpet, natural stone |
| 5 | Surface condition | Clean, dry, no wax/sealers | Waxed, sealed, oily, or dirty |
| 6 | Door clearance check | 10mm+ clearance above doors | Doors scrape or won’t close |
| 7 | Moisture test | No moisture visible or detected | Any signs of dampness or water damage |
If you pass all 7 checks, tiling over existing tiles pros cons likely favour overlay. If you fail any check, removal is the safer option.
🛠️ How to Tile Over Existing Tiles (Step-by-Step)
If you’ve passed the inspection and decided to proceed, here’s the correct process for tile over tile installation:
Step 1: Deep Clean the Existing Tiles
Remove all dirt, grease, wax, and sealers. Use a heavy-duty tile cleaner and degreaser. Rinse thoroughly and allow to dry completely (24-48 hours). Any contamination will prevent adhesive bonding.
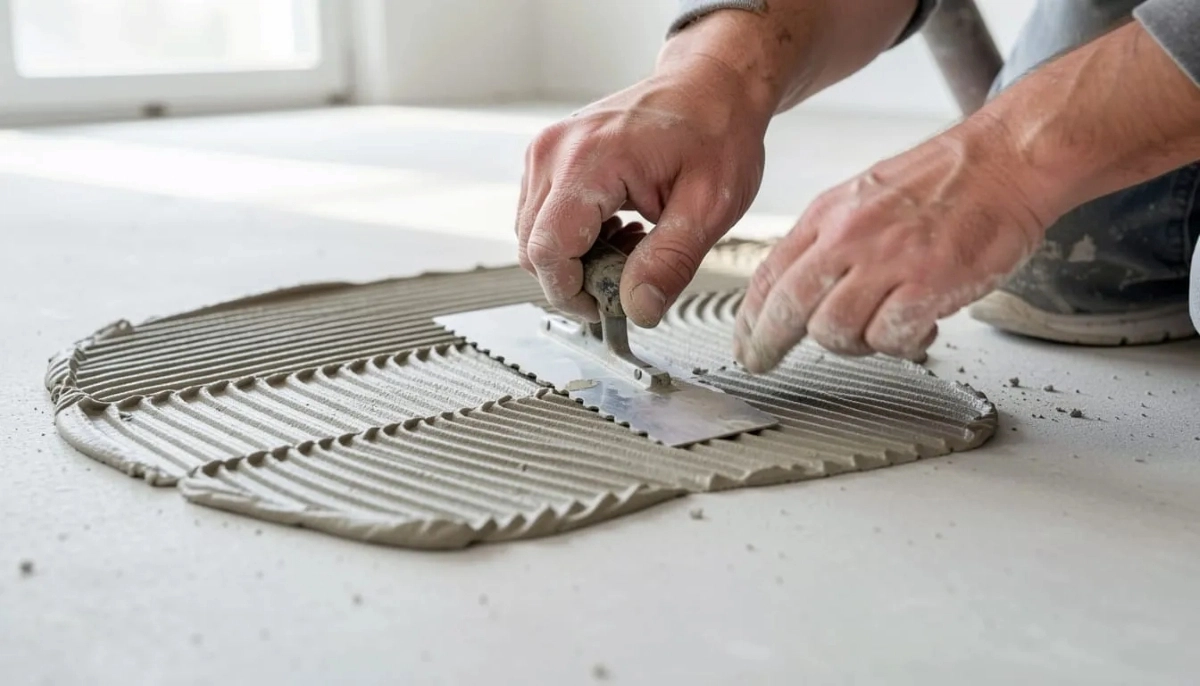
Step 2: Roughen the Surface
Glossy tiles won’t accept adhesive. Use a floor grinder with diamond disc or heavy-grit sandpaper (40-60 grit) to create a rough, scratched surface. Vacuum all dust thoroughly.
Step 3: Apply Primer (Recommended)
Use a primer specifically designed for “tile over tile” applications. This improves adhesion on glossy or dense surfaces. Follow manufacturer instructions for drying time.
Step 4: Choose the Right Adhesive
Use a high-bond, polymer-modified thin-set mortar rated for “tile over tile.” Read tile adhesives explained for specific product recommendations. Mix according to instructions.
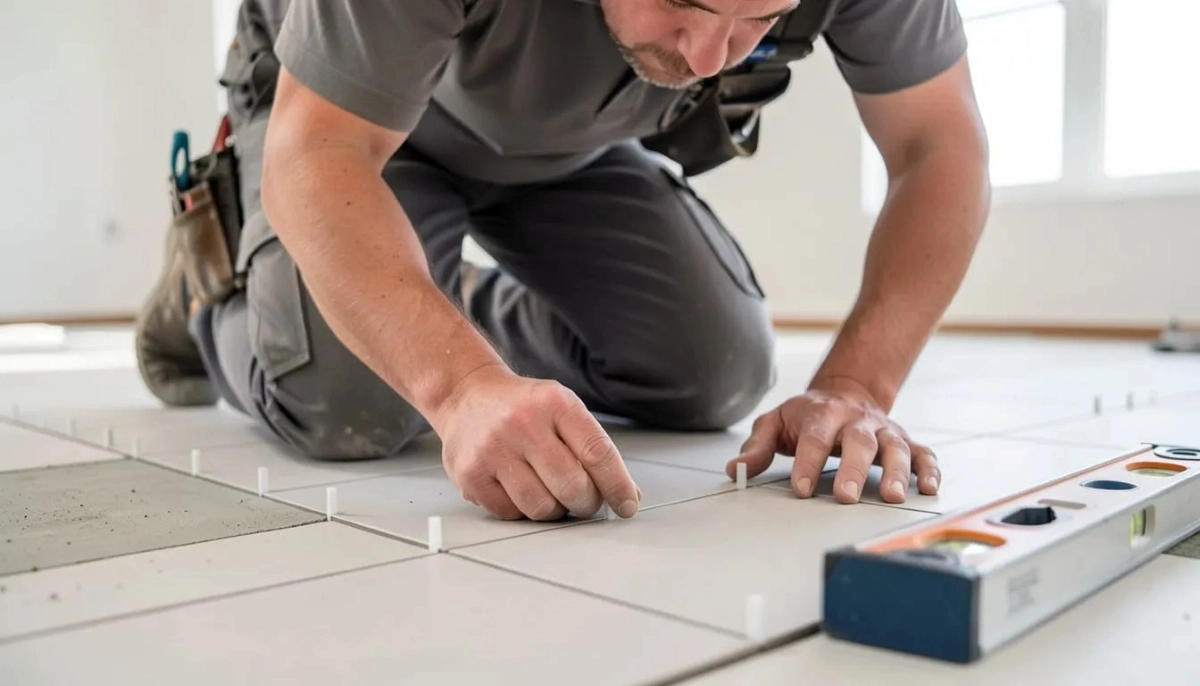
Step 5: Apply Adhesive and Lay Tiles
Use a notched trowel (6-12mm depending on tile size). Apply adhesive to manageable sections. Back-butter each tile for maximum coverage. Press firmly and use tile spacers and leveling system for consistent gaps.
Step 6: Allow Proper Curing Time
Tile over tile installations need longer curing times because the adhesive can’t breathe through the old tiles. Wait 48-72 hours before grouting, and 7 days before heavy foot traffic.
Step 7: Grout and Seal
Apply grout as normal. For natural stone tiles, apply sealer. For ceramic or porcelain, sealing is optional but recommended for grout lines.
Pro Tip: For large format tiles on overlay, use a tile leveling system to prevent lippage. Read tile lippage guide for troubleshooting.

🧪 Choosing the Right Adhesive for Tile Over Tile
Standard thin-set mortar is NOT strong enough for tile over tile. You need a high-bond, polymer-modified adhesive specifically rated for this application.
| Adhesive Type | Suitable for Tile Over Tile? | Best For | Notes |
|---|---|---|---|
| Standard thin-set mortar | ❌ No | New substrates only | Not strong enough for overlay |
| Polymer-modified thin-set | ✅ Yes (high-bond version) | Ceramic/porcelain overlay | Look for “tile over tile” on label |
| Epoxy adhesive | ✅ Yes | Commercial, wet areas, heavy traffic | Strongest but expensive and difficult to use |
| LFT mortar (large format tile) | ✅ Yes | Tiles larger than 600x600mm | High bond strength, non-sag formula |
| Mastic adhesive | ❌ No | Wall tiles only, dry areas | Not for floors or overlay |
Recommended adhesive brands for tile over tile in South Africa:
- Weber Set Plus – High-bond, polymer-modified
- SikaCeram-122 – Professional grade tile adhesive
- Bostik H40 – High-performance for difficult substrates
- Pratley Powafix – Locally available, good for small areas
Read our full tile adhesives explained guide for more details on each type.
💰 Cost Comparison: Overlay vs Removal vs New Substrate
Here’s how tiling over existing tiles pros cons stack up financially for a typical 50m² living area in Gauteng, Johannesburg, or Pretoria.
| Cost Item | Overlay Tiling | Removal + New Tiles | New Substrate + Tiles |
|---|---|---|---|
| Tile removal (R200/m²) | R0 | R10,000 | R10,000 |
| Skip hire & disposal | R0 | R1,200 | R1,200 |
| Subfloor prep/leveling | R0 (if tiles are level) | R2,500 | R5,000 (new screed) |
| Surface preparation (roughening) | R1,500 | R0 | R0 |
| Primer | R500 | R0 | R500 |
| High-bond adhesive (extra cost) | R1,000 more | R0 | R0 |
| New tiles (R300/m²) | R15,000 | R15,000 | R15,000 |
| Tiling labour (R180/m²) | R9,000 | R9,000 | R9,000 |
| TOTAL COST | R27,000 | R37,700 | R40,700 |
| Time to complete | 2-3 days | 5-7 days | 7-10 days |
Key takeaway: Overlay saves R10,000-R13,000 (approx 30%) and 3-5 days of labour compared to full removal. But only if your existing tiles pass the 7-point inspection checklist.
For a complete breakdown of tile costs, read tile installation cost per square meter.
🚫 Common Mistakes to Avoid When Tiling Over Existing Tiles
⚠️ Warning: These Mistakes Will Ruin Your Tile Over Tile Installation
- Not roughening glossy tiles: Adhesive won’t stick to smooth, glossy surfaces. Always grind or sand first.
- Skipping the tap test: Hollow tiles will crack your new tiles. Test every single tile before proceeding.
- Using standard thin-set mortar: Standard adhesive isn’t strong enough. You need high-bond, polymer-modified mortar.
- Not cleaning thoroughly: Wax, sealers, grease, or dirt prevent bonding. Clean twice, rinse, dry completely.
- Ignoring door clearances: Adding 10mm of height can make doors stick or not close. Check before you start.
- Tiling over cracked tiles: Cracks indicate movement. New tiles will crack in the same places. Read why tiles crack.
- Rushing the curing time: Tile over tile needs longer to cure because adhesive can’t breathe. Wait 48-72 hours before grouting.
❓ Frequently Asked Questions About Tiling Over Existing Tiles
Can you tile over existing tiles pros and cons — what’s the biggest risk?
The biggest risk when tiling over existing tiles pros cons is bonding failure. If your existing tiles are glossy, dirty, or have any loose/hollow spots, the new adhesive won’t bond properly. This leads to loose new tiles, cracking grout, and eventual failure. That’s why proper surface preparation (roughening, cleaning, primer) and the 7-point inspection are critical before attempting tile over tile.
Can you tile over tiles in a bathroom or wet area?
Yes, but with extra precautions. Bathroom tile overlay requires perfect waterproofing behind the existing tiles. If the existing waterproofing has failed, moisture will be trapped between the old and new tiles, causing mould and failure. Read waterproofing for durable tiling before attempting bathroom overlay. For shower floors, removal is strongly recommended.
What adhesive should I use for tiling over existing tiles?
Use a high-bond, polymer-modified thin-set mortar specifically rated for “tile over tile” applications. Standard thin-set is not strong enough. Brands like Weber Set Plus, SikaCeram-122, or Bostik H40 are suitable. Read tile adhesives explained for detailed recommendations based on your tile type and location.
Do I need to remove old grout before tiling over tiles?
No, you don’t need to remove old grout. However, you must ensure the grout is sound (not crumbling or missing). If the grout is damaged, rake out loose sections and repair with fresh grout or filler. The new adhesive will bond to the tile faces, not the grout lines, as long as the surface is properly roughened and cleaned.
Will tiling over existing tiles increase floor height significantly?
Yes, tile over tile adds approximately 8-12mm total height: 3-5mm for adhesive, 1-2mm for primer/roughening, and 4-8mm for the new tile (depending on thickness). This can affect door clearances, appliance fits, and transitions to adjacent flooring. Measure door clearances and appliance gaps before committing to overlay.
Can I tile over tiles on walls (like a kitchen backsplash)?
Yes, wall tile overlay is often easier than floors because there’s less weight and no foot traffic. However, you still need solid existing tiles, proper roughening, and high-bond adhesive. For kitchen backsplashes, check that outlets and switches still align after adding thickness. Read kitchen backsplash installation guide for more.
How do I know if my existing tiles are suitable for overlay?
Use the 7-point inspection checklist in this guide. Key requirements: solid (no hollow sounds), no cracks, ceramic or porcelain only, level within 3mm over 2m, clean and dry. If you’re unsure, hire a professional from ServiceLink SA’s tiling services to inspect. A free inspection can save you from a costly mistake.
Is tiling over existing tiles cheaper than removal?
Yes, significantly. For a 50m² floor, tile overlay costs approximately R27,000 vs R37,700 for removal and new installation — a saving of R10,000+ (around 30%). However, this saving is only realized if your existing tiles pass all safety checks. If overlay fails, you’ll pay twice (overlay + removal + redo). Always inspect thoroughly first.
Can I tile over tiles in a rental property?
Yes, overlay tiling is popular for rental properties because it minimizes downtime. Tenants don’t need to move out for days of demolition. However, get landlord approval first and document the condition of the existing floor before overlay. Future removal will be more expensive (two layers to remove), so consider if this is a short-term or long-term solution.
How long does tile over tile last?
When done correctly (proper inspection, surface preparation, high-bond adhesive, and good workmanship), tile over tile lasts just as long as standard tiling — 15-25+ years. The key is ensuring the existing substrate is solid before starting. Read why tiles crack after installation to understand failure causes. A workmanship guarantee from a verified installer protects your investment.
✅ Final Thoughts: Should You Tile Over Your Existing Tiles?
After weighing all the tiling over existing tiles pros cons, here’s my honest advice:
Tile over tile IS a good option if:
- Your existing tiles pass ALL 7 inspection checks (solid, no cracks, level, ceramic/porcelain)
- You want to save 30% on costs and 3-5 days of time
- You can accept 8-12mm of added floor height
- You’re using a high-bond adhesive designed for overlay
- You hire a tiler with specific experience in tile over tile installations
Do NOT tile over tile if:
- Any tiles are loose, hollow, or cracked
- Your tiles are vinyl, rubber, cork, or natural stone
- The floor has moisture problems
- Doors won’t clear or appliances won’t fit
- You’re tiling a shower floor (always remove for proper waterproofing)
Your next step: Get a professional inspection. A qualified tiler from ServiceLink SA’s network can assess your existing floor in 30 minutes and give you an honest answer: overlay or remove. Read how to choose the right contractor for hiring tips.
Ready to Update Your Tiles Without the Mess?
Get free quotes from verified tiling specialists who can inspect your existing floor and tell you if overlay is right for your home.
📞 Call us: 073 138 4726 to discuss your tiling project.
Free inspections •
Workmanship guarantees •
Beat Your Quote •
Pay Later option
Are You a Tiling Professional?
Join ServiceLink SA’s network of verified tiling contractors. Get qualified leads for overlay, removal, and new installation projects.
📚 Official resources & standards referenced:
- SANS 10400 – South African National Standard for overlay standards and building regulations.
- SABS – South African Bureau of Standards for adhesive standards and material specifications.
Information provided for general guidance. Always consult a qualified tiling professional before attempting tile over tile installation.
Written by: ServiceLink SA Research Team
Specialist Tiling & Home Renovation Experts
The ServiceLink SA Research Team has extensive experience with complex tiling projects, including overlay installations, tile removal, and substrate preparation. Our team has worked with tilers, contractors, and homeowners across South Africa to develop best practices for tiling over existing tiles. This guide distills years of practical knowledge into actionable advice for homeowners considering tile over tile as a renovation option.
For more information about tiling projects, explore our related resources: tile removal and replacement cost, tile adhesives explained, floor leveling guide, and tile installation cost per square meter. Learn about our process on what is ServiceLink SA and how ServiceLink SA works. Find tilers in your area: Gauteng, Johannesburg, and Pretoria. For related services, see our building construction and flooring services guides.