
Planning a Marble Tile Project?
Get free quotes from verified tiling specialists who have experience with natural stone and marble. Proper marble tiles installation requires specialist skills.
Get Free Marble Installation Quotes
Servicing Gauteng, Sandton, Hyde Park, and across South Africa
Marble Tiles Installation & Maintenance Guide for SA Homes
✨ From quarry to your floor – the complete guide to installing and caring for beautiful marble tiles
There’s nothing quite like marble. The elegant veining, the subtle translucency, the way light dances across its polished surface. For centuries, marble has been the choice of kings, emperors, and luxury homeowners. And now, you’re considering it for your home in Sandton, Hyde Park, or elsewhere in Gauteng.
But here’s what most people don’t realise: marble tiles installation is completely different from installing ceramic or porcelain. And marble tile maintenance is a commitment – not a burden, but a responsibility. Marble is softer, more porous, and more reactive than other tiles. It can stain, etch, and scratch if not properly cared for.
I’ve worked on marble projects across Gauteng’s most prestigious addresses. I’ve seen stunning installations that look perfect decades later – and I’ve seen beautiful marble ruined within months by poor installation or improper cleaning. The difference is knowledge.
In this complete guide to how to install and maintain marble tiles, I’ll walk you through everything: selecting the right marble, preparing the substrate, installation techniques specific to natural stone, sealing, daily care, and long-term maintenance. By the end, you’ll know exactly what it takes to enjoy beautiful marble flooring that lasts a lifetime.
For more information on natural stone, check out our guides on natural stone vs porcelain, travertine tiles explained, and tile sealing guide. For ongoing care, read tile maintenance tips and restoring old tile floors.
📋 Table of Contents – Marble Tiles Guide
🏛️ What Is Marble? Understanding the Material
Marble is a metamorphic rock formed when limestone is subjected to intense heat and pressure deep within the earth. This process recrystallises the calcium carbonate, creating the distinctive veining and crystalline structure that makes marble so beautiful.
Key Properties of Marble:
- Composition: Primarily calcium carbonate (CaCO₃)
- Hardness: 3-5 on Mohs scale (relatively soft – can be scratched by metal)
- Porosity: Moderate to high – absorbs liquids without sealing
- Acid sensitivity: Reacts with acids (etching) – vinegar, lemon juice, wine, and many cleaners
- Appearance: Unique veining patterns – no two tiles are identical
- Finish options: Polished (high gloss), honed (matte), tumbled (antique)
Why Marble Is Special:
Unlike man-made tiles, marble has depth. Light penetrates the surface and reflects from within, creating a warm, luminous quality that porcelain cannot replicate. The natural veining tells the geological history of the stone. For many homeowners, this authenticity is worth the extra care required.
For a material comparison, see the tile type comparison chart and read our natural stone vs porcelain guide.
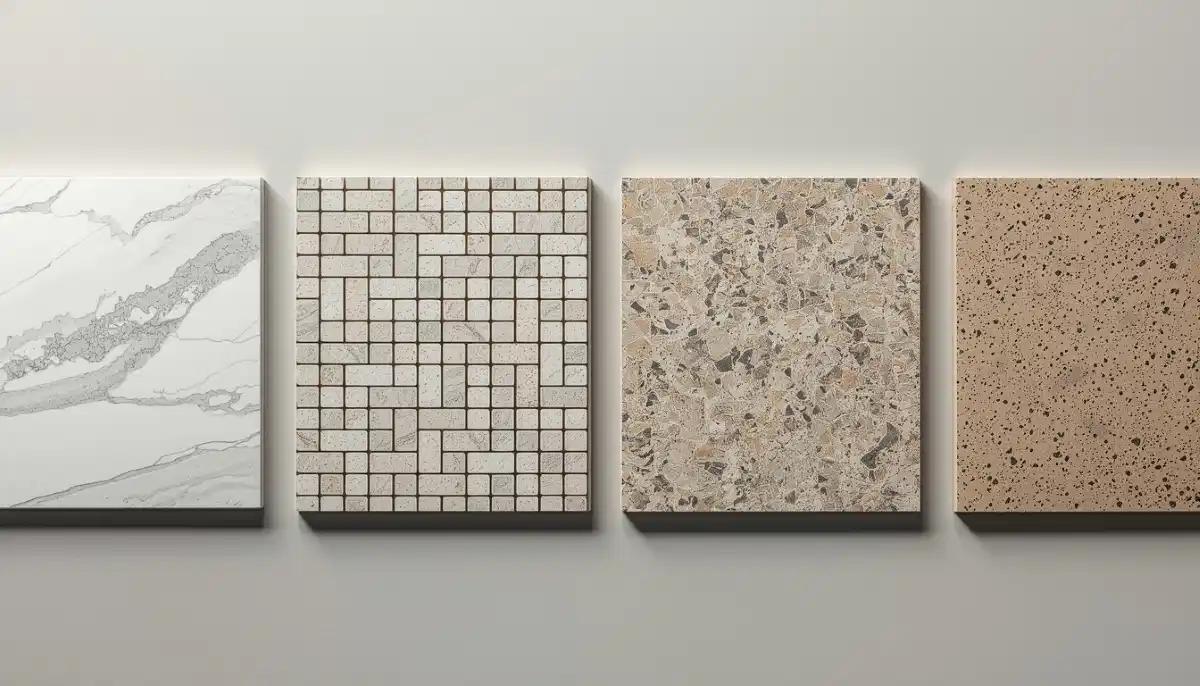
🗻 Types of Marble Tiles – Choosing the Right One
Not all marble is the same. Here are the most common types available in South Africa:
| Marble Type | Appearance | Hardness | Best For | Price Range/m² |
|---|---|---|---|---|
| Carrara | White/light grey, soft feathery veining | Moderate | Bathrooms, floors, countertops | R600 – R1,000 |
| Calacatta | White with bold, dramatic grey/gold veining | Moderate | Luxury bathrooms, feature walls | R1,000 – R2,000+ |
| Statuario | Bright white with thick, dark grey veining | Moderate | High-end luxury, statement pieces | R1,500 – R3,000+ |
| Crema Marfil | Cream/beige with subtle veining | Softer | Traditional bathrooms, warm interiors | R500 – R900 |
| Nero Marquina | Black with white veining | Moderate | Dramatic accents, modern design | R800 – R1,500 |
Finish Options:
- Polished: High-gloss, reflective, shows scratches more easily. Best for walls and low-traffic areas.
- Honed: Matte, smooth, non-reflective. Hides scratches better. Best for floors and high-traffic areas.
- Tumbled: Aged, rustic appearance with softened edges. Best for traditional or Mediterranean styles.
- Brushed: Textured, slip-resistant. Best for wet areas and outdoors.
For honed marble in particular, read our travertine guide for similar care considerations.
✅❌ Pros and Cons of Marble Flooring
Before committing to marble flooring, understand what you’re signing up for:
Pros:
- ✓ Unmatched natural beauty – elegant, timeless, luxurious
- ✓ Each tile is unique – no two floors look exactly alike
- ✓ Adds significant home value – especially in luxury markets
- ✓ Cools naturally – stays cool in summer (great for SA heat)
- ✓ Can be refinished – ground and re-polished to remove damage
- ✓ Available in wide range of colours and patterns
- ✓ Develops a beautiful patina over time
Cons:
- ✗ Expensive – both material and installation
- ✗ Requires regular sealing (every 6-12 months)
- ✗ Etches from acids – lemon juice, vinegar, wine, and many cleaners
- ✗ Scratches relatively easily – softer than granite or porcelain
- ✗ Stains without proper sealing – especially oil and dark liquids
- ✗ Can be slippery when polished and wet
- ✗ Not recommended for kitchens (acid risk) or high-traffic areas
- ✗ Requires specialist installation – not all tilers qualify
Is marble right for you? Ask yourself:
- Are you willing to seal your floors every 6-12 months?
- Will you wipe up spills immediately – especially wine, juice, or oil?
- Do you have children or pets that might spill or scratch?
- Is this a low-traffic area (not kitchen or hallway)?
- Do you love natural variation (no two tiles identical)?
If you answered yes to all, marble could be perfect. If you hesitated on any, consider porcelain stone-look tiles instead.

Looking for a Marble Installation Specialist?
Not every tiler has experience with natural stone. Get free quotes from verified specialists who understand how to install and maintain marble tiles correctly.
Find Marble Specialists Near You
Free inspections available. Beat Your Quote guarantee.
🏗️ Marble Tiles Installation – Pre-Installation Preparation
Proper marble tiles installation starts long before the first tile is placed. Here’s what’s required:
1. Subfloor Requirements:
- Must be extremely flat – within 3mm over 2 meters (stricter than ceramic)
- Must be clean, dry, and free of contaminants
- Concrete subfloor must be fully cured (minimum 28 days)
- Wooden subfloor must have minimal deflection – may require additional plywood
- Use self-levelling compound if needed
2. Substrate Preparation:
- Apply primer to improve adhesion
- Install uncoupling membrane (recommended) – prevents cracks from subfloor movement
- For wet areas, ensure proper waterproofing before tiling
3. Material Preparation:
- Open all marble boxes and inspect for damage or colour variation
- Mix tiles from multiple boxes during installation for blended appearance
- Dry-lay tiles to plan layout and minimise cuts
- Pre-seal marble before installation (some installers do this – controversial but helpful)
4. Gather Specialist Tools:
- Wet saw with diamond blade (marble cannot be cut with manual cutter)
- White thin-set adhesive (grey can bleed through light marble)
- Unsanded grout (sanded grout scratches marble)
- Rubber grout float (metal edges scratch)
For complete floor preparation guidance, read our floor leveling guide.
🔧 Step-by-Step Marble Installation Process
Professional marble tiles installation follows this process:
Step 1: Apply White Thin-Set Adhesive
Use white, polymer-modified thin-set. Grey adhesive can bleed through light-coloured marble, causing discolouration. Apply with notched trowel (6mm for standard tiles, 8-10mm for large format). Only spread adhesive you can tile within 15-20 minutes.
Step 2: Back-Butter Each Tile
Apply a thin, flat layer of adhesive to the back of each marble tile. This ensures full coverage – critical for natural stone. Marble is less forgiving than ceramic.
Step 3: Place and Beat In
Press tile into adhesive with twisting motion. Use a rubber mallet and beating block to seat it evenly. Check level frequently – marble lippage is very noticeable.
Step 4: Use Tile Spacers
Marble requires slightly wider grout joints (3-5mm) than rectified porcelain. Natural stone tiles vary slightly in size – wider joints accommodate variation.
Step 5: Allow to Cure
Wait 24-48 hours before grouting. Do not walk on tiles during this time. Marble adhesive requires full cure time.
Step 6: Grout with Unsanded Grout
Use unsanded grout – sanded grout scratches marble. Apply with rubber float (not metal). Push grout firmly into joints. Clean with damp sponge after 15-30 minutes.
Step 7: Seal Immediately
Unlike porcelain, marble must be sealed after grouting (once grout has cured, 72 hours). See sealing section below.
For large format marble tiles, also read our large format tiles installation guide.

🛡️ Sealing Marble – The Most Critical Maintenance Step
Unlike porcelain, marble is porous. Without sealing, it will absorb spills, stain permanently, and deteriorate. Natural stone care starts with proper sealing.
When to Seal:
- Immediately after installation (once grout has cured – 72 hours)
- Then every 6-12 months depending on traffic and wear
- Test by dropping water on the surface – if it darkens or absorbs, reseal
How to Seal Marble:
Step 1: Clean marble thoroughly with pH-neutral stone cleaner. Allow to dry completely (24 hours).
Step 2: Apply penetrating sealer using a lambswool applicator or soft cloth. Work in small sections.
Step 3: Allow sealer to penetrate for the time specified on product (usually 5-15 minutes).
Step 4: Wipe off excess sealer with a dry, clean cloth. Do not let it dry on the surface.
Step 5: Apply second coat for maximum protection (recommended for floors).
Step 6: Allow 24 hours before exposing to moisture or traffic.
Choosing a Sealer:
- Penetrating sealer: Absorbs into stone, repels liquids without changing appearance. Best for marble.
- Impregnating sealer: Similar to penetrating but fills pores more completely. Good for high-traffic areas.
- Topical sealer: Creates surface film. Not recommended for floors – wears unevenly and can yellow.
For detailed guidance, read our tile sealing guide.
🧹 Daily and Weekly Marble Tile Maintenance
Consistent marble tile maintenance keeps your floor beautiful for decades:
Daily Care:
- Sweep or vacuum daily: Dirt and grit act like sandpaper, scratching the surface. Use a soft-bristle broom or vacuum with hard floor attachment (no beater bar).
- Wipe spills immediately: Especially acidic spills (wine, juice, coffee, vinegar, tomato sauce). Blot – don’t wipe – to avoid spreading.
- Use doormats: Place at all entrances to trap dirt before it reaches marble.
Weekly Care:
- Damp mop with pH-neutral stone cleaner: Never use vinegar, bleach, or ammonia-based cleaners. Dilute cleaner according to instructions.
- Use a microfiber mop: Avoid string mops – they can trap grit that scratches.
- Change cleaning water frequently: Dirty water leaves residue and streaks.
- Dry the floor: After mopping, dry with a clean microfiber cloth to prevent water spots.
Monthly Care:
- Inspect for damage: Check for etch marks, stains, or scratches.
- Test sealer effectiveness: Drop water on the surface. If it beads up, sealer is working. If it darkens or absorbs, reseal.
What to Use:
- ✅ pH-neutral stone cleaner (R100-R300 per bottle)
- ✅ Microfiber cloths and mops
- ✅ Soft-bristle broom
- ✅ Penetrating sealer for annual maintenance
For more cleaning guidance, read our tile cleaning methods guide.
🚫 What NOT to Use on Marble – Common Mistakes
⚠️ Critical Warning:
Many common household cleaners will permanently damage marble. NEVER use the following on marble surfaces.
NEVER Use These on Marble:
- Vinegar or lemon juice: Acids etch marble immediately. The damage is permanent without professional refinishing.
- Bleach or ammonia: Harsh chemicals dull the finish and damage sealers.
- Bathroom or tile cleaners: Most contain acids or abrasives. Check labels carefully.
- Abrasive scrubbers (steel wool, scouring pads): Scratch marble permanently.
- Steam cleaners: Heat and moisture can damage sealer and cause stone to crack.
- Wax or acrylic finishes: Yellow over time and make marble slippery.
- Any product containing acids, alkalis, or abrasives.
What to Use Instead:
- ✅ pH-neutral stone cleaner (specifically formulated for marble)
- ✅ Mild dish soap diluted in water (temporary, but safe)
- ✅ Isopropyl alcohol (70%) for disinfecting – but test first
- ✅ Soft microfiber cloths and mops
For more on what damages natural stone, read our tile maintenance tips.
🔨 Repairing Etch Marks, Stains, and Scratches
Even with perfect care, accidents happen. Here’s how to address common marble damage:
Etch Marks (Dull Spots from Acid):
Etching occurs when acid (wine, juice, vinegar) reacts with marble’s calcium carbonate. The surface becomes dull or rough. Mild etching can be polished with marble polishing powder (available at tile shops). Deep etching requires professional honing and re-polishing.
Stains:
- Oil-based stains (cooking oil, lotions): Apply baking soda poultice (mix baking soda with water to paste). Cover with plastic wrap, leave 24-48 hours. Remove, rinse, dry.
- Organic stains (coffee, tea, wine): Use hydrogen peroxide poultice (mix with diatomaceous earth or baking soda). Same application method.
- Rust stains: Professional poultice required – DIY can spread rust.
Scratches:
- Light scratches: Use marble polishing powder with a damp cloth. Rub gently in circular motions.
- Deep scratches: Professional grinding and re-polishing required. Do not attempt DIY – you’ll create uneven surfaces.
When to Call a Professional:
For deep etching, deep scratches, large stained areas, or any damage on polished marble, hire a professional stone restorer. DIY attempts often make damage worse. Read our restoring old tile floors guide for more information.
📞 When to Hire a Professional for Marble Care
While daily marble tile maintenance is DIY-friendly, some tasks require specialists:
- Installation: Always hire a tiler with natural stone experience. Marble is expensive and unforgiving.
- Deep etching or scratch removal: Professional honing and polishing restores marble to like-new condition.
- Stain removal (stubborn or large areas): Professionals have stronger poultices and experience.
- Re-polishing large areas: Diamond pad grinding machines require training.
- Annual professional cleaning: Some homeowners hire stone pros for deep cleaning and re-sealing once a year.
ServiceLink SA connects you with verified natural stone specialists. Learn more about what is ServiceLink SA and how we verify contractors. For hiring guidance, read how to choose the right contractor.
💰 Marble Tile Cost Guide
Here’s what you can expect to pay for marble flooring in South Africa:
| Cost Component | Typical Range | Notes |
|---|---|---|
| Marble tiles (material/m²) | R500 – R1,500 | Carrara R600-1,000, Calacatta R1,000-2,000+ |
| Specialist installation/m² | R250 – R500 | Higher than ceramic/porcelain |
| Subfloor preparation | R1,000 – R5,000 | Self-levelling, uncoupling membrane |
| Sealing (professional)/m² | R50 – R150 | DIY: R200-R500 per litre (covers 20-40m²) |
| Professional honing/polishing/m² | R200 – R400 | Restoring damaged marble |
| Total installed (50m²) | R40,000 – R100,000+ | Material + installation + preparation |
For a complete breakdown of tile costs, read our tile installation cost per square meter guide and tile removal cost guide.
❓ Frequently Asked Questions About Marble Tiles
How often does marble need to be sealed?
Marble should be sealed every 6-12 months, depending on traffic and wear. Test by dropping water on the surface – if it beads up, sealer is working. If it darkens or absorbs, reseal immediately. High-traffic areas like entryways may need sealing every 6 months; low-traffic bathrooms may last 12-18 months.
Can I use vinegar to clean marble tiles?
NEVER. Vinegar is acidic and will etch marble permanently. The damage appears as dull spots or rings that cannot be cleaned away – only professional re-polishing can fix etching. Use only pH-neutral stone cleaners specifically formulated for natural stone care.
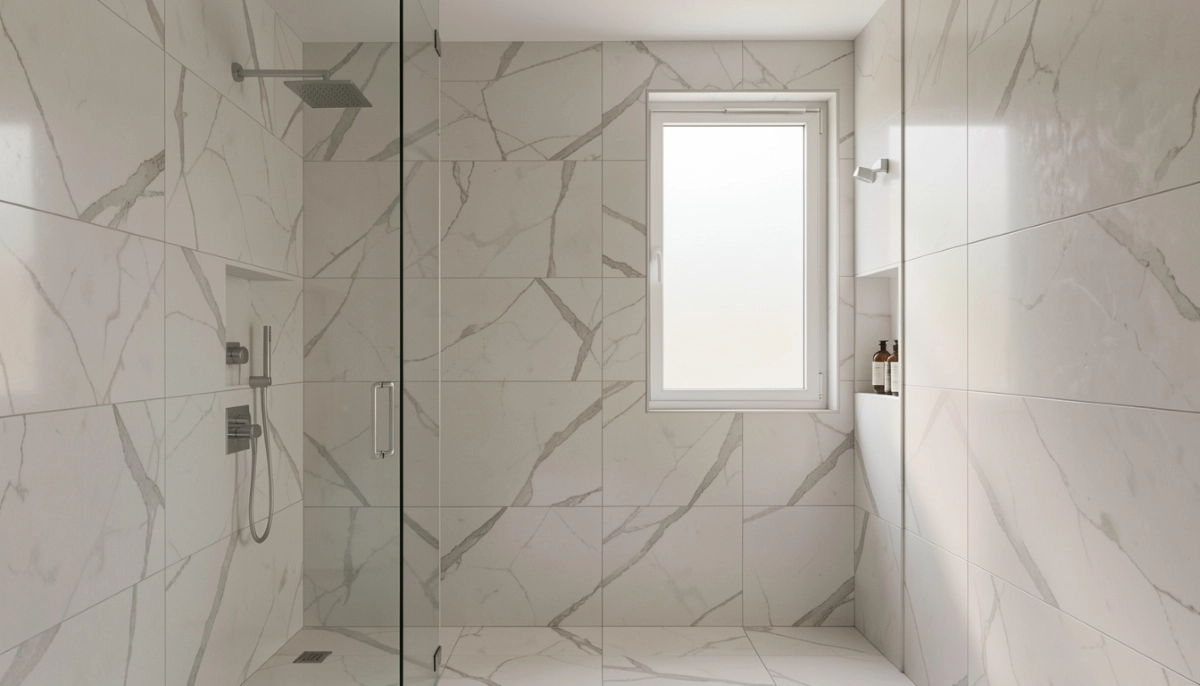
Is marble suitable for bathroom floors?
Yes – marble is beautiful in bathrooms. However, choose honed (matte) rather than polished for better slip resistance. Seal thoroughly and reseal annually. Be aware that acidic products (toilet cleaners, some soaps) can etch marble. Use only stone-safe products. Many luxury bathrooms feature stunning marble flooring successfully.
Can I install marble tiles myself?
Not recommended. Marble tiles installation requires specialist skills: proper substrate preparation, white thin-set, back-buttering, careful handling to avoid breakage, and unsanded grout. Mistakes are expensive – marble tiles cost R500-1,500/m². Hire a verified natural stone specialist through ServiceLink SA.
How do I remove stains from marble?
Use a poultice – a paste that draws stains out. For oil stains: baking soda and water. For organic stains (coffee, wine): hydrogen peroxide and baking soda. Apply paste, cover with plastic wrap, leave 24-48 hours, then remove. For stubborn stains, hire a professional stone restorer. Read our tile cleaning guide for more.
What’s the difference between polished and honed marble?
Polished marble has a high-gloss, reflective finish that shows veining dramatically. It shows scratches and etches more easily. Honed marble has a matte, smooth finish that hides scratches better and is less slippery. For floors, honed is recommended. For walls, polished is stunning. Both require sealing.
Does marble crack easily?
Marble is softer than porcelain but not brittle when properly installed. Cracking occurs from subfloor movement (inadequate preparation), impact (dropping heavy objects), or point loads (heavy furniture with small legs). Proper subfloor preparation and an uncoupling membrane prevent most cracking.
Can marble be used outdoors in South Africa?
Yes, but with caution. Marble is frost-sensitive – in freezing conditions (some parts of SA), water in pores can freeze and crack tiles. Marble also etches from acid rain. For outdoor patios, consider granite or porcelain instead. If using marble outdoors, choose a honed or brushed finish and seal heavily.
✅ Final Thoughts: Marble Is a Commitment Worth Making
Marble is not for everyone. It requires more care than porcelain, more sealing than granite, and more attention than ceramic. But for homeowners who appreciate natural beauty, authenticity, and timeless elegance, there’s no substitute.
The key to successful marble flooring is understanding what you’re signing up for. Accept that marble will develop a patina over time – small etches, light scratches, and the character of a lived-in natural stone surface. If you want perfect, uniform, worry-free floors, choose porcelain. If you want floors with soul, choose marble.
Key takeaways for marble tiles installation and maintenance:
- Always hire a specialist installer – marble requires experience
- Seal immediately after installation and every 6-12 months thereafter
- Use only pH-neutral cleaners – never vinegar, bleach, or ammonia
- Wipe spills immediately, especially acidic liquids
- Sweep or vacuum daily to prevent scratching from grit
- Accept that marble will develop character over time
- For high-traffic areas or homes with children/pets, consider stone-look porcelain instead
Your next step: Ready to install marble in your home? Get free quotes from verified natural stone specialists who can handle proper marble tiles installation and guide you on long-term marble tile maintenance.
Ready to Install Beautiful Marble Tiles?
Get free quotes from verified natural stone specialists. Proper marble tiles installation ensures your investment lasts a lifetime.
📞 Call us: 073 138 4726 to discuss your marble project.
Free inspections •
Beat Your Quote guarantee •
Why choose us
Are You a Natural Stone Installation Specialist?
Join ServiceLink SA’s network of verified tiling contractors. Get qualified leads, showcase your natural stone expertise, and grow your business.
📚 Official resources & standards referenced:
- SABS – South African Bureau of Standards for marble standards, including hardness, porosity, and quality specifications.
- SANS 10400 – South African National Standard for installation standards and substrate requirements for natural stone.
Information provided for general guidance. Marble installation and maintenance require specialist knowledge – always consult qualified professionals.
Written by: Innocent T Hanyani
Construction & Home Services Industry Specialist | 21+ Years Experience
Innocent T Hanyani has over two decades of experience working across South Africa’s construction and home improvement sectors. Throughout his career, he has specialised in natural stone installations, including marble, travertine, and granite. He has trained numerous tilers on proper marble handling, sealing techniques, and maintenance protocols. His practical experience helps homeowners understand the commitment of marble tile maintenance and the joy of living with authentic natural stone. He has seen beautiful marble floors ruined by vinegar and restored damaged marble to like-new condition through professional honing and polishing.
For more information about marble and natural stone, explore our related resources: natural stone vs porcelain, tile sealing guide, tile maintenance tips, restoring old tile floors, and travertine tiles guide. Learn about our process on what is ServiceLink SA and how we verify contractors. Find tilers in your area: Gauteng, Sandton, and Hyde Park. For related services, see our cleaning services and flooring services guides.