
Ready to Restore Your Old Tiles?
Get free quotes from verified tiling specialists who can assess your floor and recommend the best tile floor restoration approach.
Servicing Gauteng, Johannesburg, Pretoria, and across South Africa
How to Restore Old Tile Floors: Bring Your Tiles Back to Life SA
🔄 From dull and dated to dazzling – the complete guide to tile renovation
You look at your old tile floor and see dullness, stains, and cracked grout. You assume the only solution is expensive replacement. But before you call a demolition crew, there’s good news: most old tiles can be restored to like-new condition.
I’ve restored countless old tile floors across Gauteng, from Johannesburg to Pretoria. Floors that looked beyond saving – covered in layers of wax, stained grout, and dull surfaces – came back to life with the right techniques. And the cost? A fraction of full replacement.
In this complete guide to restore old tile floors, I’ll answer how to restore old tile floors without replacing them. You’ll learn about deep cleaning, grout restoration, polishing, and when professional tile floor restoration is needed. You’ll also learn when refurbish tiles is possible and when replacement is unavoidable. By the end, you’ll know exactly how to bring your old tiles back to life.
For more maintenance advice, check out our guides on tile maintenance tips, best tile cleaning methods, tile sealing guide, and removing stains from tile and grout. For replacement costs, read tile removal and replacement cost guide.
📋 Table of Contents – Tile Floor Restoration Guide
🔍 Assess Your Floor – Can It Be Restored?
Before diving into tile renovation, determine if restoration is possible:
Good Candidates for Restoration:
- ✓ Dull, scratched, or hazy surfaces (but tiles intact)
- ✓ Dirty or stained grout (but grout is present, not missing)
- ✓ Wax or sealer buildup causing yellowing
- ✓ Minor chips or scratches (not deep cracks)
- ✓ Natural stone that has lost its shine (can be re-honed and re-polished)
Poor Candidates (May Need Replacement):
- ✗ Multiple cracked tiles (indicates subfloor issues – read why tiles crack)
- ✗ Loose or hollow-sounding tiles (adhesive failure – read loose tile repair)
- ✗ Missing chunks or deep chips
- ✗ Worn-through glaze (ceramic) – pattern worn away
- ✗ Water damage or mould under tiles – read water damage guide
First Step: Perform the tap test – tap tiles with a screwdriver. Hollow sounds indicate loose tiles that need re-bonding before restoration. Read our hollow tiles guide for diagnosis.
According to SANS 10400 restoration standards and SABS material standards, restoration is appropriate when the structural integrity remains sound.
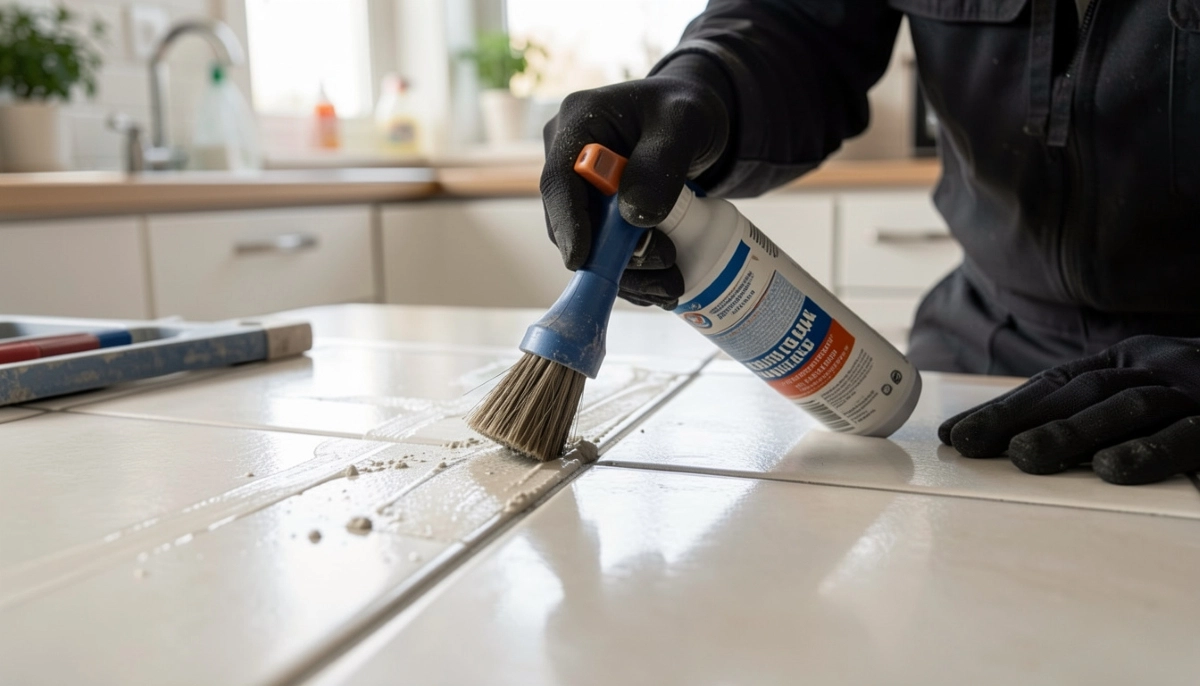
🧹 Deep Cleaning – The First Step in Refurbish Tiles
Many “old” floors just need a deep clean. Here’s how:
For Ceramic and Porcelain Tiles:
- Sweep and vacuum thoroughly
- Mix warm water with pH-neutral tile cleaner or mild dish soap
- Scrub with a stiff brush or floor scrubber
- For stubborn dirt, use a mixture of baking soda and water (paste)
- Rinse thoroughly and dry
For Natural Stone (Marble, Travertine, Slate):
- Use stone-specific cleaner – never vinegar or acidic cleaners
- Soft brush or microfiber mop only – abrasive scrubbers scratch stone
- Rinse with clean water and dry immediately
For Heavy Build-up (Wax, Old Sealers):
See Section 4 below – wax stripping requires special techniques.
Pro Tip: After deep cleaning, many floors look dramatically better. Before attempting complex restoration, deep clean first – you might be surprised.
For more cleaning guidance, read our best tile cleaning methods guide.
🪥 Grout Restoration – The Biggest Impact
Dirty grout is often the main reason floors look old. Here’s how to restore old tile floors by fixing grout:
Deep Grout Cleaning (Stains but grout intact):
- Apply oxygen bleach paste (mix powder with water) to grout lines
- Let sit 15-30 minutes
- Scrub with grout brush
- Rinse thoroughly
- Repeat for stubborn stains
Grout Colorant / Grout Paint (Stains won’t come out):
- Clean grout thoroughly and allow to dry completely (24 hours)
- Apply grout colorant with small brush or applicator bottle
- Wipe excess from tile surfaces before it dries
- Apply second coat if needed
- Seal after colorant dries
Full Grout Replacement (Grout is crumbling or missing):
- Remove old grout with grout saw or oscillating tool (2-3mm depth)
- Vacuum dust
- Mix fresh grout (colour-matched)
- Apply with rubber float
- Clean excess, let cure 72 hours, then seal
Pro Tip: Grout colorant comes in many colours – you can even change your grout colour completely. White grout on floor? Change to grey or tan for easier maintenance.
For more grout advice, read our removing stains from tile and grout guide.

Need Professional Tile Restoration?
Get free quotes from verified tiling specialists who can assess your old floor and perform professional tile floor restoration.
Free inspections available. Workmanship guarantees.
🕯️ Removing Old Wax and Sealers
Old wax and acrylic sealers yellow and trap dirt. Here’s how to strip them for how to restore old tile floors without replacing:
For Ceramic and Porcelain Tiles:
- Use commercial wax stripper (follow instructions)
- Apply to floor, let sit as directed
- Scrub with floor buffer or stiff brush
- Rinse thoroughly – multiple times to remove all residue
- Allow to dry completely before applying new sealer
For Natural Stone:
- NEVER use standard wax strippers – they can damage stone
- Use stone-specific wax remover
- Test in inconspicuous area first
- Consider professional stone restoration for wax buildup on marble/travertine
Important: After stripping wax, floors will look dull – this is normal. The next step is polishing and applying new penetrating sealer (not wax).
✨ Polishing and Buffing – Restoring Shine
For dull but intact tiles, polishing can restore the shine:
For Glazed Ceramic/Porcelain:
- Use a fine-grit (400-600) sanding pad on a floor buffer – very light pressure
- Alternatively, use tile polishing compound with a soft cloth
- Test in inconspicuous area first – aggressive polishing can damage glaze
- For minor dullness, a good cleaning and new sealer may be enough
For Natural Stone (Marble, Travertine, Limestone):
- Professional honing and polishing is recommended – DIY can cause uneven surfaces
- Honing removes scratches and etching; polishing restores shine
- This is specialized work – hire a stone restoration professional
For Unglazed Ceramic and Quarry Tile:
- These cannot be polished – they have a natural matte finish
- Deep cleaning and sealing improves appearance
Pro Tip: Before polishing, ensure floor is perfectly clean – any grit will scratch during polishing.
🪨 Restoring Natural Stone – Marble, Travertine, Slate
Natural stone requires specialised tile renovation techniques:
Marble and Limestone (Soft Stone):
- Etching (dull spots from acids) – can be re-polished with marble polishing powder
- Deep scratches – professional honing and polishing required
- Stains – poultice method (see stain removal guide)
- After restoration, seal with stone-specific impregnating sealer
Travertine:
- Similar to marble – requires stone-specific products
- Filled travertine may need re-filling if holes appear
- Honed (matte) finish is easier to maintain than polished
- Read our travertine tiles guide for more
Slate:
- Slate has a natural cleft (uneven) surface – don’t try to polish smooth
- Deep cleaning and sealing improves appearance dramatically
- Use slate-specific sealer (enhances natural colour)
Granite:
- Very durable – usually just needs deep cleaning and sealing
- Polishing restores shine – can be done DIY with granite polish
Professional Stone Restoration: For extensive damage or valuable stone, hire a stone restoration specialist. They have diamond polishing pads, commercial-grade equipment, and expertise.
For more on natural stone, read our marble tiles guide and natural stone vs porcelain guide.
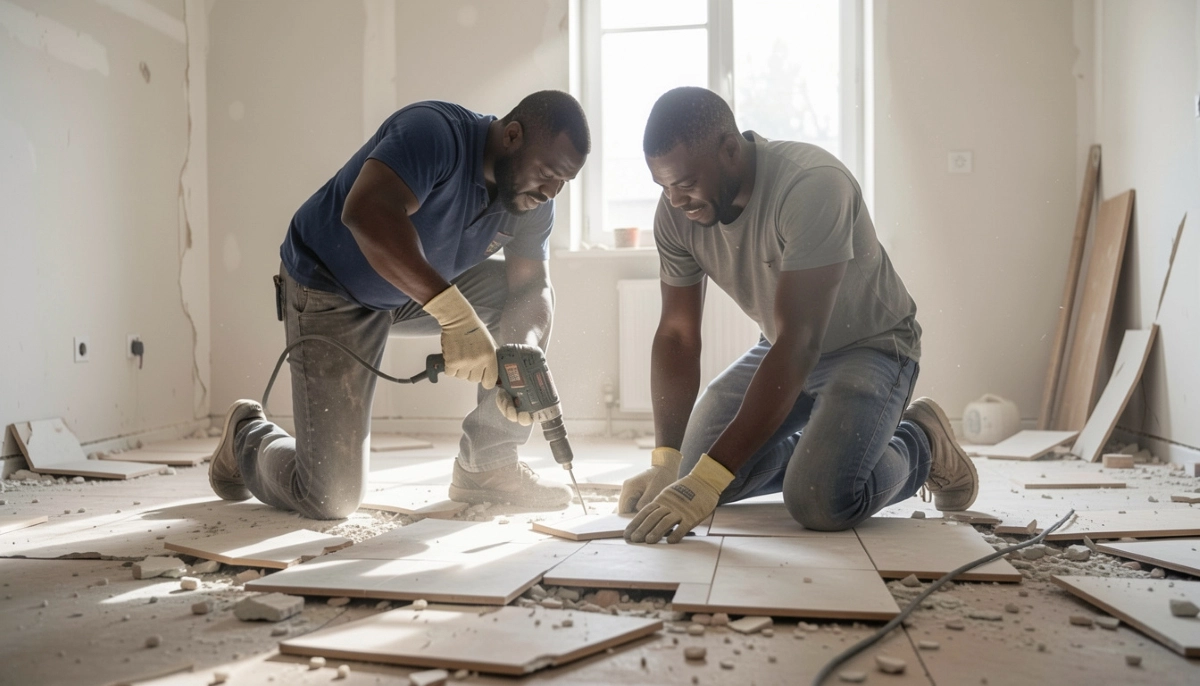
🔨 Repairing Cracked or Loose Tiles
Before full restoration, repair damaged tiles:
For Cracked Tiles (Single crack, tile intact):
- Hairline cracks: fill with colour-matched epoxy or grout
- Read our cracked tile repair guide for detailed instructions
For Cracked Tiles (Needs replacement):
- Remove cracked tile carefully
- Clean substrate, apply fresh adhesive
- Install new matching tile
- Grout and seal
- Read tile removal and replacement cost guide
For Loose or Hollow Tiles:
- If tile rocks or sounds hollow, it needs re-bonding
- Read our loose tile repair guide for methods
- For large areas of loose tiles, professional assessment needed
Finding Matching Replacement Tiles:
If you don’t have spares, check with original supplier, search online, or consider a contrasting tile as a design feature. Read how to match discontinued tiles.
🛡️ Sealing After Restoration – Locking in Results
After tile floor restoration, sealing protects your work:
When to Seal:
- After grout has fully cured (72 hours for new grout)
- After deep cleaning and complete drying (24-48 hours)
- After removing old wax or sealers
What to Seal:
- Natural stone: Must be sealed with penetrating sealer
- Grout: Always seal grout (unless epoxy grout)
- Unglazed ceramic: Seal tile and grout
- Glazed ceramic/porcelain: Tile doesn’t need sealing, but grout does
Sealing Process:
- Ensure floor is perfectly clean and dry (24-48 hours)
- Apply penetrating sealer with applicator pad or cloth
- Keep wet for manufacturer-recommended time (5-15 minutes)
- Wipe off excess before it dries
- Apply second coat for maximum protection
- Allow 24-72 hours cure time before heavy use
For complete sealing instructions, read our tile sealing guide.
⚠️ When Restoration Isn’t Enough – Replacement Needed
Sometimes refurbish tiles isn’t practical. Here’s when to replace:
| Condition | Restoration Possible? | Recommended Action |
|---|---|---|
| Multiple cracked tiles in a pattern | No – indicates subfloor movement | Full replacement after fixing subfloor – read cracking causes |
| Widespread hollow/losse tiles | No – adhesive failure | Full replacement – read loose tile guide |
| Water damage under tiles | No – subfloor likely damaged | Remove tiles, repair subfloor, re-tile – read water damage guide |
| Glaze worn through (ceramic) | No – pattern is gone | Replace – cannot restore worn glaze |
| Deep, extensive etching (marble) | Professional only | Professional honing, or replace if very bad |
| Tiles are outdated (style) | Yes – but consider replacement | Restore if tiles are quality; replace if you want new look |
Cost Comparison: Restoration typically costs 20-40% of full replacement. If your floor is structurally sound but just looks old, restoration is usually the better value.
For replacement costs, read our tile removal and replacement cost guide.
🛠️ DIY vs Professional Restoration
Decide whether to tackle how to restore old tile floors yourself or hire a pro:
DIY-Friendly Restoration (Most Homeowners):
- ✓ Deep cleaning
- ✓ Grout cleaning with oxygen bleach
- ✓ Applying grout colorant
- ✓ Removing old wax (on ceramic/porcelain)
- ✓ Applying penetrating sealer
- ✓ Minor crack repair with epoxy
Professional Restoration Recommended:
- ✗ Natural stone honing and polishing (marble, travertine, limestone)
- ✗ Extensive etching removal
- ✗ Full grout replacement (large areas)
- ✗ Loose tile re-bonding (multiple tiles)
- ✗ Floors with subfloor issues
- ✗ Very large areas (100m²+) – professionals are faster
Professional Cost Factors:
- Deep clean and seal: R20-R50 per m²
- Grout cleaning: R30-R80 per m²
- Stone honing and polishing: R150-R400 per m²
- Grout replacement: R100-R250 per m²
ServiceLink SA connects you with verified tiling specialists. Learn more about what is ServiceLink SA and how we verify contractors. For hiring guidance, read how to choose the right contractor.
❓ Frequently Asked Questions About Restoring Old Tile Floors
Can old tile floors be restored without replacing them?
Yes – how to restore old tile floors without replacing them is often possible. Methods include deep cleaning, grout cleaning/colorant, removing old wax, polishing, and applying new sealer. Many old floors look dramatically better after professional cleaning and grout restoration. Replacement is only needed for structural issues (widespread cracks, loose tiles) or worn-through glaze.
How much does tile floor restoration cost?
Tile floor restoration costs vary: DIY R200-500 for supplies; professional deep cleaning and sealing R20-50/m²; grout cleaning R30-80/m²; stone honing/polishing R150-400/m². A typical 50m² floor might cost R1,500-4,000 for professional restoration – far less than replacement (R15,000-40,000+). Get a free quote from verified specialists.
How do I get my old tile floors to shine again?
To restore shine: first deep clean to remove dirt. Remove old wax or sealers if present. For glazed ceramic/porcelain, polish with fine-grit pad or polishing compound. For natural stone, professional honing and polishing. Then apply penetrating sealer (not wax). Avoid wax – it yellows and traps dirt. Read our tile sealing guide for more.
Can I change the colour of my grout during restoration?
Yes – grout colorant (grout paint) allows you to change grout colour completely. Options include lightening (white/light grey) or darkening (charcoal, brown). Clean grout thoroughly first, let dry completely, apply colorant with small brush, wipe excess from tiles. Sealed grout will resist future stains. Read grout colour selection guide for choosing colours.
How do I restore old marble tile floors?
Refurbish tiles of marble requires special care. For etching (dull spots), use marble polishing powder. For deeper scratches, professional honing and polishing. Never use vinegar or acidic cleaners – they etch marble. After restoration, seal with stone-specific impregnating sealer. For extensive damage, hire a stone restoration specialist. Read our marble tiles guide for more.
Why are my floor tiles turning black around the edges?
Black edges usually indicate moisture in grout causing mould, or old wax/sealer trapping dirt. First, clean grout with oxygen bleach. If mould persists, use mould remover. Improve ventilation in the room. If tiles themselves are turning black, you may have water damage underneath – read water damage guide. Also check for hollow tiles – water under tiles causes hollow sounds.
How long does tile floor restoration last?
With proper maintenance, restored floors last 5-10+ years. Grout cleaning lasts 2-5 years before needing refresh. Sealer lasts 1-3 years (reapply as needed). Natural stone honing/polishing lasts 5-10+ years with proper care. Regular tile maintenance tips – sweeping, prompt spill cleanup, and using appropriate cleaners – extends restoration life significantly.
Can I restore tiles that have old wax buildup?
Yes – but you must strip the old wax first. Use commercial wax stripper for ceramic/porcelain (follow instructions). For natural stone, use stone-specific wax remover. After stripping, floors will look dull – this is normal. Then deep clean, polish if needed, and apply penetrating sealer (not wax). Never apply new wax over old wax – it creates buildup. For professional tile renovation, consider hiring a specialist.
✅ Final Thoughts: Give Your Old Tiles a New Life
Restore old tile floors rather than replacing them – it’s often more affordable, less disruptive, and environmentally friendly. A deep clean, grout restoration, and fresh sealer can transform floors you thought were beyond saving.
Start with assessment – tap test for hollow tiles, check for cracks, and evaluate grout condition. Then choose your restoration path: DIY for basic cleaning and sealing, professional for stone restoration or extensive grout work. And remember – regular maintenance after restoration keeps your floors looking beautiful for years.
Key takeaways for tile floor restoration:
- Most old tiles can be restored – replacement is often unnecessary
- Deep cleaning and grout restoration make the biggest difference
- Grout colorant can completely transform the look of your floor
- Natural stone requires specialised products and techniques
- After restoration, seal to protect your work
- Restoration costs 20-40% of full replacement
- When tiles are cracked, loose, or water-damaged, replacement may be needed
Your next step: Ready to restore your old tile floors? Get free quotes from verified tiling specialists who can assess your floor and recommend the best tile floor restoration approach.
Ready to Restore Your Old Tile Floors?
Get free quotes from verified tiling specialists who can assess your floor and perform professional tile floor restoration.
📞 Call us: 073 138 4726 to discuss your tile restoration project.
Free inspections •
Beat Your Quote guarantee •
Workmanship guarantees
Are You a Tiling or Restoration Specialist?
Join ServiceLink SA’s network of verified contractors. Get qualified leads for restoration, cleaning, and tiling projects.
📚 Official resources & standards referenced:
- SANS 10400 – South African National Standard for restoration standards and material guidelines.
- SABS – South African Bureau of Standards for material standards and quality specifications.
Information provided for general guidance. For extensive damage or valuable stone, always consult qualified professionals.
Written by: Innocent T Hanyani
Construction & Home Services Industry Specialist | 21+ Years Experience
Innocent T Hanyani has over two decades of experience working across South Africa’s construction and home improvement sectors. Throughout his career, he has restored hundreds of old tile floors – from Victorian-era encaustic tiles to mid-century terrazzo. His practical experience helps homeowners distinguish between floors that can be restored and those that need replacement. He has seen dramatic transformations through deep cleaning and grout restoration, saving homeowners thousands compared to full replacement. His advice emphasises assessing first, then restoring when possible.
For more information about tile restoration and maintenance, explore our related resources: tile maintenance tips, best tile cleaning methods, tile sealing guide, removing stains from tile and grout, and tile removal and replacement cost guide. Learn about our process on what is ServiceLink SA and how we verify contractors. Find tilers in your area: Gauteng, Johannesburg, and Pretoria. For related services, see our cleaning services and flooring services guides.